2015 FORD F250 SUPER DUTY ECU
[x] Cancel search: ECUPage 151 of 470
By moving the gearshift lever from the D(Drive) position to the M (Manual) positionyou may now manually select the gear youdesire. Only the current gear will bedisplayed. Press the + button or the –button to upshift or downshift. If the –button is pressed at a vehicle speed that
would cause an engine overspeed, therequested gear will flash then disappearand the transmission will remain in thecurrent gear.
Recommended shift speeds
Upshift according to the following chart:
Upshifts when accelerating (recommended for best fuel economy)
Diesel enginesGasoline enginesShift from:
12 mph (19 km/h)15 mph (24 km/h)1 – 2
19 mph (31 km/h)25 mph (40 km/h)2 – 3
26 mph (42 km/h)40 mph (64 km/h)3 – 4
34 mph (55 km/h)45 mph (72 km/h)4 – 5
46 mph (74 km/h)50 mph (80 km/h)5 – 6
In order to prevent the engine from runningat too low an RPM, which may cause it tostall, SelectShift will still automaticallymake some downshifts if it has determinedthat you have not downshifted in time.Although SelectShift will make somedownshifts for you, it will still allow you todownshift at any time as long as theSelectShift determines that the engine willnot be damaged from over-revving.
SelectShift will not automatically upshift,even if the engine is approaching the RPMlimit. It must be shifted manually bypressing the + button.
Note:Engine damage may occur ifexcessive engine revving is held withoutshifting.
Automatic Transmission AdaptiveLearning
This feature is designed to increasedurability and provide consistent shift feelover the life of the vehicle. A new vehicleor transmission may have firm shifts, softshifts or both. This operation is considerednormal and will not affect function ordurability of the transmission. Over time,the adaptive learning process will fullyupdate transmission operation.Additionally, whenever the battery isdisconnected or a new battery installed,the strategy must be relearned.
Brake-Shift Interlock
WARNINGS
Do not drive your vehicle until youverify that the brake lamps areworking.
148
Super Duty (), enUSA
Transmission
Page 152 of 470
WARNINGS
When doing this procedure, you willbe taking the vehicle out of parkwhich means the vehicle can rollfreely. To avoid unwanted vehiclemovement, always fully set the parkingbrake prior to doing this procedure. Usewheel chocks if appropriate.
If the parking brake is fully released,but the brake warning lamp remainsilluminated, the brakes may not beworking properly. See your authorizeddealer.
Your vehicle is equipped with a brake-shiftinterlock feature that prevents thegearshift lever from being moved from P(Park) when the ignition is in the 3 (on)position and the brake pedal is not pressed.
If you cannot move the gearshift lever outof P (Park) position with the ignition in the4 (on) position and the brake pedalpressed, a malfunction may have occurred.It is possible that a fuse has blown or thevehicle’s brake lamps are not operatingproperly. See Fuse Specification Chart(page 223).
If the fuse is not blown and the brakelamps are working properly, the followingprocedure will allow you to move thegearshift lever from P (Park):
1. Apply the parking brake. Turn theignition key to 1 (off), then remove thekey.
2. Move the steering column to the fulldown and full rearward position(toward the driver’s seat).
3. Remove the gearshift lever boot.
4. Place fingers into hole where thegearshift lever boot was removed fromand pull top half of shroud up andforward to separate it from the lowerhalf of the shroud. There is a hinge atthe forward edge of the top shroud.Roll the top half of the shroud upwardon the hinge point to clear the hazardflasher button, then pull straightrearward toward the driver’s seat toremove.
5. Remove the top half of the shroud.
6. Remove the three fasteners under thecolumn that secure the lower shroudhalf to the column.
7.Pull the lock lever into the full unlockedposition and remove the lower shroudcover by pulling the lever handlethrough the slot in the cover.
8.Apply the brake and move the gearshiftlever into N (Neutral).
149
Super Duty (), enUSA
TransmissionE163185 E163186
Page 189 of 470
Tailgate Removal
WARNING
Always properly secure cargo toprevent shifting cargo or cargo fallingfrom vehicle, which could result incompromised vehicle stability and seriouspersonal injury to vehicle occupants orothers.
You can remove the tailgate for moreloading room.
Note:Skip to Step 4 if your vehicle doesnot have a rearview camera.
1. Locate and disconnect the rearviewcamera in-line connector. It is underthe pickup box on the right-hand sideof the vehicle near the spare tire.
2. There is a tethered cap on the wireassembly. Install it on the in-lineconnector that remains under thepickup box.
3. Partially lower the tailgate. Carefullyfeed the tailgate harness up throughthe gap between the pickup box andthe bumper and place it out of the wayunder the pickup box.
4. Lower the tailgate.
5. Use a screwdriver to gently pry thespring clip on each connector past thehead of the support screw. Disconnectthe cable.
6. Disconnect the other cable.
7. Lift the tailgate to a 45-degree anglefrom horizontal.
8. Lift the right side off its hinge.
9.Lift the tailgate to an 80-degree anglefrom horizontal.
10.Remove the tailgate from the left sidehinge by sliding it to the right.
Reverse the steps to reinstall the tailgate.
Tailgate Step (If Equipped)
Use the step to make entering the truckbed easier.
To reduce the risk of falling:
•Only operate the step when yourvehicle is on a level surface.
•Only operate the step in areas withsufficient lighting.
•Always open the step panel to widenthe step.
•Always use the grab handle whenclimbing on the step.
•Do not use the step with bare feet.
•Make sure the step is clean before use.
•Keep the step load, you plus the load,below 350 pounds (159 kilograms).
186
Super Duty (), enUSA
Load CarryingE163090 E163092
Page 190 of 470
Opening the Step
Note:Make sure to close and fully latch thestep before moving your vehicle. Never drivewith the step or grab handle open.
1. Lower the tailgate.
2.Pull the yellow lever on the grab handleto the unlock position.
3. Raise the handle upright until you feelit latch and see the lever in the lockposition. You only need to use the leverwhen releasing the grab handle.
4. Rotate the center molding to unlatchthe step. Pull it toward you to extendit.
5.Open the step panel to widen the step.
Note:Do not tow with the step or grabhandle.
Replace the slip resistance tape or grabhandle molding if it appears worn ordamaged.
Closing the Step
1. Close the step panel then lift and fullyclose the step into the tailgate.
2. Move the yellow lever on the grabhandle to the unlock position and lowerthe handle.
Bed Extender (If Equipped)
Note:Do not use the bed extender whendriving off road.
Note:Make sure to engage the locking pinsand knobs fully before driving your vehicle.
Note:Make sure to secure all cargo.
Note:Do not exceed 150 pounds (68kilograms) on the tailgate when your vehicleis moving.
Note:Do not keep the bed extender in thetailgate mode when you are not using it forrestraining cargo. Always keep the bedextender in the grocery mode or the stowedposition with the tailgate closed.
Tailgate Mode
1. Pull the locking pin toward the centerof your vehicle.
187
Super Duty (), enUSA
Load CarryingE163093 E163094 E163095
Page 191 of 470

2.Open the latches to release the panels.
3. Rotate the panels toward the tailgate.Repeat Steps 1-3 on the other side ofyour vehicle.
4. Connect the two panels. Rotate bothknobs one-quarter turn clockwise tosecure the panels.
5. Make sure to insert the latch rod intothe tailgate hole. Make sure to engageboth sides of the locking pins into theirholes in the pick-up box.
Reverse the steps to store the bedextender.
Grocery Mode
Follow Steps 1-4 of the tailgate modeinstructions by rotating the panels awayfrom the tailgate. Close the tailgate.
188
Super Duty (), enUSA
Load CarryingE163096 E163097 E163098 E163099 E163100
Page 199 of 470
Do not use a hitch that eitherclamps onto the bumper orattaches to the axle. You mustdistribute the load in your trailerso that 10-15% for conventionaltowing or 15-25% for fifth wheeltowing of the total weight of thetrailer is on the tongue.
Weight-distributing Hitches
WARNING
Do not adjust aweight-distributing hitch toany position where the rearbumper of the vehicle is higherthan it was before attaching thetrailer. Doing so will defeat thefunction of the weight-distributinghitch, which may causeunpredictable handling, and could
result in serious personal injury.
When hooking-up a trailer using aweight-distributing hitch, alwaysuse the following procedure:
1. Park the loaded vehicle,without the trailer, on a levelsurface.
2.Measure the height to the topof your vehicle's front wheelopening on the fender. This isH1.
3.Attach the loaded trailer toyour vehicle without theweight-distributing barsconnected.
4.Measure the height to the topof your vehicle's front wheelopening on the fender a secondtime. This is H2.
5.Install and adjust the tensionin the weight-distributing barsso that the height of yourvehicle's front wheel openingon the fender is approximatelyhalfway between H1 and H2.
6.Check that the trailer is level orslightly nose down toward yourvehicle. If not, adjust the ballheight accordingly and repeatSteps 2-6.
Once the trailer is level or slightlynose down toward the vehicle:
•Lock the bar tension adjusterin place.
•Check that the trailer tonguesecurely attaches and locksonto the hitch.
•Install safety chains, lighting,and trailer brake controls asrequired by law or the trailermanufacturer.
Fifth-wheel Trailer Hitch (IfEquipped)
WARNINGS
The mounting pads in the bedare specifically designed forcertain fifth-wheel trailer hitchesand gooseneck ball hitches. Donot use these mounting pads forother purposes. Doing so couldresult in vehicle structural
196
Super Duty (), enUSA
Towing
Page 208 of 470
Launching or Retrieving a Boator Personal Watercraft (PWC)
Note:Disconnect the wiring to thetrailer before backing the trailerinto the water.
Note:Reconnect the wiring to thetrailer after you remove the trailerfrom the water.
When backing down a rampduring boat launching or retrieval:
•Do not allow the static waterlevel to rise above the bottomedge of the rear bumper.
•Do not allow waves to breakhigher than 6 inches (15centimeters) above the bottomedge of the rear bumper.
Exceeding these limits may allowwater to enter vehiclecomponents:
•Causing internal damage to thecomponents.
•Affecting driveability,emissions, and reliability.
Replace the rear axle lubricantanytime the rear axle has beensubmerged in water. Water mayhave contaminated the rear axlelubricant, which is not normallychecked or changed unless a leakis suspected or other axle repair isrequired.
TOWING POINTS
WARNINGS
Using recovery hooks is dangerousand should only be done by a personfamiliar with proper vehicle recoverysafety practices. Improper use of recoveryhooks may cause hook failure or separationfrom the vehicle and could result in seriousinjury or death.
Always slowly remove the slack fromthe recovery strap prior to pulling.Failure to do so can introducesignificantly higher loads which can causethe recovery hooks to break off, or therecovery strap to fail which can causeserious injury or death.
Never link two straps together witha clevis pin. These heavy metalobjects could become projectiles ifthe strap breaks and can cause seriousinjury or death.
Your vehicle comes equipped withframe-mounted front recovery hooks.These hooks should never have a loadapplied to them greater than the grossvehicle weight rating of your vehicle.
Before using recovery hooks:
•Make sure all attaching points aresecure and capable of withstandingthe applied load.
•Never use chains, cables or tow strapswith metal hook ends.
•Only use recovery straps that have aminimum breaking strength two tothree times the gross vehicle weight ofthe stuck vehicle.
•Make sure the recovery strap is in goodcondition and free of visible cuts, tearsor damage.
205
Super Duty (), enUSA
Towing
Page 212 of 470
•Transmissions give their best fueleconomy when operated in the topcruise gear and with steady pressureon the gas pedal.
•Four-wheel-drive operation (ifequipped) is less fuel efficient thantwo-wheel-drive operation.
•Close the windows for high-speeddriving.
DRIVING THROUGH WATER
Note:Driving through deep water abovethe recommended levels can cause vehicledamage.
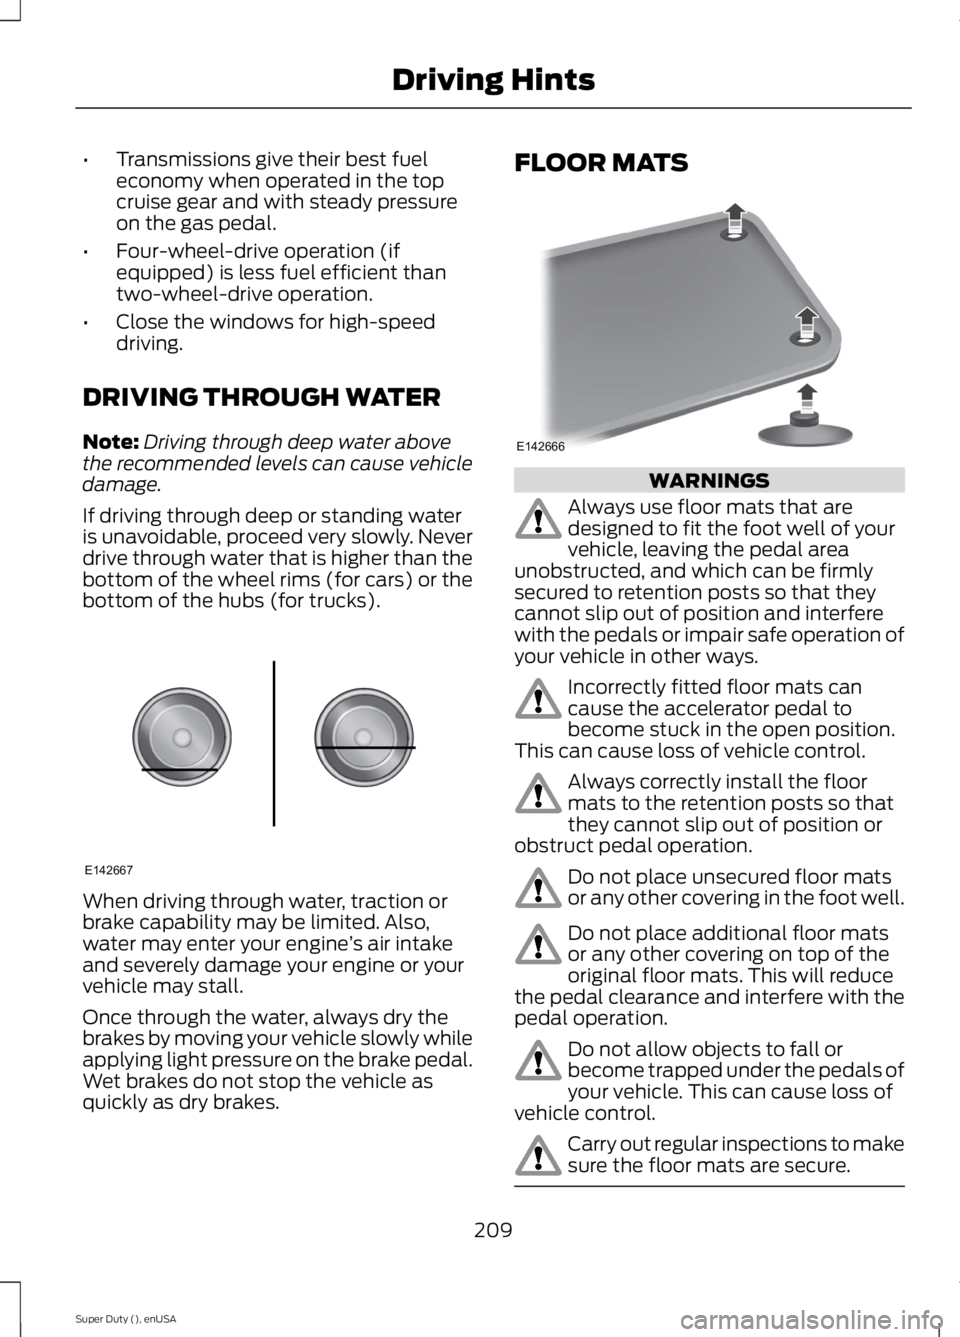
If driving through deep or standing wateris unavoidable, proceed very slowly. Neverdrive through water that is higher than thebottom of the wheel rims (for cars) or thebottom of the hubs (for trucks).
When driving through water, traction orbrake capability may be limited. Also,water may enter your engine’s air intakeand severely damage your engine or yourvehicle may stall.
Once through the water, always dry thebrakes by moving your vehicle slowly whileapplying light pressure on the brake pedal.Wet brakes do not stop the vehicle asquickly as dry brakes.
FLOOR MATS
WARNINGS
Always use floor mats that aredesigned to fit the foot well of yourvehicle, leaving the pedal areaunobstructed, and which can be firmlysecured to retention posts so that theycannot slip out of position and interferewith the pedals or impair safe operation ofyour vehicle in other ways.
Incorrectly fitted floor mats cancause the accelerator pedal tobecome stuck in the open position.This can cause loss of vehicle control.
Always correctly install the floormats to the retention posts so thatthey cannot slip out of position orobstruct pedal operation.
Do not place unsecured floor matsor any other covering in the foot well.
Do not place additional floor matsor any other covering on top of theoriginal floor mats. This will reducethe pedal clearance and interfere with thepedal operation.
Do not allow objects to fall orbecome trapped under the pedals ofyour vehicle. This can cause loss ofvehicle control.
Carry out regular inspections to makesure the floor mats are secure.
209
Super Duty (), enUSA
Driving HintsE142667 E142666