2015 FORD F250 SUPER DUTY glove box
[x] Cancel search: glove boxPage 58 of 470

The autolock feature will unlock all thedoors when:
•autolock has locked the doors
•you stop the vehicle and switch theignition off or to accessory mode, and
•you open the driver door within 10minutes.
Note:The doors will not autounlock if youhave electronically locked them beforeopening the driver door.
Enabling or Disabling
You can enable or disable these featuresin the information display or yourauthorized dealer can do it for you. SeeGeneral Information (page 81).
Note:You can enable or disable theautolock and autounlock featuresindependently of each other.
Illuminated Entry
The interior lamps and select exteriorlamps will illuminate when you unlock thedoors with the remote entry system.
The illuminated entry system will turn offthe lights if:
•the ignition is on
•you press the remote control lockbutton, or
•after 25 seconds of illumination.
The dome lamp will not turn on if thecontrol is set to the off position.
The lights will not turn off if:
•you turn them on with the dimmercontrol, or
•any door is open.
Battery Saver
The battery saver turns off the interiorlamps 30 minutes after you switch theignition off if a door is open and the domelamp switch is on. It turns off the interiorlamps after 10 minutes if the dome lampswitch is off.
KEYLESS ENTRY (IF EQUIPPED)
SECURICODE™ KEYLESS ENTRYKEYPAD
The keypad is located near the driverwindow.
Note:If you enter your entry code too faston the keypad, the unlock function may notwork. Re-enter your entry code more slowly.
You can use the keypad to lock or unlockthe doors without using a key.
You can operate the keypad with thefactory-set 5-digit entry code. The code islocated on the owner’s wallet card in theglove box and is available from anauthorized dealer. You can also create upto five of your own 5-digit personal entrycodes.
Programming a Personal Entry Code
To create your own personal entry code:
1. Enter the factory-set code.
2. Press 1·2 on the keypad within fiveseconds.
55
Super Duty (), enUSA
LocksE163050
Page 293 of 470

LocationTool
SuperCab: Under rear bench seat onpassenger side
Regular cab: Fastened to floor behind driverseatJack handle, lug wrench, lug wrench exten-sion (only available on dual rear wheelvehicles) and wheel chock (only availableon single rear wheel vehicles equipped witha diesel engine)
SuperCab: Fastened to floor under rear seatCrew Cab: Fastened to floor behind rearseat at driver side
In the glove boxKey and spare tire lock
Removing the Spare Tire (WithSpare Tire Carrier Only)
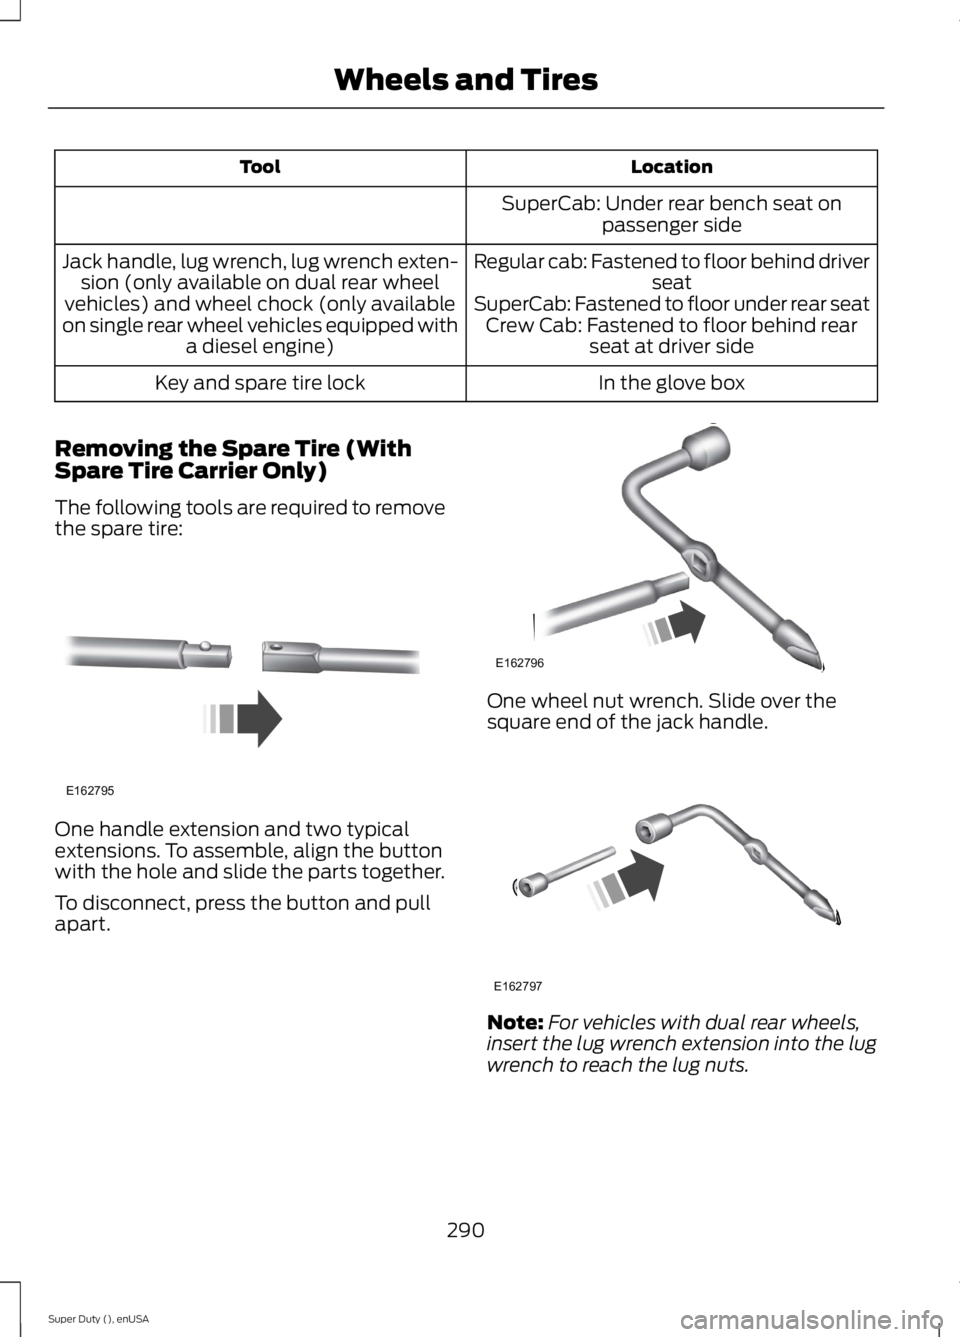
The following tools are required to removethe spare tire:
One handle extension and two typicalextensions. To assemble, align the buttonwith the hole and slide the parts together.
To disconnect, press the button and pullapart.
One wheel nut wrench. Slide over thesquare end of the jack handle.
Note:For vehicles with dual rear wheels,insert the lug wrench extension into the lugwrench to reach the lug nuts.
290
Super Duty (), enUSA
Wheels and TiresE162795 E162796 E162797
Page 324 of 470

AUDIO INPUT JACK
WARNINGS
Driving while distracted can result inloss of vehicle control, crash andinjury. We strongly recommend thatyou use extreme caution when using anydevice that may take your focus off theroad. Your primary responsibility is the safeoperation of your vehicle. We recommendagainst the use of any hand-held devicewhile driving and encourage the use ofvoice-operated systems when possible.Make sure you are aware of all applicablelocal laws that may affect the use ofelectronic devices while driving.
For safety reasons, do not connector adjust the settings on yourportable music player while yourvehicle is moving.
Store the portable music player in asecure location, such as the centerconsole or the glove box, when yourvehicle is moving. Hard objects maybecome projectiles in a collision or suddenstop, which may increase the risk of seriousinjury. The audio extension cable must belong enough to allow the portable musicplayer to be safely stored while yourvehicle is moving.
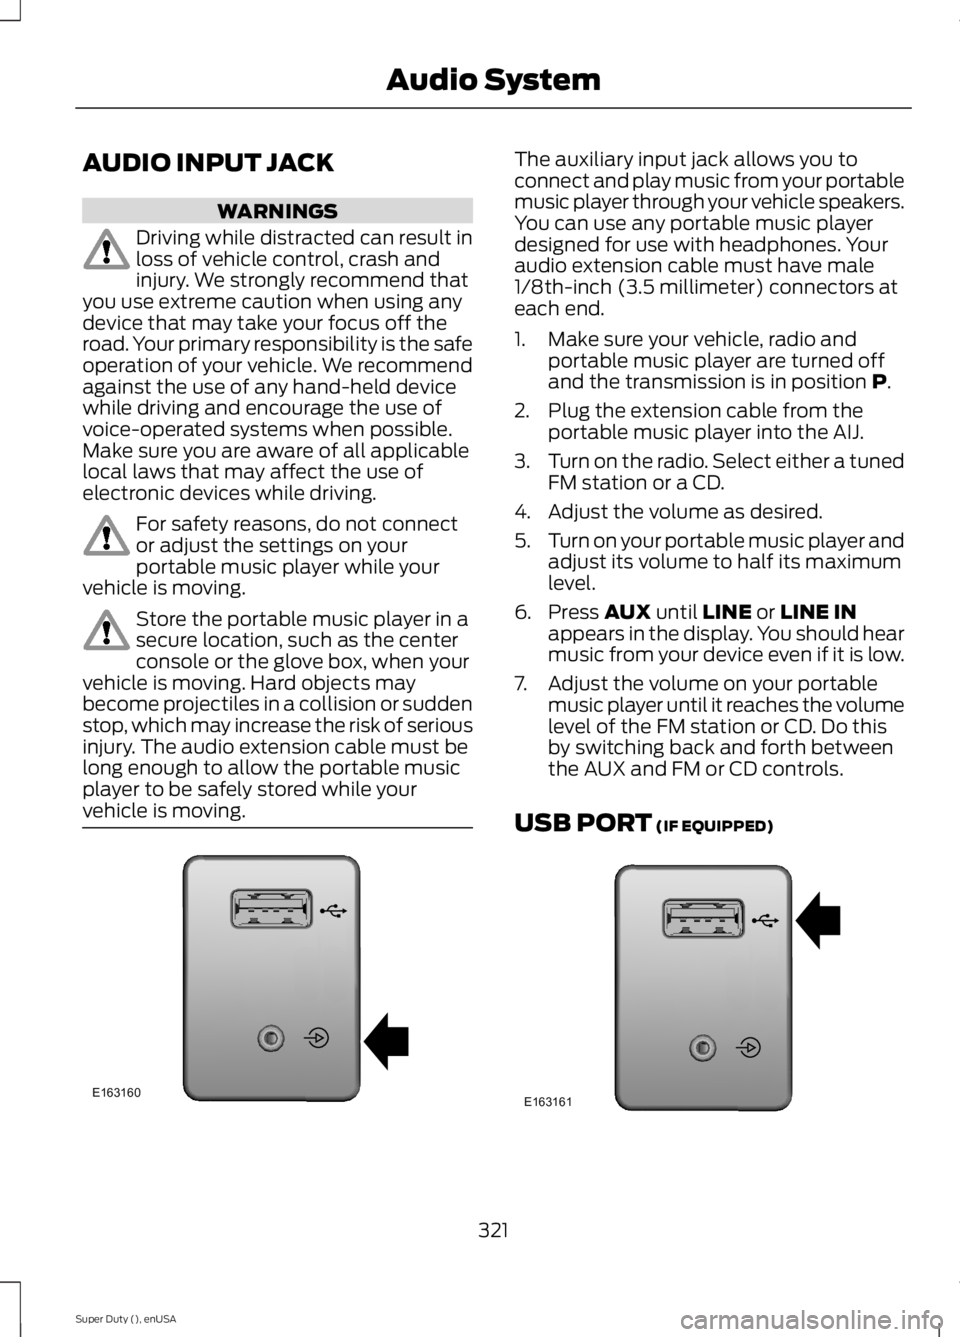
The auxiliary input jack allows you toconnect and play music from your portablemusic player through your vehicle speakers.You can use any portable music playerdesigned for use with headphones. Youraudio extension cable must have male1/8th-inch (3.5 millimeter) connectors ateach end.
1. Make sure your vehicle, radio andportable music player are turned offand the transmission is in position P.
2. Plug the extension cable from theportable music player into the AIJ.
3.Turn on the radio. Select either a tunedFM station or a CD.
4. Adjust the volume as desired.
5.Turn on your portable music player andadjust its volume to half its maximumlevel.
6. Press AUX until LINE or LINE INappears in the display. You should hearmusic from your device even if it is low.
7. Adjust the volume on your portablemusic player until it reaches the volumelevel of the FM station or CD. Do thisby switching back and forth betweenthe AUX and FM or CD controls.
USB PORT (IF EQUIPPED)
321
Super Duty (), enUSA
Audio SystemE163160 E163161
Page 395 of 470

To access, press the lower leftcorner on the touchscreen, thenselect the BT Stereo tab.
Bluetooth Audio Voice Commands
If you are listening to a Bluetoothaudio device, press the voicebutton on the steering wheelcontrol. When prompted, say "Next song","Pause", "Play" or "Previous song".
If you are not listening to a Bluetooth audiodevice, press the voice button and, afterthe tone, say "Next song", "Pause", "Play"or "Previous song".
A/V Inputs
WARNINGS
Driving while distracted can result inloss of vehicle control, crash andinjury. We strongly recommend thatyou use extreme caution when using anydevice that may take your focus off theroad. Your primary responsibility is the safeoperation of your vehicle. We recommendagainst the use of any handheld devicewhile driving and encourage the use ofvoice-operated systems when possible.Make sure you are aware of all applicablelocal laws that may affect the use ofelectronic devices while driving.
For safety reasons, do not connector adjust the settings on yourportable music player while yourvehicle is moving.
Store the portable music player in asecure location, such as the centerconsole or the glove box, when yourvehicle is moving. Hard objects maybecome projectiles in a crash or suddenstop, which may increase the risk of seriousinjury. The audio extension cable must belong enough to allow the portable musicplayer to be safely stored while yourvehicle is moving.
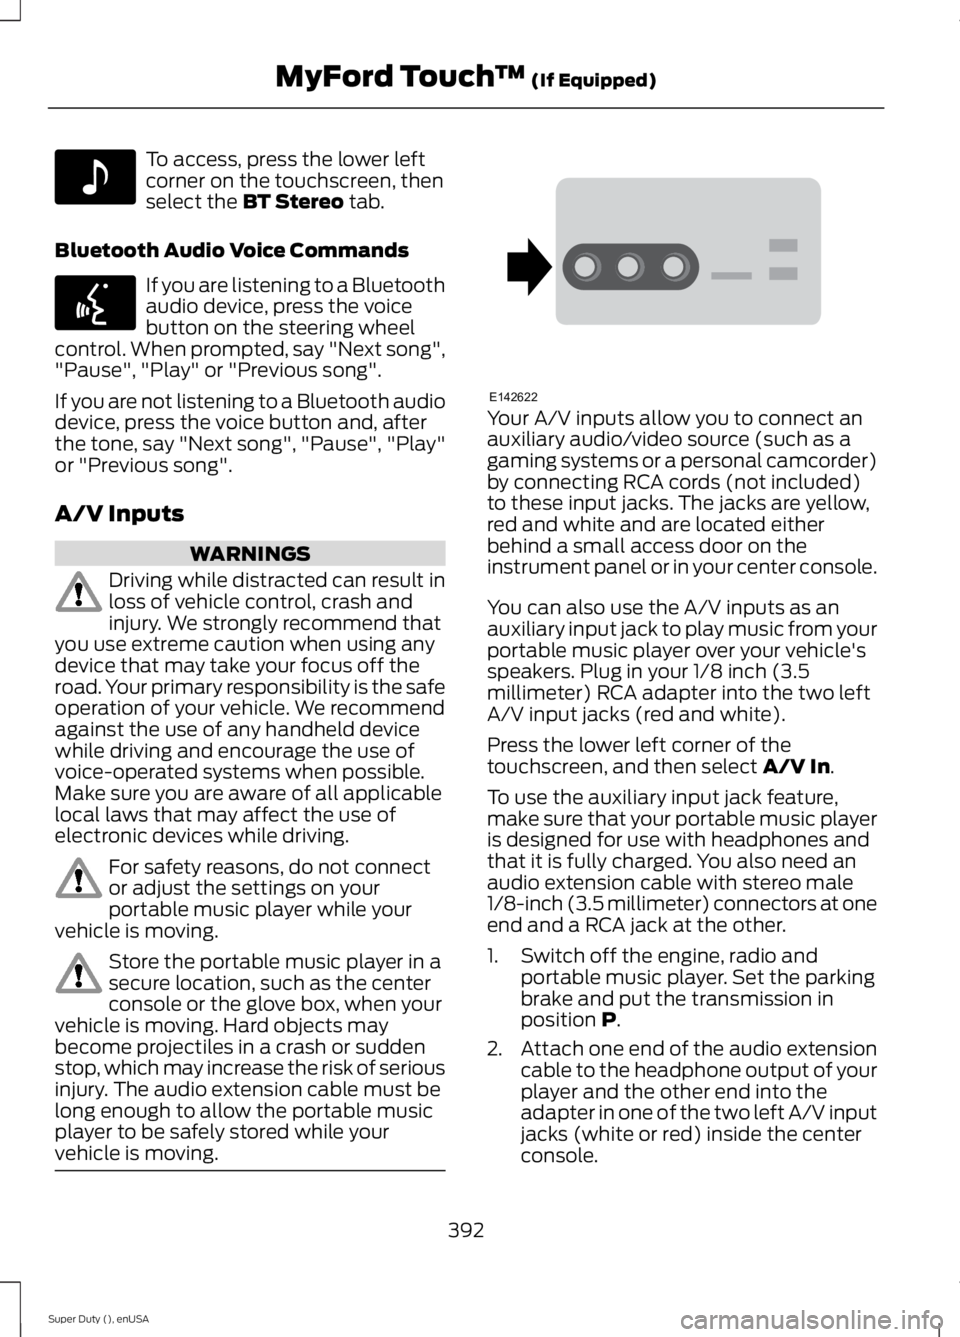
Your A/V inputs allow you to connect anauxiliary audio/video source (such as agaming systems or a personal camcorder)by connecting RCA cords (not included)to these input jacks. The jacks are yellow,red and white and are located eitherbehind a small access door on theinstrument panel or in your center console.
You can also use the A/V inputs as anauxiliary input jack to play music from yourportable music player over your vehicle'sspeakers. Plug in your 1/8 inch (3.5millimeter) RCA adapter into the two leftA/V input jacks (red and white).
Press the lower left corner of thetouchscreen, and then select A/V In.
To use the auxiliary input jack feature,make sure that your portable music playeris designed for use with headphones andthat it is fully charged. You also need anaudio extension cable with stereo male1/8-inch (3.5 millimeter) connectors at oneend and a RCA jack at the other.
1. Switch off the engine, radio andportable music player. Set the parkingbrake and put the transmission inposition P.
2.Attach one end of the audio extensioncable to the headphone output of yourplayer and the other end into theadapter in one of the two left A/V inputjacks (white or red) inside the centerconsole.
392
Super Duty (), enUSA
MyFord Touch™ (If Equipped)E142611 E142599 E142622
Page 425 of 470

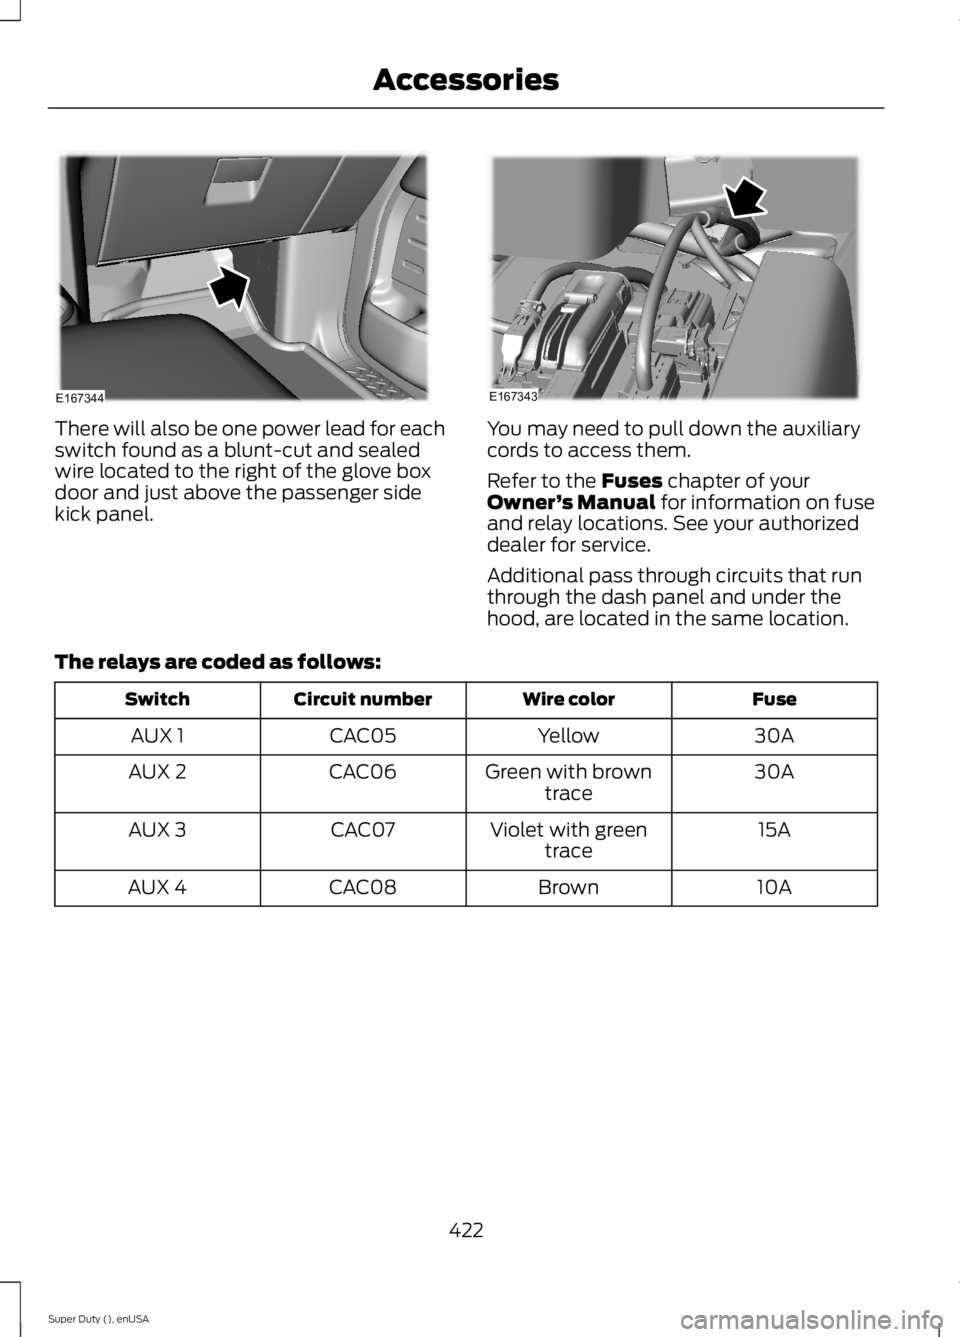
There will also be one power lead for eachswitch found as a blunt-cut and sealedwire located to the right of the glove boxdoor and just above the passenger sidekick panel.
You may need to pull down the auxiliarycords to access them.
Refer to the Fuses chapter of yourOwner’s Manual for information on fuseand relay locations. See your authorizeddealer for service.
Additional pass through circuits that runthrough the dash panel and under thehood, are located in the same location.
The relays are coded as follows:
FuseWire colorCircuit numberSwitch
30AYellowCAC05AUX 1
30AGreen with browntraceCAC06AUX 2
15AViolet with greentraceCAC07AUX 3
10ABrownCAC08AUX 4
422
Super Duty (), enUSA
AccessoriesE167344 E167343