2015 FORD F250 SUPER DUTY tow
[x] Cancel search: towPage 6 of 470
Rear Axle
Limited Slip Differential.............................160
Electronic Locking Differential................160
Brakes
General Information....................................162
Hints on Driving With Anti-LockBrakes...........................................................162
Parking Brake.................................................163
Hill Start Assist..............................................163
Traction Control
Principle of Operation.................................165
Using Traction Control................................165
Stability Control
Principle of Operation.................................167
Using Stability Control................................167
Terrain Response
Principle of Operation.................................170
Using Hill Descent Control........................170
Parking Aids
Parking Aid.......................................................172
Rear View Camera........................................173
Cruise Control
Principle of Operation.................................176
Using Cruise Control....................................176
Driving Aids
Steering.............................................................177
Load Carrying
Load Limit........................................................178
Tailgate.............................................................185
Towing
Towing a Trailer.............................................189
Trailer Sway Control....................................190
Recommended Towing Weights............190
Essential Towing Checks...........................193
Towing Points...............................................205
Transporting the Vehicle..........................206
Towing the Vehicle on Four Wheels......207
Driving Hints
Breaking-In....................................................208
Economical Driving.....................................208
Driving Through Water..............................209
Floor Mats......................................................209
Snowplowing.................................................210
Roadside Emergencies
Roadside Assistance...................................212
Hazard Warning Flashers...........................213
Fuel Shutoff....................................................213
Jump Starting the Vehicle.........................214
Post-Crash Alert System...........................216
Customer Assistance
Getting the Services You Need................217
In California (U.S. Only).............................218
The Better Business Bureau (BBB) AutoLine Program (U.S. Only)......................219
Utilizing the Mediation/ArbitrationProgram (Canada Only)........................219
Getting Assistance Outside the U.S. andCanada........................................................220
Ordering Additional Owner'sLiterature......................................................221
Reporting Safety Defects (U.S.Only)..............................................................221
Reporting Safety Defects (CanadaOnly).............................................................222
Fuses
Fuse Specification Chart...........................223
3
Super Duty (), enUSA
Table of Contents
Page 10 of 470
ABOUT THIS MANUAL
Thank you for choosing Ford. Werecommend that you take some time toget to know your vehicle by reading thismanual. The more that you know about it,the greater the safety and pleasure youwill get from driving it.
WARNING
Driving while distracted can result inloss of vehicle control, crash andinjury. We strongly recommend thatyou use extreme caution when using anydevice that may take your focus off theroad. Your primary responsibility is the safeoperation of your vehicle. We recommendagainst the use of any handheld devicewhile driving and encourage the use ofvoice-operated systems when possible.Make sure you are aware of all applicablelocal laws that may affect the use ofelectronic devices while driving.
Note:This manual describes productfeatures and options available throughoutthe range of available models, sometimeseven before they are generally available. Itmay describe options not fitted to yourvehicle.
Note:Some of the illustrations in thismanual may be used for different models,so may appear different to you on yourvehicle. However, the essential informationin the illustrations is always correct.
Note:Always use and operate your vehiclein line with all applicable laws andregulations.
Note:Pass on this manual when sellingyour vehicle. It is an integral part of thevehicle.
Note:Either Ford Motor Company or anauthorized Ford dealer may have originallysold this incomplete vehicle to a vehiclemodifier who upfitted it. As a result, someof the options and features on this vehiclemay differ from what we describe in thismanual.
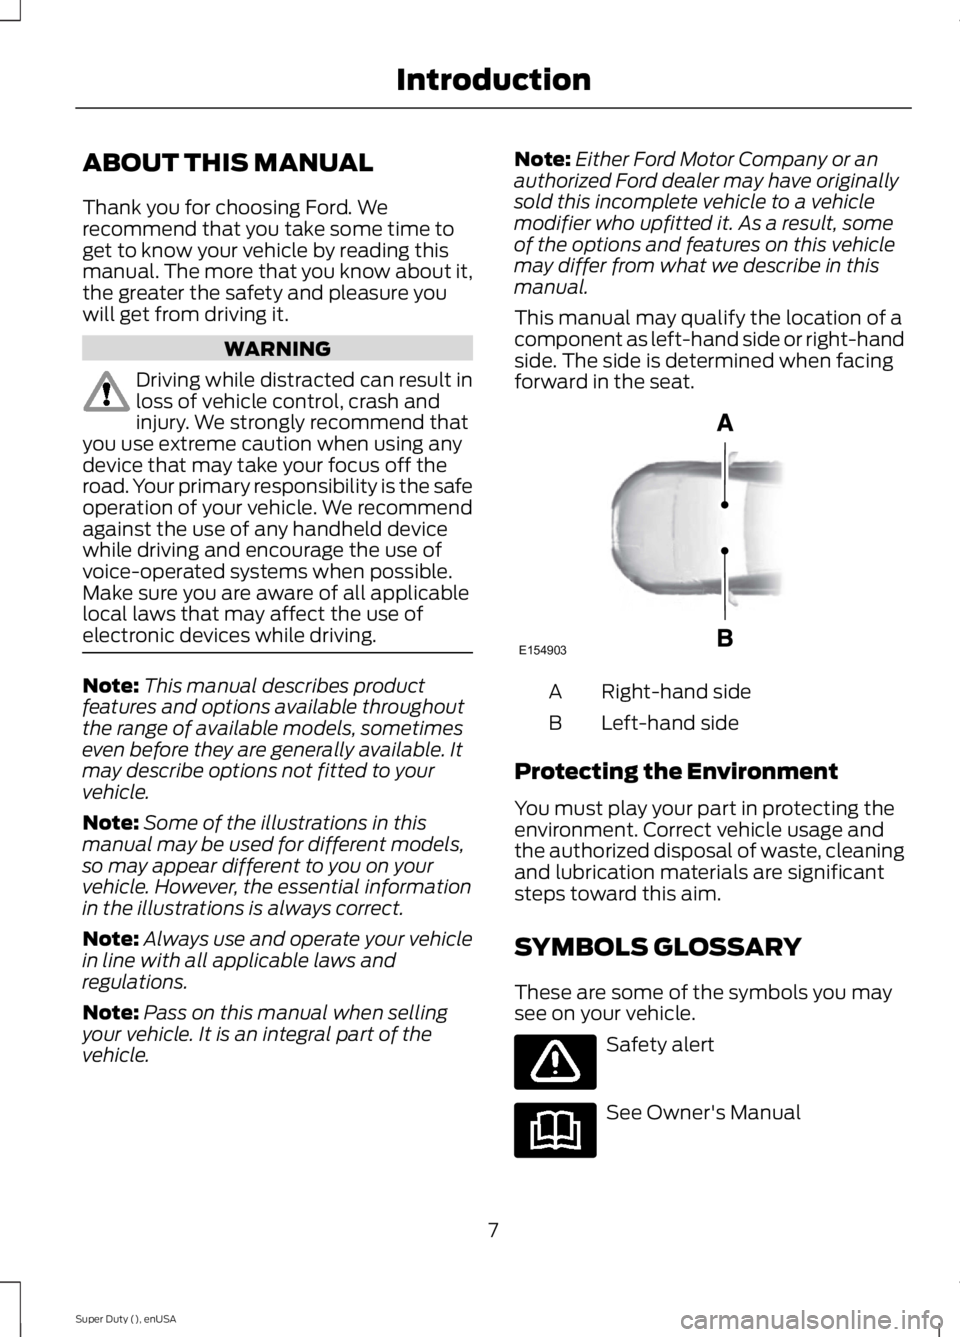
This manual may qualify the location of acomponent as left-hand side or right-handside. The side is determined when facingforward in the seat.
Right-hand sideA
Left-hand sideB
Protecting the Environment
You must play your part in protecting theenvironment. Correct vehicle usage andthe authorized disposal of waste, cleaningand lubrication materials are significantsteps toward this aim.
SYMBOLS GLOSSARY
These are some of the symbols you maysee on your vehicle.
Safety alert
See Owner's Manual
7
Super Duty (), enUSA
IntroductionE154903
Page 22 of 470
weight of the child is added to the childrestraint. It also helps to achieve theproper snugness of the child seat toyour vehicle. Sometimes, a slight leantoward the buckle will help to removeremaining slack from the belt.
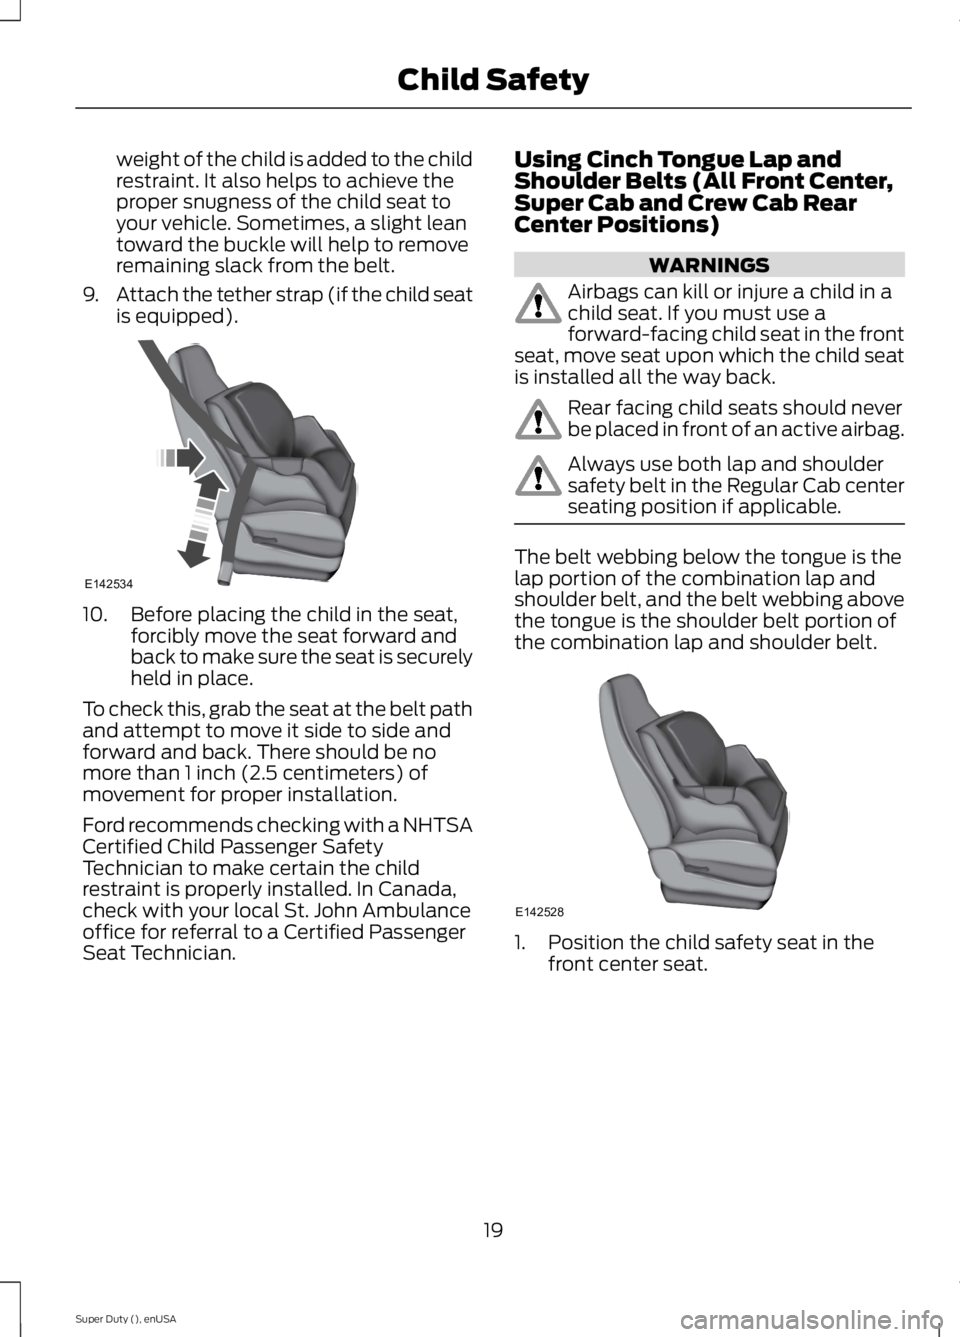
9.Attach the tether strap (if the child seatis equipped).
10. Before placing the child in the seat,forcibly move the seat forward andback to make sure the seat is securelyheld in place.
To check this, grab the seat at the belt pathand attempt to move it side to side andforward and back. There should be nomore than 1 inch (2.5 centimeters) ofmovement for proper installation.
Ford recommends checking with a NHTSACertified Child Passenger SafetyTechnician to make certain the childrestraint is properly installed. In Canada,check with your local St. John Ambulanceoffice for referral to a Certified PassengerSeat Technician.
Using Cinch Tongue Lap andShoulder Belts (All Front Center,Super Cab and Crew Cab RearCenter Positions)
WARNINGS
Airbags can kill or injure a child in achild seat. If you must use aforward-facing child seat in the frontseat, move seat upon which the child seatis installed all the way back.
Rear facing child seats should neverbe placed in front of an active airbag.
Always use both lap and shouldersafety belt in the Regular Cab centerseating position if applicable.
The belt webbing below the tongue is thelap portion of the combination lap andshoulder belt, and the belt webbing abovethe tongue is the shoulder belt portion ofthe combination lap and shoulder belt.
1. Position the child safety seat in thefront center seat.
19
Super Duty (), enUSA
Child SafetyE142534 E142528
Page 29 of 470
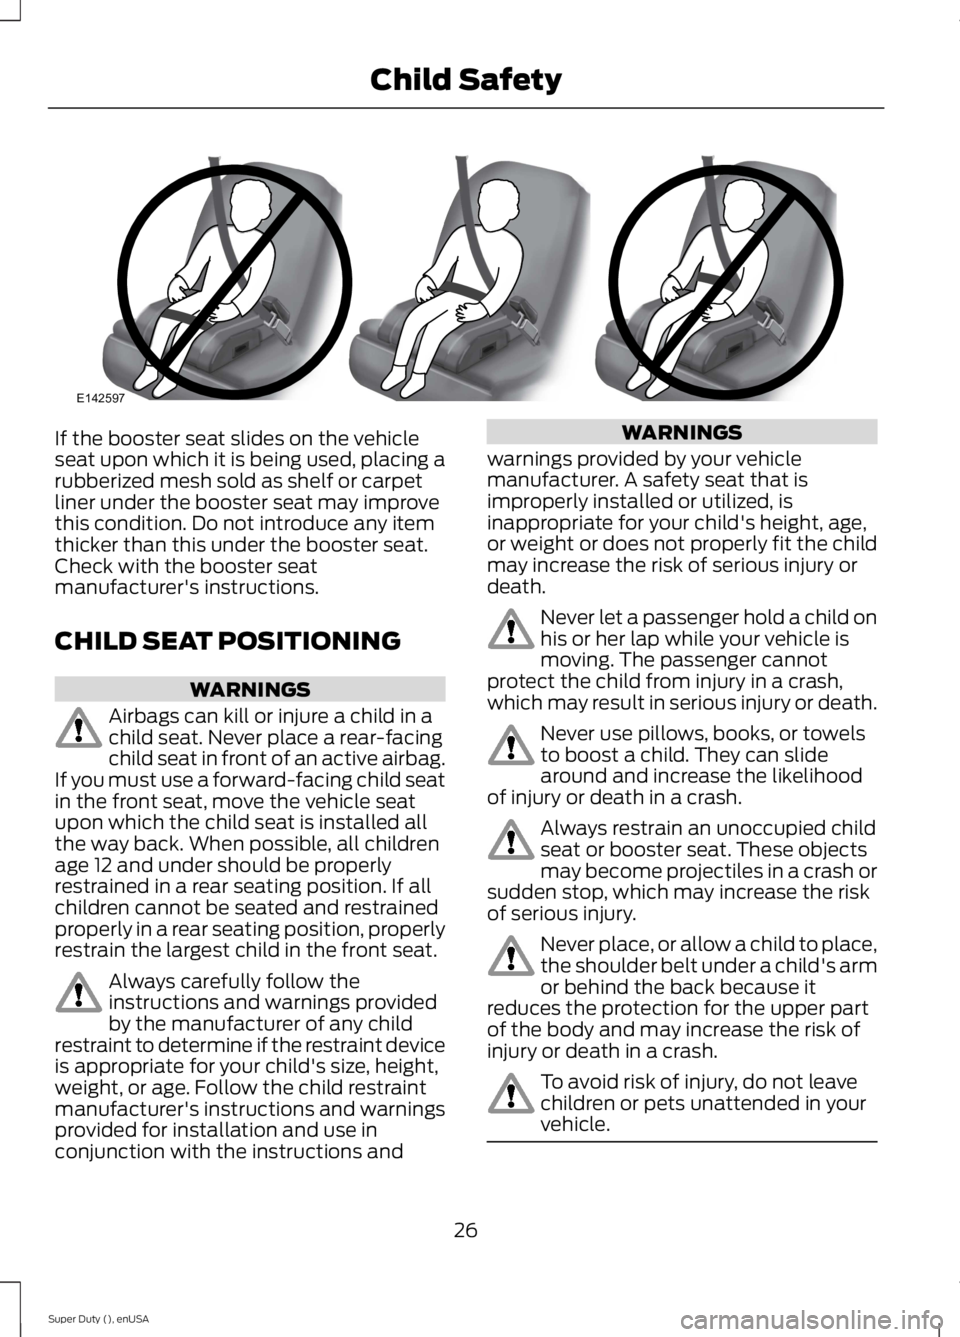
If the booster seat slides on the vehicleseat upon which it is being used, placing arubberized mesh sold as shelf or carpetliner under the booster seat may improvethis condition. Do not introduce any itemthicker than this under the booster seat.Check with the booster seatmanufacturer's instructions.
CHILD SEAT POSITIONING
WARNINGS
Airbags can kill or injure a child in achild seat. Never place a rear-facingchild seat in front of an active airbag.If you must use a forward-facing child seatin the front seat, move the vehicle seatupon which the child seat is installed allthe way back. When possible, all childrenage 12 and under should be properlyrestrained in a rear seating position. If allchildren cannot be seated and restrainedproperly in a rear seating position, properlyrestrain the largest child in the front seat.
Always carefully follow theinstructions and warnings providedby the manufacturer of any childrestraint to determine if the restraint deviceis appropriate for your child's size, height,weight, or age. Follow the child restraintmanufacturer's instructions and warningsprovided for installation and use inconjunction with the instructions and
WARNINGS
warnings provided by your vehiclemanufacturer. A safety seat that isimproperly installed or utilized, isinappropriate for your child's height, age,or weight or does not properly fit the childmay increase the risk of serious injury ordeath.
Never let a passenger hold a child onhis or her lap while your vehicle ismoving. The passenger cannotprotect the child from injury in a crash,which may result in serious injury or death.
Never use pillows, books, or towelsto boost a child. They can slidearound and increase the likelihoodof injury or death in a crash.
Always restrain an unoccupied childseat or booster seat. These objectsmay become projectiles in a crash orsudden stop, which may increase the riskof serious injury.
Never place, or allow a child to place,the shoulder belt under a child's armor behind the back because itreduces the protection for the upper partof the body and may increase the risk ofinjury or death in a crash.
To avoid risk of injury, do not leavechildren or pets unattended in yourvehicle.
26
Super Duty (), enUSA
Child SafetyE142597
Page 32 of 470
The safety belt pretensioners at the frontseating positions are designed to tightenthe safety belts when activated. In frontaland near-frontal crashes, side crashes androllovers, the safety belt pretensioners maybe activated alone or, if the crash is ofsufficient severity, together with the frontairbags.
FASTENING THE SAFETY
BELTS
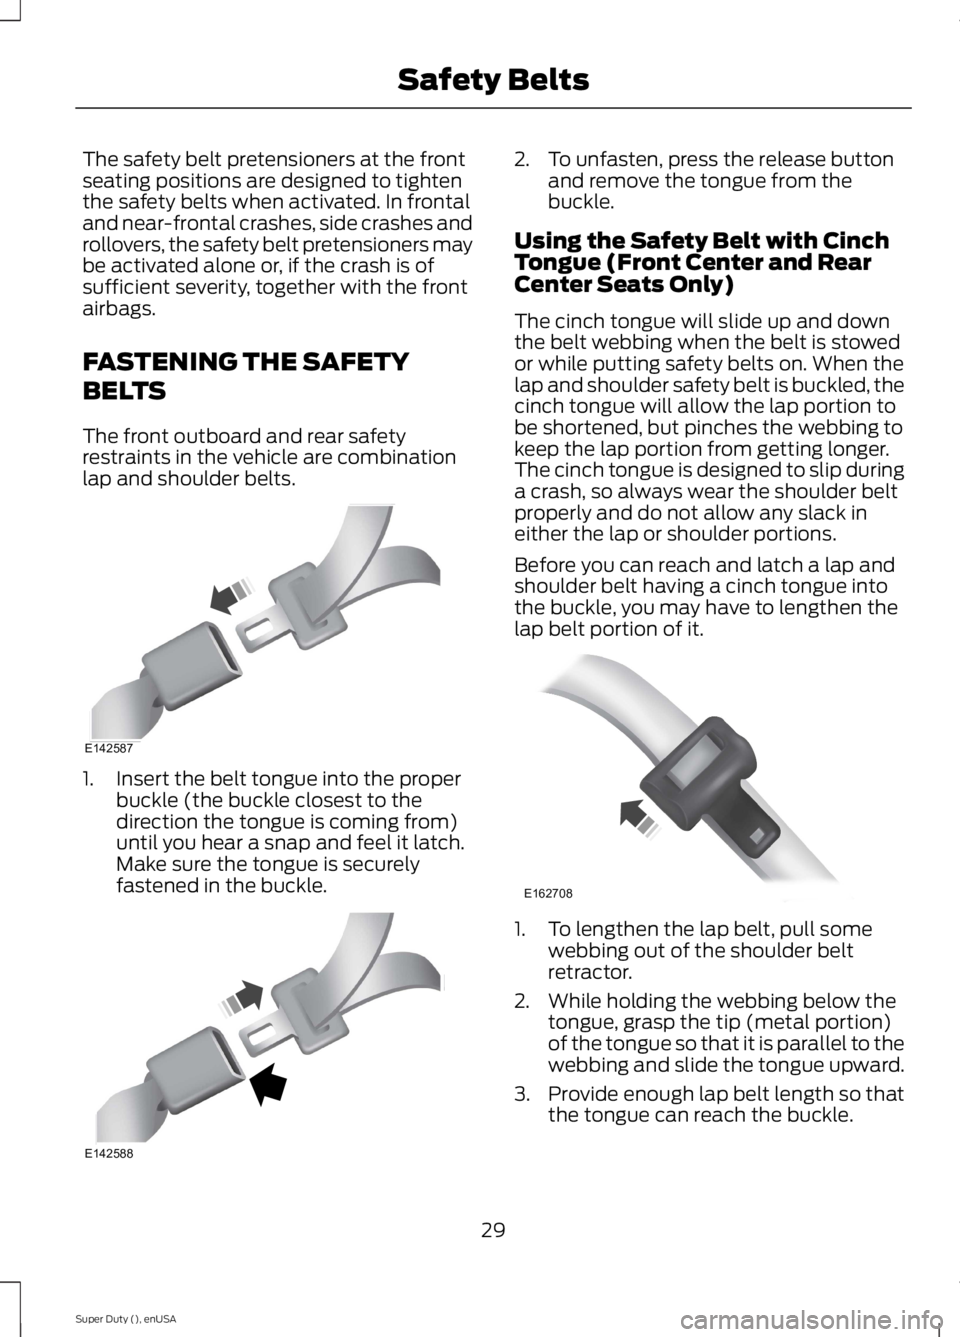
The front outboard and rear safetyrestraints in the vehicle are combinationlap and shoulder belts.
1. Insert the belt tongue into the properbuckle (the buckle closest to thedirection the tongue is coming from)until you hear a snap and feel it latch.Make sure the tongue is securelyfastened in the buckle.
2. To unfasten, press the release buttonand remove the tongue from thebuckle.
Using the Safety Belt with CinchTongue (Front Center and RearCenter Seats Only)
The cinch tongue will slide up and downthe belt webbing when the belt is stowedor while putting safety belts on. When thelap and shoulder safety belt is buckled, thecinch tongue will allow the lap portion tobe shortened, but pinches the webbing tokeep the lap portion from getting longer.The cinch tongue is designed to slip duringa crash, so always wear the shoulder beltproperly and do not allow any slack ineither the lap or shoulder portions.
Before you can reach and latch a lap andshoulder belt having a cinch tongue intothe buckle, you may have to lengthen thelap belt portion of it.
1. To lengthen the lap belt, pull somewebbing out of the shoulder beltretractor.
2. While holding the webbing below thetongue, grasp the tip (metal portion)of the tongue so that it is parallel to thewebbing and slide the tongue upward.
3.Provide enough lap belt length so thatthe tongue can reach the buckle.
29
Super Duty (), enUSA
Safety BeltsE142587 E142588 E162708
Page 47 of 470
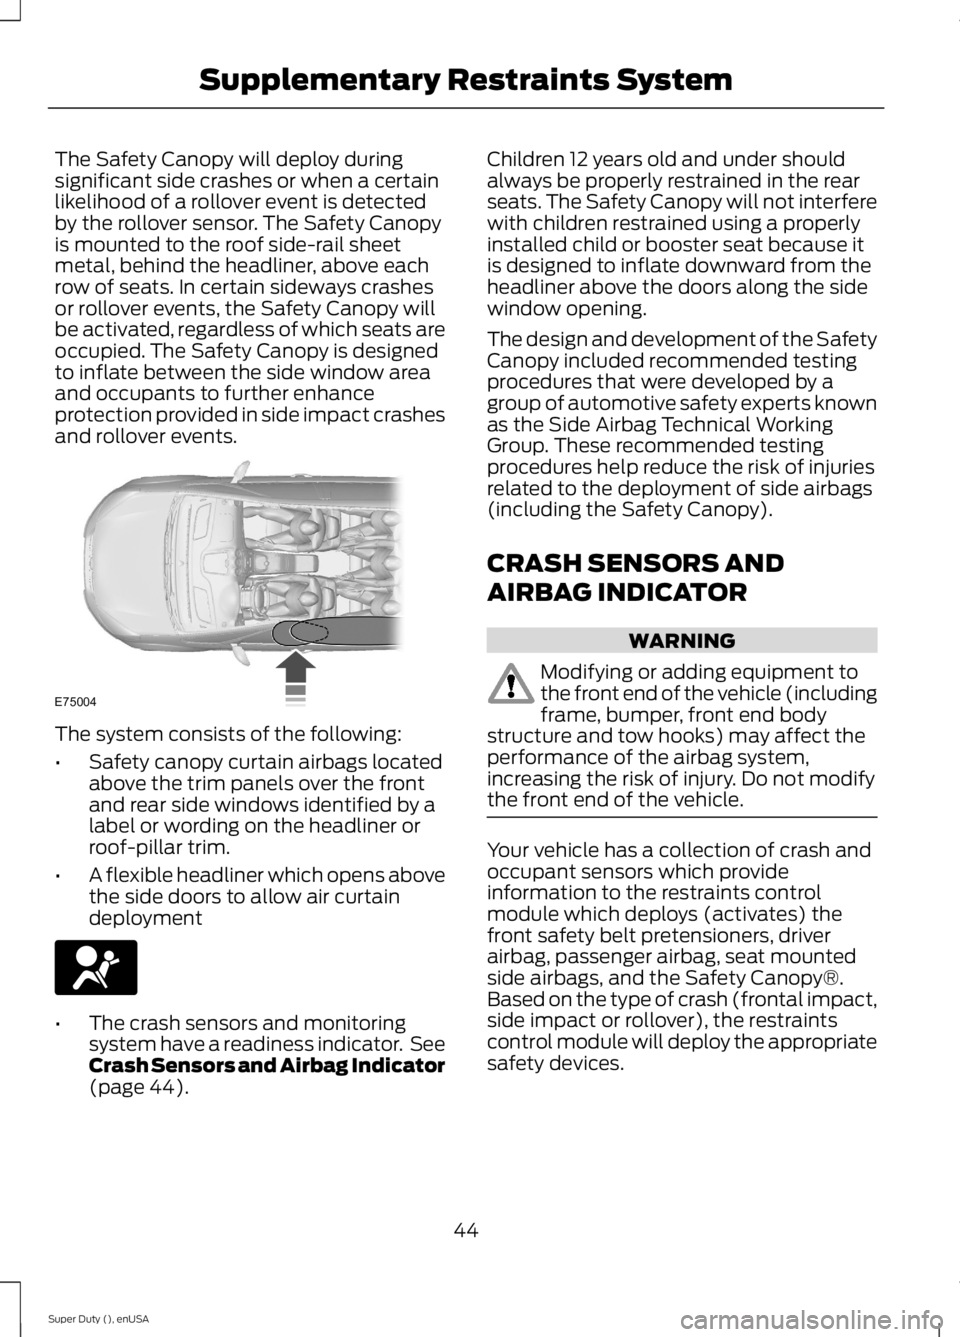
The Safety Canopy will deploy duringsignificant side crashes or when a certainlikelihood of a rollover event is detectedby the rollover sensor. The Safety Canopyis mounted to the roof side-rail sheetmetal, behind the headliner, above eachrow of seats. In certain sideways crashesor rollover events, the Safety Canopy willbe activated, regardless of which seats areoccupied. The Safety Canopy is designedto inflate between the side window areaand occupants to further enhanceprotection provided in side impact crashesand rollover events.
The system consists of the following:
•Safety canopy curtain airbags locatedabove the trim panels over the frontand rear side windows identified by alabel or wording on the headliner orroof-pillar trim.
•A flexible headliner which opens abovethe side doors to allow air curtaindeployment
•The crash sensors and monitoringsystem have a readiness indicator. SeeCrash Sensors and Airbag Indicator(page 44).
Children 12 years old and under shouldalways be properly restrained in the rearseats. The Safety Canopy will not interferewith children restrained using a properlyinstalled child or booster seat because itis designed to inflate downward from theheadliner above the doors along the sidewindow opening.
The design and development of the SafetyCanopy included recommended testingprocedures that were developed by agroup of automotive safety experts knownas the Side Airbag Technical WorkingGroup. These recommended testingprocedures help reduce the risk of injuriesrelated to the deployment of side airbags(including the Safety Canopy).
CRASH SENSORS AND
AIRBAG INDICATOR
WARNING
Modifying or adding equipment tothe front end of the vehicle (includingframe, bumper, front end bodystructure and tow hooks) may affect theperformance of the airbag system,increasing the risk of injury. Do not modifythe front end of the vehicle.
Your vehicle has a collection of crash andoccupant sensors which provideinformation to the restraints controlmodule which deploys (activates) thefront safety belt pretensioners, driverairbag, passenger airbag, seat mountedside airbags, and the Safety Canopy®.Based on the type of crash (frontal impact,side impact or rollover), the restraintscontrol module will deploy the appropriatesafety devices.
44
Super Duty (), enUSA
Supplementary Restraints SystemE75004
Page 49 of 470
GENERAL INFORMATION ON
RADIO FREQUENCIES
This device complies with Part 15 of theFCC Rules and with Industry Canadalicense-exempt RSS standard(s).Operation is subject to the following twoconditions: (1) This device may not causeharmful interference, and (2) This devicemust accept any interference received,including interference that may causeundesired operation.
Note:Changes or modifications notexpressively approved by the partyresponsible for compliance could void theuser's authority to operate the equipment.The term IC before the radio certificationnumber only signifies that Industry Canadatechnical specifications were met.
The typical operating range for yourtransmitter is approximately 33 feet (10meters). Vehicles with the remote startfeature will have a greater range. One ofthe following could cause a decrease inoperating range:
•weather conditions
•nearby radio towers
•structures around the vehicle
•other vehicles parked next to yourvehicle
The radio frequency used by your remotecontrol can also be used by other shortdistance radio transmissions, for exampleamateur radios, medical equipment,wireless headphones, remote controls andalarm systems. If the frequencies arejammed, you will not be able to use yourremote control. You can lock and unlockthe doors with the key.
Note:Make sure to lock your vehicle beforeleaving it unattended.
Note:If you are in range, the remote controlwill operate if you press any buttonunintentionally.
REMOTE CONTROL
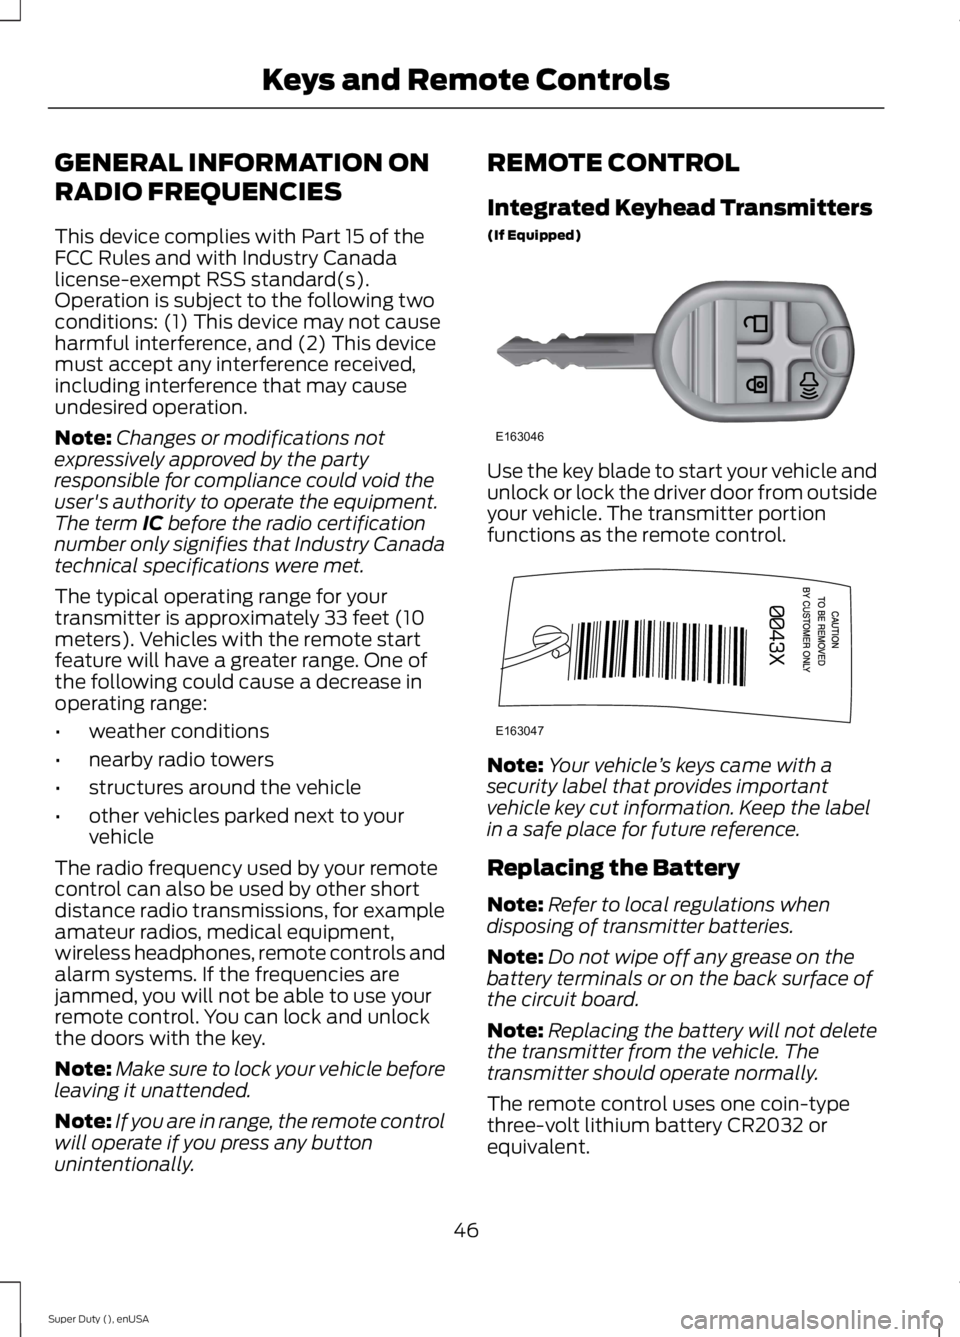
Integrated Keyhead Transmitters
(If Equipped)
Use the key blade to start your vehicle andunlock or lock the driver door from outsideyour vehicle. The transmitter portionfunctions as the remote control.
Note:Your vehicle’s keys came with asecurity label that provides importantvehicle key cut information. Keep the labelin a safe place for future reference.
Replacing the Battery
Note:Refer to local regulations whendisposing of transmitter batteries.
Note:Do not wipe off any grease on thebattery terminals or on the back surface ofthe circuit board.
Note:Replacing the battery will not deletethe transmitter from the vehicle. Thetransmitter should operate normally.
The remote control uses one coin-typethree-volt lithium battery CR2032 orequivalent.
46
Super Duty (), enUSA
Keys and Remote ControlsE163046 E163047
Page 51 of 470

Sounding a Panic Alarm
Note:The panic alarm will only operatewhen the ignition is off.
Press the button to activate thealarm. Press the button again orturn the ignition on to deactivateit.
Remote Start (If Equipped)
WARNING
To avoid exhaust fumes, do not useremote start if your vehicle is parkedindoors or areas that are not wellventilated.
Note:Do not use remote start if your vehicleis low on fuel.
The remote start button is on thetransmitter.
This feature allows you to start yourvehicle from outside the vehicle. Thetransmitter has an extended operatingrange.
Vehicles with automatic climate controlcan be set to operate when you remotestart the vehicle. See Climate Control(page 103). A manual climate controlsystem will run at the setting it was set towhen you switch the vehicle off.
Many states and provinces haverestrictions for the use of remote start.Check your local and state or provinciallaws for specific requirements regardingremote start systems.
The remote start system will not work if:
•the ignition is on
•the alarm system is triggered
•you disable the feature
•the hood is open
•the transmission is not in P
•the vehicle battery voltage is too low
•the service engine soon indicator is on.
Remote Starting the Vehicle
Note:You must press each button withinthree seconds of each other. Your vehiclewill not remote start and the horn will notsound if you do not follow this sequence.
The label on your transmitter details thestarting procedure.
To remote start your vehicle:
1. Press the lock button to lock all thedoors.
2. Press the remote start button twice.The exterior lamps will flash twice.
The horn will sound if the system fails tostart.
Note:If you remote start your vehicle withan integrated keyhead transmitter, you mustswitch the ignition on before driving yourvehicle. If you remote start your vehicle withan intelligent access transmitter, you mustpress the START/STOP button on theinstrument panel once while applying thebrake pedal before driving your vehicle.
The power windows will not work duringthe remote start and the radio will not turnon automatically.
The parking lamps will remain on and thevehicle will run for 5, 10, or 15 minutes,depending on the setting.
48
Super Duty (), enUSA
Keys and Remote ControlsE138624 E138625 E138626