2015 FORD F250 SUPER DUTY ECU
[x] Cancel search: ECUPage 62 of 470

1.Insert the first previously programmedcoded key into the ignition.
2.Switch the ignition from off to on. Keepthe ignition on for at least threeseconds, but no more than 10 seconds.
3.Switch the ignition off and remove thefirst coded key from the ignition.
4. After three seconds but within 10seconds of switching the ignition off,insert the second previously coded keyinto the ignition.
5.Switch the ignition from off to on. Keepthe ignition on for at least threeseconds, but no more than 10 seconds.
6.Switch the ignition off and remove thesecond previously programmed codedkey from the ignition.
7. After three seconds but within 10seconds of switching the ignition offand removing the previouslyprogrammed coded key, insert the newunprogrammed key into the ignition.
8.Switch the ignition from off to on. Keepthe ignition on for at least six secondsuntil you hear the door locks cycle.
9.Remove the newly programmed codedkey from the ignition.
The key will start the engine ifprogramming is successful. You canoperate the remote entry system if the newkey is an integrated keyhead transmitter.
If programming was not successful, wait20 seconds and repeat Steps 1 through 8.If you are still unsuccessful, take yourvehicle to an authorized dealer.
ANTI-THEFT ALARM (IF EQUIPPED)
The system warns you of an unauthorizedentry to your vehicle. It triggers if any dooror the hood opens without using the key,remote control or keyless entry keypad.
The direction indicators flash and the hornsounds if the system triggers while thealarm is armed.
Take all remote controls to an authorizeddealer if there is any potential alarmproblem with your vehicle.
Arming the Alarm
The alarm is ready to arm when there isnot a key in the ignition. Electronically lockthe vehicle to arm the alarm.
The direction indicators flash once afteryou lock the vehicle. This indicates thealarm is in the pre-armed mode. It will fullyarm in 20 seconds.
Disarming the Alarm
Disarm the alarm by any of the followingactions:
•Press the power door unlock buttonwithin the 20-second pre-armed mode.
•Unlock the doors with the remotecontrol or keyless entry keypad.
•Switch the ignition on or start thevehicle.
•Use a key in the driver door to unlockthe vehicle, then switch the ignition onwithin 12 seconds.
Note:Pressing the panic button on theremote control will stop the horn and signalindicators, but will not disarm the system.
59
Super Duty (), enUSA
Security
Page 86 of 470

EXHAUST FILTER
For more information, refer to the Dieselsupplement.
System check and vehicle featurecustomization
Press the SETUP button repeatedly tocycle the information display through thefollowing features:
Note:Some options may appear slightlydifferent or not at all if the items areoptional.
Note:When returning to the SETUP menuand you selected a non-English language,HOLD RESET FOR ENGLISH will display tochange back to English. Press and hold theRESET button to change back to English.
SETUP
OIL LIFEpress the RESET buttonRESET FOR SYSTEMCHECKEXHAUST FLUID LEVEL(Diesel only)
ENGINE HOURS
ENGINE IDLE HOURS
CHARGING SYSTEM
DOOR
BRAKE SYSTEM
TBC GAIN = XX.X
FUEL LEVEL
MYKEY DISTANCE
SETUP (cont’d)
MYKEY(S) PROGRAMMEDpress the RESETbuttonRESET FORSYSTEM CHECKADMIN KEYS PROGRAMMED
OIL LIFE
English or Metricpress the RESETbuttonUNITS
0 to 180 secondsAUTOLAMP (SEC)
On or OffAUTOLOCK
On or OffAUTOUNLOCK
On or OffCOURTESY WIPE
83
Super Duty (), enUSA
Information Displays
Page 95 of 470

Compass/Transmission indicatordisplay (if equipped)
The compass heading will display in theupper right corner of the informationdisplay; the transmission gear indicatordisplays in the right side of the informationdisplay when using the SelectShiftAutomatic™ transmission feature. Thesedisplays will not be shown in all screenmodes. For example: when programmingcertain vehicle features or in certaininformation menus.
INFORMATION MESSAGES
Note:Depending on your vehicle optionsand instrument cluster type, not all of themessages will display or be available.Additionally, the information display mayabbreviate or shorten certain messages.
Press the RESET button for Type 1 displaysor the OK button for Type 2 displays toacknowledge and remove some messagesfrom the information display. Theinformation display will automaticallyremove other messages after a short time.
You need to confirm certain messagesbefore you can access the menus.
AdvanceTrac™
ActionMessage
The system detects a condition that requires service. Havethe system checked by an authorized dealer.SERVICE ADVAN-CETRAC
The driver has disabled the stability control system. SeeUsing Stability Control (page 167).ADVANCETRAC OFF
The driver has disabled the traction control system. See UsingTraction Control (page 165).TRACTION CONTROLOFF
Alarm
ActionMessage
An unauthorized entry has triggered the alarm. See Anti-TheftAlarm (page 59).TO STOP ALARMSTART VEHICLE
The security system has detected a fault. Have the systemchecked by an authorized dealer.SECURITY SYSTEMFAULT
92
Super Duty (), enUSA
Information Displays
Page 124 of 470

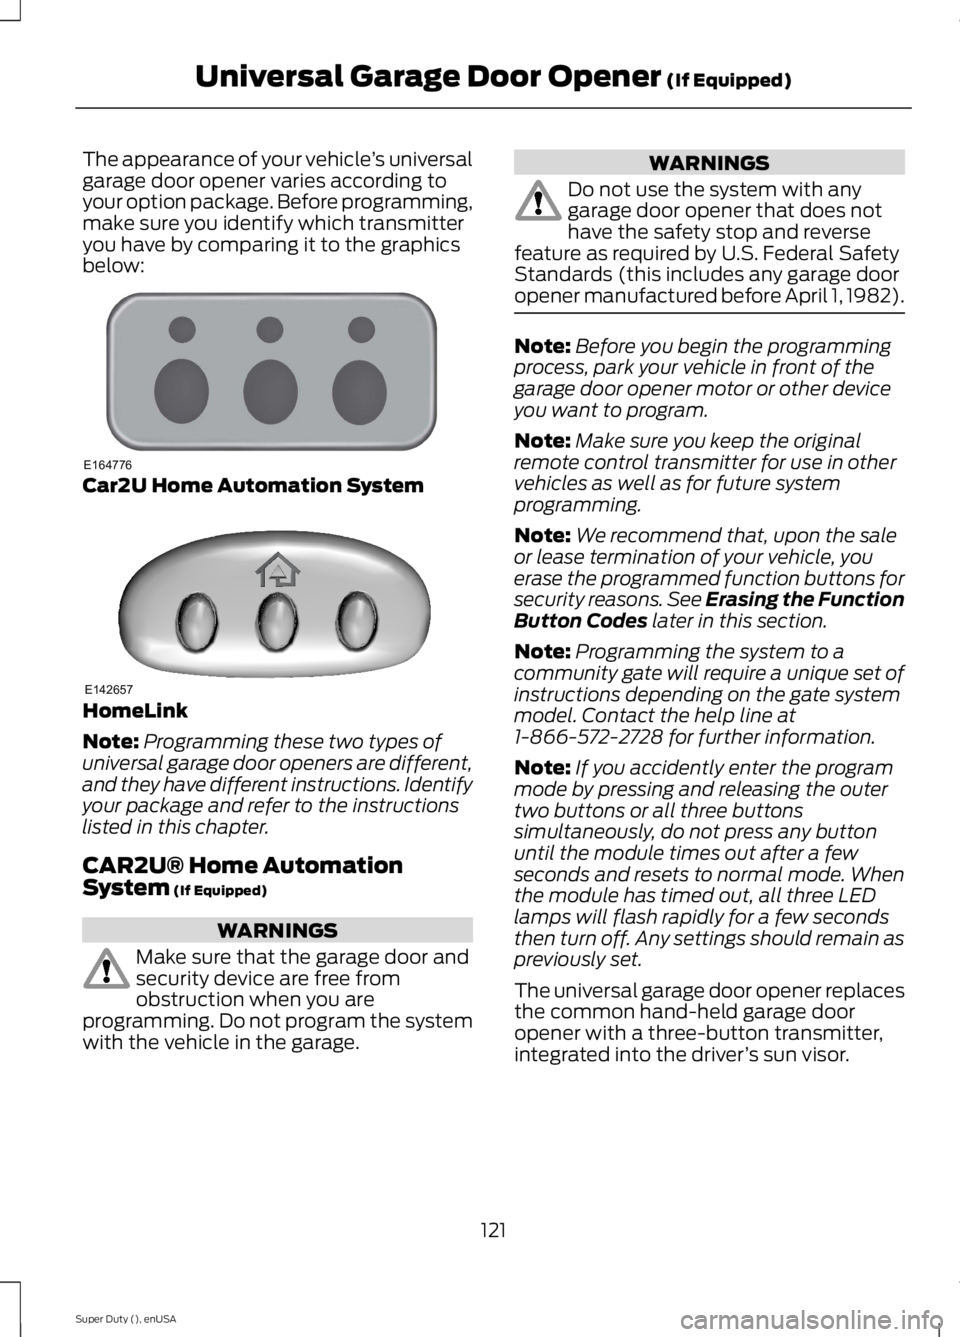
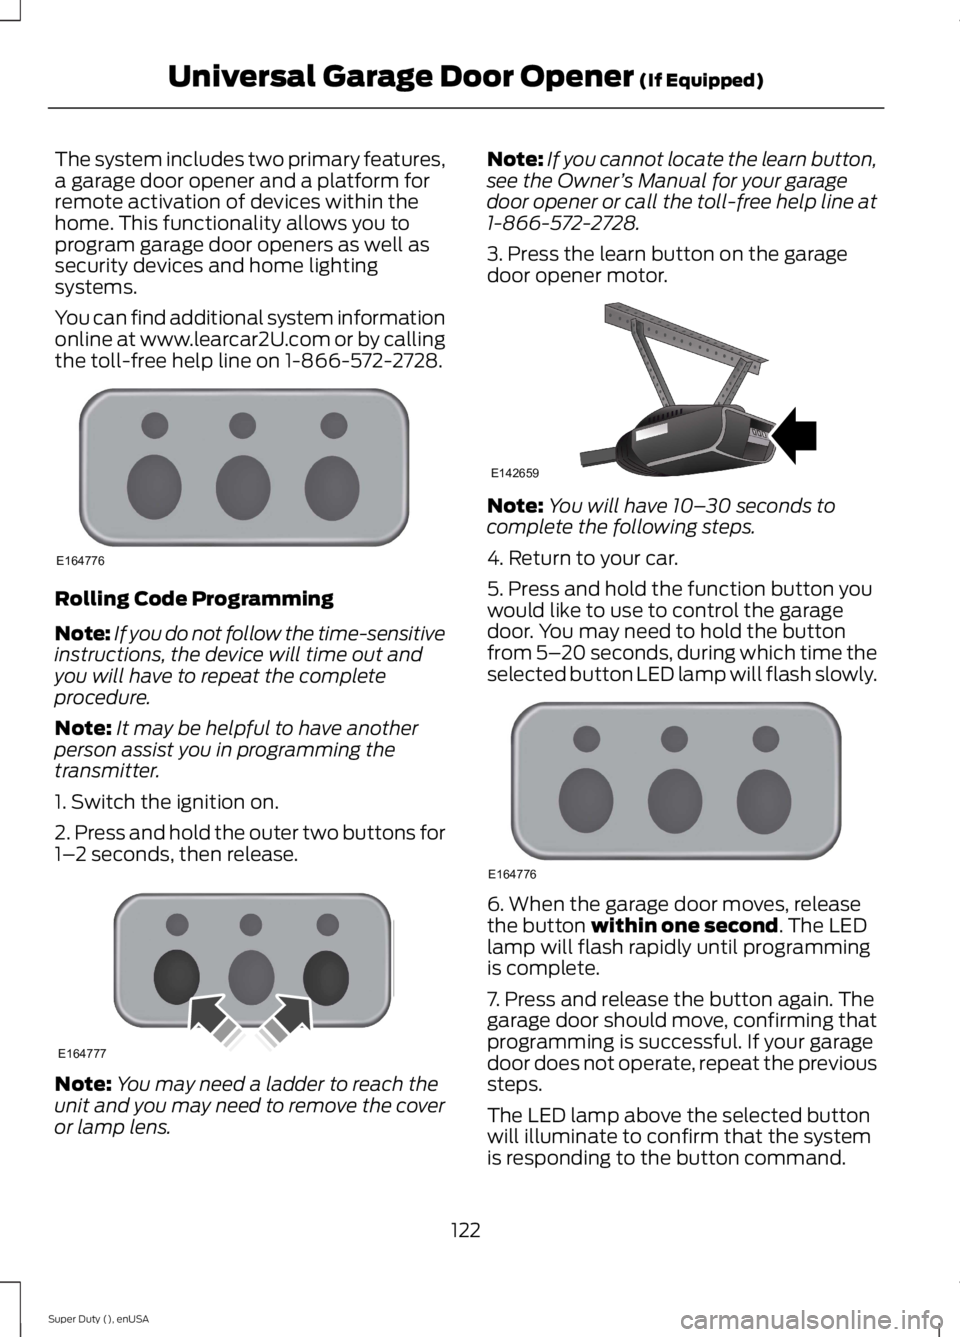
The appearance of your vehicle’s universalgarage door opener varies according toyour option package. Before programming,make sure you identify which transmitteryou have by comparing it to the graphicsbelow:
Car2U Home Automation System
HomeLink
Note:Programming these two types ofuniversal garage door openers are different,and they have different instructions. Identifyyour package and refer to the instructionslisted in this chapter.
CAR2U® Home AutomationSystem (If Equipped)
WARNINGS
Make sure that the garage door andsecurity device are free fromobstruction when you areprogramming. Do not program the systemwith the vehicle in the garage.
WARNINGS
Do not use the system with anygarage door opener that does nothave the safety stop and reversefeature as required by U.S. Federal SafetyStandards (this includes any garage dooropener manufactured before April 1, 1982).
Note:Before you begin the programmingprocess, park your vehicle in front of thegarage door opener motor or other deviceyou want to program.
Note:Make sure you keep the originalremote control transmitter for use in othervehicles as well as for future systemprogramming.
Note:We recommend that, upon the saleor lease termination of your vehicle, youerase the programmed function buttons forsecurity reasons. See Erasing the FunctionButton Codes later in this section.
Note:Programming the system to acommunity gate will require a unique set ofinstructions depending on the gate systemmodel. Contact the help line at1-866-572-2728 for further information.
Note:If you accidently enter the programmode by pressing and releasing the outertwo buttons or all three buttonssimultaneously, do not press any buttonuntil the module times out after a fewseconds and resets to normal mode. Whenthe module has timed out, all three LEDlamps will flash rapidly for a few secondsthen turn off. Any settings should remain aspreviously set.
The universal garage door opener replacesthe common hand-held garage dooropener with a three-button transmitter,integrated into the driver’s sun visor.
121
Super Duty (), enUSA
Universal Garage Door Opener (If Equipped)E164776 E142657
Page 125 of 470

The system includes two primary features,a garage door opener and a platform forremote activation of devices within thehome. This functionality allows you toprogram garage door openers as well assecurity devices and home lightingsystems.
You can find additional system informationonline at www.learcar2U.com or by callingthe toll-free help line on 1-866-572-2728.
Rolling Code Programming
Note:If you do not follow the time-sensitiveinstructions, the device will time out andyou will have to repeat the completeprocedure.
Note:It may be helpful to have anotherperson assist you in programming thetransmitter.
1. Switch the ignition on.
2. Press and hold the outer two buttons for1–2 seconds, then release.
Note:You may need a ladder to reach theunit and you may need to remove the coveror lamp lens.
Note:If you cannot locate the learn button,see the Owner’s Manual for your garagedoor opener or call the toll-free help line at1-866-572-2728.
3. Press the learn button on the garagedoor opener motor.
Note:You will have 10–30 seconds tocomplete the following steps.
4. Return to your car.
5. Press and hold the function button youwould like to use to control the garagedoor. You may need to hold the buttonfrom 5–20 seconds, during which time theselected button LED lamp will flash slowly.
6. When the garage door moves, releasethe button within one second. The LEDlamp will flash rapidly until programmingis complete.
7. Press and release the button again. Thegarage door should move, confirming thatprogramming is successful. If your garagedoor does not operate, repeat the previoussteps.
The LED lamp above the selected buttonwill illuminate to confirm that the systemis responding to the button command.
122
Super Duty (), enUSA
Universal Garage Door Opener (If Equipped)E164776 E164777 E142659 E164776
Page 127 of 470

2. When the LED lamps flash, release thebuttons. You have erased all of the buttoncodes.
FCC and RSS-210 Industry CanadaCompliance
This device complies with Part 15 of theFCC Rules and with RSS-210 of IndustryCanada. Operation is subject to thefollowing two conditions:
1. This device may not cause harmfulinterference, and
2. This device must accept anyinterference received, includinginterference that may cause undesiredoperation.
Changes or modifications to your devicenot expressly approved by the partyresponsible for compliance can void theuser’s authority to operate the equipment.
HomeLink Wireless ControlSystem (If Equipped)
WARNING
Do not use the system with anygarage door opener that does nothave the safety stop and reversefeature as required by U.S. Federal SafetyStandards (this includes any garage dooropener manufactured before April 1, 1982).A garage door opener that cannot detectan object, signaling the door to stop andreverse, does not meet current federalsafety standards. Using a garage dooropener without these features increasesthe risk of serious injury or death.
Note:Make sure that the garage door andsecurity device are free from obstructionwhen you are programming. Do not programthe system with the vehicle in the garage.
Note:Make sure you keep the originalremote control transmitter for use in othervehicles as well as for future systemprogramming.
Note:We recommend that, upon the saleor lease termination of your vehicle, youerase the programmed function buttons forsecurity reasons. See Erasing the ButtonCodes later in this section.
Note:You can program a maximum ofthree devices. To change or replace any ofthe three devices after you haveprogrammed them, you must first erase thecurrent settings. See Erasing the ButtonCodes later in this section.
The universal garage door opener replacesthe common hand-held garage dooropener with a three-button transmitter,integrated into the driver’s sun visor.
The system includes two primary features,a garage door opener and a platform forremote activation of devices within thehome. This functionality allows you toprogram garage door openers as well asentry gate operators, security systems,entry door locks and home or officelighting.
You can find additional system informationonline at www.homelink.com or by callingthe toll-free help line on 1-800-355-3515.
124
Super Duty (), enUSA
Universal Garage Door Opener (If Equipped)E164777 E142657
Page 147 of 470

AUTOMATIC TRANSMISSION
WARNING
Always set the parking brake fullyand make sure the gearshift islatched in P (Park). Turn the ignitionto the off position and remove the keywhenever you leave your vehicle.
Understanding the Shift Positionsof the 5–Speed AutomaticTransmission (If Equipped)
Putting your vehicle in or out of gear:
1. Fully press down the brake pedal.
2. Move the gearshift lever into thedesired gear.
3. Come to a complete stop.
4. Move the gearshift lever and securelylatch it in P (Park)
P (Park)
This position locks the transmission andprevents the rear wheels from turning.
R (Reverse)
With the gearshift lever in R (Reverse), thevehicle will move backward. Always cometo a complete stop before shifting into andout of R (Reverse).
N (Neutral)
With the gearshift lever in N (Neutral), thevehicle can be started and is free to roll.Hold the brake pedal down while in thisposition.
D (Overdrive) with tow/haul off
D (Overdrive) with tow/haul off is thenormal driving position for the best fueleconomy. The overdrive function allowsautomatic upshifts and downshifts throughgears one through five.
D (Overdrive) with tow/haul on
The tow/haul feature improvestransmission operation when towing atrailer or a heavy load. All transmissiongear ranges are available when usingtow/haul.
To activate tow/haul, press thebutton on the end of thegearshift lever. The TOW HAULindicator light will illuminate in theinstrument cluster.
Tow/haul delays upshifts to reducefrequency of transmission shifting.Tow/haul also provides engine braking inall forward gears when the transmission isin the D (Overdrive) position; this enginebraking will slow the vehicle and assist thedriver in controlling the vehicle whendescending a grade. Depending on drivingconditions and load conditions, the
144
Super Duty (), enUSA
TransmissionE161511
P R N D 3 2 1 E163182 E161509
Page 148 of 470

transmission may downshift, slow thevehicle and control the vehicle speed whendescending a hill, without the acceleratorpedal being pressed. The amount ofdownshift braking provided will vary basedupon the amount the brake pedal ispressed.
To deactivate the tow/haul feature andreturn to normal driving mode, press thebutton on the end of the gearshift lever.The TOW HAUL light will no longer beilluminated.
When you shut-off and restart the engine,the transmission will automatically returnto normal D (Overdrive) mode (tow/hauloff).
WARNING
Do not use the tow/haul or enginebrake features when driving in icy orslippery conditions as the increasedengine braking can cause the rear wheelsto slide and your vehicle to swing aroundwith the possible loss of vehicle control.
3 (Third)
Transmission starts and operates in thirdgear only
Used for improved traction on slipperyroads. Selecting 3 (Third) provides enginebraking.
2 (Second)
Use 2 (Second) to start-up on slipperyroads or to provide additional enginebraking on downgrades.
1 (First)
•Provides maximum engine braking
•Allows upshifts by moving gearshiftlever
•The transmission will not downshiftinto 1 (First) at high speeds; it willdownshift to a lower gear and thenshift into 1 (First) when the vehiclereaches slower speeds.
Forced downshifts
•Allowed in D (Overdrive) with thetow/haul feature on or off
•Press the accelerator to the floor
•Allows transmission to select anappropriate gear
Understanding the Shift Positionsof a 6–Speed AutomaticTransmission (If Equipped)
Putting your vehicle in or out of gear:
1. Fully press down the brake pedal.
2. Move the gearshift lever into thedesired gear.
3. Come to a complete stop.
4. Move the gearshift lever and securelylatch it in P (Park)
P (Park)
This position locks the transmission andprevents the rear wheels from turning.
145
Super Duty (), enUSA
TransmissionE163183