2015 FORD F250 SUPER DUTY battery
[x] Cancel search: batteryPage 7 of 470
Changing a Fuse............................................231
Maintenance
General Information....................................232
Opening and Closing the Hood..............232
Under Hood Overview - 6.2L...................233
Under Hood Overview - 6.8L..................234
Engine Oil Dipstick......................................235
Engine Oil Check..........................................235
Engine Coolant Check...............................236
Automatic Transmission FluidCheck...........................................................240
Transfer Case Fluid Check........................243
Brake Fluid Check........................................243
Power Steering Fluid Check.....................243
Washer Fluid Check....................................244
Fuel Filter........................................................244
Changing the 12V Battery.........................244
Checking the Wiper Blades.....................246
Changing the Wiper Blades.....................246
Adjusting the Headlamps.........................247
Removing a Headlamp.............................248
Changing a Bulb..........................................250
Bulb Specification Chart...........................252
Changing the Engine Air Filter................254
Vehicle Care
General Information...................................256
Cleaning Products.......................................256
Cleaning the Exterior..................................256
Waxing..............................................................257
Cleaning the Engine....................................257
Cleaning the Windows and WiperBlades..........................................................258
Cleaning the Interior...................................258
Cleaning the Instrument Panel andInstrument Cluster Lens.......................258
Cleaning Leather Seats.............................259
Repairing Minor Paint Damage..............260
Cleaning the Alloy Wheels........................261
Vehicle Storage.............................................261
Wheels and Tires
General Information...................................263
Tire Care..........................................................265
Using Snow Chains.....................................282
Tire Pressure Monitoring System...........282
Changing a Road Wheel...........................288
Technical Specifications..........................299
Capacities and Specific-ations
Engine Specifications.................................301
Motorcraft Parts..........................................302
Vehicle Identification Number................303
Vehicle Certification Label.......................303
Transmission Code Designation............304
Technical Specifications..........................305
Audio System
General Information....................................310
Audio unit - Vehicles With: AM/FM.........311
Audio unit - Vehicles With: AM/FM/CD/SYNC.............................................................312
Audio unit - Vehicles With: Sony AM/FM/CD...................................................................315
Digital Radio...................................................316
Satellite Radio...............................................318
Audio Input Jack............................................321
USB Port...........................................................321
Media Hub......................................................322
SYNC™
General Information...................................323
Using Voice Recognition...........................325
Using SYNC™ With Your Phone.............327
SYNC™ Applications and Services......338
Using SYNC™ With Your MediaPlayer...........................................................345
SYNC™ Troubleshooting.........................353
4
Super Duty (), enUSA
Table of Contents
Page 11 of 470
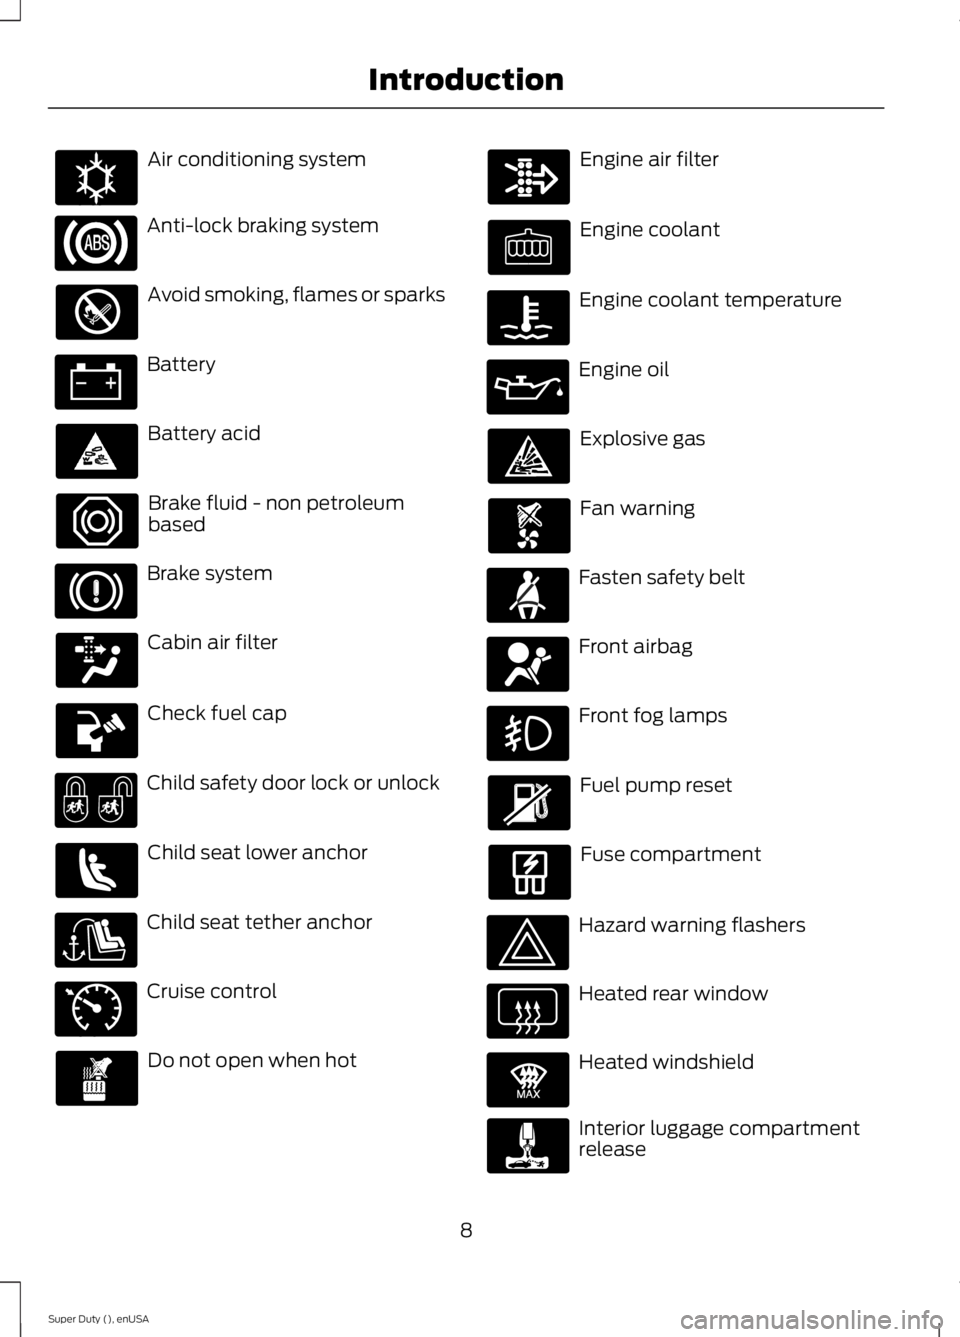
Air conditioning system
Anti-lock braking system
Avoid smoking, flames or sparks
Battery
Battery acid
Brake fluid - non petroleumbased
Brake system
Cabin air filter
Check fuel cap
Child safety door lock or unlock
Child seat lower anchor
Child seat tether anchor
Cruise control
Do not open when hot
Engine air filter
Engine coolant
Engine coolant temperature
Engine oil
Explosive gas
Fan warning
Fasten safety belt
Front airbag
Front fog lamps
Fuel pump reset
Fuse compartment
Hazard warning flashers
Heated rear window
Heated windshield
Interior luggage compartmentrelease
8
Super Duty (), enUSA
IntroductionE162384 E71340 E91392
Page 49 of 470
GENERAL INFORMATION ON
RADIO FREQUENCIES
This device complies with Part 15 of theFCC Rules and with Industry Canadalicense-exempt RSS standard(s).Operation is subject to the following twoconditions: (1) This device may not causeharmful interference, and (2) This devicemust accept any interference received,including interference that may causeundesired operation.
Note:Changes or modifications notexpressively approved by the partyresponsible for compliance could void theuser's authority to operate the equipment.The term IC before the radio certificationnumber only signifies that Industry Canadatechnical specifications were met.
The typical operating range for yourtransmitter is approximately 33 feet (10meters). Vehicles with the remote startfeature will have a greater range. One ofthe following could cause a decrease inoperating range:
•weather conditions
•nearby radio towers
•structures around the vehicle
•other vehicles parked next to yourvehicle
The radio frequency used by your remotecontrol can also be used by other shortdistance radio transmissions, for exampleamateur radios, medical equipment,wireless headphones, remote controls andalarm systems. If the frequencies arejammed, you will not be able to use yourremote control. You can lock and unlockthe doors with the key.
Note:Make sure to lock your vehicle beforeleaving it unattended.
Note:If you are in range, the remote controlwill operate if you press any buttonunintentionally.
REMOTE CONTROL
Integrated Keyhead Transmitters
(If Equipped)
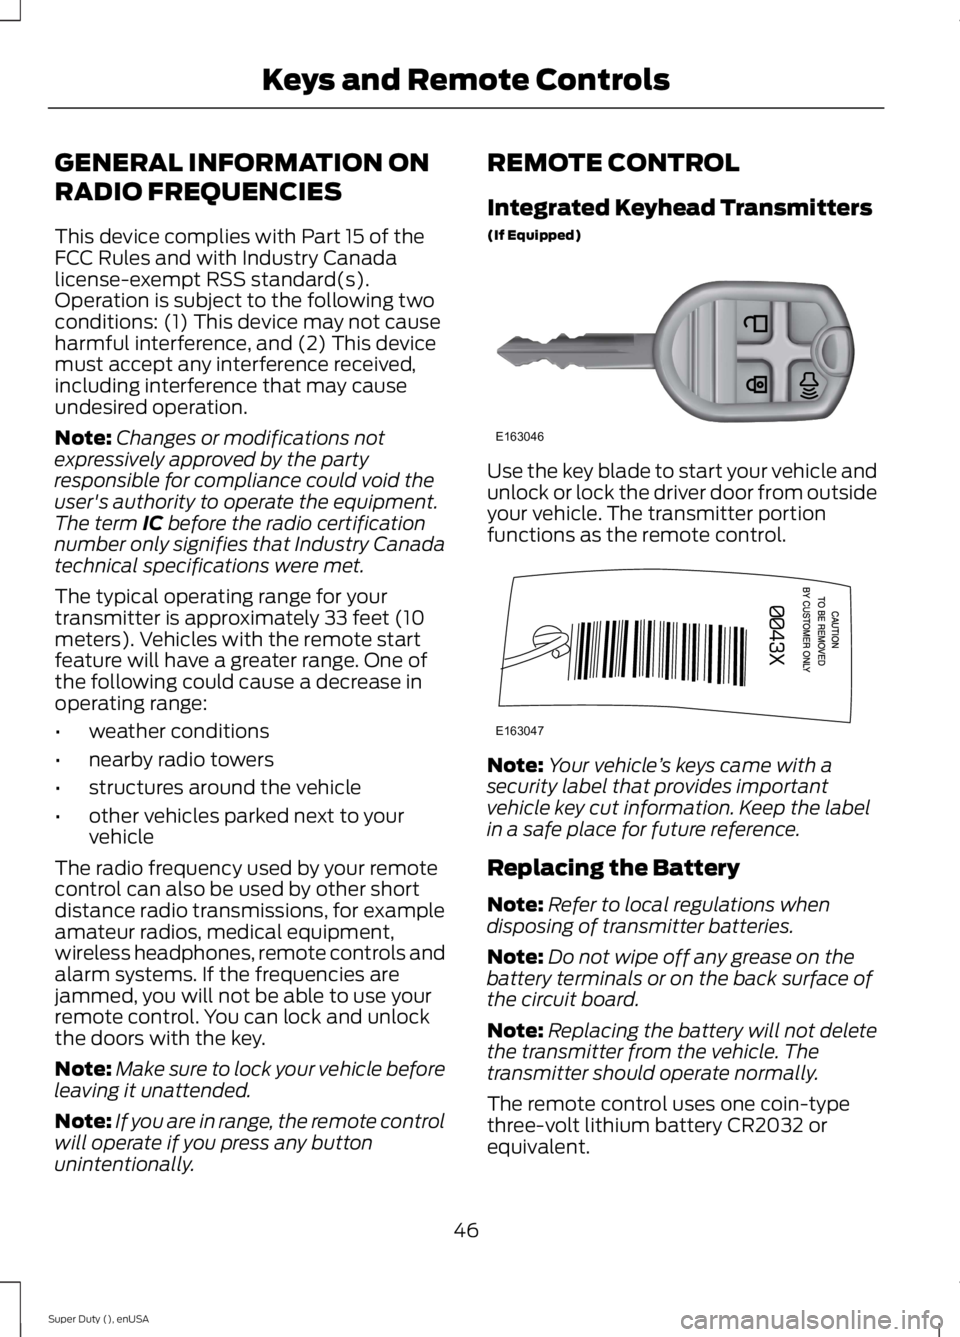
Use the key blade to start your vehicle andunlock or lock the driver door from outsideyour vehicle. The transmitter portionfunctions as the remote control.
Note:Your vehicle’s keys came with asecurity label that provides importantvehicle key cut information. Keep the labelin a safe place for future reference.
Replacing the Battery
Note:Refer to local regulations whendisposing of transmitter batteries.
Note:Do not wipe off any grease on thebattery terminals or on the back surface ofthe circuit board.
Note:Replacing the battery will not deletethe transmitter from the vehicle. Thetransmitter should operate normally.
The remote control uses one coin-typethree-volt lithium battery CR2032 orequivalent.
46
Super Duty (), enUSA
Keys and Remote ControlsE163046 E163047
Page 50 of 470
Integrated Keyhead Transmitter
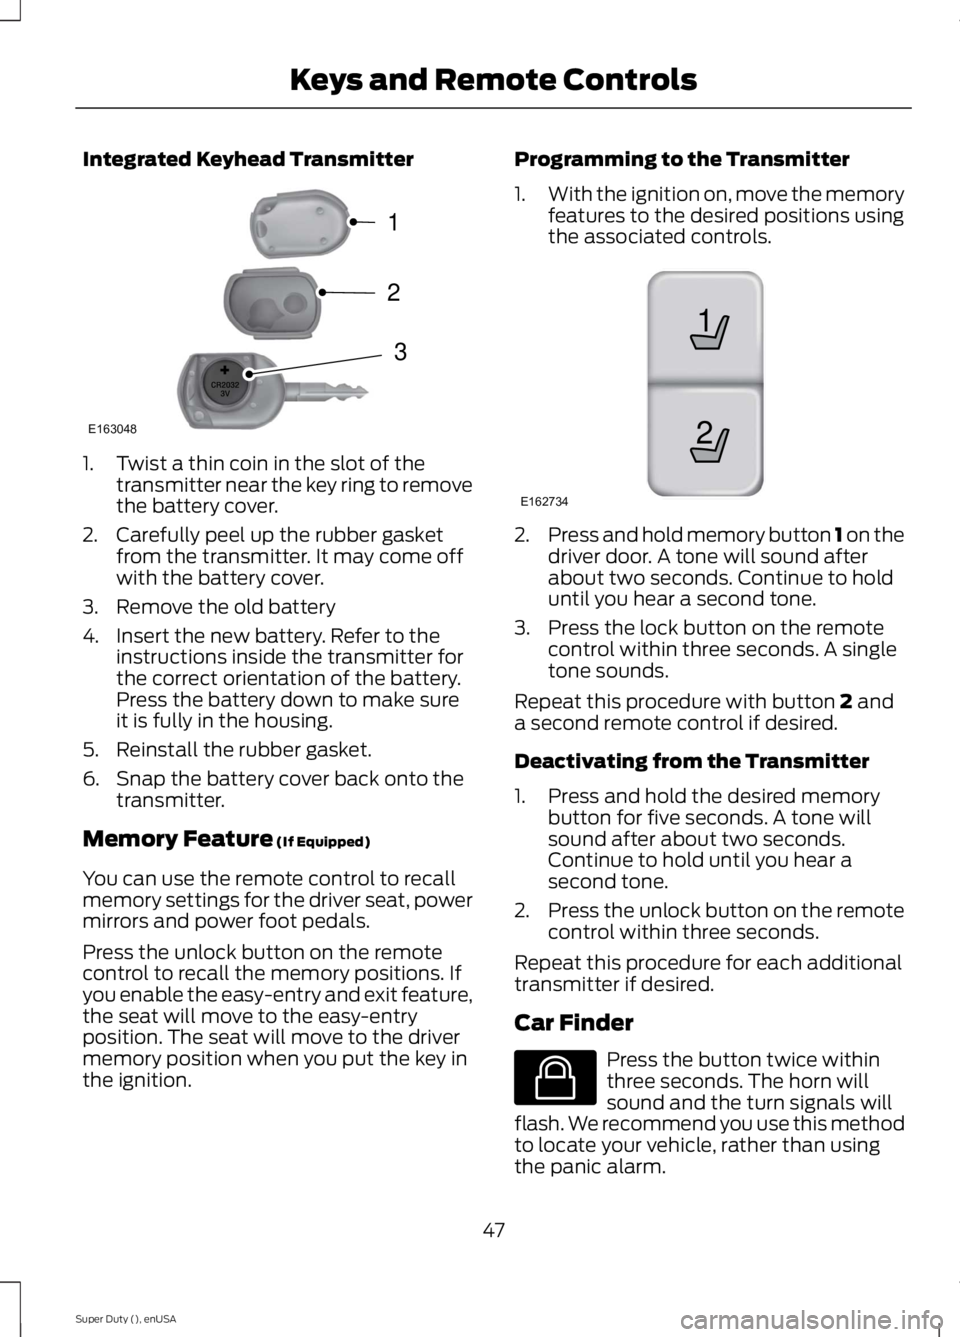
1. Twist a thin coin in the slot of thetransmitter near the key ring to removethe battery cover.
2. Carefully peel up the rubber gasketfrom the transmitter. It may come offwith the battery cover.
3. Remove the old battery
4. Insert the new battery. Refer to theinstructions inside the transmitter forthe correct orientation of the battery.Press the battery down to make sureit is fully in the housing.
5. Reinstall the rubber gasket.
6. Snap the battery cover back onto thetransmitter.
Memory Feature (If Equipped)
You can use the remote control to recallmemory settings for the driver seat, powermirrors and power foot pedals.
Press the unlock button on the remotecontrol to recall the memory positions. Ifyou enable the easy-entry and exit feature,the seat will move to the easy-entryposition. The seat will move to the drivermemory position when you put the key inthe ignition.
Programming to the Transmitter
1.With the ignition on, move the memoryfeatures to the desired positions usingthe associated controls.
2.Press and hold memory button 1 on thedriver door. A tone will sound afterabout two seconds. Continue to holduntil you hear a second tone.
3. Press the lock button on the remotecontrol within three seconds. A singletone sounds.
Repeat this procedure with button 2 anda second remote control if desired.
Deactivating from the Transmitter
1. Press and hold the desired memorybutton for five seconds. A tone willsound after about two seconds.Continue to hold until you hear asecond tone.
2.Press the unlock button on the remotecontrol within three seconds.
Repeat this procedure for each additionaltransmitter if desired.
Car Finder
Press the button twice withinthree seconds. The horn willsound and the turn signals willflash. We recommend you use this methodto locate your vehicle, rather than usingthe panic alarm.
47
Super Duty (), enUSA
Keys and Remote ControlsE163048
3
2
1 21
E162734 E138623
Page 51 of 470

Sounding a Panic Alarm
Note:The panic alarm will only operatewhen the ignition is off.
Press the button to activate thealarm. Press the button again orturn the ignition on to deactivateit.
Remote Start (If Equipped)
WARNING
To avoid exhaust fumes, do not useremote start if your vehicle is parkedindoors or areas that are not wellventilated.
Note:Do not use remote start if your vehicleis low on fuel.
The remote start button is on thetransmitter.
This feature allows you to start yourvehicle from outside the vehicle. Thetransmitter has an extended operatingrange.
Vehicles with automatic climate controlcan be set to operate when you remotestart the vehicle. See Climate Control(page 103). A manual climate controlsystem will run at the setting it was set towhen you switch the vehicle off.
Many states and provinces haverestrictions for the use of remote start.Check your local and state or provinciallaws for specific requirements regardingremote start systems.
The remote start system will not work if:
•the ignition is on
•the alarm system is triggered
•you disable the feature
•the hood is open
•the transmission is not in P
•the vehicle battery voltage is too low
•the service engine soon indicator is on.
Remote Starting the Vehicle
Note:You must press each button withinthree seconds of each other. Your vehiclewill not remote start and the horn will notsound if you do not follow this sequence.
The label on your transmitter details thestarting procedure.
To remote start your vehicle:
1. Press the lock button to lock all thedoors.
2. Press the remote start button twice.The exterior lamps will flash twice.
The horn will sound if the system fails tostart.
Note:If you remote start your vehicle withan integrated keyhead transmitter, you mustswitch the ignition on before driving yourvehicle. If you remote start your vehicle withan intelligent access transmitter, you mustpress the START/STOP button on theinstrument panel once while applying thebrake pedal before driving your vehicle.
The power windows will not work duringthe remote start and the radio will not turnon automatically.
The parking lamps will remain on and thevehicle will run for 5, 10, or 15 minutes,depending on the setting.
48
Super Duty (), enUSA
Keys and Remote ControlsE138624 E138625 E138626
Page 58 of 470

The autolock feature will unlock all thedoors when:
•autolock has locked the doors
•you stop the vehicle and switch theignition off or to accessory mode, and
•you open the driver door within 10minutes.
Note:The doors will not autounlock if youhave electronically locked them beforeopening the driver door.
Enabling or Disabling
You can enable or disable these featuresin the information display or yourauthorized dealer can do it for you. SeeGeneral Information (page 81).
Note:You can enable or disable theautolock and autounlock featuresindependently of each other.
Illuminated Entry
The interior lamps and select exteriorlamps will illuminate when you unlock thedoors with the remote entry system.
The illuminated entry system will turn offthe lights if:
•the ignition is on
•you press the remote control lockbutton, or
•after 25 seconds of illumination.
The dome lamp will not turn on if thecontrol is set to the off position.
The lights will not turn off if:
•you turn them on with the dimmercontrol, or
•any door is open.
Battery Saver
The battery saver turns off the interiorlamps 30 minutes after you switch theignition off if a door is open and the domelamp switch is on. It turns off the interiorlamps after 10 minutes if the dome lampswitch is off.
KEYLESS ENTRY (IF EQUIPPED)
SECURICODE™ KEYLESS ENTRYKEYPAD
The keypad is located near the driverwindow.
Note:If you enter your entry code too faston the keypad, the unlock function may notwork. Re-enter your entry code more slowly.
You can use the keypad to lock or unlockthe doors without using a key.
You can operate the keypad with thefactory-set 5-digit entry code. The code islocated on the owner’s wallet card in theglove box and is available from anauthorized dealer. You can also create upto five of your own 5-digit personal entrycodes.
Programming a Personal Entry Code
To create your own personal entry code:
1. Enter the factory-set code.
2. Press 1·2 on the keypad within fiveseconds.
55
Super Duty (), enUSA
LocksE163050
Page 72 of 470
POWER WINDOWS (IF EQUIPPED)
WARNINGS
Do not leave children unattended inyour vehicle and do not let them playwith the power windows. They mayseriously injure themselves.
When closing the power windows,you should verify they are free ofobstructions and make sure thatchildren and pets are not in the proximityof the window openings.
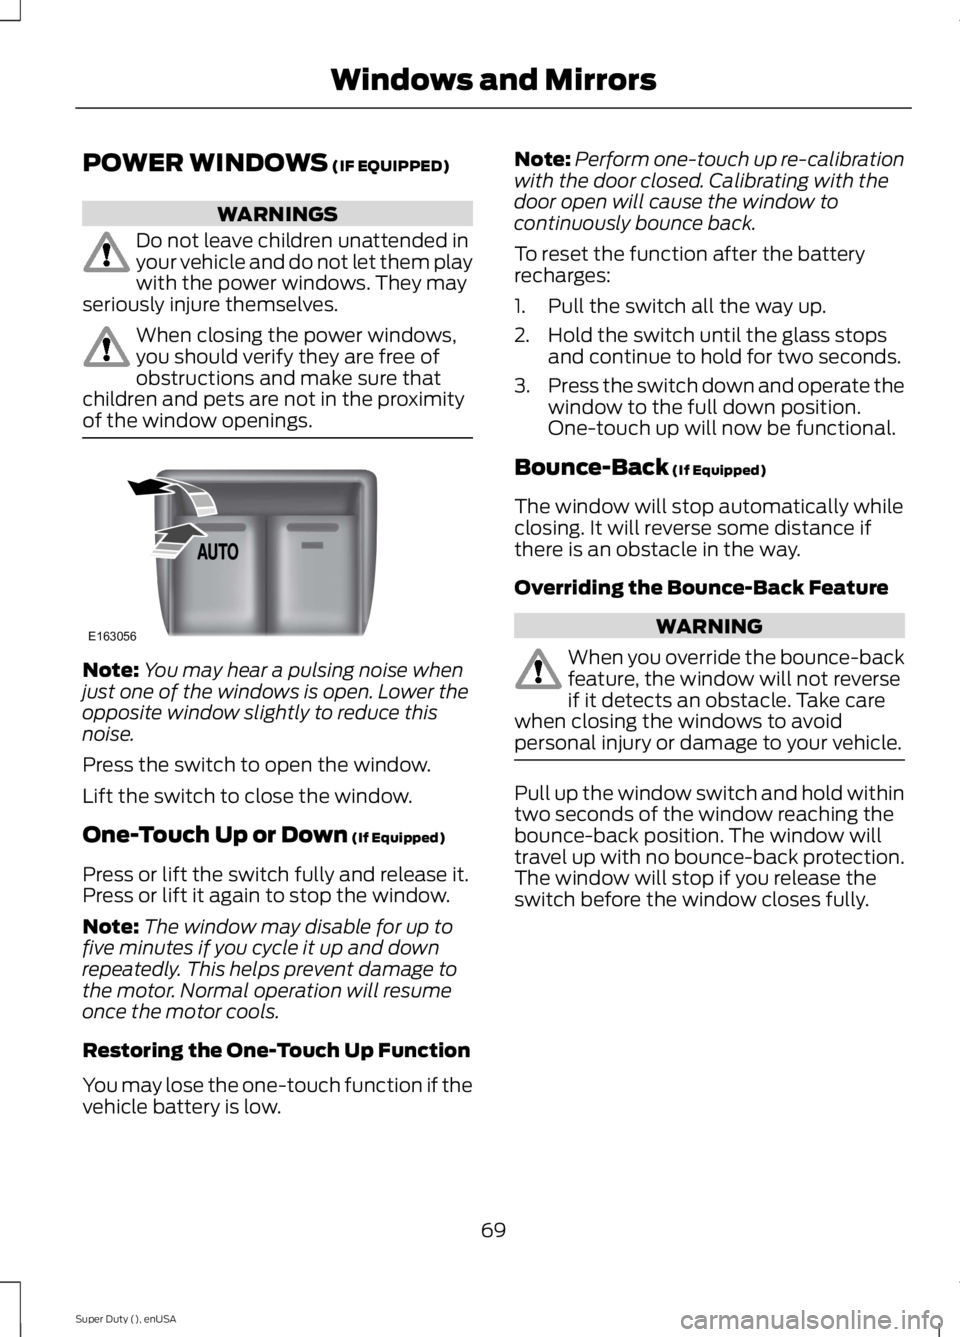
Note:You may hear a pulsing noise whenjust one of the windows is open. Lower theopposite window slightly to reduce thisnoise.
Press the switch to open the window.
Lift the switch to close the window.
One-Touch Up or Down (If Equipped)
Press or lift the switch fully and release it.Press or lift it again to stop the window.
Note:The window may disable for up tofive minutes if you cycle it up and downrepeatedly. This helps prevent damage tothe motor. Normal operation will resumeonce the motor cools.
Restoring the One-Touch Up Function
You may lose the one-touch function if thevehicle battery is low.
Note:Perform one-touch up re-calibrationwith the door closed. Calibrating with thedoor open will cause the window tocontinuously bounce back.
To reset the function after the batteryrecharges:
1. Pull the switch all the way up.
2. Hold the switch until the glass stopsand continue to hold for two seconds.
3.Press the switch down and operate thewindow to the full down position.One-touch up will now be functional.
Bounce-Back (If Equipped)
The window will stop automatically whileclosing. It will reverse some distance ifthere is an obstacle in the way.
Overriding the Bounce-Back Feature
WARNING
When you override the bounce-backfeature, the window will not reverseif it detects an obstacle. Take carewhen closing the windows to avoidpersonal injury or damage to your vehicle.
Pull up the window switch and hold withintwo seconds of the window reaching thebounce-back position. The window willtravel up with no bounce-back protection.The window will stop if you release theswitch before the window closes fully.
69
Super Duty (), enUSA
Windows and MirrorsE163056
Page 80 of 470
Variations:
Distance-to-emptyFuel gauge positionDriving type (fuel economyconditions)
35 miles to 80 miles (56 kmto 129 km)1/16thHighway driving
35 miles (56km)1/16thSevere duty driving (trailertowing, extended idle)
Information Display
Odometer
Located in the bottom of the informationdisplay Registers the accumulateddistance your vehicle has traveled.
Trip Computer
See General Information (page 81).
Vehicle Settings and Personalization
See General Information (page 81).
WARNING LAMPS AND
INDICATORS
The following warning lamps andindicators will alert you to a vehiclecondition that may become serious. Somelamps will illuminate when you start yourvehicle to make sure they work. If anylamps remain on after starting your vehicle,refer to the respective system warninglamp for further information.
Note:Some warning indicators appear inthe information display and function thesame as a warning lamp but do not displaywhen you start your vehicle.
Anti-Lock Braking System
If it illuminates when you aredriving, this indicates amalfunction. You will continueto have the normal braking system(without ABS) unless the brake systemwarning lamp is also illuminated. Have thesystem checked by your authorized dealer.
Battery
If it illuminates while driving, itindicates a malfunction. Switchoff all unnecessary electricalequipment and have the system checkedby your authorized dealer immediately.
Brake System
Illuminates when you engage theparking brake with the ignitionon.
If it illuminates when you are driving, checkthat the parking brake is not engaged. Ifthe parking brake is not engaged, thisindicates low brake fluid level or a brakesystem malfunction. Have the systemchecked immediately by your authorizeddealer.
77
Super Duty (), enUSA
Instrument Cluster E144522