2015 FORD F250 SUPER DUTY battery
[x] Cancel search: batteryPage 85 of 470
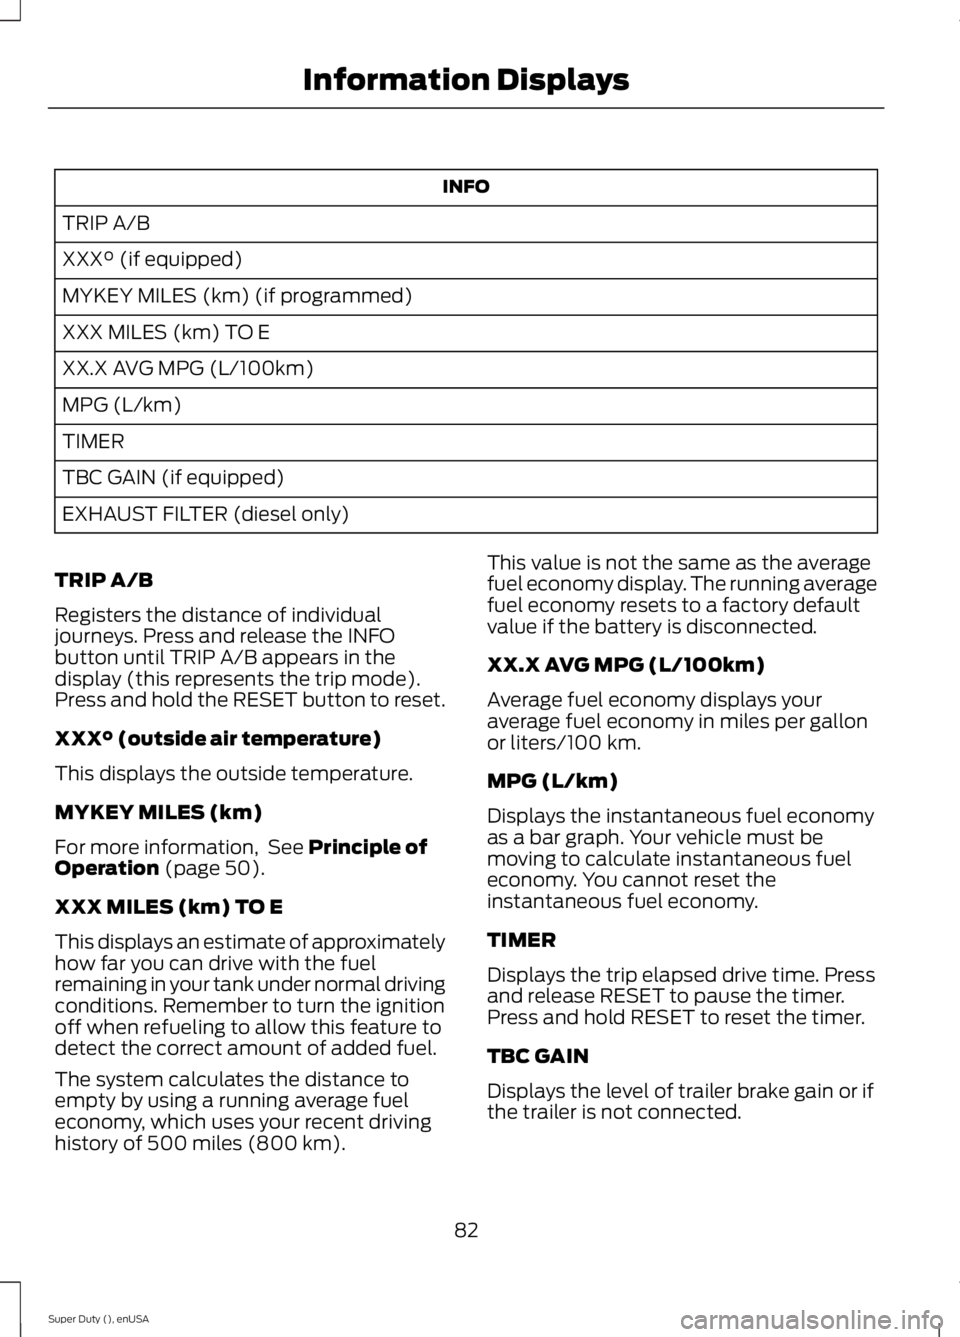
INFO
TRIP A/B
XXX° (if equipped)
MYKEY MILES (km) (if programmed)
XXX MILES (km) TO E
XX.X AVG MPG (L/100km)
MPG (L/km)
TIMER
TBC GAIN (if equipped)
EXHAUST FILTER (diesel only)
TRIP A/B
Registers the distance of individualjourneys. Press and release the INFObutton until TRIP A/B appears in thedisplay (this represents the trip mode).Press and hold the RESET button to reset.
XXX° (outside air temperature)
This displays the outside temperature.
MYKEY MILES (km)
For more information, See Principle ofOperation (page 50).
XXX MILES (km) TO E
This displays an estimate of approximatelyhow far you can drive with the fuelremaining in your tank under normal drivingconditions. Remember to turn the ignitionoff when refueling to allow this feature todetect the correct amount of added fuel.
The system calculates the distance toempty by using a running average fueleconomy, which uses your recent drivinghistory of 500 miles (800 km).
This value is not the same as the averagefuel economy display. The running averagefuel economy resets to a factory defaultvalue if the battery is disconnected.
XX.X AVG MPG (L/100km)
Average fuel economy displays youraverage fuel economy in miles per gallonor liters/100 km.
MPG (L/km)
Displays the instantaneous fuel economyas a bar graph. Your vehicle must bemoving to calculate instantaneous fueleconomy. You cannot reset theinstantaneous fuel economy.
TIMER
Displays the trip elapsed drive time. Pressand release RESET to pause the timer.Press and hold RESET to reset the timer.
TBC GAIN
Displays the level of trailer brake gain or ifthe trailer is not connected.
82
Super Duty (), enUSA
Information Displays
Page 100 of 470
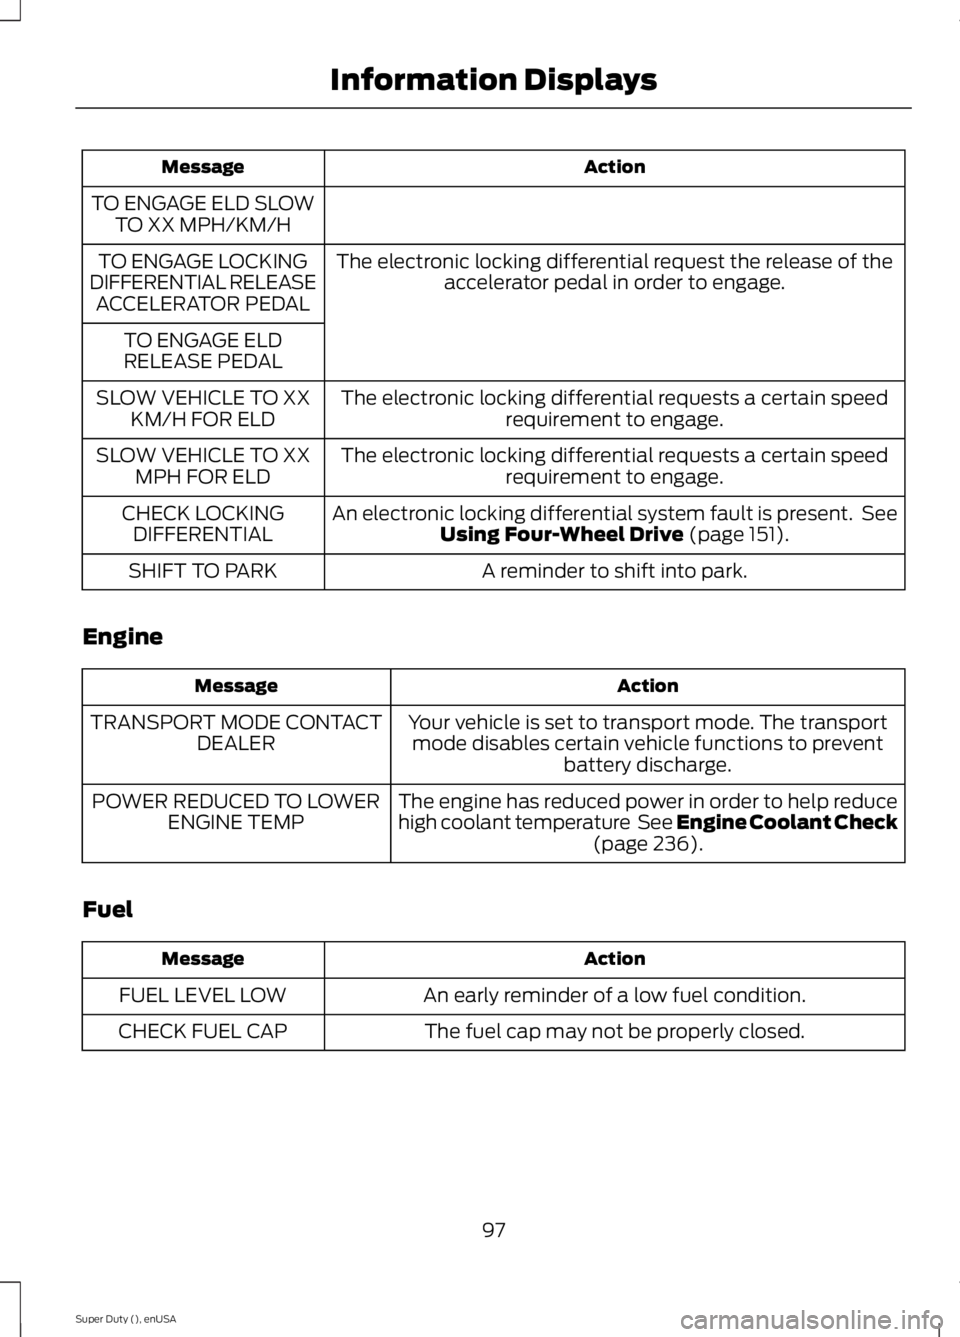
ActionMessage
TO ENGAGE ELD SLOWTO XX MPH/KM/H
The electronic locking differential request the release of theaccelerator pedal in order to engage.TO ENGAGE LOCKINGDIFFERENTIAL RELEASEACCELERATOR PEDAL
TO ENGAGE ELDRELEASE PEDAL
The electronic locking differential requests a certain speedrequirement to engage.SLOW VEHICLE TO XXKM/H FOR ELD
The electronic locking differential requests a certain speedrequirement to engage.SLOW VEHICLE TO XXMPH FOR ELD
An electronic locking differential system fault is present. SeeUsing Four-Wheel Drive (page 151).CHECK LOCKINGDIFFERENTIAL
A reminder to shift into park.SHIFT TO PARK
Engine
ActionMessage
Your vehicle is set to transport mode. The transportmode disables certain vehicle functions to preventbattery discharge.
TRANSPORT MODE CONTACTDEALER
The engine has reduced power in order to help reducehigh coolant temperature See Engine Coolant Check(page 236).
POWER REDUCED TO LOWERENGINE TEMP
Fuel
ActionMessage
An early reminder of a low fuel condition.FUEL LEVEL LOW
The fuel cap may not be properly closed.CHECK FUEL CAP
97
Super Duty (), enUSA
Information Displays
Page 119 of 470
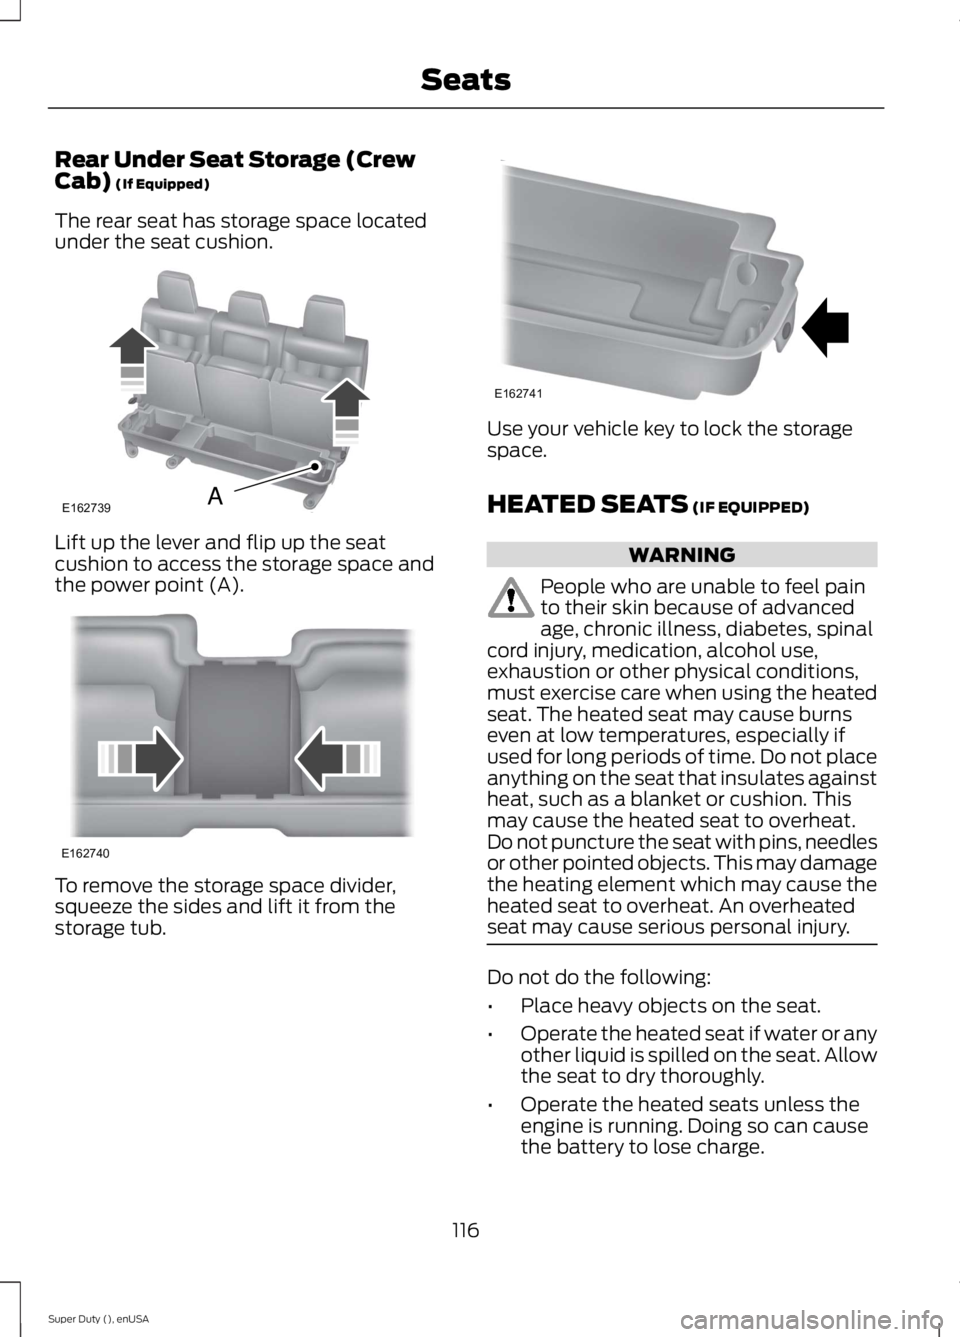
Rear Under Seat Storage (CrewCab) (If Equipped)
The rear seat has storage space locatedunder the seat cushion.
Lift up the lever and flip up the seatcushion to access the storage space andthe power point (A).
To remove the storage space divider,squeeze the sides and lift it from thestorage tub.
Use your vehicle key to lock the storagespace.
HEATED SEATS (IF EQUIPPED)
WARNING
People who are unable to feel painto their skin because of advancedage, chronic illness, diabetes, spinalcord injury, medication, alcohol use,exhaustion or other physical conditions,must exercise care when using the heatedseat. The heated seat may cause burnseven at low temperatures, especially ifused for long periods of time. Do not placeanything on the seat that insulates againstheat, such as a blanket or cushion. Thismay cause the heated seat to overheat.Do not puncture the seat with pins, needlesor other pointed objects. This may damagethe heating element which may cause theheated seat to overheat. An overheatedseat may cause serious personal injury.
Do not do the following:
•Place heavy objects on the seat.
•Operate the heated seat if water or anyother liquid is spilled on the seat. Allowthe seat to dry thoroughly.
•Operate the heated seats unless theengine is running. Doing so can causethe battery to lose charge.
116
Super Duty (), enUSA
SeatsE162739A E162740 E162741
Page 121 of 470
CLIMATE CONTROLLED SEATS
Heated Seats (If Equipped)
WARNING
People who are unable to feel painto their skin because of advancedage, chronic illness, diabetes, spinalcord injury, medication, alcohol use,exhaustion or other physical conditions,must exercise care when using the heatedseat. The heated seat may cause burnseven at low temperatures, especially ifused for long periods of time. Do not placeanything on the seat that insulates againstheat, such as a blanket or cushion. Thismay cause the heated seat to overheat.Do not puncture the seat with pins, needlesor other pointed objects. This may damagethe heating element which may cause theheated seat to overheat. An overheatedseat may cause serious personal injury.
Do not do the following:
•Place heavy objects on the seat.
•Operate the heated seat if water or anyother liquid is spilled on the seat. Allowthe seat to dry thoroughly.
•Operate the heated seats unless theengine is running. Doing so can causethe battery to lose charge.
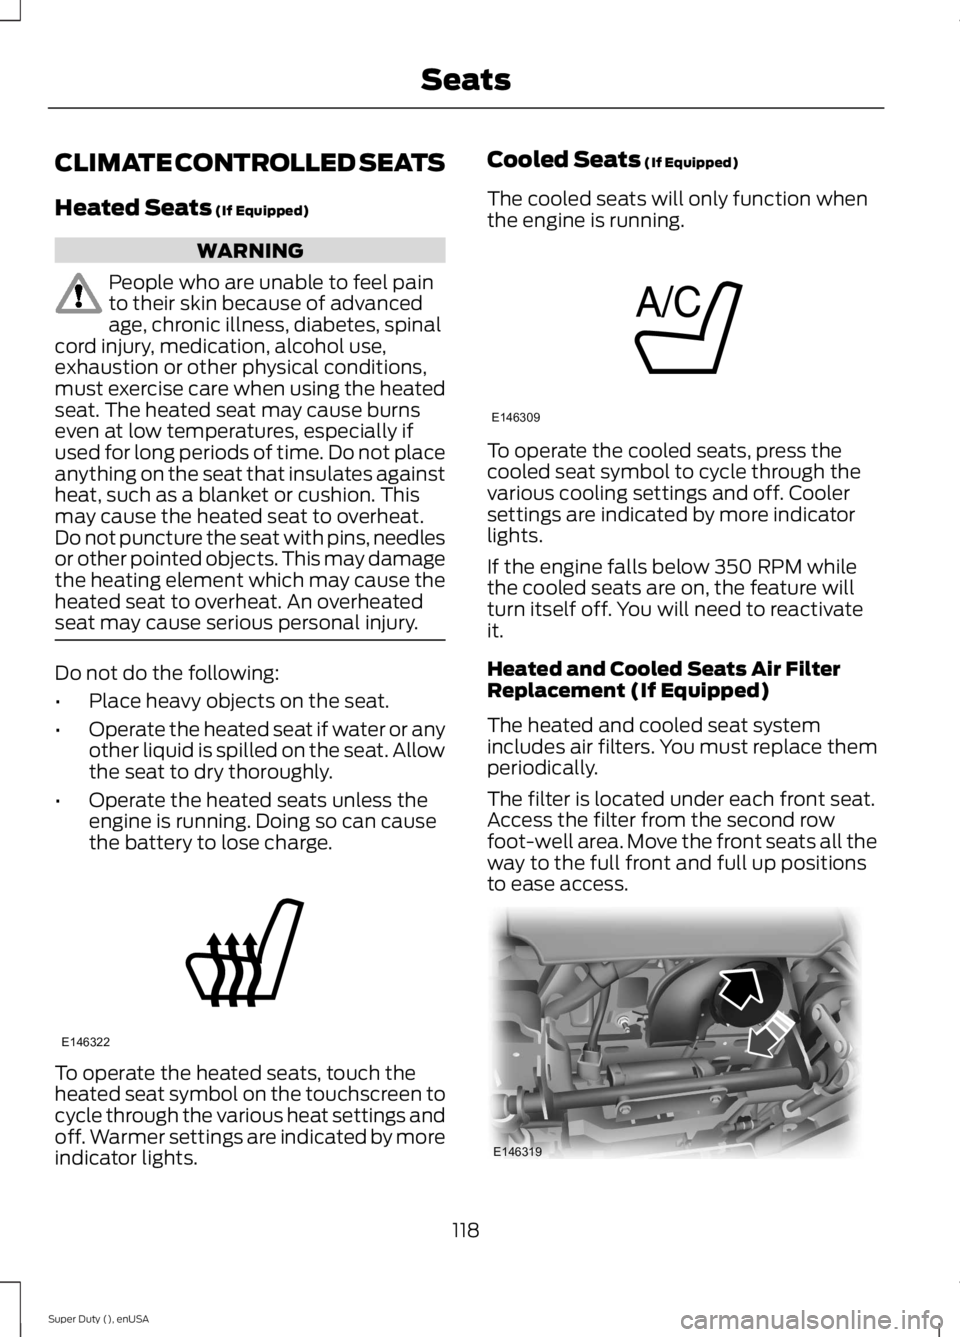
To operate the heated seats, touch theheated seat symbol on the touchscreen tocycle through the various heat settings andoff. Warmer settings are indicated by moreindicator lights.
Cooled Seats (If Equipped)
The cooled seats will only function whenthe engine is running.
To operate the cooled seats, press thecooled seat symbol to cycle through thevarious cooling settings and off. Coolersettings are indicated by more indicatorlights.
If the engine falls below 350 RPM whilethe cooled seats are on, the feature willturn itself off. You will need to reactivateit.
Heated and Cooled Seats Air FilterReplacement (If Equipped)
The heated and cooled seat systemincludes air filters. You must replace themperiodically.
The filter is located under each front seat.Access the filter from the second rowfoot-well area. Move the front seats all theway to the full front and full up positionsto ease access.
118
Super Duty (), enUSA
SeatsE146322 E146309 E146319
Page 126 of 470
To program another rolling code device,repeat Steps 1 through 6, substituting adifferent function button in Step 5.
Fixed Code Programming
Note:It may be helpful to have anotherperson assist you in programming thetransmitter.
To program units with fixed code DIPswitches, you will need the garage doorhand-held transmitter, paper and a pen orpencil.
1. Switch the ignition on.
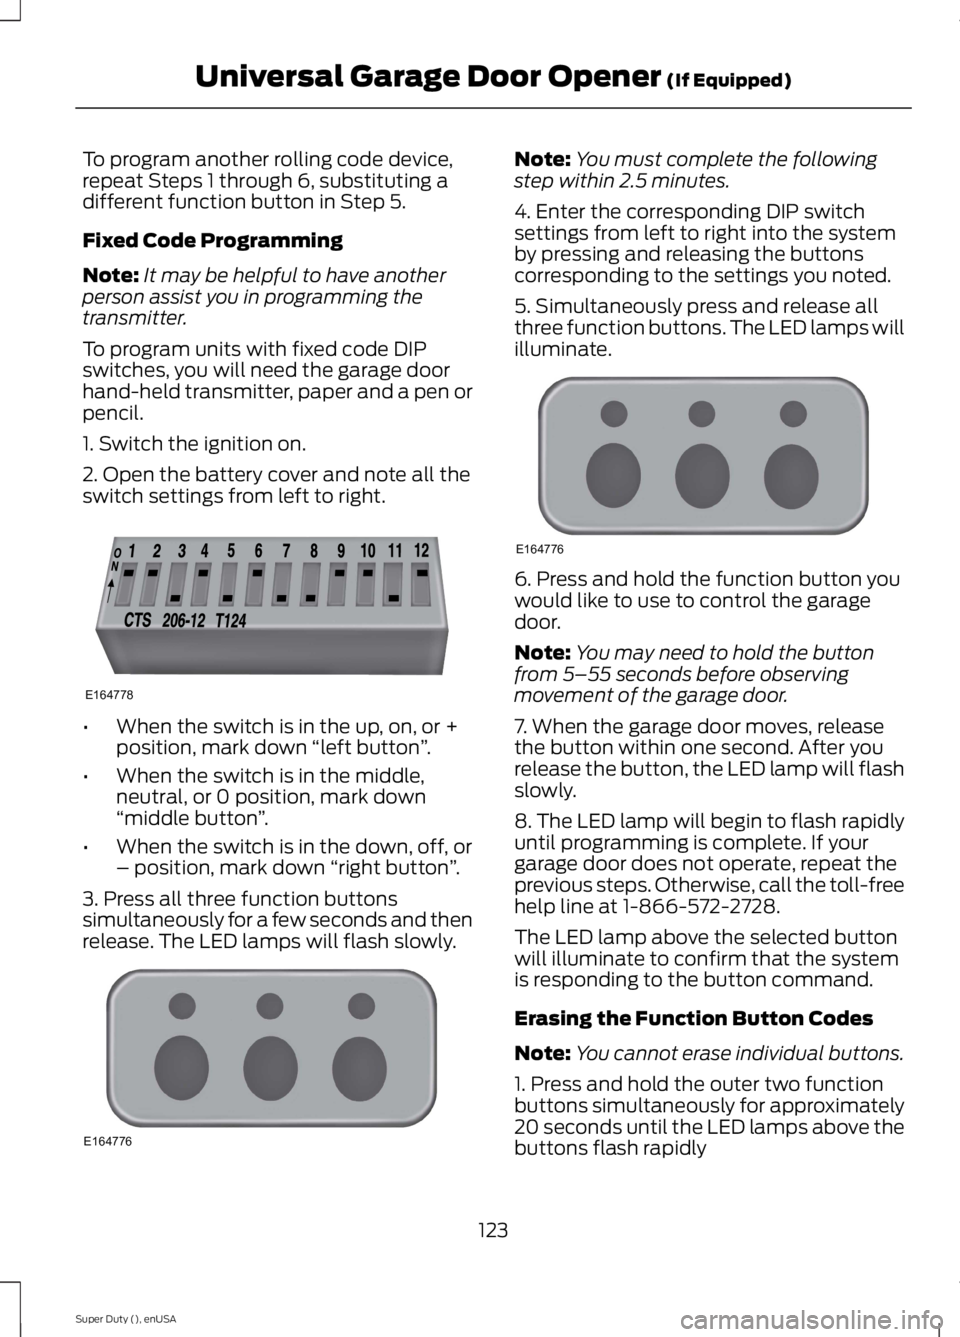
2. Open the battery cover and note all theswitch settings from left to right.
•When the switch is in the up, on, or +position, mark down “left button”.
•When the switch is in the middle,neutral, or 0 position, mark down“middle button”.
•When the switch is in the down, off, or– position, mark down “right button”.
3. Press all three function buttonssimultaneously for a few seconds and thenrelease. The LED lamps will flash slowly.
Note:You must complete the followingstep within 2.5 minutes.
4. Enter the corresponding DIP switchsettings from left to right into the systemby pressing and releasing the buttonscorresponding to the settings you noted.
5. Simultaneously press and release allthree function buttons. The LED lamps willilluminate.
6. Press and hold the function button youwould like to use to control the garagedoor.
Note:You may need to hold the buttonfrom 5–55 seconds before observingmovement of the garage door.
7. When the garage door moves, releasethe button within one second. After yourelease the button, the LED lamp will flashslowly.
8. The LED lamp will begin to flash rapidlyuntil programming is complete. If yourgarage door does not operate, repeat theprevious steps. Otherwise, call the toll-freehelp line at 1-866-572-2728.
The LED lamp above the selected buttonwill illuminate to confirm that the systemis responding to the button command.
Erasing the Function Button Codes
Note:You cannot erase individual buttons.
1. Press and hold the outer two functionbuttons simultaneously for approximately20 seconds until the LED lamps above thebuttons flash rapidly
123
Super Duty (), enUSA
Universal Garage Door Opener (If Equipped)E164778 E164776 E164776
Page 128 of 470
In-vehicle Programming
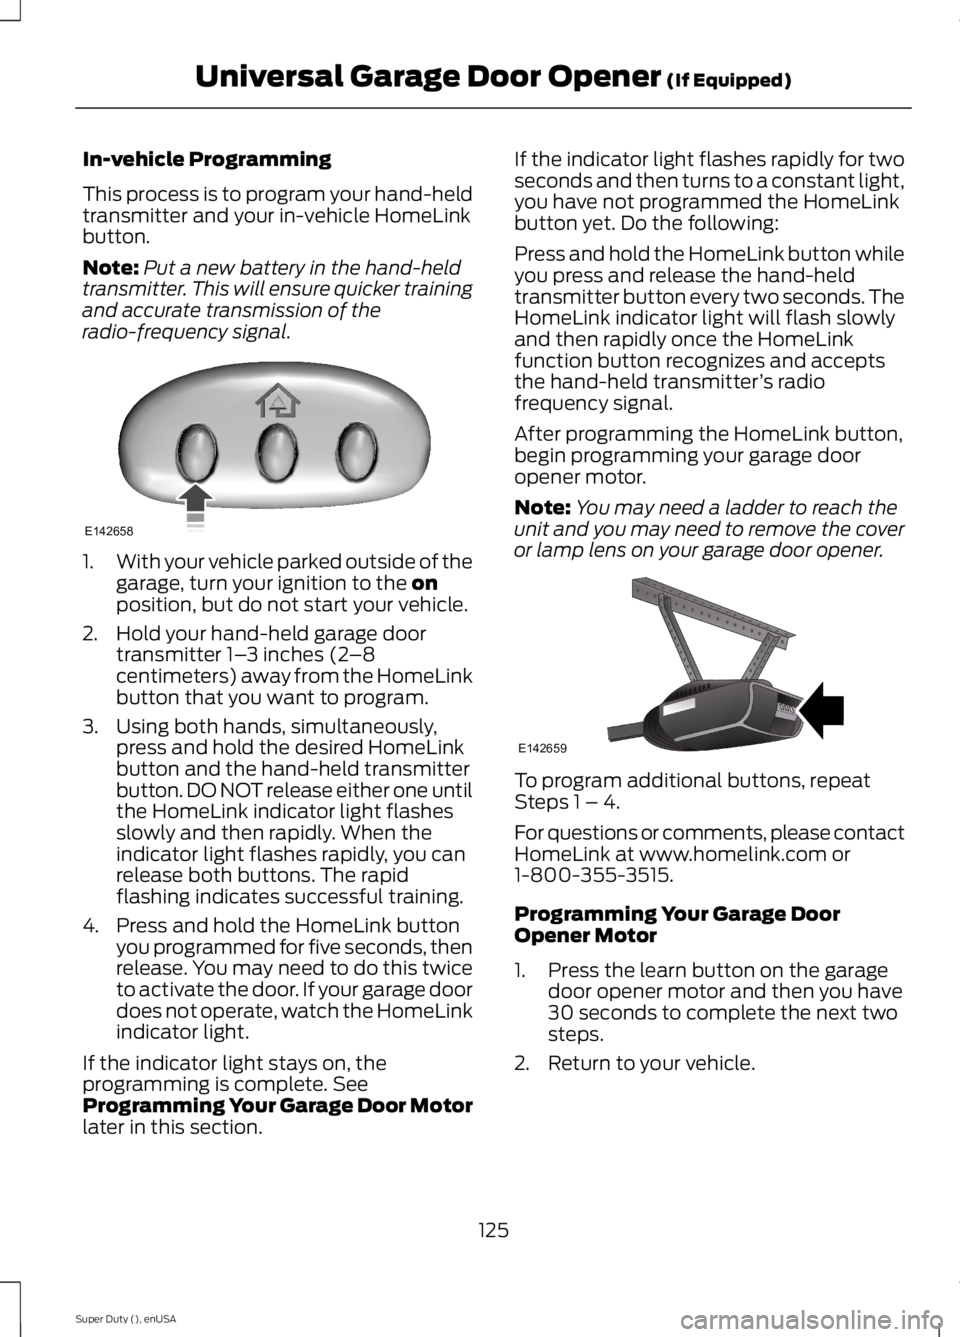
This process is to program your hand-heldtransmitter and your in-vehicle HomeLinkbutton.
Note:Put a new battery in the hand-heldtransmitter. This will ensure quicker trainingand accurate transmission of theradio-frequency signal.
1.With your vehicle parked outside of thegarage, turn your ignition to the onposition, but do not start your vehicle.
2. Hold your hand-held garage doortransmitter 1–3 inches (2–8centimeters) away from the HomeLinkbutton that you want to program.
3. Using both hands, simultaneously,press and hold the desired HomeLinkbutton and the hand-held transmitterbutton. DO NOT release either one untilthe HomeLink indicator light flashesslowly and then rapidly. When theindicator light flashes rapidly, you canrelease both buttons. The rapidflashing indicates successful training.
4. Press and hold the HomeLink buttonyou programmed for five seconds, thenrelease. You may need to do this twiceto activate the door. If your garage doordoes not operate, watch the HomeLinkindicator light.
If the indicator light stays on, theprogramming is complete. SeeProgramming Your Garage Door Motorlater in this section.
If the indicator light flashes rapidly for twoseconds and then turns to a constant light,you have not programmed the HomeLinkbutton yet. Do the following:
Press and hold the HomeLink button whileyou press and release the hand-heldtransmitter button every two seconds. TheHomeLink indicator light will flash slowlyand then rapidly once the HomeLinkfunction button recognizes and acceptsthe hand-held transmitter’s radiofrequency signal.
After programming the HomeLink button,begin programming your garage dooropener motor.
Note:You may need a ladder to reach theunit and you may need to remove the coveror lamp lens on your garage door opener.
To program additional buttons, repeatSteps 1 – 4.
For questions or comments, please contactHomeLink at www.homelink.com or1-800-355-3515.
Programming Your Garage DoorOpener Motor
1. Press the learn button on the garagedoor opener motor and then you have30 seconds to complete the next twosteps.
2. Return to your vehicle.
125
Super Duty (), enUSA
Universal Garage Door Opener (If Equipped)E142658 E142659
Page 132 of 470
12 Volt DC Power Point
WARNING
Do not plug optional electricalaccessories into the cigar lightersocket (if equipped). Improper useof the lighter can cause damage notcovered by your warranty, and can resultin fire or serious injury.
Note:If used when the engine is notrunning, the battery will discharge. Theremay be insufficient power to restart yourengine.
Note:Do not insert objects other than anaccessory plug into the power point. Thiswill damage the outlet and blow the fuse.
Note:Do not hang any type of accessory oraccessory bracket from the plug.
Note:Do not use the power point over thevehicle capacity of 12 volt DC 180 watts ora fuse may blow.
Note:Do not use the power point foroperating a cigar lighter element.
Note:Improper use of the power point cancause damage not covered by yourwarranty.
Note:Always keep the power point capsclosed when not in use.
Run the engine for full capacity use of thepower point. To prevent the battery frombeing discharged:
•do not use the power point longer thannecessary when the engine is notrunning
•do not leave devices plugged inovernight or when the vehicle is parkedfor extended periods.
Locations
Power points may be found:
•On the instrument panel (twolocations).
•Inside the center console.
•On the rear of the center console.
•Inside the front under-seat storagecompartment (if equipped).
•Inside the rear under-seat storagecompartment (if equipped).
110 Volt AC Power Points (If Equipped)
WARNING
Do not keep electrical devicesplugged in the power points whenthe devices are not in use. Do not useany extension cord with the 110 volt ACpower points, since it will defeat the safetyprotection design. Do not use a singlepower point to power multiple devices. Itmay cause the power point to exceed the150 watt load limit and overload, resultingin fire or serious injury.
Note:Keep the engine running to use thepower points.
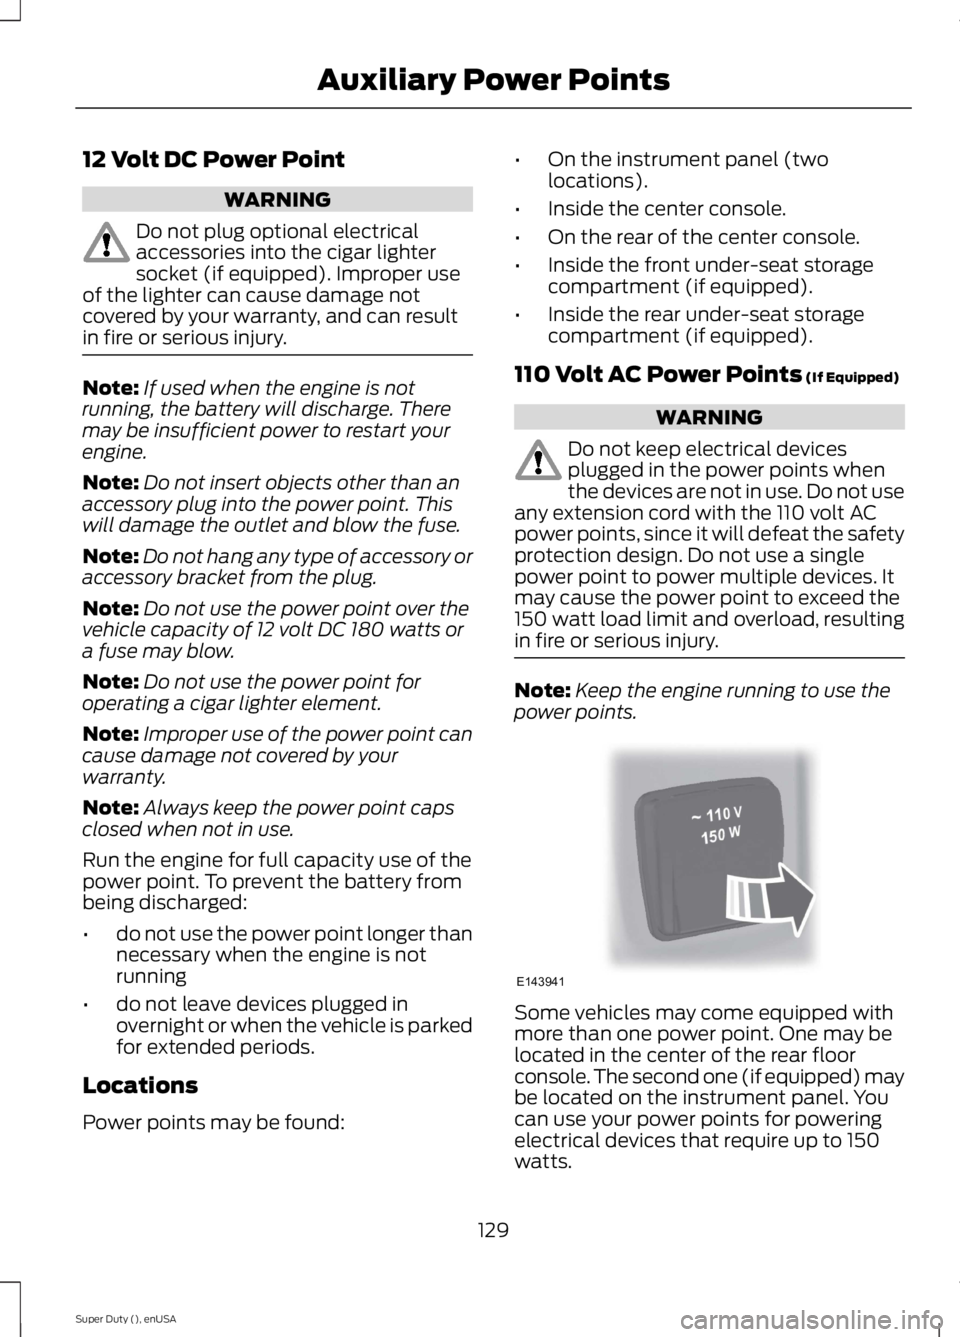
Some vehicles may come equipped withmore than one power point. One may belocated in the center of the rear floorconsole. The second one (if equipped) maybe located on the instrument panel. Youcan use your power points for poweringelectrical devices that require up to 150watts.
129
Super Duty (), enUSA
Auxiliary Power PointsE143941
Page 135 of 470
GENERAL INFORMATION
WARNINGS
Extended idling at high enginespeeds can produce very hightemperatures in the engine andexhaust system, creating the risk of fire orother damage.
Do not park, idle or drive your vehicleon dry grass or other dry groundcover. The emission system heats upthe engine compartment and exhaustsystem, creating the risk of fire.
Do not start the engine in a closedgarage or in other enclosed areas.Exhaust fumes can be toxic. Alwaysopen the garage door before you start theengine.
If you smell exhaust fumes insideyour vehicle, have your vehiclechecked by your authorized dealerimmediately. Do not drive your vehicle ifyou smell exhaust fumes.
If you disconnect the battery, your vehiclemay exhibit some unusual drivingcharacteristics for approximately 5 miles(8 kilometers) after you reconnect it. Thisis because the engine management systemmust realign itself with the engine. You candisregard any unusual drivingcharacteristics during this period.
The powertrain control system meets allCanadian interference-causing equipmentstandard requirements regulating theimpulse electrical field or radio noise.
When you start the engine, avoid pressingthe accelerator pedal before and duringoperation. Only use the accelerator pedalwhen you have difficulty starting theengine.
If your vehicle is operated in a heavy snowstorm or blowing snow conditions, theengine air induction may become partiallyclogged with snow and ice. If this occurs,the engine may experience a significantreduction in power output. At the earliestopportunity, clear all the snow and iceaway from the air induction inlet.
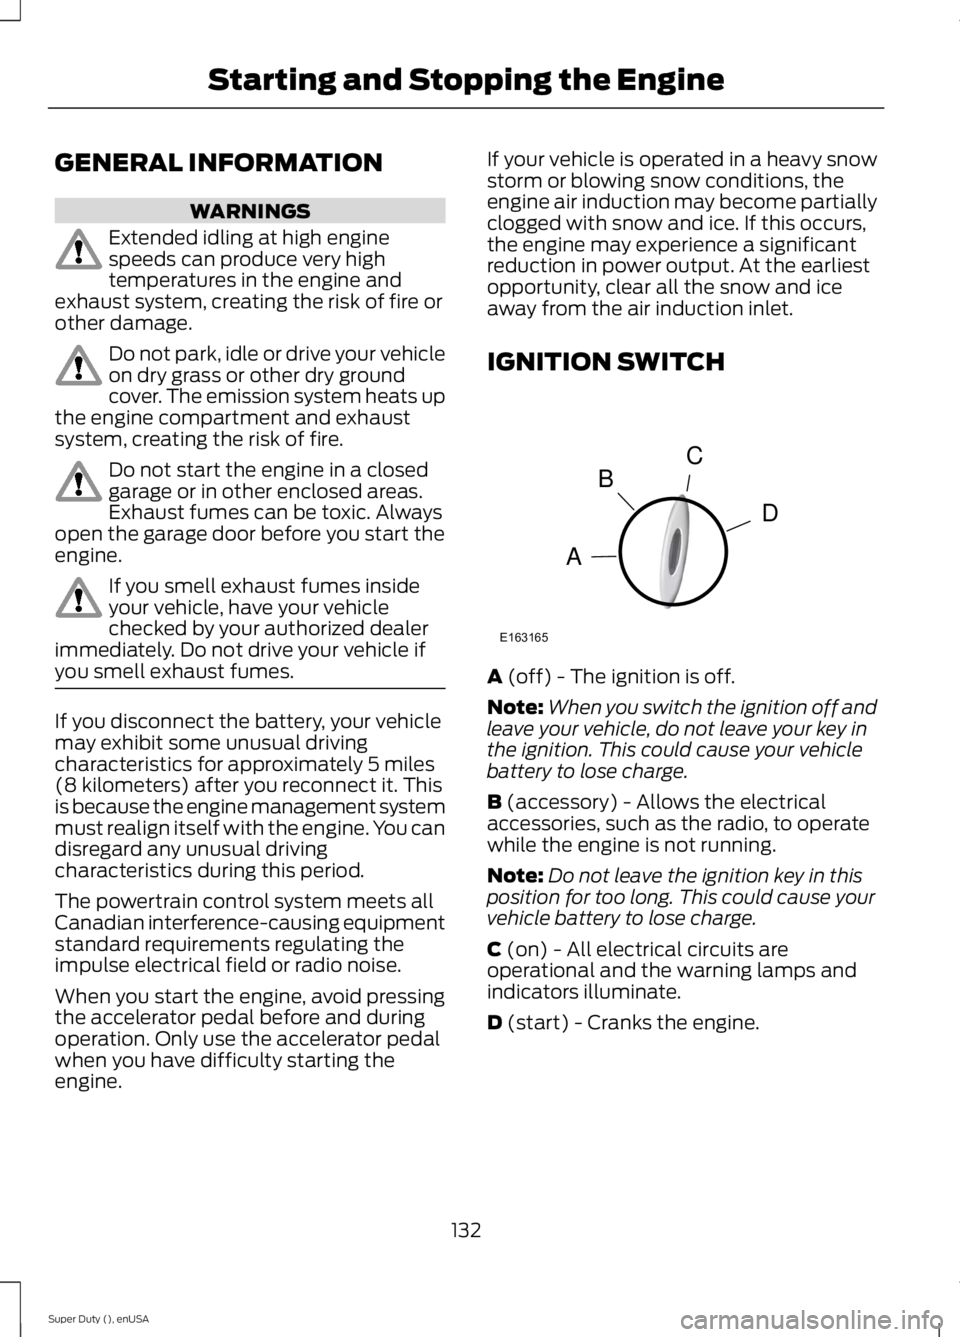
IGNITION SWITCH
A (off) - The ignition is off.
Note:When you switch the ignition off andleave your vehicle, do not leave your key inthe ignition. This could cause your vehiclebattery to lose charge.
B (accessory) - Allows the electricalaccessories, such as the radio, to operatewhile the engine is not running.
Note:Do not leave the ignition key in thisposition for too long. This could cause yourvehicle battery to lose charge.
C (on) - All electrical circuits areoperational and the warning lamps andindicators illuminate.
D (start) - Cranks the engine.
132
Super Duty (), enUSA
Starting and Stopping the EngineC
D
B
A
E163165