2015 FORD F250 SUPER DUTY change time
[x] Cancel search: change timePage 2 of 470

The information contained in this publication was correct at the time of going to print. In the interest ofcontinuous development, we reserve the right to change specifications, design or equipment at any timewithout notice or obligation. No part of this publication may be reproduced, transmitted, stored in aretrieval system or translated into any language in any form by any means without our written permission.Errors and omissions excepted.© Ford Motor Company 2014
All rights reserved.Part Number: 20140123200509
Page 34 of 470

All safety restraints in the vehicle arecombination lap and shoulder belts. Thedriver safety belt has the first type oflocking mode. The front outboardpassenger and rear outboard seat safetybelts have both types of locking modesdescribed as follows:
Vehicle Sensitive Mode
This is the normal retractor mode, whichallows free shoulder belt lengthadjustment to your movements andlocking in response to vehicle movement.For example, if the driver brakes suddenlyor turns a corner sharply, or the vehiclereceives an impact of about 5 mph(8 km/h) or more, the combination safetybelts will lock to help reduce forwardmovement of the driver and passengers.
In addition, the retractor is designed to lockif the webbing is pulled out too quickly. Ifthis occurs, let the belt retract slightly andpull webbing out again in a slow andcontrolled manner.
Automatic Locking Mode
In this mode, the shoulder belt isautomatically pre-locked. The belt will stillretract to remove any slack in the shoulderbelt. The automatic locking mode is notavailable on the driver safety belt.
When to Use the Automatic LockingMode
Use this mode any time a child safety seat,except a booster, is installed in passengerfront or rear seating positions. You shouldproperly restrain children 12 years old andunder in a rear seating position wheneverpossible. See Child Safety (page 15).
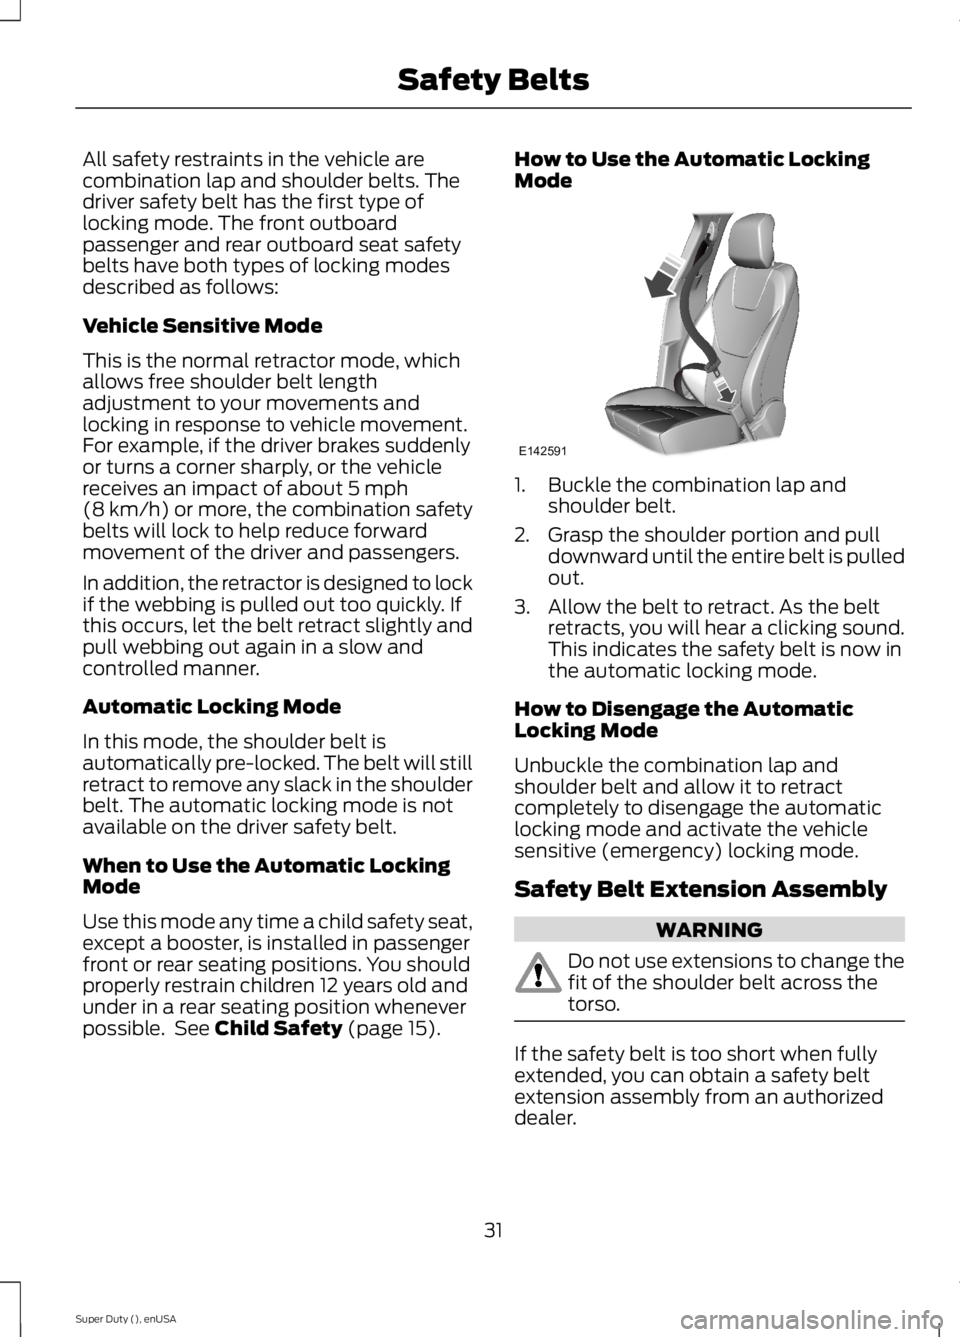
How to Use the Automatic LockingMode
1. Buckle the combination lap andshoulder belt.
2. Grasp the shoulder portion and pulldownward until the entire belt is pulledout.
3. Allow the belt to retract. As the beltretracts, you will hear a clicking sound.This indicates the safety belt is now inthe automatic locking mode.
How to Disengage the AutomaticLocking Mode
Unbuckle the combination lap andshoulder belt and allow it to retractcompletely to disengage the automaticlocking mode and activate the vehiclesensitive (emergency) locking mode.
Safety Belt Extension Assembly
WARNING
Do not use extensions to change thefit of the shoulder belt across thetorso.
If the safety belt is too short when fullyextended, you can obtain a safety beltextension assembly from an authorizeddealer.
31
Super Duty (), enUSA
Safety BeltsE142591
Page 53 of 470

PRINCIPLE OF OPERATION
MyKey allows you to program keys withrestricted driving modes to promote gooddriving habits. All but one of the keysprogrammed to the vehicle can beactivated with these restricted modes.
Any keys that have not been programmedare referred to as administrator keys oradmin keys. They can be used to:
•create a MyKey
•program configurable MyKey settings
•clear all MyKey features.
When you have programmed a MyKey, youcan access the following information usingthe information display:
•How many admin keys and MyKeys areprogrammed to your vehicle.
•The total distance your vehicle hastraveled using a MyKey.
Note:All MyKeys are programmed to thesame settings. You cannot program themindividually.
Non-configurable Settings
The following settings cannot be changedby an admin key user:
•Belt-Minder. You cannot disable thisfeature. The audio system will mutewhen the front seat occupants’ safetybelts are not fastened.Note: If yourvehicle is equipped with AM/FM radioonly, then the radio will not mute.
•Early low fuel. The low fuel warning isactivated earlier, giving the MyKey usermore time to refuel.
•Driver assist features, if equipped onyour vehicle, are forced on: parking aid,blind spot information system (BLIS)with cross traffic alert, lane departurewarning and forward collision warningsystem.
Configurable Settings
With an admin key, you can configurecertain MyKey settings when you firstcreate a MyKey and before you recycle thekey or restart the vehicle. You can alsochange the settings afterward with anadmin key:
•A vehicle speed limit can be set.Warnings will be shown in the displayfollowed by an audible tone when yourvehicle reaches the set speed. Youcannot override the set speed by fullydepressing the accelerator pedal or bysetting cruise control.
•Vehicle speed minders of 45, 55 or 65mph (75, 90 or 105 km/h). Once youselect a speed, it will be shown in thedisplay, followed by an audible tonewhen the preselected vehicle speed isexceeded.
•Audio system maximum volume of45%. A message will be shown in thedisplay when you attempt to exceedthe limited volume. Also, thespeed-sensitive or compensatedautomatic volume control will bedisabled.Note: If your vehicle isequipped with AM/FM radio only, thenthe radio volume will not be limited.
•Always on setting. When this isselected, you will not be able to turnoff AdvanceTrac (if your vehicle isequipped with this feature).
CREATING A MYKEY
Use the information display to create aMyKey. There are two types of informationdisplays, and their controls and messagingvary. To determine which type of displayyou have, you will need to referenceanother chapter. See GeneralInformation (page 81).
If You Have a Type 1 InformationDisplay:
50
Super Duty (), enUSA
MyKey™
Page 55 of 470

Note:You can clear or change your MyKeysettings at any time during the same keycycle as you created the MyKey. Once youhave switched the engine off, however, youwill need an admin key to change or clearyour MyKey settings.
CLEARING ALL MYKEYS
You can clear all MyKeys within the samekey cycle as you created the MyKey. If youswitch your ignition off, however, you willneed to use an admin key to clear yourMyKeys.
Note:When you clear your MyKeys, youremove all restrictions and return all MyKeysto their original admin key status at once.
To clear all MyKeys of all MyKey settings,use the information display. There are twotypes of information displays, and theircontrols and messaging vary. To determinewhich type of display you have, you willneed to reference another chapter. SeeGeneral Information (page 81).
If You Have a Type 1 InformationDisplay:
1.Press SETUP until PRESS RESET TOCLEAR MYKEY displays.
2. Press and release the RESET button.The display will show HOLD RESETTO CONFIRM CLEAR.
3. Press and hold the RESET button fortwo seconds until ALL MYKEYSCLEARED displays.
If You Have a Type 2 InformationDisplay:
1. Access the main menu and selectSETTINGS, then MYKEY.
2.Scroll to CLEAR ALL and press the OKbutton.
3. Hold the OK button until ALLMYKEYS CLEARED displays.
CHECKING MYKEY SYSTEM
STATUS
You can find information about yourprogrammed MyKeys by using theinformation display.
MYKEY DISTANCE
Tracks the distance when drivers use aMyKey. The only way to delete theaccumulated distance is by using an adminkey to clear your MyKey. If the distancedoes not accumulate as expected, thenthe intended user is not using the MyKey,or an admin key user recently cleared andthen recreated a MyKey.
NUMBER OF MYKEY(S)
Indicates the number of MyKeysprogrammed to your vehicle. Use thisfeature to detect how many MyKeys youhave for your vehicle and determine whena MyKey has been deleted.
NUMBER OF ADMIN KEY(S)
Indicates how many admin keys areprogrammed to your vehicle. Use thisfeature to determine how manyunrestricted keys you have for your vehicle,and detect if an additional MyKey has beenprogrammed.
USING MYKEY WITH REMOTE
START SYSTEMS
MyKey is not compatible with nonFord-approved, aftermarket remote startsystems. If you choose to install a remotestart system, see an authorized dealer fora Ford-approved remote start system.
52
Super Duty (), enUSA
MyKey™
Page 57 of 470

LOCKING AND UNLOCKING
You can use the power door lock controlor the remote control to lock and unlockyour vehicle.
Power Door Locks (If Equipped)
The power door lock control is on the driverand front passenger door panels.
UnlockA
LockB
Remote Control (If Equipped)
You can use the remote control at any timeyour vehicle is not running.
Unlocking the Doors (Two-StageUnlock)
Press the button to unlock thedriver door.
Press the button again withinthree seconds to unlock all doors. The turnsignals will flash.
Press and hold both the lock and unlockbuttons on the remote control for fourseconds to disable or enable two-stageunlocking. Disabling two-stage unlockingallows all vehicle doors to unlock with onepress of the button. The turn signals willflash twice to indicate a change to theunlocking mode. The unlocking modeapplies to the remote control and keylessentry keypad.
Locking the Doors
Press the button to lock all thedoors. The turn signals willilluminate.
Press the button again within threeseconds to confirm that all the doors areclosed. The doors will lock again, the hornwill sound and the turn signals willilluminate if all the doors are closed.
Mislock
If any door is open or if the hood is open onvehicles with an anti-theft alarm or remotestart, the horn will sound twice and thelamps will not flash.
Smart Unlocks (If Equipped)
This feature helps to prevent you fromlocking yourself out of your vehicle if yourkey is still in the ignition.
When you open the driver door and lockyour vehicle with the power door lockcontrol, all the doors will lock then unlockif your key is still in the ignition.
Your can still lock your vehicle with the keyin the ignition by:
•using the manual lock on the door
•locking the driver door with a key
•using the keyless entry keypad
•using the lock button on the remotecontrol
Autolock and Autounlock (If Equipped)
The autolock feature will lock all the doorswhen:
•all doors are closed, and
•the ignition is on, and
•you shift into any gear putting yourvehicle in motion, and
•your vehicle attains a speed greaterthan 12 mph (20 km/h).
54
Super Duty (), enUSA
LocksABE163049 E138629 E138623
Page 69 of 470

Note:If the vehicle is equipped withautolamps, it will have the headlamps onwith windshield wipers feature. If thewindshield wipers are turned on, the exteriorlamps will turn on with the headlampcontrol in the autolamp position.
The autolamp system also keeps the lightson for a predetermined amount of time afterthe ignition switch is turned to off. You canchange the amount of time the lamps stayon by using the programming procedure thatfollows:
Autolamps - Programmable ExitDelay
Programmable exit delay allows the lengthof the autolamp exit delay to be changed.
To program the auto lamp exit time delay:
1.Start with the ignition in the off positionand the headlamp control in theautolamp position.
2. Turn the headlamp control to off.
3.Turn the ignition switch to on and thenback to off.
4. Turn the headlamp control to theautolamp position. The headlamps willturn on.
5. Wait the desired amount of time forthe exit delay you want (up to threeminutes), then turn the headlamps off.
INSTRUMENT LIGHTING
DIMMER
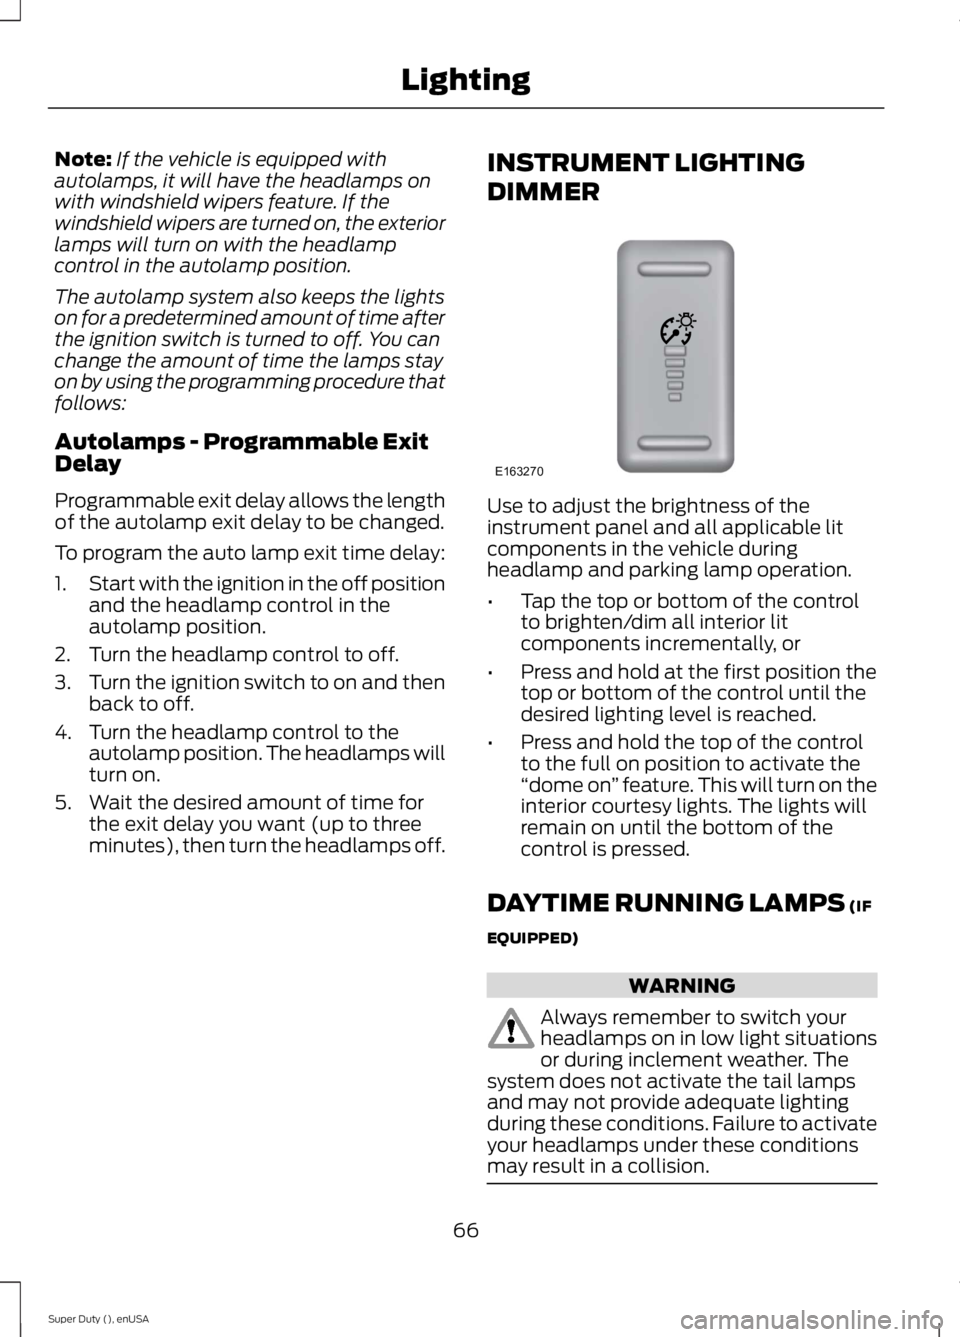
Use to adjust the brightness of theinstrument panel and all applicable litcomponents in the vehicle duringheadlamp and parking lamp operation.
•Tap the top or bottom of the controlto brighten/dim all interior litcomponents incrementally, or
•Press and hold at the first position thetop or bottom of the control until thedesired lighting level is reached.
•Press and hold the top of the controlto the full on position to activate the“dome on” feature. This will turn on theinterior courtesy lights. The lights willremain on until the bottom of thecontrol is pressed.
DAYTIME RUNNING LAMPS (IF
EQUIPPED)
WARNING
Always remember to switch yourheadlamps on in low light situationsor during inclement weather. Thesystem does not activate the tail lampsand may not provide adequate lightingduring these conditions. Failure to activateyour headlamps under these conditionsmay result in a collision.
66
Super Duty (), enUSA
LightingE163270
Page 70 of 470

The system switches the headlamps onwith a reduced output in daylightconditions.
To switch the system on:
1. Switch the ignition on.
2. Switch the lighting control to the off,or parking lamp position.
3. Disengage the parking brake.
4. Make sure the transmission selectorlever is not in position P.
FRONT FOG LAMPS (IF EQUIPPED)
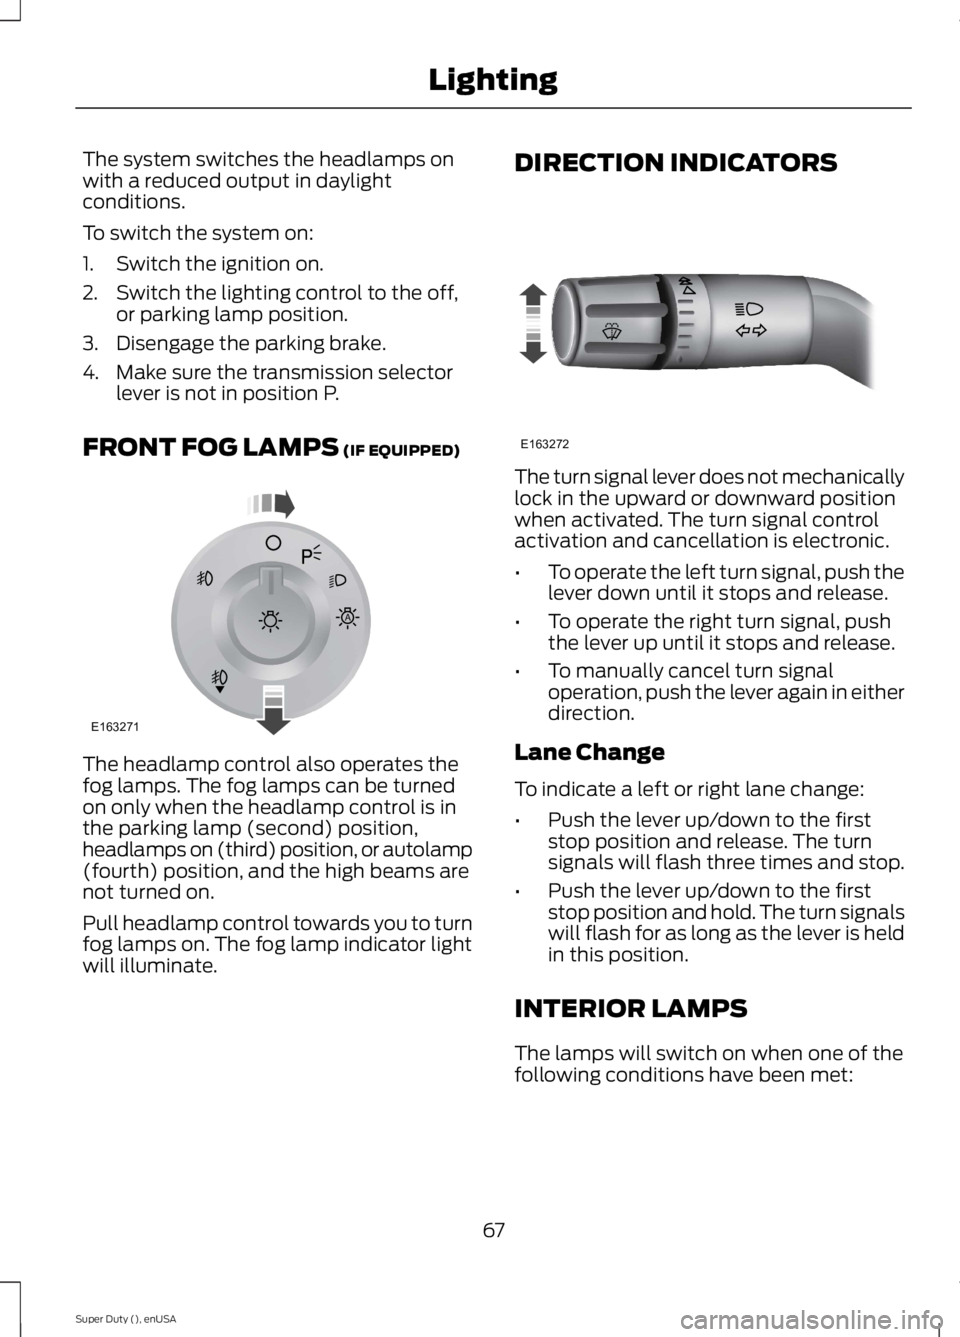
The headlamp control also operates thefog lamps. The fog lamps can be turnedon only when the headlamp control is inthe parking lamp (second) position,headlamps on (third) position, or autolamp(fourth) position, and the high beams arenot turned on.
Pull headlamp control towards you to turnfog lamps on. The fog lamp indicator lightwill illuminate.
DIRECTION INDICATORS
The turn signal lever does not mechanicallylock in the upward or downward positionwhen activated. The turn signal controlactivation and cancellation is electronic.
•To operate the left turn signal, push thelever down until it stops and release.
•To operate the right turn signal, pushthe lever up until it stops and release.
•To manually cancel turn signaloperation, push the lever again in eitherdirection.
Lane Change
To indicate a left or right lane change:
•Push the lever up/down to the firststop position and release. The turnsignals will flash three times and stop.
•Push the lever up/down to the firststop position and hold. The turn signalswill flash for as long as the lever is heldin this position.
INTERIOR LAMPS
The lamps will switch on when one of thefollowing conditions have been met:
67
Super Duty (), enUSA
LightingE163271
A E163272
Page 91 of 470

Fuel Hist.
Shows fuel usage as a bar graph based ontime. The graph is updated each minutewith the fuel economy that was achievedduring the prior 5, 10, 30 minutes of driving.
Truck Apps
In this mode, off-roadinformation depicted withgraphics and trailer towingapplication options are available.
Note:Some items are optional and maynot appear.
Truck Apps
Pitch and bank angle (in degrees)Off Road
Steering angle (in degrees)
Differential lock/unlock
Energy flow
ELD (Electronic Locking Differential)Press OK for Info
Hill Descent Control
4X4 System
Traction Control
AdvanceTrac + RSC
Active trailer name or default trailerTrailer
Accumulated trailer distance
Trailer gain and output
Trailer Disconnected
OptionsPress OK for options
Change Active Trailer
Adding a new trailer
Conventional, FifthWheel or GooseneckConnection Checklist (ifequipped)
Delete Trailer
Tow / Haul or TrailerBrake ControllerInformation Screen
88
Super Duty (), enUSA
Information DisplaysE163181