2015 AUDI TT ROADSTER homelink
[x] Cancel search: homelinkPage 4 of 244

2 Table of contents Vehicle literature .. .. .. .. .. ... .
About this Owner's Manual ...
Controls and equipment .. ... .
Cockpit ................ .... .. . .
General illus tration .... ... .. .. ... .
Instruments and warning/
indicator lights ........ .. .. .. . .
Ins truments . .. .. ..... ... .. .. ... .
War ning/ indi cator lights ... .. ... .. .
Driver information system .. .
Introduct ion . .. .. ..... ... .. .. ... .
Trip computer .. .. ..... ... .. .. ... .
M enu display . ........... .... ... .
Efficiency program ........ .. .. .. . .
Service interval d isp lay ..... ... .. . .
Lap timer .. .......... ........ .. .
On- Board Diagnostic system (OBD) .. .
Opening and closing .. .. .. .. . .
Keys ........................ .. .
P owe r locking system ............ .
R ear lid/ trun k li d ................ .
Ant i- t heft ala rm system ... .. .. .. . .
P owe r win dows .. ..... ... .. .. ... .
Convertible top .............. .
Convertible top ....... ... .. .. ... .
W ind Deflector . .. ..... ... .. .. ... .
Conve rtible top eme rgency o peration .
Clear vision .. .. ..... ... .. .. ... .
Lights ...... .. .. ..... ... .. .. ... .
Inter ior lights .. . ...... ... .. .. ... .
V1s1on . .. ................. .. ... .
W iper and washer system .. .. .. ... .
D ig ita l compass ........... .... .. .
Seats and storage ....... .. .. . .
Ge neral recommendat ions ........ .
Ad just ing front seats manually .. ... .
5
6
8
8
8
1 0
1 0
12
2 2
22
23
24
27
28
28
30
32
32
34
37
3 8
39
4 1
41
44
4 4
4 8
48
51
52
54
58
59 59
60
P owe r seats . . . . . . . . . . . . . . . . . . . . . 6 1
H ead res traints . . . . . . . . . . . . . . . . . . 6 2
L uggage compartmen t . . . . . . . . . . . . 6 2
Cup holder . . . . . . . . . . . . . . . . . . . . . . 63 Asht
ray ... .... .. ... .. ..... .... . .
Cigarette lighter/socket . ..... ... .. .
Storage ... .. .. .. .. ... .. .. .. .. .. .
Warm and cold ... .. ..... .... . .
Climate controls .. .. .... .... ... .. . 63
64
65
67
67
On the road
. . . . . . . . . . . . . . . . . . . 72
Stee ring . ..... .. ... .. ..... ... .. .
Ignition lock and ignition sw itch .. .. .
Starting and stopping the engine ... .
Parking brake ................... .
Speed warning system ............ .
Cru ise cont ro l .. .. ............... .
Audi magnet ic r ide ... ... .... ... .. .
Spo rt m ode .................. .. .
A coustic parking sys tem
Transmission .. .. ........... .. .
S t ronic transmission ........... .. .
72
72
73
74
75
77
79
79
79
81
81
Homelink . . . . . . . . . . . . . . . . . . . . . 88
U nivers al remote control ...... .. .. .
Safety first ................... .
Driving Safely .... .......... .. .
Gener al notes .. .. ............. .. .
P roper occ upan t seating positions . . .
Drive r and passenger side footwe ll .. .
Pedal a rea ..... .. .. ... ..... ... .. .
Stow ing luggage . ............. .. .
Reporting Safety Defects ........ .. .
88
9 1
91
91
92
95
96
96
98
Safety belts . . . . . . . . . . . . . . . . . . . 100
General notes . . . . . . . . . . . . . . . . . . . . 100
Why safety belts? . . . . . . . . . . . . . . . . 101
Safety be lts . . . . . . . . . . . . . . . . . . . . . 103
Safety belt pretensioners . . . . . . . . . . 106
Airbag system . . . . . . . . . . . . . . . . . 108
Important th ings to know . . . . . . . . . . 108
Front air bags .. .. ... .. ....... ... . 112
Moni to ring the Advanced Ai rbag
S ystem . . . . . . . . . . . . . . . . . . . . . . . . .
118
Page 90 of 244
88 Homelin k
Homelink
Universal remote
control
General information
The Homelink universal remote control can
be programmed with hand-held transmitters
from existing equipment .
You must first program the Homelink trans
mitter before you can use the system
~ page 88 , Programming the Homelink
transmitter.
In order to program the Homelink transmit
ter for devices utilizing rolling code, a second
person on a ladder who can safely reach the
garage door opener motor is recommended.
It is also necessary to locate the "learn" but
ton on your garag e door open er motor . Refer
to the ope rating instructions for the opener ,
as the location and color of this bu tton may
vary by manufacturer .
You can still use the original remote control
for the device at any time.
A WARNING
-
- Never use the Homelink transmitter
with any garage door opener that does
have not the safety stop and reverse fea
ture as required by federal safety stand
ards. This includes any garage door open
er model manufactured before April 1,
1982.
- A garage door opener which cannot de
tect an object, signaling the door to stop
and reverse does not meet current feder
al safety standards. Using a garage door
opener without these features increases
risk of serious injury or death.
- For safety reasons never release the
parking brake or start the engine while
anyone is standing in front of the vehicle.
- A garage door or an estate gate may
sometimes be set in motion when the
Homelink remote control is being pro
grammed. If the device is repeatedly ac- tivated, this can overstrain motor and
damage its electrical components - an
overheated motor
is a fire hazard!
- To avoid possible injuries or property
damage, please always make absolutely
certain that no persons or objects are lo
cated in the range of motion of any
equipment being operated.
(!) Tips
- If you would like more information on
Homelink, where to purchase the Home
Link compatible products, or would like
to purchase the Homelink Home Light
ing Package, please call toll-free :
1-800-355-3515.
- For Declaration of Compliance to United
States FCC and Industry Canada regula
tions ~
page 228.
Programming the Homelink transmitter
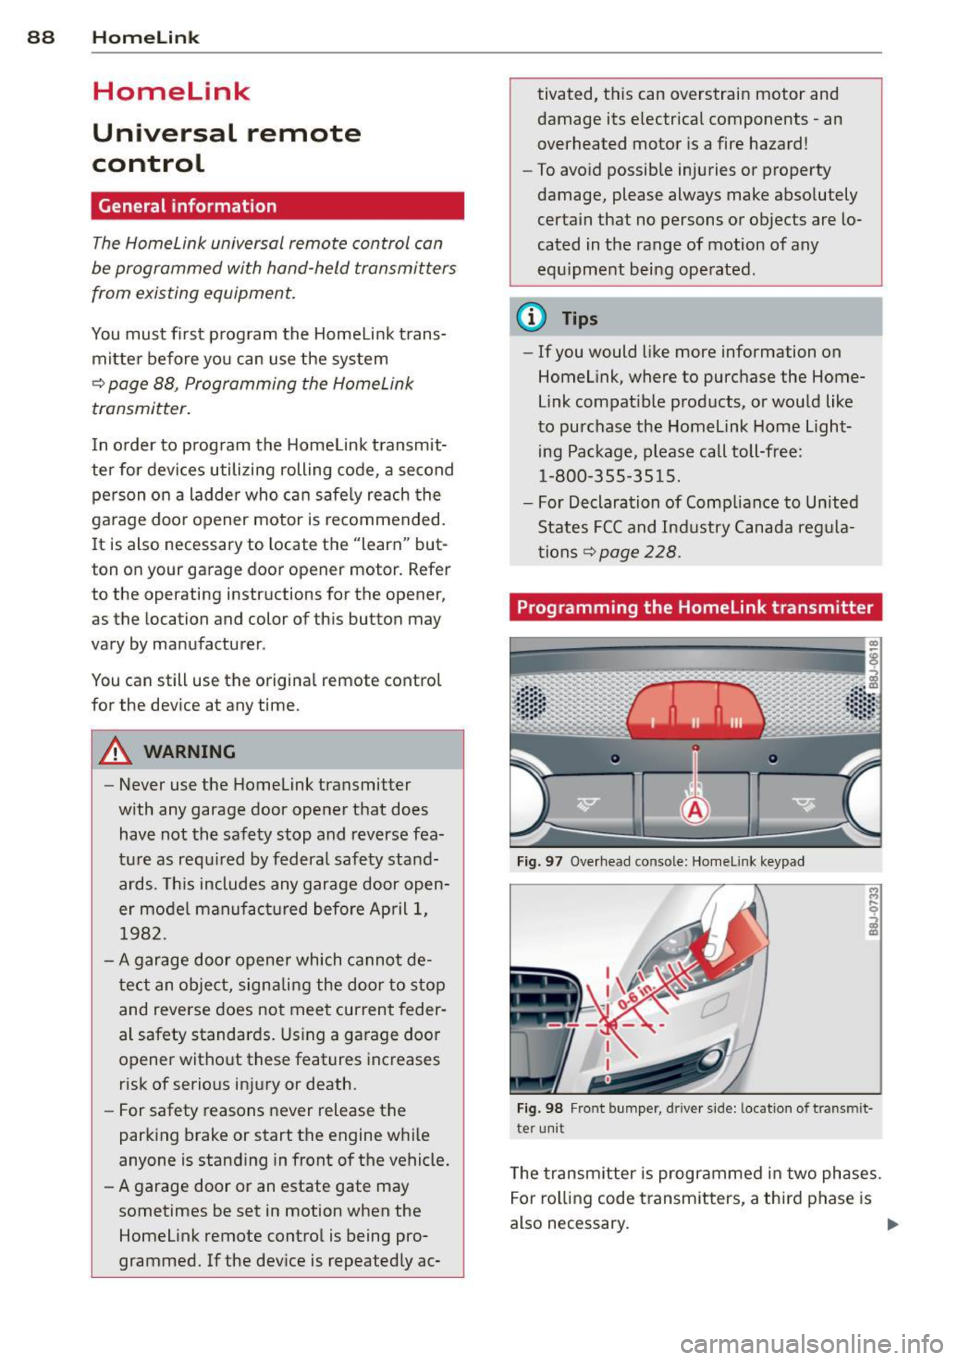
Fig. 97 Overhead co nsole: Homelink keypad
Fig. 98 Front bumper , driver side: lo catio n of tra n smi t
te r unit
The transmitter is programmed in two phases.
For rolling code transmitters, a third phase is
also necessary.
ll-
Page 91 of 244
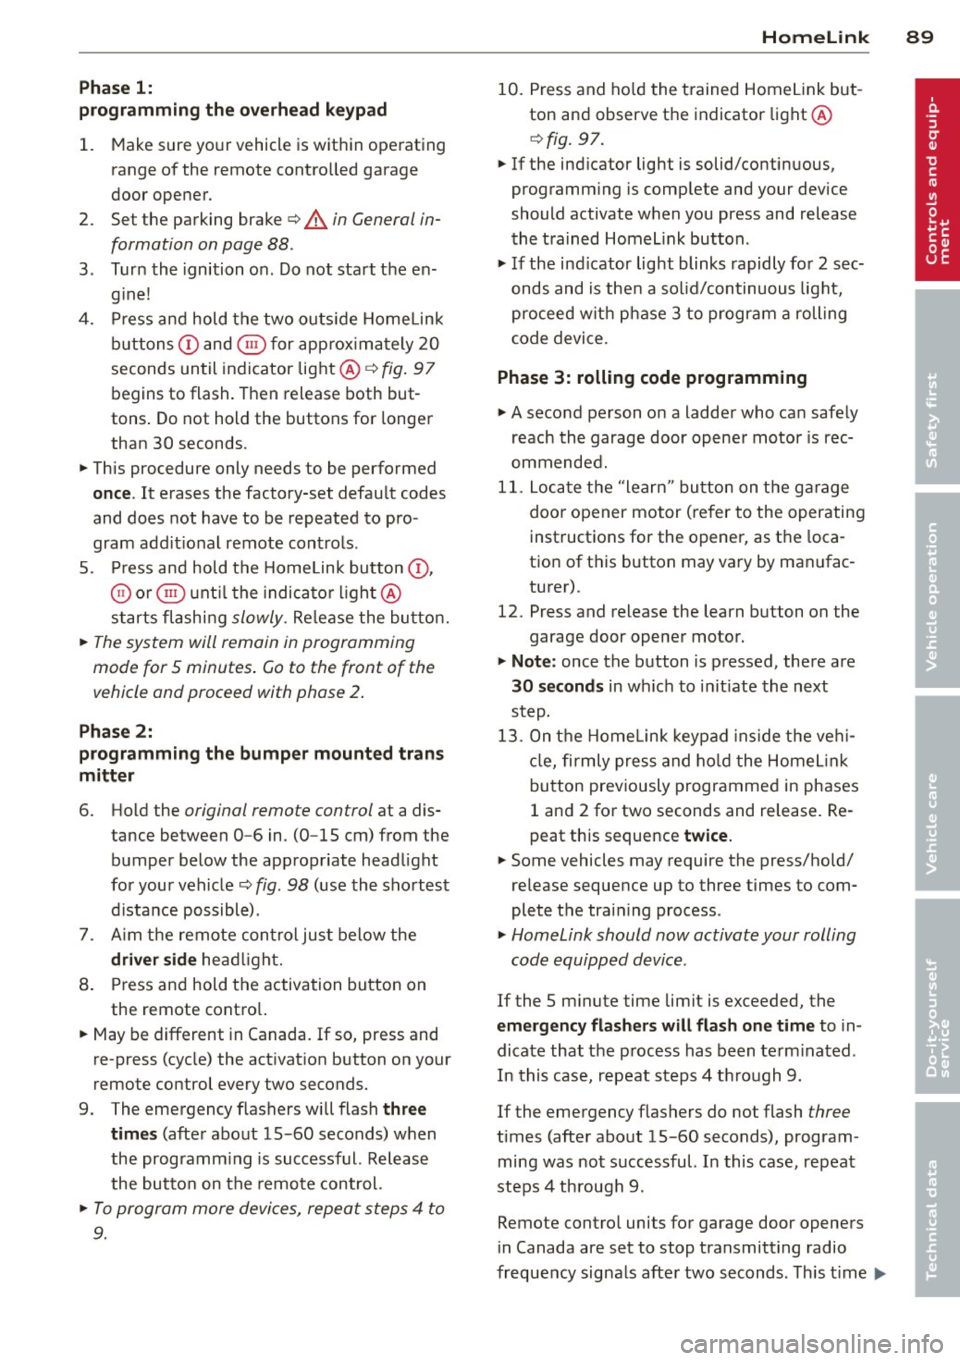
Phase 1:
p rogramming th e overh ead keypad
1. Make sure yo ur vehicle is wit hin ope rating
range of the remote contro lled garage
door opener .
2. Set the parking brake
q A in General in
formation on page 88 .
3. Tur n the ignition on . Do not sta rt the en
g ine!
4. P ress and hold the two o utside Home Link
b uttons
(D and @for app rox ima tely 20
seconds until indicator light @
q fig . 97
begins to flash. Then release both but
tons . Do not hold the buttons for longer
than 30 seconds.
.,. This procedure only needs to be performed
once . It erases the factory-set defau lt codes
and does not have to be repeated to pro
gram add it ional remote controls .
S. Pr ess and hold t he Home link button (D ,
® or@ unt il the indicato r ligh t@
starts flashing
slowly . Release the bu tton.
.,. The system will remain in programming
mode for 5 minutes . Co to the front of the
vehicle and proceed with phase 2 .
Phase 2:
programming the bumper mounted trans
mitter
6. Hold the original remote control at a dis
tance between 0 -6 in . (0 -15 cm) from the
bumper below the appropriate head light
for your vehicle
q fig . 98 (use th e sho rtest
d istance possible) .
7. A im t he remote con trol jus t be low the
driver side head ligh t.
8 . Pr ess and hold the activa tion button on
the remote cont ro l.
.,. May be different in Canada.
If so, press and
re -press (cycle) the act ivat ion button on your
remote control every two seconds.
9 . The emergency flashers will flash
three
time s
(after about 15 -60 seconds) when
the prog ramm ing is successful. Release
the butto n on the re m ote control.
.,. To program more devi ces, repeat steps 4 to
9.
Homelink 89
10. Press and ho ld the t rained Home link b ut
ton and observe t he indicator light @
qfig. 97.
.,. If the ind icator light is solid/contin uous,
programm ing is comp lete and your device
should activate w hen you press and release
t he t ra ined Homel ink button .
.,. If the ind icator light blinks rapidly fo r 2 sec
onds and is t hen a so lid/continuous light,
p roceed w it h phase 3 to progr am a roll ing
code device.
Phase 3: rolling code programming
.,. A second pe rson o n a ladde r who can safely
reach th e garage door opene r motor is rec
ommended .
11. Loc ate t he "lea rn" bu tton on t he g arage
doo r opener motor ( re fer to the operating
inst ruct ions for the opener, as t he loca
t ion of t his button may va ry by man ufac
turer) .
12 . Press and release the learn b utton on the
garage door opener motor .
.,. Note : once the b utton is p ressed, there are
30 seconds in w hich to initiate the next
step.
13 . On t he Home link keypad ins ide t he ve hi
cl e, firmly press and hold t he Home link
bu tton prev iously progr ammed in phases
1 and 2 fo r two seconds and release . R e
peat this seque nce
twice.
.,. Some vehicles may require the press/ho ld/
re lease sequence up to three t imes to com
plete t he trai ning process .
.,. Homelink should now activate your rolling
code equipped device .
If the S minute time limit is exceeded , the
emergency flashers will flash one time to in
dicate that the p rocess has been te rm ina ted .
In this case, repeat steps 4 t hrough 9.
If the emergency flashers do not flash
three
times (afte r about lS -60 seconds) , program
ming was not successful. In this case, repeat
steps 4 through 9 .
Remote contro l units for garage door openers
in Canada are set to stop transmitting radio
fr eque ncy signa ls afte r two seconds . This t ime
Ill-
Page 92 of 244
90 Homelink
may not be s ufficient for the Homelin k sys
tem to learn t he radio frequency signal. Per
form all other steps as described above.
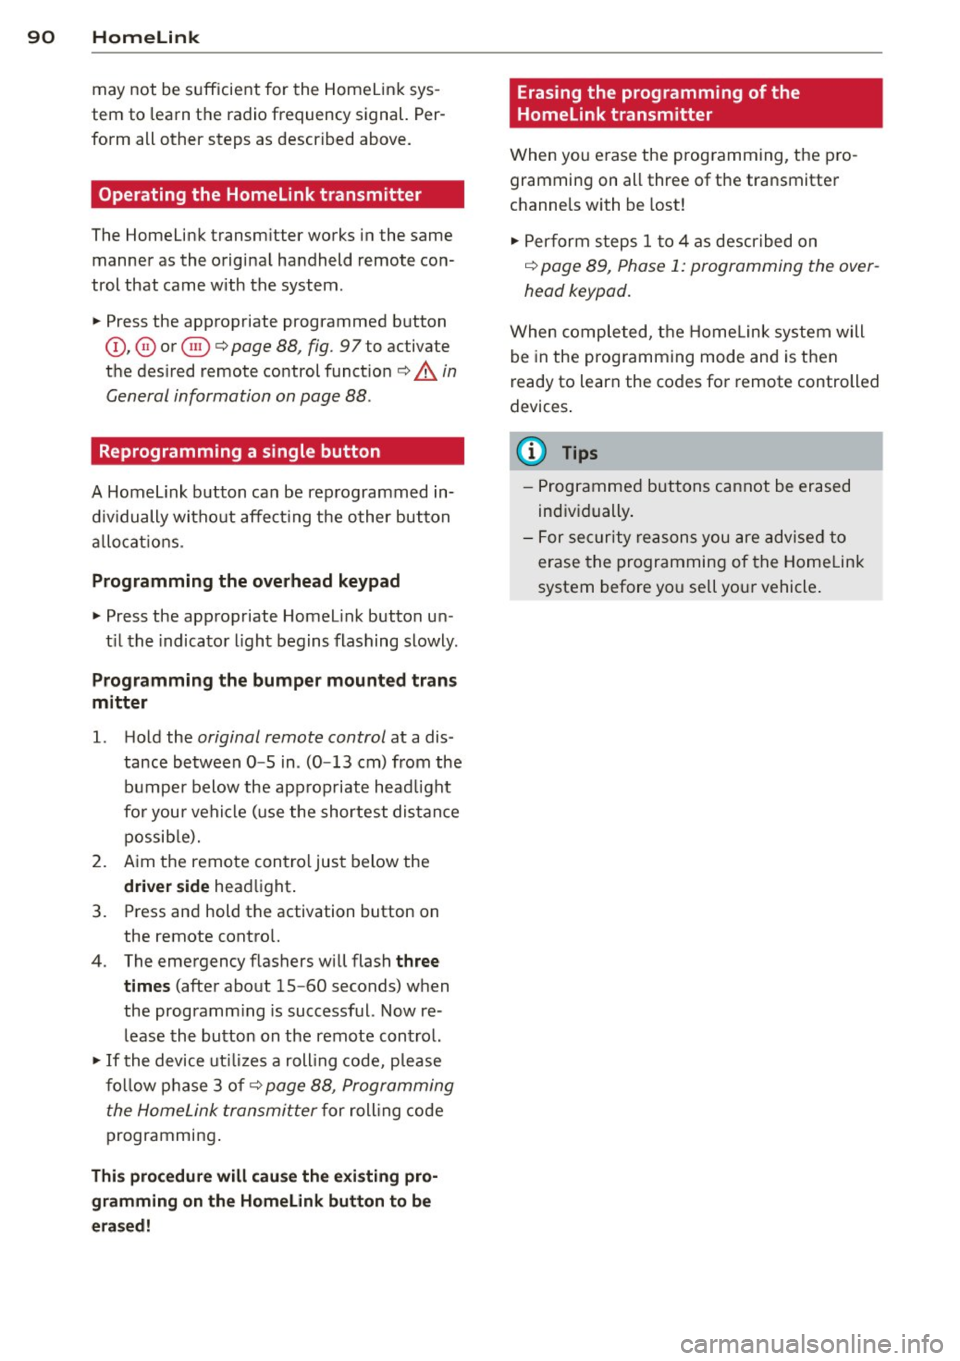
Operating the Homelink transmitter
The Homelink transm itter works in the same
manner as the orig inal handheld remote con
trol that came with the system .
.. Press the appropriate prog rammed button
Q) ,@ or @ ¢ page 88, fig . 97 to activate
the des ired remote control functio n ¢ .&.
in
General information on page
88 .
Reprogramming a single button
A Homel ink button can be rep rogrammed in
d iv idually wi tho ut affec ting t he o ther bu tton
a llo cat io ns.
Programming the overhead keypad
.. Press the appropriate Homel ink button u n-
t il the indicato r light begins flashing slowly .
Programming the bumper mounted trans
mitter
1. Hold the original remote control at a dis
tance between
0 -5 in . (0 -13 cm) from the
bumper below the app ropriate head light
fo r you r vehicle (use the shortest distance
possib le).
2. A im the remote control just below the
driver side head light.
3. P ress and hold the activation button on
the remote contro l.
4 . The emergency flashers will flash
three
tim es
(after about 15 -60 seconds) when
the programm ing is successful. Now re
lease the bu tton on the remote control.
.. If the device ut ilizes a roll ing code, p lease
fo llow p hase 3 of¢
page 88, Programming
the HomeLink transmitter
f or roll ing code
programming .
This procedure will cau se the exi sting pro
gramming on the Homelink button to be
e ra sed! Erasing the programming of the
Homelink transmitter
When you e
rase the prog ramming, the p ro
gramming on all three of the transmitte r
c h anne ls with be lost!
.. Per form steps 1 to 4 as described on
¢ page 89, Phase 1: programming the over
head keypad .
When completed, the Home link system will
be in the prog ramming mode and is then
ready to learn the codes for remote controlled
devices .
(D Tips
- Programmed buttons cannot be erased
individually .
- F or se curity reasons you are advise d to
erase the programming of the Homelink
system before yo u sell yo ur vehicle .
Page 230 of 244
228 Consumer Information
Technical Modifications
Our guidelines must be complied with when technical modifications are made .
Always consult an authorized Audi dealer be
fore starting work on any modifications.
This will help ensure that vehicle function,
performance and safety are not impaired
¢ &. .
Attempting to work on electronic components
and the software used with them can cause
malfunctions. Because of the way electronic
components are interconnected with each
other, such malfunctions can also have an ad
verse affect on other systems that are not di
rectly involved. This means that you risk both
a substantial reduction in the operational
safety of your vehicle and an increased wear of
ve hicle parts ¢
A:,..
Author ized Audi dealers will perform th is
wo rk in a professiona l and competent manner
or, in special cases, refer you to a professional
company that specializes in such modifica
tions .
A WARNING
Improper repairs and modifications can
change the way vehicle systems work and
cause damage to the veh icle and serious
personal injury.
If emergency repairs must be performed
elsewhere, have the vehicle examined by
an authorized Audi dealership as soon as
possible.
Declaration of Compliance, Telecommu
nication or Electronic Systems
-
Radio Frequency Devices and Radiocommuni
cation Equipment User Manual Notice.
The manufacturer is not responsible for any
radio or TV interference caused by unauthor
ized modifications to th is equ ipment.
Devices
T he following devices each comply with FCC
Part 15.19, FCC Part 15.21 and RSS-Gen Issue
1:
- Cell phone package
- Electron ic immobilizer
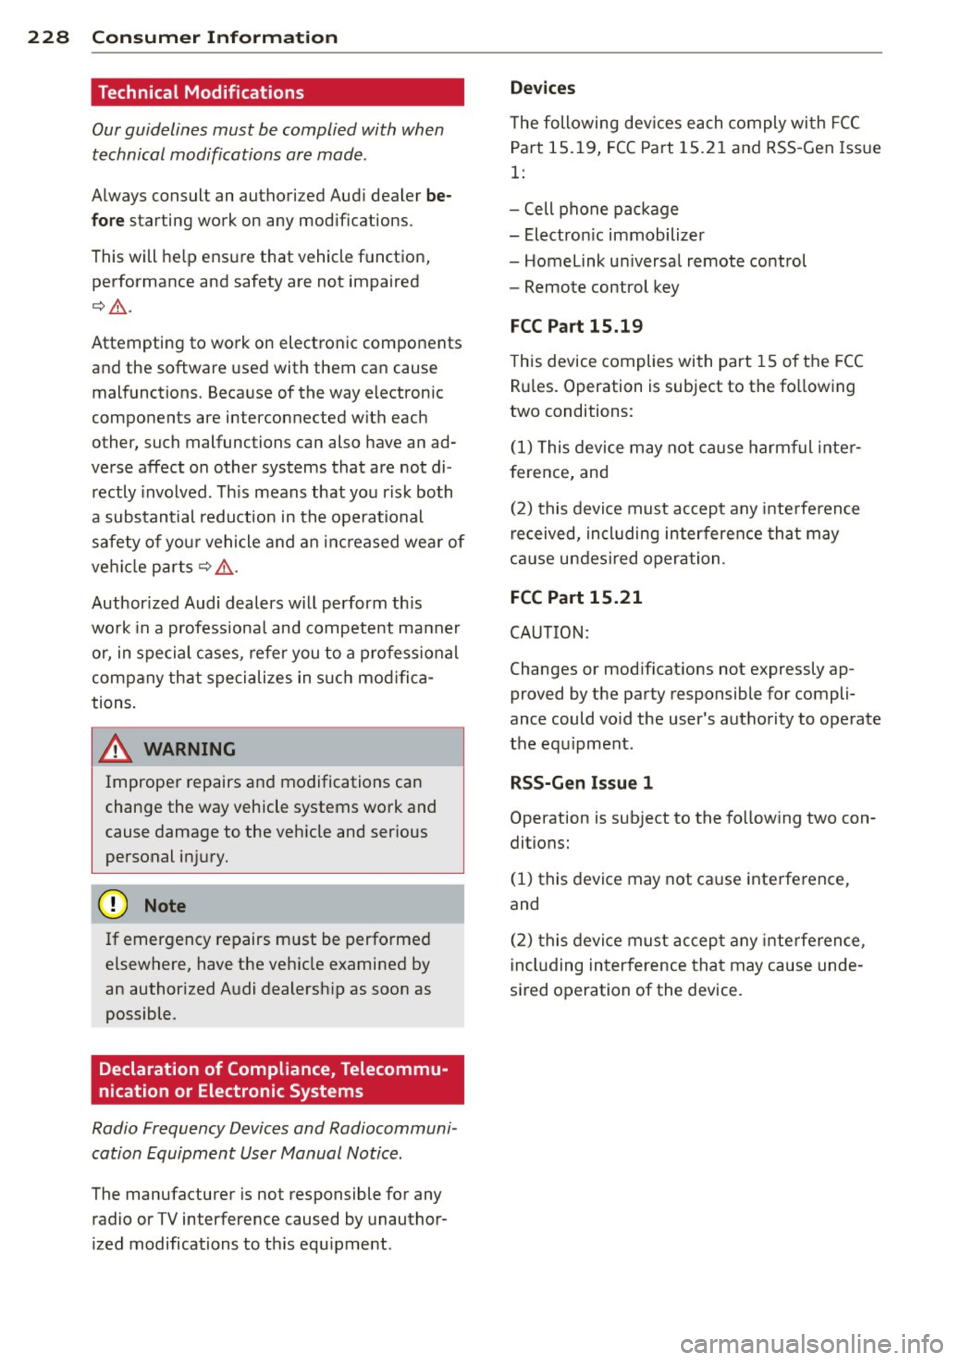
- Homelink universal remote control
- Remote control key
FCC Part 15.19
This device complies with part 15 of the FCC
Rules . Operation is subject to the fo llowing
two conditions:
(1) This device may not cause harmful inter
f erence, and
(2) this device must accept any interference
received, including interference that may
cause undesired operation.
FCC Part 15.21
CAUTION:
Changes or modifications not expressly ap
proved by the party responsible for compli
ance could vo id the user's authority to operate
the equipment.
RSS-Gen Issue 1
Operation is subject to the following two con
ditions:
(1) this device may not ca use interference,
and
(2) this device must accept any interference,
including interference that may cause unde
s ired operation of the device.
Page 233 of 244
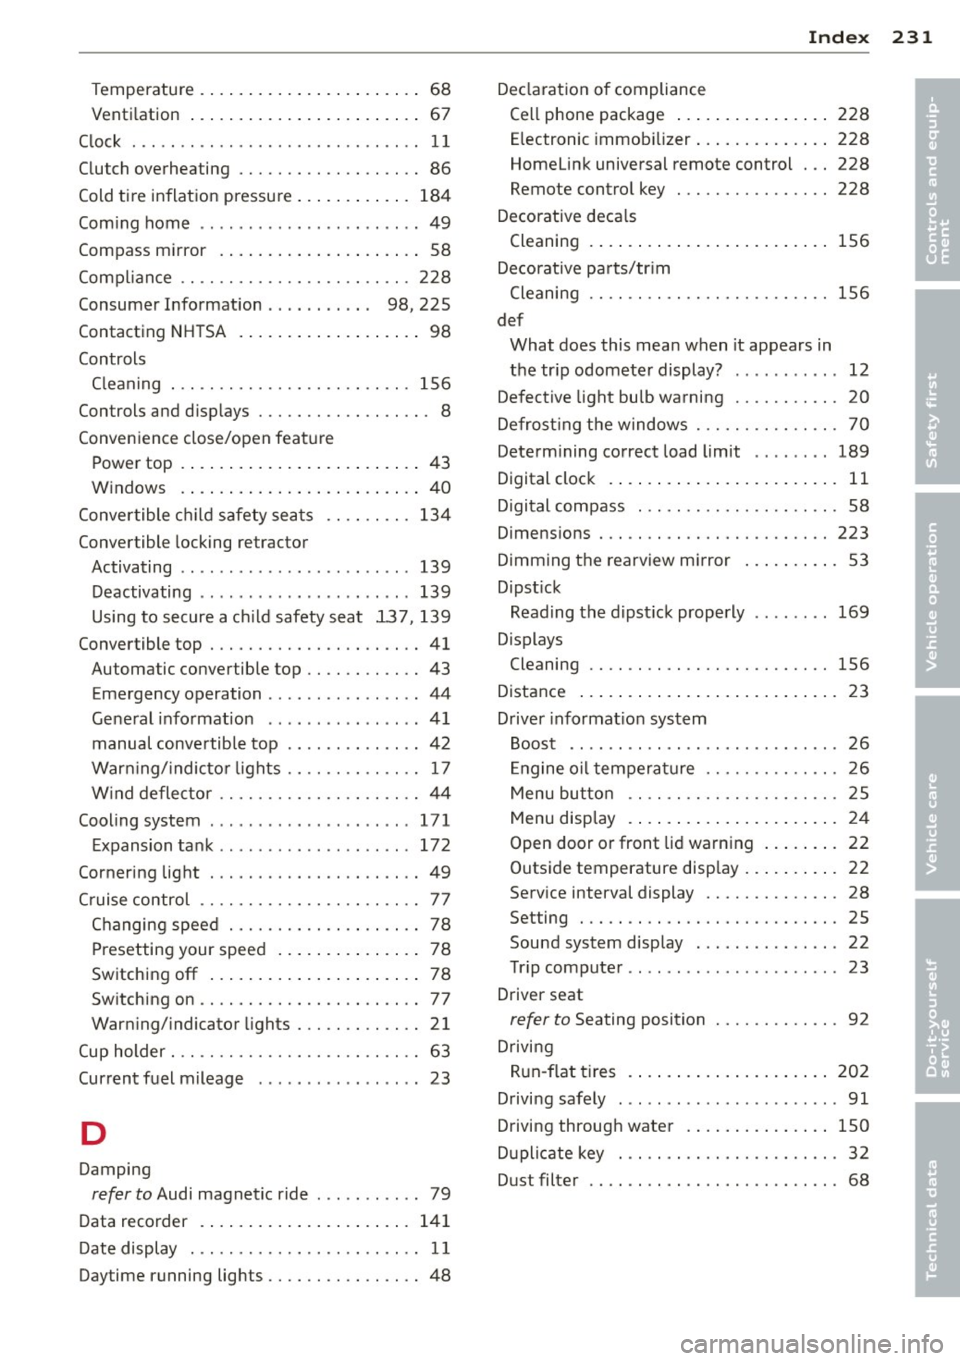
_______________________________ ___:I~n ~d ~e:.::x 231
Temperature ... ... .... ... .. .. .. .... 68
Venti lation ..... .. .... ... .. .. .. .... 67
C lock ..... ................... .. ....
11
Clutch overheating . . . . . . . . . . . . . . . . . . . 86
Cold tire inflat ion pressure ... .. .. .. .. .
184
Com ing home .............. ... ... ... 49
Compass m irror . ....... ... .. .. .. .. .. 58
Comp lian ce .. ............. .. .. .. ... 228
Consumer Info rmat ion . . . . . . . . . . . 98, 225
Contact ing NH TSA . ..... ... .. .. .. .. .. 98
Controls Cleaning . .. .. ........... .. .. .. ...
156
Controls and d isp lays ....... .. .. .. .. .. . 8
Convenience close/open feat ure
Powe r top . . . . . . . . . . . . . . . . . . . . . . . . .
43
Windows . ..... ...... ... .. .. .. .... 40
Conve rtible c hild safety sea ts .. .. .. .. .
134
Convertible locking retractor
Activating . . . . . . . . . . . . . . . . . . . . . . . .
139
Deactivating ................ .... .. 139
Using to secure a ch ild safety seat 137, 139
Convertible top . ........... .. .. .. .. .. 41
Au tomatic convertible top .. .. .. .. .. .. 43
Emergency operation ........... .... . 44
Ge ne ral i nfo rmation .......... ... ...
41
manual conve rtib le top .. ... . .. ... ... 42
War ning/ indic to r l igh ts .... .. .. .. .. ..
1 7
W ind deflecto r ........... .... .. .. .. 44
Cooling system . . . . . . . . . . . . . . . . . . . . .
1 71
Expansion ta nk ... ... ... .. .. .. .. .. . 172
Cornering light ............ .... .. .. .. 49
Cruise control . . . . . . . . . . . . . . . . . . . . . . . 77
Changing spee d . . . . . . . . . . . . . . . . . . . . 7 8
Presetting your speed . . . . . . . . . . . . . . . 78
Sw itching
off .... ..... ... .. .. .. .... 78
Sw itching on . . . . . . . . . . . . . . . . . . . . . . . 77
War ning/ indicator lights ... .. .. .. .. ..
21
Cup holder . . . . . . . . . . . . . . . . . . . . . . . . . . 63
Current fuel m ileage
23
D
Damping
refer to Audi magnetic ride ... .. .. .. .. 79
D ata recorder . ..... .... ... .. .. .. ... 14 1
Date display . . . . . . . . . . . . . . . . . . . . . . . . 11
Daytime running lights .... .. .. .. .. .. .. 48
Decla rat ion of compliance
Ce ll phone package .. ... .... ... .. .. 228
E lectronic immob ilizer .. ..... ... .. .. 228
Homelink universal remote control . .. 228
Remo te contro l key ... ............. 228
Decorative deca ls
Cleaning . ... .... ... .. .. ..... ... ..
156
Decorative pa rts/tr im
Cleaning .. .. .. .. .... .............
156
def
What does this mea n when it appears in
the tr ip odometer display? ...........
12
Defective light bulb warning . ....... .. . 20
Defrost ing the w indows . .... ..... .. .. . 70
Determ ining correct load limit ........
189
Digital clock . . . . . . . . . . . . . . . . . . . . . . . . 11
D . · l 1g1ta compass . . . . . . . . . . . . . . . . . . . . . 58
Dimens ions . .. .. .. .... ............. 223
D imming the rearview m irror .. ... .. .. . 53
D ipst ick
Reading the d ipst ick properly ........
169
Displays
Cleaning
156
Distance ... .. .. .... . ... ...... ... .. . 23
Driver informat io n system
Boost ........ .. .. ... ....... ...... 26
E ngine oi l tempera ture .. ..... .. .. .. . 26
Menu but to n .. .. ... ..... ..... .. .. . 25
Menu disp lay . . . . . . . . . . . . . . . . . . . . . . 24
Open door or front lid warning ... .. .. . 22
Outsid e temperature disp lay . . . . . . . . . . 22
Serv ice inte rval display . . . . . . . . . . . . . . 28
Se tting ... .. .. .. .... ...... ....... . 25
Sound system display ... .... ... .. .. .
22
T' np compute r .. .. .. ................ 23
Dr iver seat
refer to Seating position . ..... .. .. .. . 92
Drivi ng
Run -flat t ires . ..... . .. .. ..... ... .. 20 2
Drivi ng safely ...... ........... ......
91
Driving throug h wate r .. .. .. .. ... .. .. 150
D upli cate key . .. .. .... ... .... ...... . 32
Dus t fil ter . . . . . . . . . . . . . . . . . . . . . . . . . . 68
•
•
Page 240 of 244

238 Index
Tire pressure monitoring system ...... . 198 Trip computer ..... ............. ..... 23
Loss of air pressure ........ ... .... .
199 Single-trip memory ................. 23
M alfunct ion . ............. ... .... .
199 Tota l-trip memory .................. 23
Resetting tire pressures . . . . . . . .
200, 201 Trip odometer . .. .. ............. .. .. . 12
Tire repair kit ............. .. .. .... . 205 What does it mean when dEF appears in
Tires .. .. .... .......... ........ ... .
180 the trip odometer display? ....... ... . 12
Replacing .. ................ ... ... 191 Trunk lid ...... ... .. .............. .. 37
run-flat .. ... ............ .. .. .. .. .
201 Trunk escape handle ........... .. .. 204
Service life .............. .. .. .... . 190 Turn signals ... .. .. ............. .. .. . 50
speed rat ing letter code . .. .. .. .. .. . 192 Warning/indicator lights ........ .. .. . 21
Tire manufacturing date ......... ... 192
Tire specifications ............ .... . 192 U
Tread depth .............. ... .... . 190
Uniform tire quality grading .. .. ..... 194
Winter tire s ............... .. .... . 195
Tires/Whee ls
Low aspect ratio tires ....... ... .. .. .
197
Tire mobility system ....... .... ... . 205
Tire pressure monitoring system .... . 198
Tire repair kit ............ .. .. .. .. . 205
Tir es and vehicle load limits ... ... .... . 188
Tires and wheels
Check ing tire pressure ..............
186
Cold tire inflation pressure ..... .. .. . 184
Dimensions ............ .. .. .. .. .. .
191
General notes .............. .. .... . 180
Glossary of tire and loading termino lo-
gy . ... .... ................ ..... .
181
New tires and wheels ............... 191
Replacing ............... .. .. .... . 192
Snow chains ............... .. .... . 196
Tires and vehicle load limits .. .. .. ... 188
Wheel bolts ... ... .... ..... .. .. .. .
197
W inter t ires ... .......... .. .. .. .. . 195
Tire serv ice life .. .......... .. .. .... . 190
Tool kit ..... ................ ..... . 204
Towing
Front eyelet .................. ....
219
Rear eyelet ... ......... .. .. .. .. .. . 220
Tow truck procedures ............... 218
TPMS
Tire pressure monitoring system .. ... 199
Trailer towing . . . . . . . . . . . . . . . . . . . . . . 153
Transmission
S tron ic transmission ................ 81
Transport Canada . . . . . . . . . . . . . . . . . . . .
98
Tread Wear Indicator (TWI) ... ... .. .. . 190
Unfastening safety belts
Unidirectional tires .... .......... .. . .
Uniform tire quality grading ......... .
Univ ersal Radio- Frequency Remote Con-105
180
194
trol (HomeLink) . .. ............. .. .. . 88
Unlocking
Power locking switch ......... .. .. .. .
36
Rear lid/trunk lid ................. .. 37
Remote control key .................
35
Using the key ...................... 36
V
Vanity mirror . . . . . . . . . . . . . . . . . . . . . . . . 54
Vehicle
care/cleaning .. .. ... .......... ....
154
Vehicle electrical system ......... .... . 16
Vehicle Identification Number (V IN) . ... 222
Vehicle jack ... .. .. ....... ...... .. .. 209
Vehicle literature ..................... 5
Vehicle shut-down .............. .. ..
151
Vehicle tool kit .. .. ....... ...... .. .. 204
Ventilation ..... .. ............. ..... 67
Vinyl
Cleaning .. ...... ............. ....
157
w
Warning/ind icator lights . . . . . . . . . . 10, 12
Airbag system . .. ............. .. .. . 15
Anti-lock brake system (ABS) . . . . . . . . . 18
Brake system . . . . . . . . . . . . . . . . . . . . . .
14
Convertible top . . . . . . . . . . . . . . . . . . . . 17
Cruise contro l . . . . . . . . . . . . . . . . . . . . . . 21
Electronic power control .......... .. . 19