Page 65 of 350

M
"' 0 ..J
"". rl I.O
"' rl
"' rl
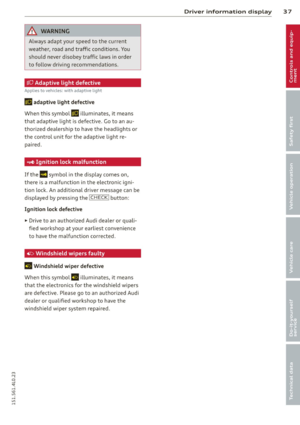
Emergency flasher
The emergency flasher makes other motorists
aware that you or your vehicle are in an emer
gency situation.
,r--,a.
-------------------
Fi g. 6 0 Center console: em ergency flasher sw itch
.. Press the sw itch ~ ~ fig. 60 to turn the
emergency flashers on or off .
When the emerge ncy flashe r is on, al l four
turn signals blink at the same time. The t urn
signal indicator lights
11111 in the instru
ment cluster, as well as the light in the emer
gency f lasher switch ~ blink likewise.
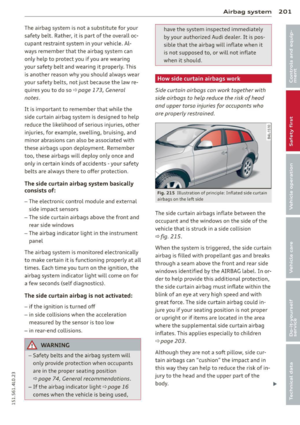
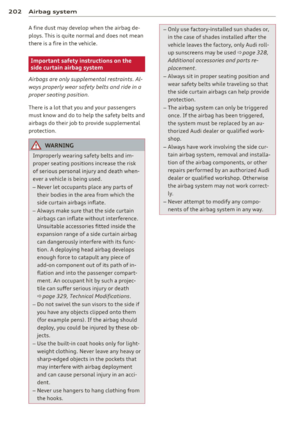
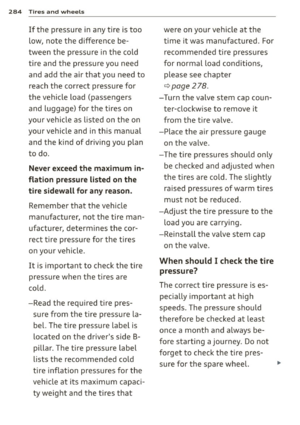
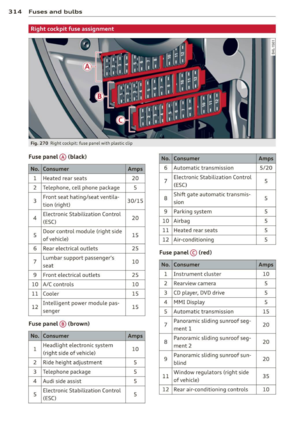
The emergency flashers will turn on automati cally if you are in an accident where the airbag
has dep loyed .
@ Tips
You shou ld tu rn on the emergency flashers
when:
- you are the l ast vehicle st anding in a tr af
fi c jam so that any other vehicles coming
can see you, or when
- your vehicle h as broken down or yo u are
i n an emergency si tuation, or when
- your vehicle is being towed by a tow
tru ck or if you are towing another vehicle
behind you.
Clear vi sion 63
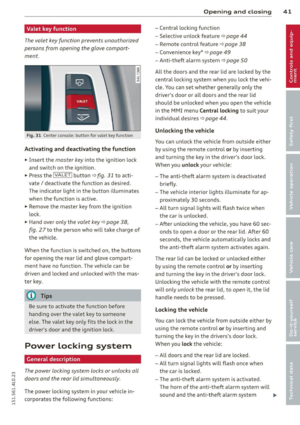
Turn signal and high beam lever
The lever on the left side of the steering col
umn is used to operate the turn signals and
the high beam as well as the headlight flash
er.
t
'
Fi g. 61 Turn signal and high beam lever
The turn signa l and high beam lever has t he
following functions :
Turn signals ¢¢
.. Lift the leve r up a ll the way ~ fig. 61 @to
use t he right turn s ignals, or push the leve r
down all the way@to use t he left tur n sig
na ls .
Auto -blink
.. Move the leve r (up or down) just to the point
of resistan ce to use the turn signa ls fo r as
long as you need them, for example w hen
chang ing lanes.
.. Move the lever (up or down) just to the point
of resistance and then release it right away
to make the turn signals blink
three times.
You can use t his feature for example when
chang ing lanes on highways.
H igh beam [D
.. Push the lever forward @ to sw itch on the
high beam .
.. Pull the lever back towards you to switch off
the high beam.
Headlight flasher [D
.. Pull the lever toward the steering wheel@
to use the headlight flasher .
~
Page 66 of 350

64 Clear vision
Notes on the se feature s
- The turn signals only work with the ignition
tu rned on. The indicator lights
II or ii in
the instr ument cluster ¢
page 14 also b link .
- After you have turned a corner, the turn sig -
nal switches off a utomat ically.
- T he
high beam works only when the head
lights are on. The indicator light
SI in the
instrument cluste r illuminates when the
high beams a re on.
- The
headlight flasher works on ly as long as
yo u hold the leve r - even if there are no
lights turned on . The ind icator light
SI in
the instrument cl uster illum inates when you
use the head light flasher.
A WARNING
Do not use the hig h beam o r headlight
flasher if you know that th ese cou ld blind
oncoming traffic.
Interior lights
Front interior lights
-
The interior ligh ts include reading lights for
bo th the driver and the front passenger .
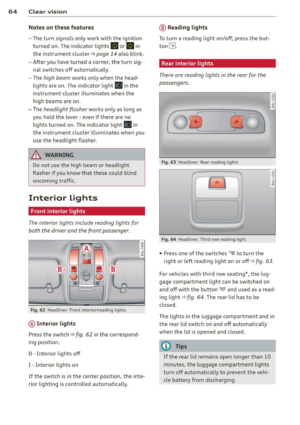
Fig. 6 2 Headli ner: Fro nt inte rior/read ing lights
@ Interior lights
Press the switch ¢ fig. 62 in the correspond
ing position.
0 -Interior lights off
I - Inte rior lights on
If the switch is in the center position, the inte
rior lighting is controlled automatica lly.
@ Reading lights
T o tur n a read ing light on/off, press the b ut
ton
t!J .
Rear interior lights
There are reading lights in the rear for the
passengers .
Fig. 63 Head liner: Rear read ing lights
~
--
' ~ '-
Fig . 64 Head liner: Third row read ing light
.. Press one of the switches ~ to turn the
N .., N
.:,
~
::i N -.:,
~
right or left reading light on or off c::;, fig. 63.
For vehicles with thi rd row seating *, the lug
gage compartment light can be switched on
and off with the button -M-and used as a read
ing light
c::;, fig. 64. The rear lid has to be
closed.
The lights in the luggage compartment and in
t h e rear lid switch on and off automatically
when the lid is opened and closed.
@ Tips
If the rear lid remains ope n longer than 10
minutes, the l uggage compartment lights
turn off automatically to prevent the vehi
cle battery from disc harging .
Page 67 of 350

M
"' 0 ..J
"". rl I.O
"' rl
"' rl
Ambience lighting
App lies to v ehicles: with a mbience ligh tin g
The ambience lighting can be adjusted in the
MMI.
... Select: I CARI funct ion button > Sy stems *
control button > Ambience l igh ting . Or
.,. Select:
ICARI funct ion button> C ar sys te m s*
control button > Vehicl e settings > In teri or
lighting .
When the ve hicle is unlocked, the standard
lighting turns on automatically and dims after
approx . 2 minutes, and when the ignition is
turned o n it switches off immediately.
The following interio r lighting is
controlled:
- Front footwe ll
- Rear footwell
- Front door panel
- Rear door panel
Vision
Sun visors
Using the sun visors makes driving safer.
Fig. 65 Passenger side: Sun visor
Sun vis ors
The forward visor of the dua l sun visor can be
pu lled out of i ts bracket in the cen ter of the
veh icle and swung towards the door. The sun
visor can be extended after it is swung to
wards t he door ¢
fig. 65.
Vanit y mirror
The vanity mir rors on the sun visors are cov
ered. When the cove r is ra ised, the mi rror
Clear vi sion 65
lighting switches on automatically. It turns
off when the lid is closed or the visor is folded
up again.
Sun shade
App lies to vehicles : wit h sun s hade
The windows in the rear doors and the rear
window are each equipped with a sun shade.
Fig. 66 Sun shade p ull ed up on a rear window
Fig. 67 Sun shade pulled up on the rear lid window
Sun shade (rear door s)
... Pull the shade out and hang it in the bracket
on the upper door frame¢
fig. 66.
Sun shad e (rear window )
... Pull the shade out and hang it in the bracket
on the rear l id frame¢
fig. 67.
Page 68 of 350

66 Clear vis ion
Wiper and washer
system
Switching the windshield wipers on
The windshield wiper lever controls both the
windshield wipers and the washer system .
Fig. 68 Windshie ld w ipe r lever
T he windshield wiper lever ¢ fig. 68 has th e
following posit ions :
Act ivating r ain sen sor
.. Move the lever up to position (D .
.. Move switch @up or down to adjust the
sensitivity of th e rain sensor.
low wiper sp eed
.. Move the leve r up to position @.
High wiper speed
.. Move the lever up to posi tion @.
One-touch wiping
.. Move the lever to pos ition @, when you
want to w ipe the w indshield
br iefly .
Automatic wip er/ washer
.. Pull the lever to posi tion ® (toward the
steering wheel) and ho ld.
.. Re lease the lever. The washer stops and the
wipers keep going for abou t four seconds .
D epend ing on how long th e lever is held,
different numbers of wash cycles are pe r
formed .
Turning off the wip ers
.. Move the lever back to position @.
General information
The w indshie ld wipers and the windsh ield
washer system operate only with the ignit ion
on .
D uring a tempora ry stop, e.g. at a traffic sig
nal, the set wipe speed is automati cally re
duced by one stage.
T he w indshie ld washe r nozzles are heated at
low temperatures when the ign ition is o n.
Removing water drop lets
About 5 seconds after the wash cycle is com
plete, the wiper system performs a s ingle au
tomat ic w ipe cycle to remove any wate r d rop
lets that remain on the w indshie ld w hile d riv
ing .
If you would like to deactivate this delayed
wipe cycle while driv ing , you have to pull the
lever to position ® agai n w ith in 10 seconds
after this wipe cycle .
Water drop let remova l is reactivated after the
ignition is sw itched off and then on aga in .
Winter posit ion
To speed up de-icing of the windsh ield wipe rs,
they move to the w inter po sition when the ig
nition is switched off and at an outside tem
perature below 39
°F (4 °() . In this position,
the windshie ld wipers are in an area on the
glass whi ch is reac hed by the air vents below
the g lass . It i s also easie r to remove snow and
ice from the w indshie ld w ipers in t his posi
tion.
T he w ipers leave the win ter posi tion, when
the igni tion is switched on, if the w indshield
wiper lever is ope rated or the active rain sen
sor reacts to moisture.
Rain sensor
T he rain sensor operates only in the interval
wiper pos ition. When it starts to rain, the in
te rv al wiper mode is activ ated automatically.
If the windshield wipe r lever is in the interval
wipe position with the ignit ion sw itched off , ..,.
Page 69 of 350

M
"' 0 ..J
"". rl I.O
"' rl
"' rl
the rain sensor is not activated until vehicle
speed is above 4 mph (6 km/h).
To reduce the sensitivity of the rain sensor,
the switch@ must be moved down. To in
crease the sensitivity of the rain sensor, the
switch must be moved up.
The higher the sensitivity setting, the sooner
the windshield wipers react to moisture on
the windshield . Increased sensitivity is sig
naled by the windshield w ipers making a sin
gle pass over the windshield.
The rain sensor wiper intervals depend on the
sensitivity setting as well as vehicle speed .
During brief stops, wiper motion will adjust in
relation to the amount of rain on the wind
shield.
A WARNING
- Wiper blades are crucial for safe driving!
Only when they are in good condition are
they able to clear the windows properly
to provide uncompromised visibility .
Worn or damaged wiper blades are a
safety hazard
i:::> page 69, Replacing
windshield wiper blades!
- The rain sensor is only designed to assist
and support the driver.
It remains entire
ly the driver's responsibility to monitor
outside weather conditions and to man
ually activate the wipers as soon as rain
or drizzle reduces visibility through the
windshield .
(D Note
In freezing or near freezing conditions:
- Always check that the wiper blades are
not frozen to the glass before you turn
the wipers on. Loosen a wiper blade
which is frozen in place before operating
the wipers to prevent damage to the
wiper blade or the wiper motor .
- Do not use the wipers to clear a frosted
window . Using the wipers as a conven
ient ice scraper will destroy the wiper
blades .
Clear vision 67
-Prior to using a car wash, the w indshield
wiper system must be switched off (lever
in position 0). This helps to prevent unin
tentional switching on and damage to
the windshield wiper system.
(1} Tips
- The windshield wipers are switched off
when the ignition is turned off. Activate
the windshield wipers after the ignition
is switched back on by moving the wind
shield wiper lever to any position .
- Worn or dirty windshield wiper blades
cause smearing which can affect the op
eration of the rain sensor . Check the con
dition of your windshield w iper blades
regularly.
- The rain sensor is part of the interval
wiping system. Turning off the ignition
will also deactivate the rain sensor. To re activate the sensor, switch off the inter
val wiping function, then switch it back
on again.
- Make sure the washer fluid reservoir in
the engine compartment is topped off
before going on a long trip. Look up
i:::> page 2 70 for checking and filling the
washer container.
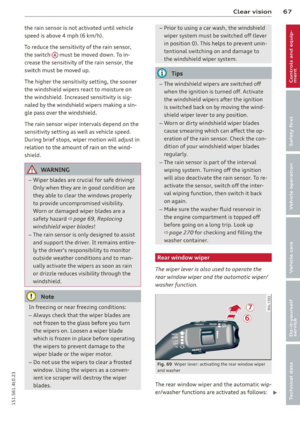
Rear window wiper
T he wip er lever is also used to operate the
rear window wiper and the automa tic wiper/
washer func tion.
Fig. 69 Wipe r leve r: activat ing the re ar w indow wiper
and was her
The rear w indow wiper and the automatic wip
er/washer functions a re activated as follows : ..,.
Page 70 of 350

68 Clear vis ion
Int ermittent w iping
.. Push the w iper lever forward to the first po
sition @~
fig. 69. The rear window wiper
will wipe the window approx. every four sec onds .
Automatic wiper /washer function
.. Push the w iper lever fo rward to the second
stop,
posi tion (!), and hold it there for as
l ong as you want the rear wiper/washer to
operate.
.. Re lease the lever aga in . the wiper wi ll keep
runn ing for approx. four seconds.
Switching interm ittent wip er action off
.. Pull the lever all the way back to the or iginal
position .
As soon as the reverse gea r is engaged and
the front wipe rs are turned on and operat ing
at the same time, the rear wipe r also turns on
automatically.
A WARNING
Wipe r blades are crucial for safe d riving!
On ly in good condition are they able to
clear the windows properly to provide un
restricted visibility. Worn or frayed wipe r
blades are a safety hazard! ¢
page 69,
Replacing windshield wiper blades
CD Note
In freezing or near freezing condit ions:
- Always check that the wiper blades are
not frozen to the glass before you turn
the wiper on. Loosen a wiper blade which i s frozen in p lace before operating the
wipe r to prevent damage to the wiper
blade o r the wiper motor .
- Do not use the wiper to clear a frosted
window . U si ng the w ipers as a conven
i ent ice sc raper will destroy the wiper
blades.
-
Headlight washer system
App lies to vehicles : wi th headlight washe r system
The headlight washer system cleans the
headlights.
.. Operate the w indshield wiper/washer sys
tem ¢
page 66, fig. 68 ® with the head
lights turned on by ho lding the lever for lon
ger than one second .
The washer jets extend forward out of the
front bumper driven by water pressu re to
spray the fro nt headlights w ith water .
You should inspect the headlights regu larly
(for example whe n refueling) and clean off
any solid di rt or i nsects from the le nses .
To ensure the system wor ks proper ly in w inter,
keep the washer jets free of snow and remove
any ice using a de-icing spray.
Service position
The wiper blades can only be changed in the
service position .
.. If the wiper blades are not frozen to the
windshie ld, bring the windshie ld wiper lever
to the basic pos ition @¢
page 66, fig. 68.
.. Select: !CAR I function button> Systems *
control button> Windshield wipers > Serv
ic e po sition .
Or
.. Select:
!CARI function button> Car sy stems*
cont ro l butto n > Servicing & checks > Wip er
s ervi ce po sition .
-On -changing the windshield wipe r blades
can o nly be done if you b ring the wiper arms
t o the servi ce position. Yo u will a lso avoid
pa int damage to the hood when wor king on
t he wipe rs in this position .
-Off -the w indshie ld w ipers are moved to
t heir initia l posi tion again .
CD Note
Never ma ne uver you r vehicle with the
front windshie ld w iper arms raised s ince
t hey will automatically be moved bac k t o
Page 71 of 350

M
"' 0 __,
"". rl I.O
"' rl
"' rl
their basic position above a speed of 3
mph (6 km/h) and can scratch the hood.
@ Tips
- You can also use the service pos ition, for
example, if you want to protect the
windshield from icing by using a cover.
- The service position automatica lly
switches to
Off when you operate the
windshield wiper lever, or speed exceeds
3 mph (6 km/h).
Cleaning windshield wiper blades
Clean the windshield wiper blades when they
begin to leave streaks . Use a soft cloth and
glass cleaner to clean the windsh ield wiper
b lades .
Front w ipe r
• Place the windshield wiper arms in the serv
ice position . Refer to
c::> page 68 .
• Lift the w iper arm away from the front win
dow .
Rear wiper
• Lift the w iper arm away from the rear w in
dow.
A WARNING
Dirty w indshield w iper blades can impa ir
your view. This can lead to acc idents .
Replacing windshield wiper blades
Wiper blades in good condition help keep the
windshield clear.
F ig. 70 Remov ing t he wiper b lades
-
Clear vi sion 69
Fig . 71 In stall ing wipe r blades
Removing a wiper blad e
• Bring the windshield wipers to the serv ice
position
c::> page 68 .
• Lift the wiper arm away from the w ind
shield.
• Squee ze the plast ic b racket on the wind
shie ld w iper arm together on both s ides @
c::> fig. 70.
• Turn the wiper b lade away from the wiper
arm.
• Lift the wiper b lade off in the d irection of
the arrow @.
Installing wip er blad e
• Place the new wipe r blade in the retaine r on
the wiper arm © c::>fig . 71.
• Swing the w iper blade in the direct ion of the
arrow @aga inst the wiper arm.
• Squeeze the corrugation on the wiper u ntil
you hear the bracket cl ick in the wiper arm.
• Place the wiper arm back against the w ind-
shield.
If the wiper blades begin to streak the wind
shield, this cou ld be caused by residue left on
the w indshield by automatic car washes.
Fill the windshield washer container with a
special solut ion avai lable at your authorized
Audi dealer to remove the residue.
A WARNING
--
For your safety, you shou ld rep lace the
wiper b lades once or twi ce a yea r. See your
a uthori zed Audi dealer fo r repla cement
b la d es.
~
Page 72 of 350

70 Clear vis ion
(D Note
- The w indshield wiper blades must on ly
b e replaced when in the service position
c:;, page 68! Otherwise, yo u risk damag
i ng t he pa int on the hood or the wind
sh ield wiper motor.
- To he lp prevent damage to the wiper sys
tem, a lways l oosen blades which are fro
zen to the windsh ield befo re operat ing
wipe rs.
- To he lp prevent damage to w iper blades,
do not use gasoline, ke rose ne, pa int
th inner, o r othe r so lvents on or nea r th e
wipe r blades .
- To he lp preven t damage to the wiper
arms or other components, do not at
temp t to mo ve the wipers by hand .
(j) Tips
Commercial hot waxes applied by a uto
mat ic car was hes affect the cleanab ility of
the w indshield .
Changing the rear wiper blade
Fig. 72 Rear w ind ow w ipe r Detac hing the rea r wipe r
b lad e
Removing the wiper blade
,.. Fold the w indshield w iper arm away from
t h e g lass .
,.. Grasp t he uppe r end o f the wiper arm with
on e hand and the metal clamp on the w iper
blade with the other
c:;, fig . 72.
,.. Hold the wiper arm in the d irect ion of the
arrow @and pull the wiper blade out of the
holder only in the direction of the arrow @.
Attaching the wiper blade
,.. Adj ust t he wiper b lade in the holder.
,.. Ho ld the upper end of the wipe r arm wi th
one hand .
,.. Press the wiper b lade into the ho lder with
your other hand.
.,. Fold the wiper arm back on to the wind
shie ld.
A WARNING
For safety reasons, the w indshie ld w iper
bl ades should b e re placed once or tw ice a
yea r.
Mirrors
Adjusting the exterior mirrors
Fig. 7 3 Fo rwar d sect io n of d river' s ar mr est: power mir
ro r con trols
Adju sting exterior mirrors
,.. Rotate the knob to the© position (driver 's
exterior m irror) or to the ® position (pas
senger 's exterior m irror)
¢fig. 73 .
.,. Rotate the knob and the mirror so that you
have a clea r view to the rear .
Heated mirrors
,.. Rotate the knob to pos ition @.
Folding both exterior mirrors flat*
.,. Rota te the knob to po sition @.
-
Depend ing on the outside tempera ture, t he
mir ro r su rfaces are heated until the ig nitio n is
swi tched off -even i f the knob is no lo nger in
pos ition @.
You are we ll-advised to fold the exter ior mir-
ro rs in when maneuver ing in tight spaces o r .,..