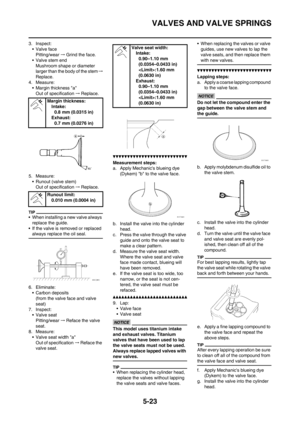
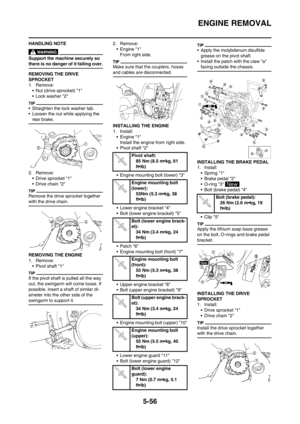
Page 65 of 230
3-6
ENGINE
ENGINE
REMOVING THE SEAT, FUEL TANK AND SIDE COVERS
Order Part name Q'ty Remarks
Turn the fuel cock to "OFF".
Disconnect the fuel hose.
1Seat 1
2 Air scoop (left and right) 2
3 Bolt (fuel tank) 2
4 Fuel tank 1
5 Left side cover 1 Open the air filter case cover.
6 Right side cover 1 Refer to removal section.
7 Headlight coupler 1
8 Headlight 1
Page 66 of 230
3-7
ENGINE
REMOVING THE SIDE COVER
1. Remove:
• Bolt (side cover)
• Right side cover "1"
Draw the side cover backward to re-
move it because its claw "a" is insert-
ed in the air filter case.
Page 67 of 230
3-8
ENGINE
REMOVING THE EXHAUST PIPE AND SILENCER
Order Part name Q'ty Remarks
Right side coverRefer to "REMOVING THE SEAT, FUEL
TANK AND SIDE COVERS" section.
1 Bolt (silencer clamp) 1 Only loosening.
2 Bolt [silencer (front)] 1
3 Bolt [silencer (rear)] 1
4 Collar 1
5 Silencer 1
6 Silencer clamp 1
7 Nut (exhaust pipe) 2
8 Exhaust pipe 1
9 Gasket 2
Page 68 of 230

3-9
ENGINE
CHECKING THE SILENCER AND
EXHAUST PIPE
1. Inspect:
• Gasket "1"
Damage→Replace.
INSTALLING THE SILENCER AND
EXHAUST PIPE
1. Install:
• Gasket
• Exhaust pipe "1"
• Nut (exhaust pipe) "2"
First, temporarily install both nuts,
then tighten either of these nuts to 13
Nm (1.3 m•kg, 9.4 ft•lb) and the other
to 20 Nm (2.0 m•kg, 14 ft•lb), and
then come back to the first one and
retighten it to 20 Nm (2.0 m•kg, 14
ft•lb).
2. Install:
• Silencer clamp "1"
• Gasket "2"
• Silencer "3"
• Washer "4"
• Bolt (silencer) "5"CHECKING THE COOLANT LEVEL
Do not remove the radiator cap
"1", drain bolt and hoses when the
engine and radiator are hot. Scald-
ing hot fluid and steam may be
blown out under pressure, which
could cause serious injury. When
the engine has cooled, place a
thick towel over the radiator cap,
slowly rotate the cap counter-
clockwise to the detent. This pro-
cedure allows any residual
pressure to escape. When the
hissing sound has stopped, press
down on the cap while turning
counterclockwise and remove it.
Hard water or salt water is harmful
to the engine parts. You may use
distilled water, if you can't get soft
water.
1. Place the machine on a level
place, and hold it in an upright po-
sition.
2. Remove:
• Radiator cap
3. Check:
• Coolant level "a"
Coolant level low→Add coolant.
1. RadiatorCHANGING THE COOLANT
Do not remove the radiator cap
when the engine is hot.
Take care so that coolant does not
splash on painted surfaces. If it
splashes, wash it away with water.
1. Place a container under the en-
gine.
2. Remove:
• Seat
• Left side cover
3. Remove the catch tank hose from
the catch tank and drain the tank
of its coolant.
4. Remove:
• Coolant drain bolt "1"
5. Remove:
• Radiator cap
Drain the coolant completely.
6. Clean:
• Cooling system
Thoroughly flush the cooling sys-
tem with clean tap water.
7. Install:
• Copper washer
• Coolant drain bolt
8. Fill:
•Radiator
• Engine
To specified level. Nut (exhaust pipe):
20 Nm (2.0 m•kg, 14
ft•lb)
Silencer clamp:
16 Nm (1.6 m•kg, 11
ft•lb)
Bolt (silencer):
30 Nm (3.0 m•kg, 22
ft•lb)
Coolant drain bolt:
10 Nm (1.0 m•kg, 7.2
ft•lb)
Recommended coolant:
High quality ethylene
glycol anti-freeze con-
taining anti-corrosion
for aluminum engine
Coolant "1" and water
(soft water) "2" mixing ra-
tio:
50%/50%
Coolant capacity:
0.99 L (0.87 Imp qt, 1.05
US qt)
Page 69 of 230

3-10
ENGINE
• Do not mix more than one type of
ethylene glycol antifreeze con-
taining corrosion inhibitors for
aluminum engine.
• Do not use water containing im-
purities or oil.
Handling notes of coolant:
The coolant is harmful so it should be
handled with special care.
• When coolant splashes to your
eye.
Thoroughly wash your eye with
water and see your doctor.
• When coolant splashes to your
clothes.
Quickly wash it away with water
and then with soap.
• When coolant is swallowed.
Quickly make him vomit and take
him to a doctor.
9. Install:
• Radiator cap
Start the engine and warm it up
for a several minutes.
10. Check:
• Coolant level
Coolant level low→Add coolant.
CHECKING THE RADIATOR CAP
1. Inspect:
• Seal (radiator cap) "1"
• Valve and valve seat "2"
Crack/damage→Replace.
Exist fur deposits "3" →Clean or
replace.CHECKING THE RADIATOR CAP
OPENING PRESSURE
1. Attach:
• Radiator cap tester "1" and adapt-
er "2"
Apply water on the radiator cap seal.
3. Radiator cap
2. Apply the specified pressure.
3. Inspect:
•Pressure
Impossible to maintain the speci-
fied pressure for 10 seconds→
Replace.
CHECKING THE COOLING
SYSTEM
1. Inspect:
• Coolant level
2. Attach:
• Radiator cap tester "1" and adapt-
er "2"
3. Apply the specified pressure.
• Do not apply pressure more than
specified pressure.
• Radiator should be filled fully.
4. Inspect:
• Pressure
Impossible to maintain the speci-
fied pressure for 10 seconds→
Repair.
•Radiator "1"
• Radiator hose joint "2"
Coolant leakage→Repair or re-
place.
• Radiator hose "3"
Swelling→Replace.
ADJUSTING THE CLUTCH LEVER
FREE PLAY
1. Check:
• Clutch lever free play "a"
Out of specification→Adjust.
2. Adjust:
• Clutch lever free play
Clutch lever free play adjustment
steps:
a. Loosen the locknuts "1".
b. Adjust the free play by changing
their tightening position.
c. Tighten the locknuts.
• Make minute adjustment on the le-
ver side using the adjuster "2".
• After adjustment, check proper op-
eration of clutch lever.
Radiator cap tester:
YU-24460-A/90890-
01325
Radiator cap tester
adapter:
YU-33984/90890-01352
Radiator cap opening
pressure:
95.0–125.0 kPa (0.95–
1.25 kg/cm
2, 13.8–18.1
psi)
Radiator cap tester:
YU-24460-A/90890-
01325
Radiator cap tester
adapter:
YU-33984/90890-01352
Standard pressure:
180 kPa (1.8 kg/cm
2,
25.6 psi)
Clutch lever free play "a"
:
8.0–13.0 mm (0.31–0.51
in)
Locknut:
7 Nm (0.7 m•kg, 5.1
ft•lb)
Page 70 of 230

3-11
ENGINE
ADJUSTING THE THROTTLE GRIP
FREE PLAY
1. Check:
• Throttle grip free play "a"
Out of specification→Adjust.
2. Adjust:
• Throttle grip free play
Adjustment steps:
a. Slide the adjuster cover.
b. Loosen the locknut "1".
c. Turn the adjuster "2" until the
specified free play is obtained.
d. Tighten the locknut.
Prior to adjusting throttle grip free
play, the engine idling speed should
be adjusted.
After adjusting the throttle grip
free play, turn the handlebar to the
right and to the left to ensure that
this does not cause the engine
idling speed to change.
LUBRICATING THE THROTTLE
1. Remove:
• Cover (throttle cable cap) "1"
• Cover (grip cap) "2"
• Throttle grip cap "3"
2. Apply:
• Lithium soap base grease
On the throttle cable end "a".
3. Install:
• Throttle grip cap
• Screw (throttle grip cap)
• Cover (grip cap)
• Cover (throttle cable cap)
ADJUSTING THE HOT STARTER
LEVER FREE PLAY
1. Check:
• Hot starter lever free play "a"
Out of specification→Adjust.
2. Adjust:
• Hot starter lever free play
Hot starter lever free play adjust-
ment steps:
a. Loosen the locknut "1".
b. Turn the adjuster "2" until free
play "a" is within the specified lim-
its.
c. Tighten the locknut.
After adjustment, check proper oper-
ation of hot starter.
CLEANING THE AIR FILTER
ELEMENT
Proper air filter maintenance is the
biggest key to preventing premature
engine wear and damage.
Never run the engine without the
air filter element in place; this
would allow dirt and dust to enter
the engine and cause rapid wear
and possible engine damage.
1. Open the air filter case cover "1"
Loosen the quick screw "2" and pull
on it to open the air filter case cover.
2. Unhook:
•Binder "1"
3. Remove:
• Air filter element "1"
• Air filter guide "2" Throttle grip free play
"a":
3.0–5.0 mm (0.12–0.20
in)
Locknut:
4 Nm (0.4 m•kg, 2.9
ft•lb)
Screw (throttle grip cap):
4 Nm (0.4 m•kg, 2.9
ft•lb)
Hot starter lever free play
"a":
3–6 mm (0.12–0.24 in)
Locknut:
4 Nm (0.4 m•kg, 2.9
ft•lb)
Page 71 of 230

3-12
ENGINE
4. Clean:
• Air filter element
Clean them with solvent.
After cleaning, remove the remaining
solvent by squeezing the element.
• Do not twist the element when
squeezing the element.
• Leaving too much of solvent in
the element may result in poor
starting.
5. Inspect:
• Air filter element
Damage→Replace.
6. Apply:
• Foam-air-filter oil or equivalent oil
to the element
• Squeeze out the excess oil. Ele-
ment should be wet but not drip-
ping.
• Wipe off the oil left on the element
surface using a clean dry cloth. (Ex-
cess oil in the element may ad-
versely affect engine starting.)
7. Install:
• Air filter guide "1"
• Align the projection "a" on filter
guide with the hole "b" in air filter el-
ement.
• Apply the lithium soap base grease
on the matching surface "c" on air
filter element.
8. Install:
• Air filter element "1"
Align the projection "a" on filter guide
with the hole "b" in air filter case.
9. Hook:
• Binder "1"
Hook the binder "1" so that it contacts
the filter guide projections "a".
CHECKING THE ENGINE OIL
LEVEL
1. Start the engine, warm it up for
several minutes, and then turn off
the engine and wait for five min-
utes.
2. Place the machine on a level
place and hold it up on upright po-
sition by placing the suitable
stand under the engine.
3. Inspect:
• Oil level
Oil should be up to the full level in
the check window "1".
Level check window is not full. →
Add 0.2 L (0.18 Imp qt, 0.21 US
qt) of oil.
• Engine oil also lubricates the
clutch and the wrong oil types or
additives could cause clutch
slippage. Therefore, do not add
any chemical additives or use en-
gine oils with a grade of CD or
higher and do not use oils la-
beled "ENERGY CONSERVING
II".
• Do not allow foreign materials to
enter the crankcase.
4. Install:
• Oil tank cap
5. Start the engine and let it warm up
for several minutes.
6. Turn off the engine and inspect
the oil level once again.
Wait a few minutes until the oil settles
before inspecting the oil level.
CHANGING THE ENGINE OIL
1. Start the engine and warm it up
for several minutes, and then turn
off the engine and wait for five
minute.
2. Place the machine on a level
place and hold it on upright posi-
tion by placing the suitable stand
under the engine.
3. Place a suitable container under
the engine.
4. Remove:
• Engine guard "1"
• Bolt (oil tank) "2"
• Washer "3"
• Oil filler cap "4"
• Oil tank drain bolt "5"
• Crankcase oil drain bolt "6"
• Oil filter element drain bolt "7"
Drain the crankcase and oil tank
of its oil.
Recommended brand:
YAMALUBE
Recommended engine
oil type
SAE 10W-30, SAE 10W-
40, SAE 10W-50, SAE
15W-40, SAE 20W-40 or
SAE 20W-50
Recommended engine
oil grade
API service SG type or
higher, JASO standard
MA
Page 72 of 230

3-13
ENGINE
5. Remove:
• Oil hose clamp "1"
• Bolt (oil hose)
• Oil hose "2"
• Oil strainer "3"
6. Inspect:
• Oil strainer
Clogged→Blow.
7. If the oil filter is to be replaced dur-
ing this oil change, remove the fol-
lowing parts and reinstall them.
Replacement steps:
a. Remove the oil filter element cov-
er "1" and oil filter element "2".
b. Check the O-rings "3", if cracked
or damaged, replace them with a
new one.
c. Install the oil filter element and oil
filter element cover.
8. Install:
• O-ring "1" • Oil strainer "2"
• Oil hose
• Bolt (oil hose)
• Oil hose clamp
9. Install:
• Copper washer
• Oil filter element drain bolt
• Crankcase oil drain bolt
• Oil tank drain bolt
• Engine guard
10. Fill:
• Engine oil11. Check:
• Oil leakage
12. Install:
• Oil filler cap
• Washer (oil tank)
• Bolt (oil tank)
13. Check:
• Engine oil level
CHECKING THE OIL PRESSURE
1. Check:
• Oil pressure
Checking steps:
a. Slightly loosen the oil pressure
check bolt "1".
b. Start the engine and keep it idling
until oil starts to seep from the oil
pressure check bolt. If no oil
comes out after one minute, turn
the engine off so it will not seize.
c. Check oil passages and oil pump
for damage or leakage.
d. Start the engine after solving the
problem(s) and recheck the oil
pressure.
e. Tighten the oil pressure check
bolt.
Oil filter element cover:
10 Nm (1.0 m•kg, 7.2
ft•lb)
Oil strainer:
9 Nm (0.9 m•kg, 6.5
ft•lb)
Bolt (oil hose):
8 Nm (0.8 m•kg, 5.8
ft•lb)
Oil hose clamp:
2 Nm (0.2 m•kg, 1.4
ft•lb)
Oil filter element drain
bolt:
10 Nm (1.0 m•kg, 7.2
ft•lb)
Crankcase oil drain bolt:
20 Nm (2.0 m•kg, 14
ft•lb)
Oil tank drain bolt:
18 Nm (1.8 m•kg, 13
ft•lb)
Engine guard:
7 Nm (0.7 m•kg, 5.1
ft•lb)
Oil quantity:
Periodic oil change:
1.10 L (0.97 Imp qt,
1.16 US qt)
With oil filter replace-
ment:
1.20 L (1.06 Imp qt,
1.27 US qt)
Total amount:
1.40 L (1.23 Imp qt,
1.48 US qt)
Bolt (oil tank):
7 Nm (0.7 m•kg, 5.1
ft•lb)
Oil pressure check bolt:
10 Nm (1.0 m•kg, 7.2
ft•lb)