Page 153 of 230

5-52
AC MAGNETO AND STARTER CLUTCH
• Pickup coil "3"
• Bolt (pickup coil) "4"
2. Install:
• Holder "1"
•Bolt "2"
Pass the pickup coil lead and
charging coil lead under the holder
while taking care not to allow these
leads to get caught with each oth-
er. Also take care to pass the leads
so that they do not become loose
at the bend of the holder "a" in or-
der to avoid their contacting the
starter clutch drive gear.
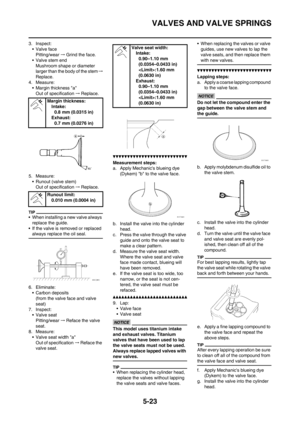
Apply the sealant to the grommet of
the AC magneto lead.
3. Install:
• Idle gear 2 "1"
• Dowel pin "2"
Apply the engine oil on the idle gear
2.
4. Install:
• Idle gear plate "1"
• Bolt (idle gear plate) "2"
5. Install:
• Washer "1"
•Bearing "2"
• Starter clutch drive gear "3"
• Washer "4"
Apply the engine oil on the washer,
bearing and starter clutch drive gear
inner circumference.
6. Install:
• Starter clutch "1"
To rotor "2".
• Install the starter clutch with its
plate side upward.
• While installing the starter clutch,
push in the projections "a" one by
one on the clutch circumference.
• Push in the starter clutch until it hits
the rotor.
7. Install:
• Starter clutch assembly cover "1"
To rotor "2".
Install the starter clutch assembly
cover by fitting its pawls "a" into the
groove "b" in the rotor.
8. Install:
• Woodruff key "1"
• Rotor "2"
• Clean the contact surfaces of the
tapered portions of the crankshaft
and rotor.
• When installing the woodruff key,
make sure that its flat surface "a" is
in parallel with the crankshaft center
line "b".
• When installing the rotor, align the
keyway "c" of the rotor with the
woodruff key.
9. Install:
• Washer (rotor)
• Nut (rotor) "1"
Use the sheave holder "2"
Tighten the rotor nut to 65 Nm (6.5
m•kg, 47 ft•lb), loosen and retighten
the rotor nut to 65 Nm (6.5 m•kg, 47
ft•lb).
Bolt (pickup coil):
10 Nm (1.0 m•kg, 7.2
ft•lb)
Bolt:
7 Nm (0.7 m•kg, 5.1
ft•lb)
Yamaha bond No. 1215:
90890-85505
(Three bond No.1215®)
E
Bolt (idle gear plate):
10 Nm (1.0 m•kg, 7.2
ft•lb)
E
Nut (rotor):
65 Nm (6.5 m•kg, 47
ft•lb)
Sheave holder:
YS-01880-A/90890-
01701
Page 154 of 230
![YAMAHA WR 250F 2014 Owners Manual 5-53
AC MAGNETO AND STARTER CLUTCH
10. Install:
• Dowel pin
• Gasket [crankcase cover (left)]
• Crankcase cover (left) "1"
• Bolt [crankcase cover (left)] "2"
• Bolt [crankcase cover (left) YAMAHA WR 250F 2014 Owners Manual 5-53
AC MAGNETO AND STARTER CLUTCH
10. Install:
• Dowel pin
• Gasket [crankcase cover (left)]
• Crankcase cover (left) "1"
• Bolt [crankcase cover (left)] "2"
• Bolt [crankcase cover (left)](/manual-img/51/52298/w960_52298-153.png)
5-53
AC MAGNETO AND STARTER CLUTCH
10. Install:
• Dowel pin
• Gasket [crankcase cover (left)]
• Crankcase cover (left) "1"
• Bolt [crankcase cover (left)] "2"
• Bolt [crankcase cover (left)] "3"
Tighten the bolts in stage, using a
crisscross pattern.
11. Install:
• Washer "1"
• Torque limiter "2"
• Washer "3"
Apply the engine oil to the shaft and
washers.
12. Install:
• O-ring
• Cover (idle gear 1) "1"
•Bolt "2"
• Apply the lithium soap base grease
on the O-ring.
• Install the cover (idle gear 1) with its
mark "a" facing upward.
13. Connect:
• AC magneto lead
Refer to "CABLE ROUTING DIA-
GRAM" section in the CHAPTER
2.
14. Install:
• Shift pedal "1"
• Bolt (shift pedal) "2"
When installing the shift pedal onto
the shift shaft, be sure that the center
of the shift pedal is about 1.4 mm
(0.06 in) "a" above the top of the foot-
rest.
Bolt [crankcase cover
(left)]:
10 Nm (1.0 m•kg, 7.2
ft•lb)
Bolt [crankcase cover
(left)]:
12 Nm (1.2 m•kg, 8.7
ft•lb)
Bolt:
10 Nm (1.0 m•kg, 7.2
ft•lb)
E
Bolt (shift pedal):
12 Nm (1.2 m•kg, 8.7
ft•lb)
Page 155 of 230
5-54
ENGINE REMOVAL
ENGINE REMOVAL
REMOVING THE ENGINE
Order Part name Q'ty Remarks
Hold the machine by placing the suitable stand
under the frame.Refer to "HANDLING NOTE".
Drain the engine oil.Refer to "CHANGING THE ENGINE OIL"
section in the CHAPTER 3.
Seat and fuel tank Refer to "REMOVING THE SEAT, FUEL
TANK AND SIDE COVERS" section in the
CHAPTER 3.
Carburetor Refer to "CARBURETOR" section.
Exhaust pipe and silencer Refer to "REMOVING THE EXHAUST PIPE
AND SILENCER" section in the CHAPTER 3.
Air cut-off valve assembly Refer to "AIR INDUCTION SYSTEM" section.
Clutch cable Disconnect at the engine side.
Radiator Refer to "RADIATOR" section.
Shift pedalRefer to "AC MAGNETO AND STARTER
CLUTCH" section.
Cylinder head breather hose Refer to "CAMSHAFTS" section.
Oil hose and oil tank breather hose Refer to "OIL PUMP" section.
Ignition coil
Page 156 of 230
5-55
ENGINE REMOVAL
Disconnect the AC magneto lead.
Negative battery lead Disconnect at the engine side.
1 Engine guard 1
2 Neutral switch 1
3 Drive chain sprocket cover 1
4 Nut (drive sprocket) 1 Refer to removal section.
5 Lock washer 1 Refer to removal section.
6 Drive sprocket 1 Refer to removal section.
7Clip 1
8 Bolt (brake pedal) 1
9 Brake pedal 1
10 Upper engine bracket 2
11 Lower engine bracket 2
12 Engine mounting bolt 3
13 Pivot shaft 1 Refer to removal section.
14 Engine 1 Refer to removal section. Order Part name Q'ty Remarks
Page 157 of 230

5-56
ENGINE REMOVAL
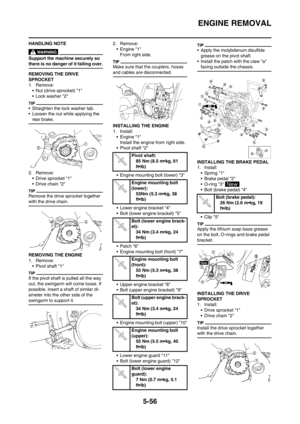
HANDLING NOTE
Support the machine securely so
there is no danger of it falling over.
REMOVING THE DRIVE
SPROCKET
1. Remove:
• Nut (drive sprocket) "1"
• Lock washer "2"
• Straighten the lock washer tab.
• Loosen the nut while applying the
rear brake.
2. Remove:
• Drive sprocket "1"
• Drive chain "2"
Remove the drive sprocket together
with the drive chain.
REMOVING THE ENGINE
1. Remove:
• Pivot shaft "1"
If the pivot shaft is pulled all the way
out, the swingarm will come loose. If
possible, insert a shaft of similar di-
ameter into the other side of the
swingarm to support it.
2. Remove:
• Engine "1"
From right side.
Make sure that the couplers, hoses
and cables are disconnected.
INSTALLING THE ENGINE
1. Install:
• Engine "1"
Install the engine from right side.
• Pivot shaft "2"
• Engine mounting bolt (lower) "3"
• Lower engine bracket "4"
• Bolt (lower engine bracket) "5"
• Patch "6"
• Engine mounting bolt (front) "7"
• Upper engine bracket "8"
• Bolt (upper engine bracket) "9"
• Engine mounting bolt (upper) "10"
• Lower engine guard "11"
• Bolt (lower engine guard) "12"
• Apply the molybdenum disulfide
grease on the pivot shaft.
• Install the patch with the claw "a"
facing outside the chassis.
INSTALLING THE BRAKE PEDAL
1. Install:
• Spring "1"
• Brake pedal "2"
• O-ring "3"
• Bolt (brake pedal) "4"
• Clip "5"
Apply the lithium soap base grease
on the bolt, O-rings and brake pedal
bracket.
INSTALLING THE DRIVE
SPROCKET
1. Install:
• Drive sprocket "1"
• Drive chain "2"
Install the drive sprocket together
with the drive chain.
Pivot shaft:
85 Nm (8.5 m•kg, 61
ft•lb)
Engine mounting bolt
(lower):
53Nm (5.3 m•kg, 38
ft•lb)
Bolt (lower engine brack-
et):
34 Nm (3.4 m•kg, 24
ft•lb)
Engine mounting bolt
(front):
53 Nm (5.3 m•kg, 38
ft•lb)
Bolt (upper engine brack-
et):
34 Nm (3.4 m•kg, 24
ft•lb)
Engine mounting bolt
(upper):
55 Nm (5.5 m•kg, 40
ft•lb)
Bolt (lower engine
guard):
7 Nm (0.7 m•kg, 5.1
ft•lb)
Bolt (brake pedal):
26 Nm (2.6 m•kg, 19
ft•lb)
Page 158 of 230
5-57
ENGINE REMOVAL
2. Install:
• Lock washer "1"
• Nut (drive sprocket) "2"
Tighten the nut while applying the
rear brake.
3. Bend the lock washer tab to lock
the nut.
4. Install:
• Drive chain sprocket guide "1"
• Drive chain sprocket cover "2"
• Bolt (drive chain sprocket cover)
"3"
INSTALLING THE NEUTRAL
SWITCH
1. Install:
• Spring "1"
•Pin "2"
• O-ring "3"
• Neutral switch "4"
• Screw (neutral switch) "5"
Apply the lithium soap base grease
on the O-ring.
Nut (drive sprocket):
75 Nm (7.5 m•kg, 54
ft•lb)
Bolt (drive chain sprock-
et cover):
7 Nm (0.7 m•kg, 5.1
ft•lb)
Screw (neutral switch):
4 Nm (0.4 m•kg, 2.9
ft•lb)
Page 159 of 230
5-58
CRANKCASE AND CRANKSHAFT
REMOVING THE CRANKSHAFT
Order Part name Q'ty Remarks
Engie Refer to "ENGINE REMOVAL" section.
Piston Refer to "CYLINDER AND PISTON" section.
Kick shaft assemblyRefer to "KICK SHAFT AND SHIFT SHAFT"
section.
SegmentRefer to "KICK SHAFT AND SHIFT SHAFT"
section.
StatorRefer to "AC MAGNETO AND STARTER
CLUTCH" section.
Balancer shaft Refer to "BALANCER" section.
1 Timing chain guide (intake side) 1
2 Timing chain 1
3 Oil delivery pipe 2 1
4 Bolt [L = 45 mm (1.77 in)] 5 Refer to removal section.
5 Bolt [L = 55 mm (2.17 in)] 1 Refer to removal section.
6 Bolt [L = 70 mm (2.76 in)] 3 Refer to removal section.
7 Hose guide 1 Refer to removal section.
8 Clutch cable holder 1 Refer to removal section.
Page 160 of 230
5-59
CRANKCASE AND CRANKSHAFT
9 Right crankcase 1 Refer to removal section.
10 Left crankcase 1 Refer to removal section.
11 Oil strainer 1
12 Crankshaft 1 Refer to removal section. Order Part name Q'ty Remarks