Page 113 of 152
 Wiper Blades and Washer Jets
MAINTENANCE7.15
Wiper Blades and Washer JetsChecking and Replacing Wiper
Blades
Periodically check and clean the edge of the
wiper blade and check the rubber for cracks,")
Wiper Blades and Washer Jets
MAINTENANCE7.15
Wiper Blades and Washer JetsChecking and Replacing Wiper
Blades
Periodically check and clean the edge of the
wiper blade and check the rubber for cracks,
splits and roughness. If damaged, replace the
blade immediately to prevent damage to the
glass.
Contaminants on the windshield, or on the
wiper blades, can reduce the effectiveness of
the wiper blades. Contaminants include ice,
wax spray from car washes, washer fluid with
bug and/or water repellent, bird droppings,
tree sap, and other organic substances.
Follow these guidelines for cleaning:
•Clean the windshield using non-abrasive
glass cleaner.
•Wipe the blades clean using isopropyl
(rubbing) alcohol or washer fluid.
If the wipers remain ineffective after cleaning,
replace the wiper blades.
For optimum performance, wiper blades
should be replaced at least once a year.
To replace wiper blades:
1.Lift the wiper arm away from the
windshield.
2.Press the locking tab while sliding the blade
down the arm.
3.To install the new blade, align the new blade
on the wiper arm and slide it toward the
hooked end of the arm until it locks into
place.
4.Place the wiper arms with the blades
against the windshield.
If the problem persists with new blades, clean
the windshield and wiper blades using a soft
cloth or sponge and warm water with non-detergent soap. Then, rinse the windshield
and wiper blades with clean water. The
windshield is clean when water beads do not
form.
CAUTION: Only use cleaning products
approved for use on automotive glass
and rubber. Inappropriate products can
cause damage or smears, and create
glare on the windshield.
CAUTION: Only install replacement
blades that are identical to the original
blades. Using inappropriate blades can
damage the wiper system and affect the
operation of the rain sensor.
Cleaning Washer Jets
The position of the windshield washers is set at
the factory and should never need adjusting.
If a windshield washer becomes blocked, use a
thin strand of wire to clear any blockages from
the nozzle.
WARNING: Do not operate the washers
while cleaning Model S. Windshield
washer fluid can irritate eyes and skin.
Read and observe the washer fluid
manufacturer’s instructions.
book.book Page 15 Friday, July 19, 2013 12:53 PM
Page 114 of 152
 Fluid ReservoirsFluid Reservoirs
7.16MODEL S OWNERS MANUAL
Fluid ReservoirsRemoving the Maintenance Panel
To access fuses and check fluid levels, remove
the maintenance panel:
1.Pull the rear edge of")
Fluid ReservoirsFluid Reservoirs
7.16MODEL S OWNERS MANUAL
Fluid ReservoirsRemoving the Maintenance Panel
To access fuses and check fluid levels, remove
the maintenance panel:
1.Pull the rear edge of the maintenance panel
upward to release the five clips that hold
the panel in place.
2.Maneuver the maintenance panel toward
the windshield to remove.
CAUTION: The maintenance panel
protects the front trunk from water.
When re-attaching, make sure it is fully
seated.
Checking Battery Coolant
If the quantity of fluid in the cooling system
drops below the recommended level, the
instrument panel displays a warning message.
Stop Model S as soon as safety permits and call
Roadside Assistance to have Model S
transported to Tesla.
Fluid Level Check
Tesla checks the Battery coolant level at the
regularly scheduled maintenance intervals. To
check it yourself, park Model S on level ground.
When Model S is cool, remove the maintenance
panel (see page 7.16).
Check the fluid level visually by looking at the
outside marks on the side of the reservoir. DO
NOT REMOVE THE FILLER CAP AND DO NOT
ADD FLUID. Doing so can result in damage not
covered by the warranty.
The fluid level should be between the MIN and
the MAX marks. If you notice that the fluid level
has dropped significantly, contact Tesla before
using Model S.
To p p i n g U p t h e B a t t e r y C o o l a n t
Under no circumstances should you add
coolant. If the instrument panel warns you that
the fluid level is low, contact Tesla immediately.
To maximize the performance and life of the
Battery, the cooling system uses a specific type
of G-48 ethylene-glycol coolant (HOAT).
Contact Tesla for more specific information
about the coolant.
book.book Page 16 Friday, July 19, 2013 12:53 PM
Page 115 of 152
 Fluid Reservoirs
MAINTENANCE7.17
Checking Brake Fluid
WARNING: Contact Tesla immediately if
you notice increased movement of the
brake pedal or a significant loss of brake fluid.
Driving under thes")
Fluid Reservoirs
MAINTENANCE7.17
Checking Brake Fluid
WARNING: Contact Tesla immediately if
you notice increased movement of the
brake pedal or a significant loss of brake fluid.
Driving under these conditions can result in
extended stopping distances or complete
brake failure.
The Brake indicator on the instrument
panel alerts you if the quantity of fluid in
the brake reservoir drops below the
recommended level. If it displays while driving,
stop as soon as safety permits by gently
applying the brakes. Do not continue driving.
Contact Tesla immediately for assistance.
Fluid Level Check
Tesla checks the brake fluid level at the
regularly scheduled maintenance intervals. To
check it yourself, park Model S on level ground.
When Model S is cool, remove the maintenance
panel (see page 7.16).
Check the fluid level visually by looking at the
outside marks on the side of the reservoir
without removing the filler cap.
The brake fluid level should be between the MIN
and the MAX marks.
NOTE: The brake fluid level drops slightly
during normal use, as a result of brake pad
wear, but should not be allowed to drop below
the MIN mark.
To p p i n g U p t h e B r a k e F l u i d
Do not top up your brake fluid. Tesla service
does this when you bring Model S in for regular
servicing. The following instructions are
provided for information purposes and future
reference only:
1.Clean the filler cap before removing to
prevent dirt from entering the reservoir.
2.Unscrew the cap and remove.
3.Top up the reservoir to the MAX mark using
brake fluid meeting DOT3 or DOT4
specifications.
4.Replace the filler cap.
WARNING: Only use new fluid from a
sealed air-tight container. Never use
previously used fluid or fluid from a previously
opened container—fluid absorbs moisture
which decreases braking performance.
WARNING: Brake fluid is highly toxic.
Keep containers sealed and out of the
reach of children. In the event of accidental
consumption, seek medical attention
immediately.
CAUTION: Brake fluid damages painted
surfaces. Immediately soak up any spills
with an absorbent cloth and wash the
area with a mixture of car shampoo and
water.
book.book Page 17 Friday, July 19, 2013 12:53 PM
Page 116 of 152
 Fluid ReservoirsFluid Reservoirs
7.18MODEL S OWNERS MANUAL
Topping Up Washer Fluid
Model S has only one reservoir into which you
can add fluid. This is the washer fluid reservoir
under the front tru")
Fluid ReservoirsFluid Reservoirs
7.18MODEL S OWNERS MANUAL
Topping Up Washer Fluid
Model S has only one reservoir into which you
can add fluid. This is the washer fluid reservoir
under the front trunk. When the level is low, a
message displays on the instrument panel. Fill
until the fluid level is visible just below the filler
neck.
Do not use formulated washer fluids that
contain water repellent or bug wash. These
fluids can cause streaking, smearing, and
squeaking, or other noises.
Operate the washers periodically to check that
the nozzles are clear and properly directed.
To top up washer fluid:
1.Clean the filler cap before opening to
prevent dirt from entering the reservoir.
2.Open the filler cap.
3.Fill the reservoir until the fluid is visible just
below the filler neck.
4.Replace the filler cap.
NOTE: Some national or local regulations
restrict the use of Volatile Organic Compounds
(VOCs). VOCs are commonly used as antifreeze
in washer fluid. Use a washer fluid with limited
VOC content only if it provides adequate freeze
resistance for all climates in which you drive
Model S.CAUTION: Under no circumstances do
you need to inspect or top up other fluid
reservoirs. Two additional fluid reservoirs
are located next to the washer fluid, but
underneath the maintenance panel. In the
unlikely event that you see a message on the
instrument panel that one of these fluid levels is
low, stop Model S as soon as safety permits,
and contact Tesla.
CAUTION: Do not spill washer fluid on
body panels. Doing so can cause
damage. Wipe up spills immediately and
wash the affected area with water.
WARNING: In temperatures below 4°C,
use a washer fluid with antifreeze. In cold
weather, using a washer fluid without antifreeze
can impair visibility through the windshield.
book.book Page 18 Friday, July 19, 2013 12:53 PM
Page 117 of 152
 Fuses
MAINTENANCE7.19
FusesFuse Box Locations
Three fuse boxes are located under the
maintenance panel, located in the front trunk.
For instructions on how to remove this panel,
see page 7.16.
1.Fu")
Fuses
MAINTENANCE7.19
FusesFuse Box Locations
Three fuse boxes are located under the
maintenance panel, located in the front trunk.
For instructions on how to remove this panel,
see page 7.16.
1.Fuse box 1 (see page 7.20). DO NOT replace
these fuses. If one of them fails, contact
Te s l a .
2.Fuse box 2. (see page 7.21).
3.Fuse box 3 (see page 7.22).
If Model S is equipped with the cold weather
option, an additional fuse box (4) is located
under the driver’s side trim panel.
Replacing a Fuse
To remove a fuse box cover, press the plastic
tabs on either side.
Identify the fuse protecting the affected circuit.
Refer to the label on the inside of the fuse box
cover or the fuse tables provided in this section.
Pull the fuse to remove it. A break in the wire
inside the fuse indicates that the fuse has
blown.
NOTE: Do not replace fuses in fuse boxes
1 and 4, and do not remove or replace any
relays. If one of these fails, contact Tesla.
WARNING: Always manually power
Model S off before replacing a fuse (see
page 4.6).
CAUTION: Only use Tesla approved
replacement fuses of the same rating and
specification. Using an incorrect fuse can
damage the electrical system and result
in a fire.
CAUTION: If a replacement fuse blows
after installation, contact Tesla to have
the electrical system checked.
book.book Page 19 Friday, July 19, 2013 12:53 PM
Page 118 of 152
 FusesFuses
7.20MODEL S OWNERS MANUAL
Fuse Box 1
Access to fuse box 1 requires removal of components that must be performed by a Tesla service
technician. The following fuse list is provided only to a")
FusesFuses
7.20MODEL S OWNERS MANUAL
Fuse Box 1
Access to fuse box 1 requires removal of components that must be performed by a Tesla service
technician. The following fuse list is provided only to assist you in determining if a fuse in this box
needs to be replaced. Contact Tesla Service if one of these fuses needs to be replaced.
Fuse RatingCircuit Protected
NOTE: THESE FUSES MUST BE REPLACED BY A TESLA SERVICE TECHNICIAN
1 5 A Accessory sensor, radio, USB hub
2 5 A Headlight leveling system (EU/China Coil Suspension vehicles only)
3 5 A Vanity lights, rear view mirror
4 30 A Outboard rear seat heaters (cold weather option)
5 15 A Seat heater (driver’s seat)
6 20 A Base audio amplifier
7 15 A Seat heater (front passenger seat)
820 APremium audio amplifier
9 25 A Sunroof
10 5 A Passive safety restraints
11 5 A Steering column controls
12 5 A Sensor for Drive mode and Yaw Rate (Stability/Traction Control)
13 15 A Wiper park
14 5 A Drive inverter
15 20 A Electric parking brake
16 5 A Parking/blind spot sensors
17 20 A Electric parking brake
18 5 A Not used
19 5 A In-vehicle HVAC sensor
20 5 A Cabin air heater logic
21 15 A Battery coolant pump 1
22 5 A Inlet actuators
23 15 A Powertrain coolant pump
24 5 A Cabin climate control
25 15 A Battery coolant pump 2
26 - Not used
27 10 A Thermal controller
book.book Page 20 Friday, July 19, 2013 12:53 PM
Page 119 of 152
 Fuses
MAINTENANCE7.21
Fuse Box 2
Fuse RatingCircuit Protected
28 25 A Window lift motor (right rear)
29 10 A Contactor power
30 25 A Window lift motor (right front)
31 - Not used
32 10 A Door controls")
Fuses
MAINTENANCE7.21
Fuse Box 2
Fuse RatingCircuit Protected
28 25 A Window lift motor (right rear)
29 10 A Contactor power
30 25 A Window lift motor (right front)
31 - Not used
32 10 A Door controls (right side)
33 - Not used
34 30 A Rear center seat heaters, washer/wiper de-ice (cold weather option)
35 15 A 12V power socket
36 25 A Air suspension
37 25 A Window lift motor (left rear)
38 5 A Driver's seat memory
39 25 A Window lift motor (left front)
40 5 A Rear door handles
41 10 A Door controls (left side)
42 30 A Powered liftgate
43 5 A Perm. power sensor, brake switch
44 5 A Charger (charge port)
45 20 A Passive entry (horns)
46 30 A Body controls (group 2)
47 5 A Glove box light
48 10 A Body controls (group 1)
49 5 A Instrument panel
50 5 A Siren, intrusion/tilt sensor (Europe only)
51 20 A Touchscreen
52 30 A Heated rear window
53 5 A Battery management system
54 - Not used
55 30 A Left front electric seat
56 30 A Right front electric seat
57 25 A Cabin fan
58 - Not used
59 - Not used
book.book Page 21 Friday, July 19, 2013 12:53 PM
Page 120 of 152
 FusesFuses
7.22MODEL S OWNERS MANUAL
Fuse Box 3
Fuse Box 4
If Model S is equipped with the cold weather option, an additional fuse box (4) is located under the
driver’s side trim panel. Access to f")
FusesFuses
7.22MODEL S OWNERS MANUAL
Fuse Box 3
Fuse Box 4
If Model S is equipped with the cold weather option, an additional fuse box (4) is located under the
driver’s side trim panel. Access to fuse box 4 requires removal of several components that must be
performed by a Tesla service technician. The following fuse list is provided only to assist you in
determining if a fuse in this box needs to be replaced. Contact Tesla Service if one of these fuses
needs to be replaced.
Fuse RatingCircuit Protected
71 40 A Condenser fan (left)
72 40 A Condenser fan (right)
73 40 A Vacuum pump
74 20 A 12V drive rail (cabin)
75 5 A Power steering
76 5 A ABS
77 25 A Stability control
78 20 A Headlights - high/low beam
79 30 A Light - exterior/interior
Fuse RatingCircuit Protected
NOTE: THESE FUSES MUST BE REPLACED BY A TESLA SERVICE TECHNICIAN
101 15 A Left rear seat heater
102 15 A Right rear seat heater
103 15 A Middle rear seat heater control
104 15 A Middle rear seat heater
105 15 A Wiper de-icer
106 - Not used
book.book Page 22 Friday, July 19, 2013 12:53 PM
 1
1 2
2 3
3 4
4 5
5 6
6 7
7 8
8 9
9 10
10 11
11 12
12 13
13 14
14 15
15 16
16 17
17 18
18 19
19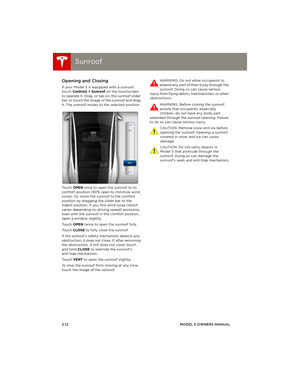 20
20 21
21 22
22 23
23 24
24 25
25 26
26 27
27 28
28 29
29 30
30 31
31 32
32 33
33 34
34 35
35 36
36 37
37 38
38 39
39 40
40 41
41 42
42 43
43 44
44 45
45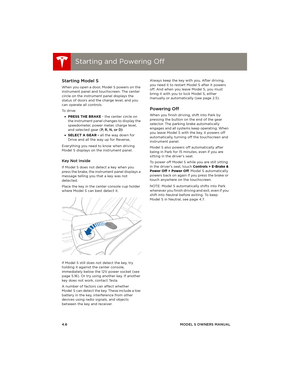 46
46 47
47 48
48 49
49 50
50 51
51 52
52 53
53 54
54 55
55 56
56 57
57 58
58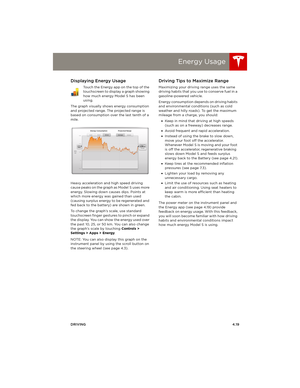 59
59 60
60 61
61 62
62 63
63 64
64 65
65 66
66 67
67 68
68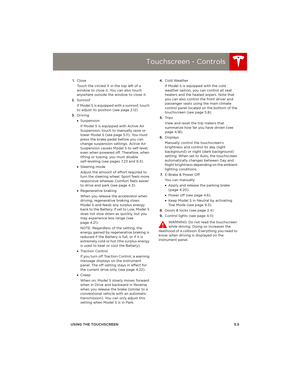 69
69 70
70 71
71 72
72 73
73 74
74 75
75 76
76 77
77 78
78 79
79 80
80 81
81 82
82 83
83 84
84 85
85 86
86 87
87 88
88 89
89 90
90 91
91 92
92 93
93 94
94 95
95 96
96 97
97 98
98 99
99 100
100 101
101 102
102 103
103 104
104 105
105 106
106 107
107 108
108 109
109 110
110 111
111 112
112 113
113 114
114 115
115 116
116 117
117 118
118 119
119 120
120 121
121 122
122 123
123 124
124 125
125 126
126 127
127 128
128 129
129 130
130 131
131 132
132 133
133 134
134 135
135 136
136 137
137 138
138 139
139 140
140 141
141 142
142 143
143 144
144 145
145 146
146 147
147 148
148 149
149 150
150 151
151