2014 SUBARU TRIBECA display
[x] Cancel search: displayPage 218 of 426
waveband will be displayed.
*2: Only when a CD is in the player.
*3: Only vehicle equipped with RSE (Rear SeatEntertainment)
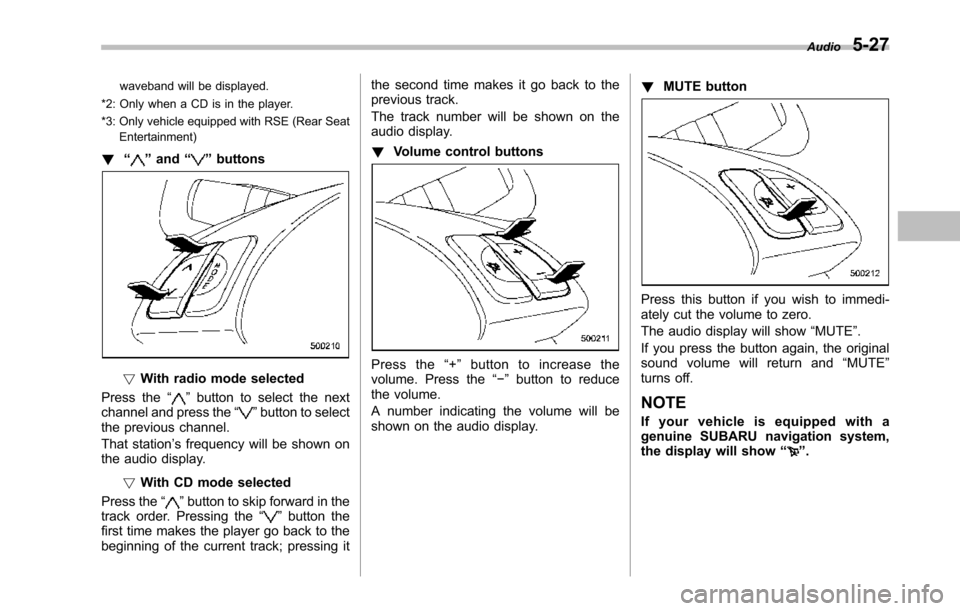
!“”and“”buttons
!With radio mode selected
Press the“”button to select the nextchannel and press the“”button to selectthe previous channel.
That station’s frequency will be shown onthe audiodisplay.
!With CD mode selected
Press the“”button to skip forward in thetrack order. Pressing the“”button thefirst time makes the player go back to thebeginning of the current track; pressing it
the second time makes it go back to theprevious track.
The track number will be shown on theaudio display.
!Volume control buttons
Press the“+”button to increase thevolume. Press the“!”button to reducethe volume.
A number indicating the volume will beshown on the audio display.
!MUTE button
Press this button if you wish to immedi-ately cut the volume to zero.
The audio display will show“MUTE”.
If you press the button again, the originalsound volume will return and“MUTE”turns off.
NOTE
If your vehicle is equipped with agenuine SUBARU navigation system,the display will show“”.
Audio5-27
Page 220 of 426
Rear Seat Entertainment
(RSE) system operation (if
equipped)
If your vehicle is equipped with the RearSeat Entertainment (RSE) system, youcan listen to the audio via the vehiclespeakers. Push the“RSE AUX”button toplay a DVD using the Rear Seat Entertain-ment system.
For detailed operating procedures, refer tothe Owner’s Manual supplement for theRear Seat Entertainment (RSE) system.
NOTE
.To watch a DVD in the front seatsusing the monitor of the navigationsystem, park the vehicle in a safelocation and apply the parking brake.Images of the DVD will not be displayedon the front monitor unless the parkingbrake is applied..The harman/kardon®audio systemis a stereo system with 2 channels. If aharman/kardon®audio system isequipped, the Rear Seat Entertainment(RSE) system may not generate asatisfying realistic sound when playing5.1 channel audio sources.
Precautions to observe when
handling a compact disc
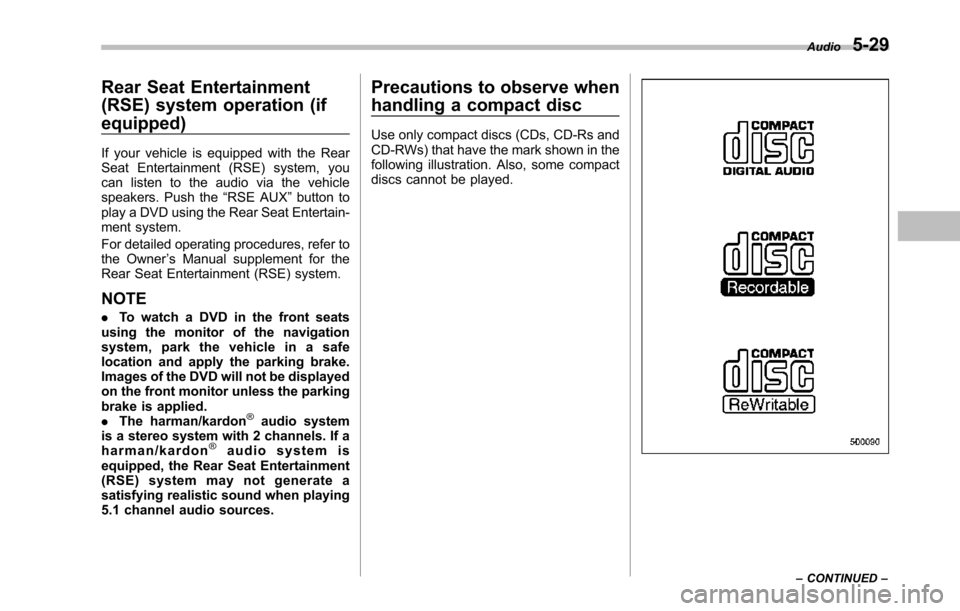
Use only compact discs (CDs, CD-Rs andCD-RWs) that have the mark shown in thefollowing illustration. Also, some compactdiscs cannot be played.
Audio5-29
–CONTINUED–
Page 242 of 426
opener by pressing the programmedHomeLink®button.
&Programming other devices
To program other devices such as doorlocks, home lighting and security systems,contact HomeLink at www.homelink.comor call 1-800-355-3515.
&Operating the HomeLink®
Wireless Control System
Once programmed, the HomeLink®Wire-less Control System can be used toremote-controlthe devices to which itsbuttons are programmed. To activate adevice, simply press the appropriate but-ton.The indicator light illuminates, indicat-ing that the signal is being transmitted.
&Erasing HomeLink®button
memory
NOTE
.Performing this procedure erasesthe memory of all the preprogrammedbuttons simultaneously. The memoryof individual buttons cannot be erased..It is recommended that upon thesale of the vehicle, the memory of allprogrammed HomeLink®buttons beerased for security purposes.
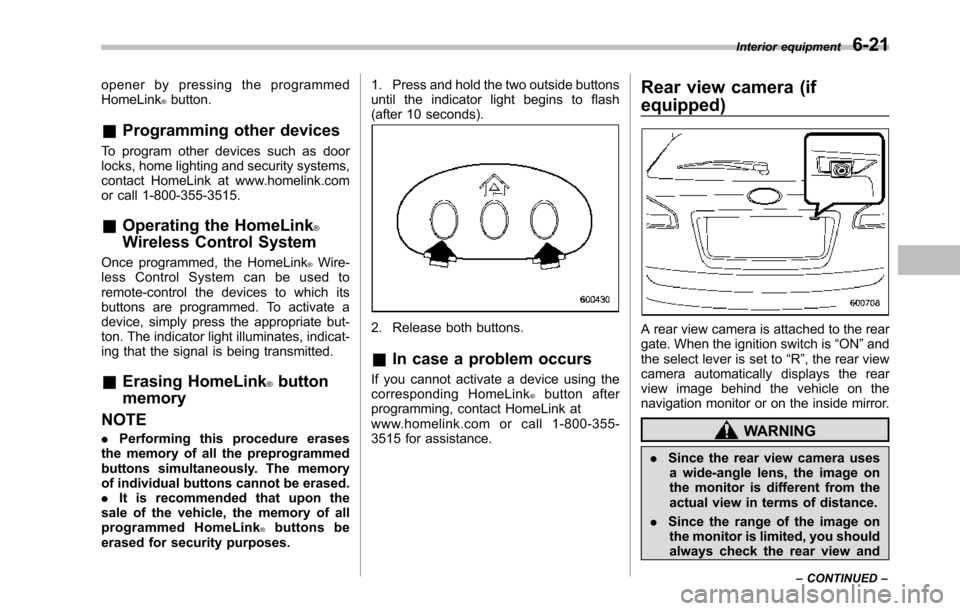
1. Press and hold the two outside buttonsuntil the indicator light begins to flash(after 10 seconds).
2. Release both buttons.
&In case a problem occurs
If you cannot activate a device using thecorresponding HomeLink®button afterprogramming, contact HomeLink atwww.homelink.com or call 1-800-355-3515 for assistance.
Rear view camera (if
equipped)
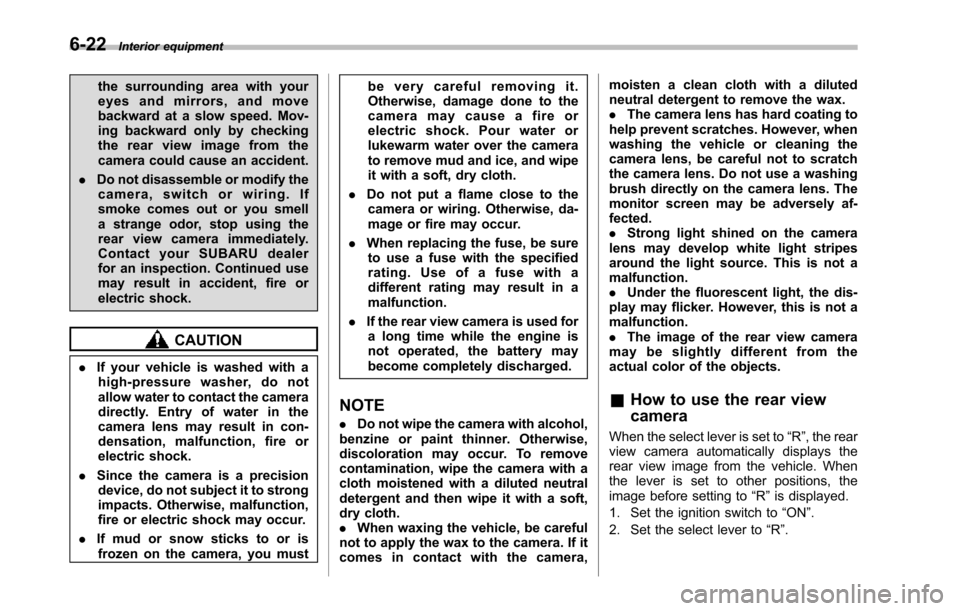
A rear view camera is attached to the reargate. When the ignition switch is“ON”andthe select lever is set to“R”, the rear viewcamera automatically displays the rearview image behind the vehicle on thenavigation monitor or on the inside mirror.
WARNING
.Since the rear view camera usesa wide-angle lens, the image onthe monitor is different from theactual view in terms of distance.
.Since the range of the image onthe monitor is limited, you shouldalways check the rear view and
Interior equipment6-21
–CONTINUED–
Page 243 of 426
6-22Interior equipment
the surrounding area with youreyes and mirrors, and movebackward at a slow speed. Mov-ing backward only by checkingthe rear view image from thecamera could cause an accident.
.Do not disassemble or modify thecamera, switch or wiring. Ifsmoke comes out or you smella strange odor, stop using therear view camera immediately.Contact your SUBARU dealerfor an inspection. Continued usemay result in accident, fire orelectric shock.
CAUTION
.If your vehicle is washed with ahigh-pressure washer, do notallow water to contact the cameradirectly. Entry of water in thecamera lens may result in con-densation, malfunction, fire orelectric shock.
.Since the camera is a precisiondevice, do not subject it to strongimpacts. Otherwise, malfunction,fire or electric shock may occur.
.If mud or snow sticks to or isfrozen on the camera, you must
be very careful removing it.Otherwise, damage done to thecamera may cause a fire orelectric shock. Pour water orlukewarm water over the camerato remove mud and ice, and wipeit with a soft, dry cloth.
.Do not put a flame close to thecamera or wiring. Otherwise, da-mage or fire may occur.
.When replacing the fuse, be sureto use a fuse with the specifiedrating. Use of a fuse with adifferent rating may result in amalfunction.
.If the rear view camera is used fora long time while the engine isnot operated, the battery maybecome completely discharged.
NOTE
.Do not wipe the camera with alcohol,benzine or paint thinner. Otherwise,discoloration may occur. To removecontamination, wipe the camera with acloth moistened with a diluted neutraldetergent and then wipe it with a soft,dry cloth..When waxing the vehicle, be carefulnot to apply the wax to the camera. If itcomes in contact with the camera,
moisten a clean cloth with a dilutedneutral detergent to remove the wax..The camera lens has hard coating tohelp prevent scratches. However, whenwashing the vehicle or cleaning thecamera lens, be careful not to scratchthe camera lens. Do not use a washingbrush directly on the camera lens. Themonitorscreen may be adversely af-fected..Strong light shined on the cameralens may develop white light stripesaround the light source. This is not amalfunction..Under the fluorescent light, the dis-play may flicker. However, this is not amalfunction..The image of the rear view cameramay be slightly different from theactual color of the objects.
&How to use the rear view
camera
When the select lever is set to“R”, the rearview camera automatically displays therear view image from the vehicle. Whenthe lever is set to other positions, theimage before setting to“R”is displayed.
1. Set the ignition switch to“ON”.
2. Set the select lever to“R”.
Page 244 of 426
NOTE
.The image of the rear view camerahas priority over other screen displays..The image of the rear view camera ishorizontally reversed as is the casewith the vehicle rearview mirror or theside view mirror..It may be difficult to see the image ofthe rearview camera in the followingcases. This is not a malfunction of thecamera.–The vehicle is in a dark place (atnight, in a tunnel, etc.).–The vehicle is in an extremely hotor cold place.–An object (such as raindrops,snow, dirt, etc.) that disturbs theview of the rear view camera sticksto the lens of the camera.–Strong light shined directly onthe camera lens (occasionally, thereare vertical lines on the screen).
&Viewing range on the screen
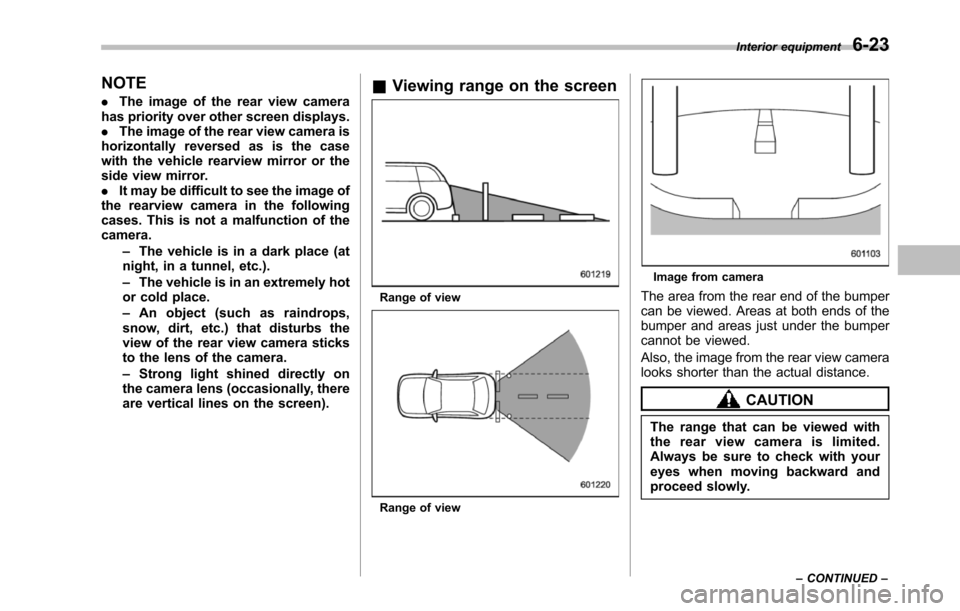
Range of view
Range of view
Image from camera
Thearea from the rear end of the bumpercan be viewed. Areas at both ends of thebumper and areas just under the bumpercannot be viewed.
Also, the image from the rear view cameralooks shorter than the actual distance.
CAUTION
The rangethat can be viewed withthe rear view camera is limited.Always be sure to check with youreyes when moving backward andproceed slowly.
Interior equipment6-23
–CONTINUED–
Page 245 of 426

6-24Interior equipment
Range of view
Image from camera
The area above the camera cannot beviewed. If there is an object that has awide projection on its upper part such as asign pole behind the vehicle, the projec-
tion cannot be seen on the screen.
CAUTION
The range that can be viewed withthe rear view camera is limited.Always be sure to check with youreyes when moving backward andproceed slowly.
&Help line
The help line (distance marker and vehiclewidth line) is a guide to help you realizethe actual distance from the screen.
Help lines displayed on the navigationmonitor
Help lines displayed on the inside mirror1) Vehicle width line (oblique vertical line)2) Approx. 10 feet (3 m) from the bumper(green horizontal line)3) Approx. 6.5 feet (2 m) from the bumper(green horizontal line)4) Approx. 3 feet (1 m) from the bumper(yellow horizontal line)5) Approx. 1.5 feet (0.5 m) from the bumper(red horizontal line)
When the select lever is set to position“R”, the monitor screen displays the helplines together with the rear view image.
CAUTION
.When moving backward, alwayscheck the back with your eyeswithout relying on the help lines.
.The actual position may be dif-
Page 247 of 426
6-26Interior equipment
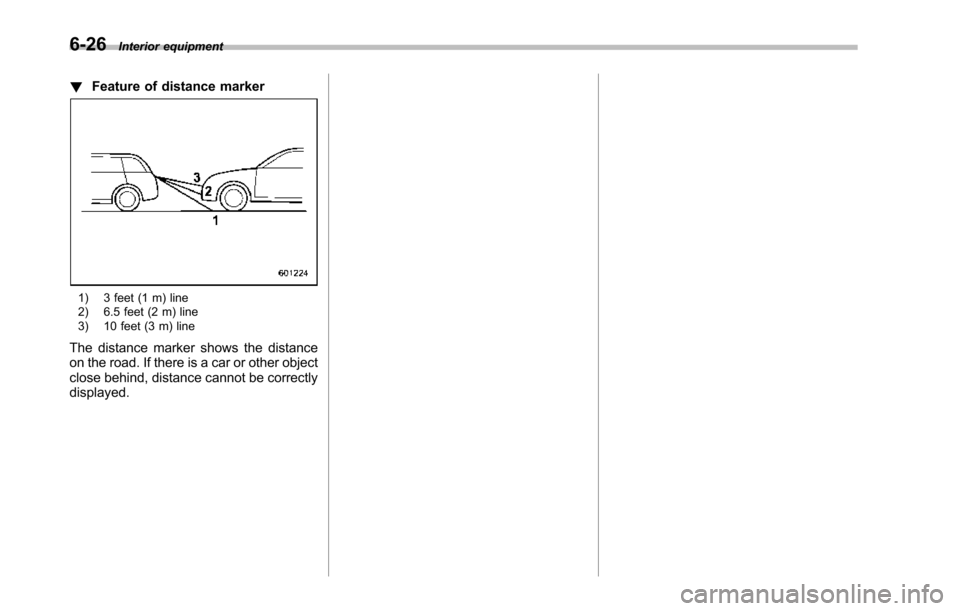
!Feature of distance marker
1) 3 feet (1 m) line2) 6.5 feet (2 m) line3) 10 feet (3 m) line
The distance marker shows the distanceon the road. If there is a car or other objectclose behind, distance cannot be correctlydisplayed.
Page 416 of 426
Map light........................................................... 6-3, 11-43Maximum load limits................................................... 8-21Meters and gauges...................................................... 3-5Mirrors...................................................................... 3-38Moonroof.................................................................. 2-25Multi function display.................................................. 3-24
NNew vehicle break-in driving.......................................... 8-2
OOdometer.................................................................... 3-6Oil filter..................................................................... 11-8Oil levelEngine.................................................................. 11-7Front differential gear............................................ 11-15Rear differential gear............................................. 11-16Oilpressure warning light............................................ 3-13On-road and off-road driving...................................... 9, 8-6OutsideMirror defogger...................................................... 3-43Mirrors.................................................................. 3-42Temperature indicator............................................. 3-23Overhead console........................................................ 6-8Overheating engine.................................................... 9-14
PParkingBrake................................................................... 7-28Brake stroke......................................................... 11-20Light.................................................................... 11-38
Light switch........................................................... 3-32Tips . . . . . . . . . . . . . . . . . . . . . . . . . . . . . . . . . . . . . . . . . . . . . . . . . . . . . . . . . . . . . . . . . . . . . . 7-29Periodic inspections..................................................... 8-4Petrol fuel................................................................... 7-2PowerDoor locking switch.................................................. 2-7Outlets.................................................................. 6-10Outside mirrors...................................................... 3-42Seat....................................................................... 1-3Steering................................................................ 7-18Steering fluid................................................ 11-16, 12-7Windows............................................................... 2-21Precautions against vehicle modification................ 1-28, 1-72Preparing to drive........................................................ 7-7Printed antenna........................................................... 5-2
RRearAir conditioner......................................................... 4-9Combination lights................................................ 11-39Differential gear oil........................................ 11-16, 12-6Gate............................................................. 2-24, 9-18Gate light...................................................... 6-3, 11-41Turn signal light.................................................... 11-39Rear differentialOil temperature warning light................................... 3-13Rear Seat Entertainment............................................. 5-29Rear view camera...................................................... 6-21Rear windowDefogger button..................................................... 3-37Wiper and washer switch......................................... 3-35
Index14-7