2014 SUBARU TRIBECA ECO mode
[x] Cancel search: ECO modePage 29 of 426

24
Function settings
A SUBARU dealer can change the settings of the functions shown in the following table to meet your personal requirements. Contactthe nearest SUBARU dealer for details. If your vehicle is equipped with the genuine SUBARU navigation system, the settings for someof these functions can be changed using the navigation monitor. For details, please refer to the Owner’s Manual supplement for thenavigation system.
Item Function Possible settings Default setting Page
Alarm system Alarm system Operation/Non-operation Operation 2-16
Monitoring start delay time (after closure of doors) 0 second/30 seconds 30 seconds 2-17
Impact sensor operation (only models with shocksensors (dealer option))Operation/Non-operation Non-operation 2-20
Passive arming Operation/Non-operation Non-operation 2-19
Dome light/map lights illuminationON/OFFOFF 2-16
Remote keyless entry sys-temHazard warning flasher Operation/Non-operation Operation 2-8
Audible signal Operation/Non-operation Operation 2-11
Key lock-in prevention Key lock-in preventionOperation/Non-operationOperation2-7
Remote engine start system(dealer option)Horn chirp confirmation ON/OFF ON 7-10
Rear window defogger Rear window defoggerOperation for 15 minutes/Continuous operationOperation for 15 minutes 3-37
Windshield wiper deicer Windshield wiper deicer Operation for 15 minutes/Continuous operationOperation for 15 minutes 3-36
Map lights/Dome light Operation of map lights/dome light OFF delaytimerOFF/Short/Normal/Long Normal 6-2/6-3
Map lights Illumination in conjunction with a door open Operation/Non-operation Operation(Illumination - ON)6-3
Battery drainage preventionfunctionBattery drainage prevention function Operation/Non-operation Operation 2-6
Page 49 of 426
1-18Seat, seatbelt and SRS airbags
the face or neck, adjust the shoulder beltanchor height (window-side seating posi-tions only) and then if necessary move thechild closer to the belt buckle to helpprovide a good shoulder belt fit. Care mustbe taken to securely place the lap belt aslow as possible on the hips and not on thechild’s waist. If the shoulder portion of thebelt cannot be properly positioned, a childrestraint system should be used. Neverplacethe shoulder belt under the child’sarm or behind the child’s back.
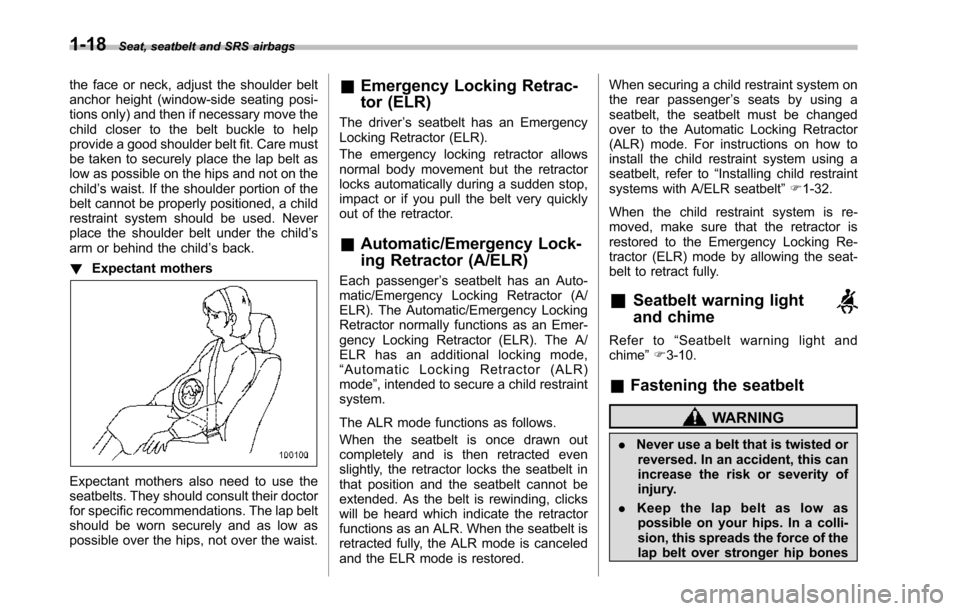
!Expectant mothers
Expectant mothers also need to use theseatbelts. They should consult their doctorfor specific recommendations. The lap beltshouldbe worn securely and as low aspossible over the hips, not over the waist.
&Emergency Locking Retrac-
tor (ELR)
The driver’s seatbelt has an EmergencyLocking Retractor (ELR).
The emergency locking retractor allowsnormal body movement but the retractorlocks automatically during a sudden stop,impact or if you pull the belt very quicklyout of the retractor.
&Automatic/Emergency Lock-
ing Retractor (A/ELR)
Each passenger’s seatbelt has an Auto-matic/Emergency Locking Retractor (A/ELR). The Automatic/Emergency LockingRetractor normally functions as an Emer-gency Locking Retractor (ELR). The A/ELR has an additional locking mode,“Automatic Locking Retractor (ALR)mode”, intended to secure a child restraintsystem.
The ALR mode functions as follows.
When the seatbelt is once drawn outcompletely and is then retracted evenslightly, the retractor locks the seatbelt inthat position and the seatbelt cannot beextended. As the belt is rewinding, clickswill be heard which indicate the retractorfunctions as an ALR. When the seatbelt isretracted fully, the ALR mode is canceledand the ELR mode is restored.
When securing a child restraint system onthe rear passenger’s seats by using aseatbelt, the seatbelt must be changedover to the Automatic Locking Retractor(ALR) mode. For instructions on how toinstall the child restraint system using aseatbelt, refer to“Installing child restraintsystems with A/ELR seatbelt”F1-32.
When the child restraint system is re-moved, make sure that the retractor isrestored to the Emergency Locking Re-tractor (ELR) mode by allowing the seat-belt to retract fully.
&Seatbelt warning light
and chime
Refer to“Seatbelt warning light andchime”F3-10.
&Fastening the seatbelt
WARNING
.Never use a belt that is twisted orreversed. In an accident, this canincrease therisk or severity ofinjury.
.Keep the lap belt as low aspossible on your hips. In a colli-sion, this spreads the force of thelap belt over stronger hip bones
Page 60 of 426
vehicle models in this Owner’sManual.Child restraint systems
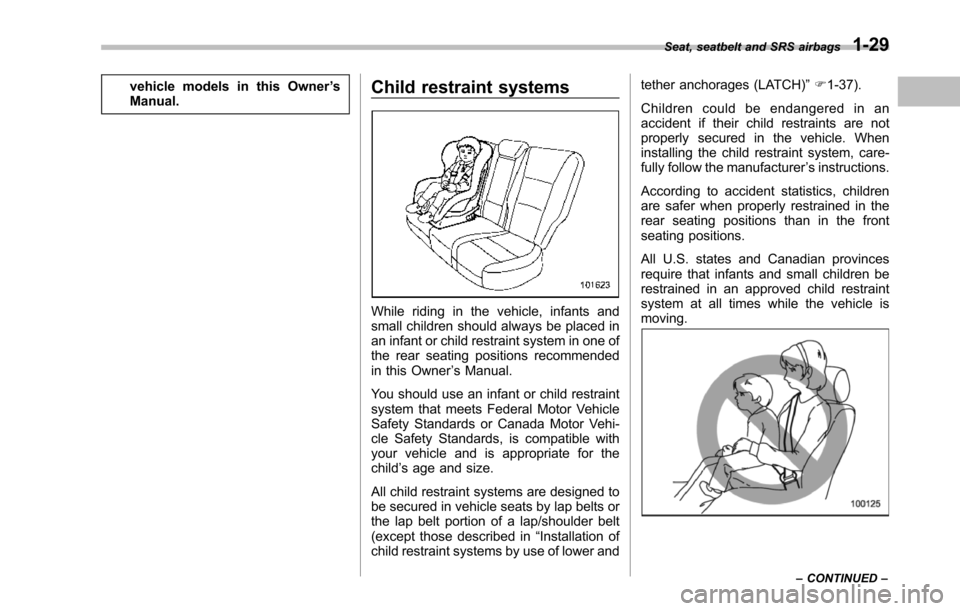
Whileriding in the vehicle, infants andsmall children should always be placed inan infant or child restraint system in one ofthe rear seating positions recommendedin this Owner’s Manual.
You should use an infant or child restraintsystem that meets Federal Motor VehicleSafetyStandards or Canada Motor Vehi-cle Safety Standards, is compatible withyour vehicle and is appropriate for thechild’s age and size.
Allchild restraint systems are designed tobe secured in vehicle seats by lap belts orthe lap belt portion of a lap/shoulder belt(except those described in“Installation ofchild restraint systems by use of lower and
tether anchorages (LATCH)”F1-37).
Children could be endangered in anaccident if their child restraints are notproperly secured in the vehicle. Wheninstalling the child restraint system, care-fully follow the manufacturer’s instructions.
According to accident statistics, childrenare safer when properly restrained in therear seating positions than in the frontseating positions.
All U.S. states and Canadian provincesrequire that infants and small children berestrained in an approved child restraintsystem at all times while the vehicle ismoving.
Seat, seatbelt and SRS airbags1-29
–CONTINUED–
Page 65 of 426
1-34Seat, seatbelt and SRS airbags
NOTE
When the child restraint system is nolonger in use, remove it and restore theELR mode of the retractor. That modeis restored by retracting the seatbeltfully.
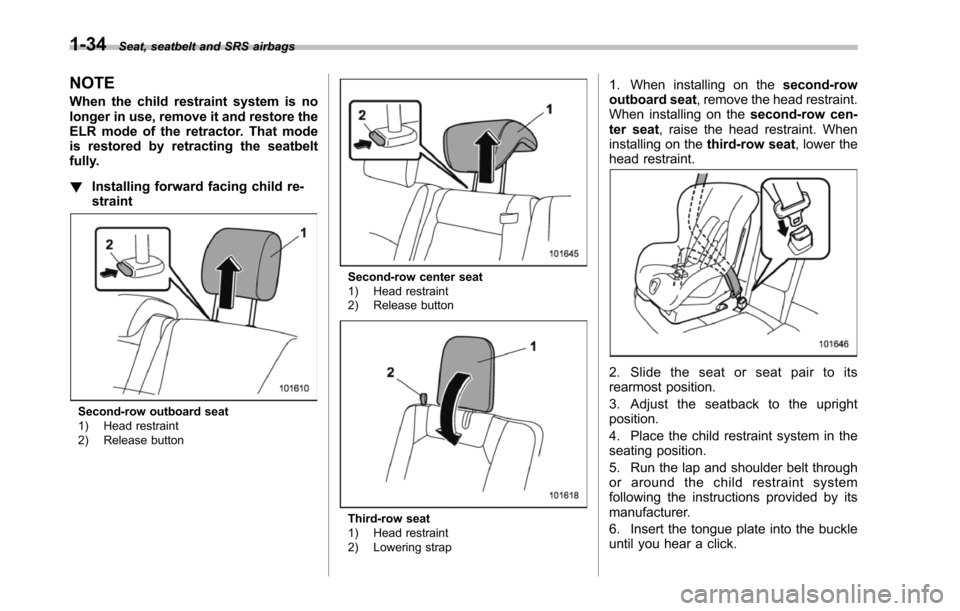
!Installingforward facing child re-straint
Second-row outboard seat1) Head restraint2) Release button
Second-row center seat1) Head restraint2) Release button
Third-row seat1) Head restraint2) Lowering strap
1. When installing on thesecond-rowoutboard seat, remove the head restraint.When installing on thesecond-row cen-ter seat, raise the head restraint. Wheninstalling on thethird-row seat, lower thehead restraint.
2. Slide the seat or seat pair to itsrearmost position.
3. Adjust the seatback to the uprightposition.
4. Place the child restraint system in theseatingposition.
5. Run the lap and shoulder belt throughor around the child restraint systemfollowing the instructions provided by itsmanufacturer.
6. Insert the tongue plate into the buckleuntil you hear a click.
Page 67 of 426
1-36Seat, seatbelt and SRS airbags
tether anchorages”F1-40.
12. To remove the child restraint system,press the release button on the seatbeltbuckle and allow the belt to retractcompletely. The belt will return to theELR mode.
NOTE
When the child restraint system is nolonger in use, remove it and restore theELR function of the retractor. Thatfunction is restored by allowing theseatbelt to retract fully.
&Installing a booster seat
WARNING
.Child restraint systems and seat-belts can become hot in a vehiclethat has been closed up in sunnyweather; they could burn a smallchild. Check the child restraintsystem before you place a childin it.
.Do not leave an unsecured childrestraint system in your vehicle.Unsecured child restraint sys-tems can be thrown around in-side of the vehicle in a suddenstop, turn or accident; they canstrike and injure vehicle occu-pants as well as result in seriousinjuriesor death to the child.
CAUTION
When you install a child restraintsystem, follow the manufacturer’sinstructions supplied with it. Afterinstalling the child restraint system,check to ensure that it is heldsecurely in position. If it is not heldtight and secure, the danger of yourchild suffering personal injury in theevent of an accident may be in-
creased.
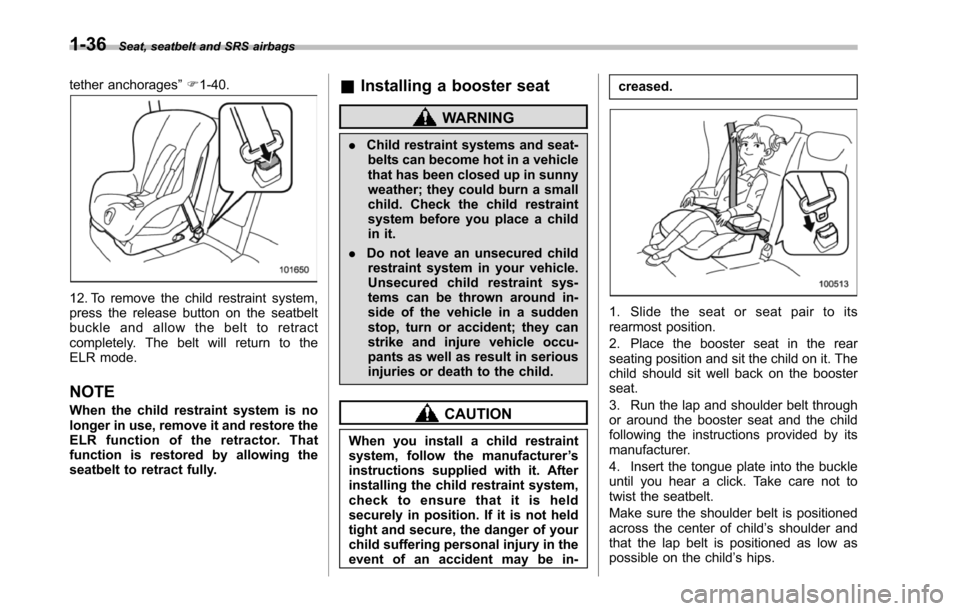
1. Slide the seat or seat pair to itsrearmost position.
2. Place the booster seat in the rearseating position and sit the child on it. Thechild should sit well back on the boosterseat.
3. Run the lap and shoulder belt throughor around the booster seat and the childfollowing the instructions provided by itsmanufacturer.
4. Insert the tongue plate into the buckleuntil you hear a click. Take care not totwist the seatbelt.
Make sure the shoulder belt is positionedacross the center of child’s shoulder andthat the lap belt is positioned as low aspossible on the child’s hips.
Page 91 of 426
1-60Seat, seatbelt and SRS airbags
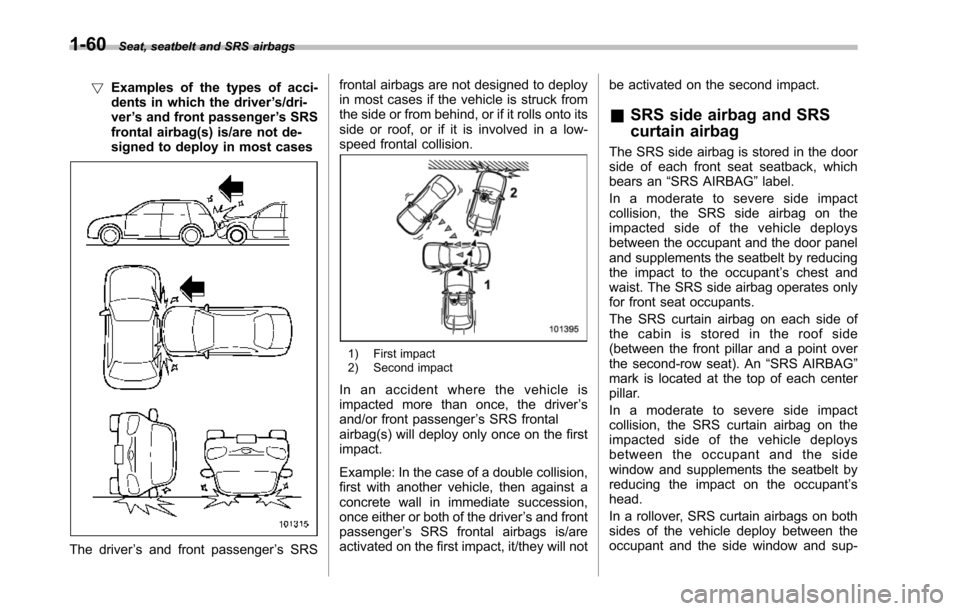
!Examples of the types of acci-dents in which the driver’s/dri-ver’s and front passenger’s SRSfrontal airbag(s) is/are not de-signed to deploy in most cases
The driver’s and front passenger’s SRS
frontal airbags are not designed to deployin most cases if the vehicle is struck fromthe side or from behind, or if it rolls onto itsside or roof, or if it is involved in a low-speed frontal collision.
1) First impact2) Second impact
In an accident where the vehicle isimpacted more than once, the driver’sand/or front passenger’s SRS frontalairbag(s) will deploy only once on the firstimpact.
Example: In the case of a double collision,first with another vehicle, then against aconcrete wall in immediate succession,once either or both of the driver’s and frontpassenger’s SRS frontal airbags is/areactivated on the first impact, it/they will not
be activated on the second impact.
&SRS side airbag and SRS
curtain airbag
The SRS side airbag is stored in the doorside of each front seat seatback, whichbears an“SRS AIRBAG”label.
In a moderate to severe side impactcollision, the SRS side airbag on theimpacted side of the vehicle deploysbetween the occupant and the door paneland supplements the seatbelt by reducingtheimpact to the occupant’s chest andwaist. The SRS side airbag operates onlyfor front seat occupants.
The SRS curtain airbag on each side ofthe cabin is stored in the roof side(betweenthe front pillar and a point overthe second-row seat). An“SRS AIRBAG”mark is located at the top of each centerpillar.
In a moderate to severe side impactcollision,the SRS curtain airbag on theimpacted side of the vehicle deploysbetween the occupant and the sidewindow and supplements the seatbelt byreducing the impact on the occupant’shead.
In a rollover, SRS curtain airbags on bothsides of the vehicle deploy between theoccupant and the side window and sup-
Page 95 of 426

1-64Seat, seatbelt and SRS airbags
right center pillars and rear wheel houses.Another impact sensor, which also sensesimpact force, is located under the second-row center seat. In addition, a rolloversensor is located inside the airbag controlmodule.
If one of the center pillar impact sensorsand the impact sensor that is locatedunder the second-row center seat to-gether sense an impact force above apredetermined level in a side collision, thecontrol module causes both the SRS sideairbag and curtain airbag on the impactedside to inflate regardless of whether therear wheel house impact sensor on thesame side senses an impact. At this time,the driver’s and front passenger’s seatbeltpretensioners also operate at the sametime.
If one of the rear wheel house impactsensors and the impact sensor that islocated under the second-row center seattogether sense an impact force above apredetermined level in a side collision, thecontrol module causes only the SRScurtain airbag on the impacted side toinflate.
If the rollover sensor detects rollover of thevehicle, the control module inflates theSRS curtain airbags. At this time, thedriver’s and front passenger’s seatbelt
pretensioners also operate at the sametime.
After deployment, the SRS side airbagimmediately starts to deflate. The timerequired from detection of an impact todeflation of an SRS side airbag afterdeployment is shorter than the blink ofan eye.
The SRS curtain airbag remains inflatedfor a while following deployment thenslowly deflates.
The SRS side airbag and SRS curtainairbag deploy even when no one occupiesthe seat on the side on which an impact isapplied.
When the SRS side airbag and SRScurtain airbag deploy, a sudden, fairly loudinflation noise will be heard and somesmoke will be released. These occur-rences are a normal result of the deploy-ment. This smoke does not indicate a firein the vehicle.
CAUTION
Do not touch the SRS side airbagsystem components around thefront seat seatback with bare handsright after deployment. Doing so cancause burns because the compo-nents can be very hot as a result of
deployment.
After deployment, do not touch anypart of the SRS curtain airbagsystem (from the front pillar to thepart of the roof side over thesecond-row seat). Doing so cancause burns because the compo-nents can be very hot as a result ofdeployment.
The SRS side airbag and SRS curtainairbag are designed to deploy in the eventof an accident involving a moderate tosevere side impact collision. Also, in thecase of a rollover, the SRS curtain airbagdeploys.They are not designed to deployin most lesser side impacts. Also, they arenot designed to deploy in most frontal ormost rear impacts because SRS sideairbag and SRS curtain airbag deploy-ment would nothelp the occupant in thosesituations.
Each SRS side airbag and SRS curtainairbag are designed to function on a one-time-only basis.
SRS side airbag and SRS curtain airbagdeployments depend on the level of forceexperiencedin the passenger compart-ment during a side impact collision. Thatlevel differs from one type of collision toanother, and it may have no bearing on
Page 123 of 426
2-18Keys and doors
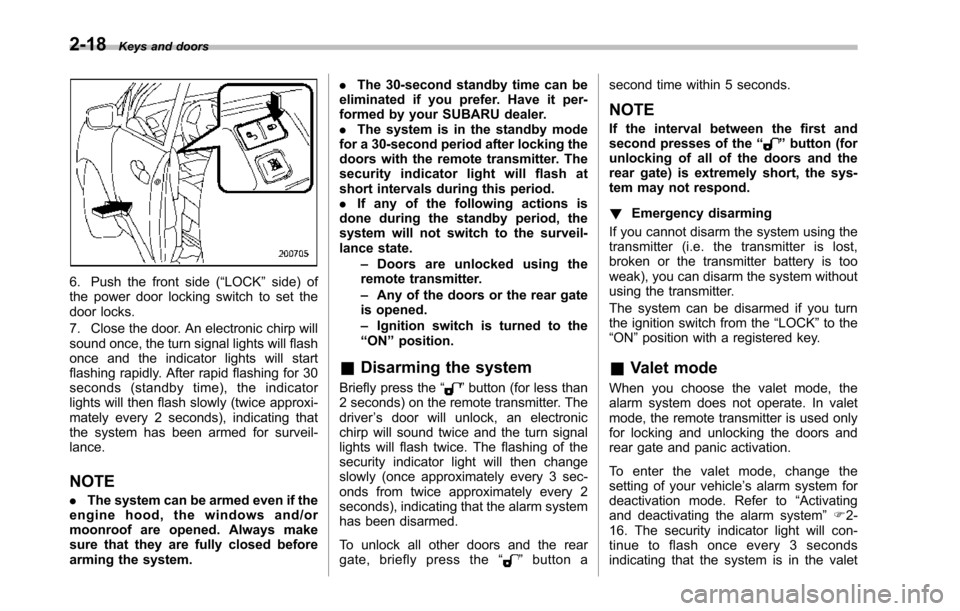
6. Push the front side (“LOCK”side) ofthe power door locking switch to set thedoor locks.
7. Close the door. An electronic chirp willsound once,the turn signal lights will flashonce and the indicator lights will startflashing rapidly. After rapid flashing for 30seconds (standby time), the indicatorlights will then flash slowly (twice approxi-mately every 2 seconds), indicating thatthe system has been armed for surveil-lance.
NOTE
.The system can be armed even if theengine hood, the windows and/ormoonroof are opened. Always makesure that they are fully closed beforearming the system.
.The 30-second standby time can beeliminated if you prefer. Have it per-formed by your SUBARU dealer..The system is in the standby modefor a 30-second period after locking thedoors with the remote transmitter. Thesecurity indicator light will flash atshort intervals during this period..If any of the following actions isdoneduring the standby period, thesystem will not switch to the surveil-lance state.–Doors are unlocked using theremote transmitter.–Any of the doors or the rear gateis opened.–Ignition switch is turned to the“ON”position.
&Disarming the system
Briefly press the“”button (for less than2 seconds) on the remote transmitter. Thedriver’s door will unlock, an electronicchirp will sound twice and the turn signallights willflash twice. The flashing of thesecurity indicator light will then changeslowly (once approximately every 3 sec-onds from twice approximately every 2seconds), indicating that the alarm systemhas been disarmed.
To unlock all other doors and the reargate, briefly press the“”button a
second time within 5 seconds.
NOTE
If the interval between the first andsecond presses of the“”button (forunlocking of all of the doors and therear gate) is extremely short, the sys-tem may not respond.
!Emergency disarming
If you cannot disarm the system using thetransmitter (i.e. the transmitter is lost,broken or the transmitter battery is tooweak), you can disarm the system withoutusing the transmitter.
The system can be disarmed if you turnthe ignition switch from the“LOCK”to the“ON”position with a registered key.
&Valet mode
When you choose the valet mode, thealarm system does not operate. In valetmode, the remote transmitter is used onlyfor locking and unlocking the doors andrear gate and panic activation.
To enter the valet mode, change thesetting of your vehicle’s alarm system fordeactivation mode. Refer to“Activatingand deactivatingthe alarm system”F2-16. The security indicator light will con-tinue to flash once every 3 secondsindicating that the system is in the valet