Page 49 of 64

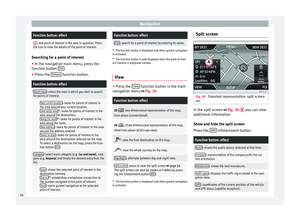
PHONE main menu Fig. 36
Standard representation: main menu
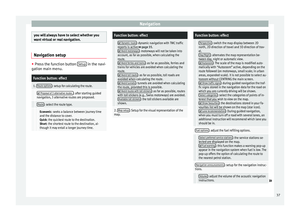
Telephone Management. Fig. 37
Standard representation: incoming
call. After the first connection, it will take")
Telephone management (PHONE)
PHONE main menu Fig. 36
Standard representation: main menu
Telephone Management. Fig. 37
Standard representation: incoming
call. After the first connection, it will take a few
minutes for the data from the phonebook of
the linked mobile phone to be available in
the infotainment system. Assign a user profile
In the telephone management, the contact
list data, the call lists and the speed dial
numbers are assigned and saved in the us-
er's profile. As soon as you connect the corre-
sponding mobile phone with the telephone
management, they will be available once
more.
If entries are modified in the phonebook of
the mobile phone, you can update the pho-
nebook data manually through the menu
User profile setup ››› page 51 .
T el
ephone management lets you store a max-
imum of 4 user profiles for mobile tele-
phones. If you wish to link/connect another
mobile phone, the oldest user profile will au-
tomatically be replaced. If you do not want it
to do this, you must previously delete one of
the user profiles. To delete a profile manual-
ly: Menu Phone Setup > press User profile set-
up > press Delete other user profiles.
Telephone management function buttons
● Press the infotainment button PHONE to ac-
tivate the main menu PHONE.
1User name of the Bluetooth device con-
nected and of the network operator.
Press to change the mobile phone
››› Fig. 36.
2Speed dial keys that may be occupied
by a contact in the phonebook
››› Fig. 36 ››› page 50.
MARK NºOpens the number pad to enter a tele-
phone number.
CONTACTSOpens the phonebook of the mobile
phone connected ››› page 49.
CALLSOpens the call lists of the mobile
phone connected ››› page 50.
SETTINGSOpens the menu Phone setup
››› page 51. The
››› Fig. 37 shows the incoming call screen
wher e
you can carry out the following ac-
tions.
Press to
accept a call.
Press to
reject an incoming call. ››› Fig. 37.
OR: Press to end a call ››› Fig. 38.
Press to silence the ringer during a call.
Press to reactivate the ringer sound again.
Press to silence the microphone during a call.
Press to reactivate the microphone sound.
This button keeps the call active. While the call
is on hold the listener will not hear the conver-
sation. To reactivate it press the call accept but-
ton (green telephone icon). To reject it press the
reject button (red telephone icon).
»
47
Page 50 of 64

Battery level of the mobile phone connected.
Signal strength of the mobile phone coverage.
Private mode: To activate private mode, go to
the Menu
Setup and deacti")
Telephone management (PHONE)
Battery level of the mobile phone connected.
Signal strength of the mobile phone coverage.
Private mode: To activate private mode, go to
the Menu
Setup and deactivate the check-
box: Hands-free (during an active call). With
the private mode activated the active audio
and microphone become that of the mobile
phone connected to the hands-free. When it
is deactivated, the audio reverts to the car-kit
of the vehicle. This configuration is only ap-
plicable to the active call, so for subsequent
calls, the audio will revert by default to the
car-kit of the vehicle.
Active call Fig. 38
Standard representation: active call. Indications and icons of the active callDisplayMeaning
A›››
Fig. 38
Name of the mobile phone network (sup-
plier) that the connected mobile phone is
using.
B››› Fig. 38
Display of the number with which you are
speaking or the name of the contact stor-
ed. If there is a photograph linked to the
name in the phonebook, this can be dis-
played ››› page 49. Note
● Some Nokia models disconnect when pri-
vate mode is activated during a call.
● In some devices, when you accept an in-
coming call from the mobile phone when it is
connected, the call automatically passes to
private mode. Enter Telephone number menu
Fig. 39
Standard representation: Enter tele-
phone number menu. In the main menu
PHONE
, press the function
b
utton Dial nr. .
Possible functions
Enter tele-
phone num-
berEnter the phone number using the key-
pad.
Press the function button
to establish
the connection.
Select a
contact from
the listUse the keypad to enter the first letters
of the contact you are looking for. The
possible entries appear in the contacts
list.
Search in the contacts list and press the
contact desired to establish the connec-
tion. 48
Page 51 of 64
Redial but-
tonPress the button and the last number
dialled will be shown on the display. To
make a connection press the button
again
.
Call voice
mailbox Keep b")
Telephone management (PHONE)Redial but-
tonPress the button and the last number
dialled will be shown on the display. To
make a connection press the button
again
.
Call voice
mailbox Keep button number 1 pressed for ap-
proximately 2 seconds or press the button.
If you still have not saved the voice mail
number, enter the number and confirm it
with OK
.
A phone number that has already been
stored can be modified in the User pro-
file settings ››› page 51 menu.
Activating voice control
Enter a na-
tional dial-
ling codeWhen you enter a country code, instead
of the two first digits (for example,
“00”), you can enter the “+” symbol.
Keep the function button pressed
0
for
about 2 seconds to add the + symbol.
Breakdown
service call
Press the function button to obtain help
in the event of breakdown. For this the
network of SEAT dealerships is available
to you with their Mobile Service.
Information
call Press the function button to obtain infor-
mation on the SEAT brand and the addi-
tional services contracted related to traf-
fic and travel. Note
Breakdown service and information calls can
incur an additional cost on your telephone
bill. Phonebook (contacts) menu
Fig. 40
Standard representation: Contacts
menu. Fig. 41
Standard representation: search
screen. After the first link process, it will take a few
minutes for the phonebook data of the mo-
bile phone connected to be available in the
infotainment system.The phonebook can also be consulted during
a call.
If there is a photograph linked to the name in
the phonebook, this can be displayed next to
the name in the list.
For this purpose the option “show pictures
for contacts” must be activated in the phone
setup context (check the compatibility lists).
In the main menu
PHONE
, press the function
b
utton Contacts .
Searching directory entry
Select a
contact
from the
listSearch in the list and press the desired con-
tact to establish the connection. If the con-
tact has more than one number you must
select the one you wish to use and press
again to establish the connection.
Search
for a con-
tact us-
ing the
search
screenPress the function button Search›››
Fig. 40 1 to open the search screen. En-
ter the name you wish to search for in the
search screen ››› Fig. 41. Each time you en-
ter a character, a phonebook will be dis-
played in the data entry field.
On the right of the data entry field the cor-
responding number of results is shown.
Press the function button to change the list
view mode.
Look through the list and press the desired
contact to establish the connection.
Press the
icon (pencil) to edit the num-
ber before calling.» 49
Page 52 of 64

Note
If you edit the number before calling, this will
only be used for the call and will not be stor-
ed in the phonebook. Call lists menu
Fig. 42
Standard representation")
Telephone management (PHONE)
Note
If you edit the number before calling, this will
only be used for the call and will not be stor-
ed in the phonebook. Call lists menu
Fig. 42
Standard representation: Call list
menu. In the main menu
PHONE
, press the function
b
utton Calls .
● Use the FILTER Function button to filter the
call list according to the selected criteria ( All
,
Missed , Dialled
or Received
).
When a number is saved in the phonebook,
the call list will display the name that is stor-
ed instead of the phone number. If there is a photograph linked to the name in
the phonebook, this can be displayed next to
the name in the call list.
Possible displays in the Calls menu
DisplayMeaningMissed: shows the numbers of calls that
have been received but not answered.
Dialled: shows the numbers that have
been dialled using the mobile phone and
telephone manager of the infotainment
system.
Received: shows the numbers of the calls
received by the mobile phone and tele-
phone manager of the infotainment sys-
tem and that have been answered.
Note
The call list display will depend on the mobile
phone used. Speed dial keys
Fig. 43
Standard representation: main menu
Telephone Management. A phone number can be assigned to each
speed dial key
›››
Fig. 43 1 .
If there is a photograph linked to the name in
the phonebook, this can be displayed on the
speed dial key ›››
page 51.
All of the speed dial keys must be assigned
m anual
ly, and a user profile is then assigned.
Possible functions
Allocating
speed dial
keysIn the main menu PHONE, press a
speed dial key that has not been as-
signed.
Select the desired contact from the
list. If several telephone numbers are
stored for that contact, select the de-
sired number. 50
Page 53 of 64
Editing speed
dial keys that
have been as-
signedIn the main menu PHONE, hold down a
speed dial key that
has been assigned
until the Contacts menu opens.
Select the desir")
Telephone management (PHONE)Editing speed
dial keys that
have been as-
signedIn the main menu PHONE, hold down a
speed dial key that
has been assigned
until the Contacts menu opens.
Select the desired contact from the
list. If several telephone numbers are
stored for that contact, select the de-
sired number.
To close the menu Contacts without
saving the modifications, press the
function button Back
.
Deleting
speed dial
keys that have
been assignedA phone number assigned to a speed
dial key can be erased in the menu
User profile setup/Manage favourites
››› page 51.
Establish a
connection
using the
speed dial
keysIn the main menu PHONE, briefly press
a speed dial key that has been as-
signed to establish the connection
with the phone number assigned to it. Telephone setup
In the main menu
PHONE
, press the Set
upfunction button.
Function button: effect
Select phone: select the telephone to be connected to the
infotainment system, or press Find phone to connect a
new device.
User profile setup: opens the menu User profile setup
››› page 51.
Function button: effect
Select ring tone: select a ring tone from the list of prede-
fined tones.
Bluetooth settings: opens the menu Bluetooth setup
››› page 51.
Invert call lists order: with the checkbox active, the call
list entries are inverted (the oldest entry is shown at the
top of the list).
Warning: do not forget your mobile phone: when you discon-
nect the ignition it will show the message “Please do not forget your mobile phone ”.
Show pictures for contacts: if there is a photograph stored
for a contact in the phonebook, this can be displayed on
the speed dial keys, in the call lists and in the phone-
book. Note
To check whether your mobile phone allows
images to be downloaded for your phone-
book, check the compatibility list. Bluetooth setup
In the main menu
PHONE, press the function
b utt
on Setup and then press
Bluetooth setup .
Function button: effect
Bluetooth: press to disconnect the Bluetooth in the
system.
Function button: effect
Visibility: activate and deactivate the Bluetooth “visibili-
ty” of the infotainment system using the function button
. To link a mobile phone to the infotainment system
the visibility must be activated. With the setting At start-up
, visibility is disabled after a certain time. If
you have an audio Bluetooth device active and playing,
the visibility is automatically set to “not visible”.
Name: when you open this option it opens a keyboard,
with which you can modify the default name of the de-
vice.
My devices: shows the devices linked to the system.
Find: looks for Bluetooth devices that are on and visible
within the working radius of the infotainment system.
The working radius is approximately 10 metres.
Audio/Bluetooth (A2DP): function button that activates
and deactivates the use of the radio as the Bluetooth re-
ceiver of the audio source. User profile setup
In the main menu
PHONE
, press the function
b
utton Setup and then press
User profile .
Function button: effect
Manage favourites: edit the speed dial keys.
Speed dial key assigned:
press to delete the as-
signed number.
Free speed dial key: press to assign a number from
the phonebook to the speed dial key in question.
» 51
Page 54 of 64
Telephone management (PHONE)Function button: effect
Mailbox number: entering or modifying the mailbox num-
ber.
Code: Enables you to enter a certain code. To make
calls with the predetermined code press the button
+0 in the menu Enter number, in Phonebook or in Calls
list.
Sort by: determine the order sequence of the phone-
book entries, by surname, first name, or by first name,
surname.
Import contacts: press to import the phonebook of the tel-
ephone connected, or to update a phonebook that has
already been imported.
Delete the profile of other users: delete all user profiles, or
one profile in particular. Note
Some telephones require a restart to down-
load the last contacts added again. 52
Page 55 of 64
 Introduction Depending on the country, the device and
the features of the vehicle, some settings
may be different.
Activating the main menu.
● Press the i")
Setup
Setup
Menu and system setting
(SETUP) Introduction Depending on the country, the device and
the features of the vehicle, some settings
may be different.
Activating the main menu.
● Press the infotainment button MENU to
open the main menu System setup (SETUP).
● Press the function button SETUP to access
the system setup.
Menu and system setup (SETUP) Activating the main menu.
● Press the infotainment button MENU to
open the main menu System setup (SETUP)
.
● Press the function button SETUP to access
the system setup.Function button: effect
Sound setup: adjust volume and sound setup
››› page 54.
Screen: complete the touch screen setting ››› page 53.
Function button: effect
Date and time: ››› Booklet Instruction Manual, chap-
ter System setup (CAR)
Idioma/Language: set the desired language for the texts
and announcements.
Keyboard: select the desired keyboard (ABC or QWERTY).
Additional keyboard languages: select an additional lan-
guage for the keyboard.
Units: ››› Booklet Instruction Manual, chapter System
setup (CAR)
Voice control: adjust the voice control setup ››› page 54.
Safely remove SD card 1, Safely remove SD card 2: eject the de-
sired memory card from the system. After ejecting the
memory card, the function button will be shown in grey.
Safely remove the USB data medium: eject the USB data medi-
um from the system.
Factory settings: ››› page 54.
Bluetooth: adjust the Bluetooth setup ››› page 51.
System information: indication of the system information
(device number, hardware and software version).
Copyright Note
For all the infotainment systems to work
properly, it is important to set the correct
time and date in the vehicle. Screen settings
Activating the main menu.
●
Press the infotainment button MENU to
open the main menu System setup (SETUP).
● Pr e
ss the function button SETUP to access
the system setup.
● Press the Screen function button. When you
close a menu, the changes will take effect au-
tomatically.
Summary of the indications and function
buttons
Function button: effect
Display switch off in 10 seconds: with this function activa-
ted, if you do not do anything with the infotainment sys-
tem, the screen will turn off automatically after approxi-
mately 10 seconds. When you touch the screen or press
an infotainment button, the screen will light up again.
Brightness: select the brightness level of the screen.
Acoustic touchscreen feedback: pressing the function but-
ton on the screen activates a feedback tone.
Animation on approach: the proximity sensors are activa-
ted. When activated, certain function buttons will be dis-
played upon placing your hand close to the touch
screen.
Show clock in standby mode: in standby mode the current
time will be shown on the display of the infotainment
system. 53
Page 56 of 64
.
● Pr e
ss the function button SETUP to access
the system setup.
● Press the func")
Setup
Voice command settings ●
Press the infotainment button MENU to
open the main menu System setup (SETUP).
● Pr e
ss the function button SETUP to access
the system setup.
● Press the function button Voice control .
When you close a menu, the changes will
take effect automatically.
Summary of the indications and function
buttons
Function button: effect
Dialogue style: select the type of dialogue.
Long: during the voice control you will hear some
additional help instructions. Brief
: some additional commands from the long
dialogue are omitted.
Display available commands: when you activate voice con-
trol, the spoken commands of the function you are oper-
ating at that time are viewed in the display.
Voice control session start tone: when you activate voice
control a signal will be emitted. Press to deactivate the
signal.
Voice control session end tone: when you deactivate voice
control a signal will be emitted. Press to deactivate the
signal.
Function button: effect
Input tone in voice dialogue: the input tone to confirm a
command is activated. Factory settings
Restoring default settings
When you reset the setup to the vehicle's de-
fault settings,
the data entered and settings
made will be erased
accordingly.
● Press the infotainment button MENU to
open the main menu System setup (SETUP)
.
● Press the function button SETUP to access
the system setup.
● Press the function button Factory settings .
● To reset all settings and data, press the
function button Restore factory settings .
● ALTERNATIVELY: To reset a particular setup,
pr e
ss the desired function button.
● Confirm the safety question that appears
by pressing the function button Reset .Sound and volume setup
Fig. 44
Standard representation: Sound set-
up menu Depending on the market, the device and the
features of the vehicle, the setup options
vary.
Adjusting setup
● To open the main menu Sound setup
, press
the infotainment button SOUND 1)
or the but-
ton Menu 2)
. In addition you can access it with
the Sound option, from
Radio setup and from
Media setup .
● Press the function button corresponding to
the setup you wish to carry out. 1)
Only in the Standard version, not with navigation.
2) Only in the Standard version, with navigation.
54


Function button: effect
Mailbox number: entering or modifying the mailbox num-
ber.
Code: Enables you to enter a certain code. To make
calls with the predetermined cod")