Page 25 of 64

Audio mode
If you do not remove the CD in the following
10 seconds, it will be drawn back in for safety
reasons, without changing to CD mode.
Unreadable or defective CD
If the data on the inserted CD cannot be read
or the CD is damaged, the corresponding in-
dication will be shown on the screen.
Depending on the unit, when a CD cannot be
read it will retry three times, ejecting and re-
inserting the CD, before showing the indica-
tion. Note
● Uneven road surfaces and strong vibrations
may cause the CD to jump.
● If the interior temperature of the unit is too
high, it will not accept or play any more CDs.
● If, after having inserted several CDs, the in-
dication CD drive error still appears, contact a
s pec
ialist workshop. Inserting and removing memory cards
Inserting a memory card
If a memory card cannot be inserted, make
sure it is positioned correctly and is compati-
ble with the unit.
Playback starts automatically if supported
audio files are stored on the memory card. Insert a compatible memory card by pushing
it into the memory card slot with the cut-off
corner first facing
upwards until it locks in
› ›
› Fig. 20.
Remo
ving a memory card
The memory card inserted must be prepared
before it is ejected.
● Press the infotainment button MENU ; then,
press Setup to open the menu
System set-
tin g
s.
● Press the function button
Remove SD card 1 safely or
Remove SD card 2 safely .
After ejecting the memory card, the function
button will be shown in grey.
● Press the memory card inserted. The mem-
ory card “jumps” to the eject position.
● Remove the memory card.
Unreadable memory card
If you insert a memory card containing data
that cannot be read, the unit will not change
to memory card mode after loading.
It will show the indication: There are no playa-
ble files available . External audio source connected to
the AUX-IN multimedia socket
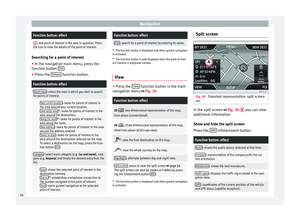
Fig. 21
Standard representation: main menu
MEDIA. Depending on the market and the features,
the vehicle may have a MEDIA-IN multimedia
interface
›››
Booklet Instruction manual. You
must use an adaptor cable with a 3.5 mm
jack to connect the external audio source.
An audio source connected through AUX can-
not be operated using the infotainment sys-
tem. Playback is started, managed and stop-
ped using the external audio source.
Connecting an external audio source to the
AUX IN multimedia socket
● Reduce the base volume of the infotain-
ment system.
● Connect the external audio source by con-
necting the AUX-IN multimedia jack. »
23
Page 26 of 64

Audio mode
● Start playback of the external audio source.
● In the main MEDIA
menu, press the SOURC E›››
Fig. 21 function button and A
UX .
The output volume
of
the c
onnected external
audio source should be adjusted to the vol-
ume of the other audio sources ››› page 54.
Things to note when operating an external
audio source using the AUX-IN multimedia
ActionEffect
Selection of another audio
source on the radio-navi-
gation system.The external audio source
continues to run in the
background.
Stopping playback on the
external audio source.The infotainment system
remains in the AUX menu.
Disconnecting the plug
from the AUX-IN multime-
dia socket.The infotainment system
changes, and plays the
last media source that was
active. Note
● Please read and observe the external audio
source manufacturer operating manual.
● Interference noise may be heard if the ex-
ternal audio source is powered from the 12-
volt power socket of the vehicle. MEDIA-IN multimedia interface
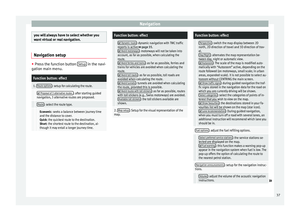
Fig. 22
Standard representation: MEDIA-IN
multimedia interface. Depending on the market and the features,
the vehicle may have a MEDIA-IN multimedia
interface
›››
Booklet Instruction manual.
The infotainment system enables you to play
and manage audio files and some video files
from an external data medium connected to
the MEDIA-IN multimedia interface.
Where this manual refers to external data me-
dia, this means USB mass storage devices
containing supported audio files, such as
MP3 players, iPods ®
and USB sticks.
The MEDIA-IN multimedia interface supplies
the usual USB voltage of 5 volts. Adapter for connecting a data medium
The external data media are connected to the
MEDIA-IN multimedia interface using an
adaptor.
Depending on the market and features, the
adaptor is included in the supply. Other
adaptors can be purchased from your SEAT
Dealership.
Do not use memory card adaptors, USB ex-
tension cords or USB hubs!
Requirements
Connectable data mediaCompatible for-
mats and files
Data media compliant with the
USB 2.0 specification.
Data media with the FAT16 (< 2
GB)
or FAT32 (> 2 GB) file system.
iPods ®
and iPhones ®
of vari-
ous generations. a)
MTP players with the “Play-
sForSure” or “ReadyForVista”
logo.– Audio files in MP3,
WMA and AAC format.
– Playlists in PLS, B4S,
ASX and WPL format.
Read and bear in mind the manufacturer's instruction
manual for the external data medium.
a) iPod ®
and iPhone ®
are protected registered trademarks of
Apple Inc.
24
Page 27 of 64

Audio mode
Notes and restrictions
The infotainment system enables you to view,
play and manage compatible audio files
through the MEDIA-IN multimedia interface.
In the case of MTP players and depending on
the battery charge and the quantity of data, it
may take a few minutes for them to be ready
for use.
External hard discs with a capacity greater
than 32 GB must, in certain circumstances,
be reformatted to the FAT32 file system. On
the Internet, for example, you will find pro-
grams and instructions for this.
If the data carrier has several partitions, only
the first partition will be recognised (except
with USB, in which the first 2 will be visible).
Take into account all other instructions and
limitations regarding requirements for media
sources.
Connecting and disconnecting an external
data medium
● Connect a suitable adaptor to the MEDIA-IN
multimedia interface.
● Connect the external data medium to the
MEDIA-IN multimedia interface via the adapt-
er.
● If necessary, switch on the external data
medium or select the appropriate data mode.
Regardless of any indications to the contrary
that there may be on the matter, the external data medium can be disconnected from the
MEDIA-IN multimedia interface at any time
without losing the data.
When disconnecting an iPod
®
or iPhone ®
from the adaptor, take care to press the two
unlocking tabs on the narrow sides of the
iPod ®
connector simultaneously.
Operating the infotainment system
An external data medium that is correctly
connected to the MEDIA-IN multimedia inter-
face can be operated using the infotainment
system.
● In the main MEDIA
menu, press the SOURC E ›››
Fig. 21 function button and select USB or
iPod ...
››› page 24 .
Other oper ation
s with the external data medi-
um (changing tracks, selecting tracks and ac-
tivating playback modes) are carried out as
described in the corresponding chapters.
iPod ®
and iPhone ®
If you connect an iPod ®
or iPhone ®
, the top
selection level will display the specific lists of
the iPod ( playlists, artist, album,
title, podcasts etc.). The appearance of
these lists is similar to that of the media cen-
tre , and they are managed as described.
Music management is blocked so it can be
managed with the iPod ®
or iPhone ®
that is
connected. The playback volume
of some iPods®
or
iPhones ®
can adapt to the volume of the oth-
er audio sources ››› page 24.
Files from iPods ®
or iPhones ®
cannot be im-
port
ed.
Possible error messages after connecting an ex-
ternal data medium
Error mes-
sageCauseProcedure
Device not
supportedThe external
data medium
cannot be
played– Consult the list of
supported devices
on the web.
– When possible,
update the software
of the external data
medium.
Unit not op-
erationalCommunication
interrupted.Check the connec-
tion and make sure
the external data
medium is working
correctly.
Due to the large number of different data media availa-
ble, it is not possible to guarantee fault-free operation of
all functions described here. Note
● The connecting adaptor used must not be
crushed or bent sharply. This could damage
the adaptor and cause operational faults.
● To play music, do not simultaneously link
the external media player to the infotainment » 25
Page 28 of 64

Audio mode
system using Bluetooth and the MEDIA-IN
multimedia interface, as this can cause play-
back limitations.
● If a connected device is not recognised, un-
plug all connected devices and reconnect the
device. External data support in MEDIA-IN*
port
Only supported audio files can be displayed
and played. Other files are ignored.
Playback starts automatically if there are
readable audio files stored on the data sup-
port.
End connection
The connected data support
must be pre-
pared for disconnection before it can be re-
moved.
● Press the infotainment button MENU ; then,
press Settings to open the menu System set-
tings ››› page 53 .
● Pr e
ss the Safely remove USB data stick function
button. After removing the data stick correct-
ly from the system, the function button be-
comes inactive (grey).
● The data media may now be disconnected. Illegible data medium
If the data on a connected support device
cannot be read, the warning
No playable files
is displayed. Note
Read and bear in mind the manufacturer's in-
struction manual for the external data medi-
um. Connecting an external media player
via Bluetooth
® Fig. 23
Standard representation: main menu
Media. In Bluetooth audio mode, audio files from an
external audio source that is connected via
Bluetooth
®
, for example a mobile phone
(Bluetooth audio playback), can be played
over the vehicle speakers. The Bluetooth audio source must be compati-
ble with the Bluetooth A2DP profile.
Starting sound transmission via Bluetooth
● Connect the Bluetooth visibility in the Blue-
tooth external audio source (for example, a
mobile phone).
● Reduce the base volume of the infotain-
ment system.
● Press the MEDIA infotainment button.
● Press the function button ››› Fig. 23 and se-
l ect
AUDIO BT .
● Press Search for new device to connect a Blue-
tooth external audio source for the first time.
● ALTERNATIVELY: Select the Bluetooth exter-
n al
audio source from the list.
● Please refer to the notes on the display of
the infotainment system and the Bluetooth
audio source regarding the rest of the proce-
dure. Similarly, you will still need to start
playback manually from the Bluetooth audio
source. Once playback of the Bluetooth audio
source has finished, the infotainment system
will remain in AUDIO BT mode.
Controlling playback
The extent to which the Bluetooth audio
source can be controlled via the infotainment
system depends on the Bluetooth audio
source connected.
26
Page 29 of 64

Audio mode
Media players with the AVRCP Bluetooth pro-
file, the playback of the Bluetooth audio
source can be started and stopped automati-
cally when changing to Bluetooth audio
mode, or to another audio source. In addi-
tion, it is possible to view or change the track
via the infotainment system. Note
Due to the large number of different Blue-
tooth audio sources available, it is not possi-
ble to guarantee fault-free operation of all
functions described here. Note
● Deactivate the service and warning sounds
of a connected Bluetooth audio source (for
example, the key tones of the mobile phone)
to avoid interference noise and anomalies in
the operation.
● Depending on the external player connec-
ted, the response time of the system can
vary.
● To ensure your BT player works correctly,
check the compatibility lists first. Changing tracks in the main menu
MEDIA
Fig. 24
Standard representation: menu ME-
DIA. You can browse through the tracks of the cur-
rent media source successively by using the
arrow buttons. The arrow buttons do
not al-
lo w
you to change playlist. A playlist must be
started manually through the track selection
menu.
Controlling playback via the MEDIA main
menu
ActionEffect
Briefly press the func-
tion button once.Goes to the start of the cur-
rent track.
ActionEffect
Press the function but-
ton twice, briefly and
consecutively.Goes to the start of the previ-
ous track. It will go from the
first track to the last on the
data medium being played.
Briefly press the func-
tion button once.To the next track. It will go
from the last track back to
the first on the data medium
being played.
Keep the function but-
ton pressed .Rewind.
Keep the function but-
ton pressed .Fast forward.
Briefly press the func-
tion button once.Playback will stop. The func-
tion button changes to .
Briefly press the func-
tion button once.Playback will continue. The
function button changes
to . ALTERNATIVELY:
Place your finger in the mid-
dl e of
the screen and, without removing it,
move it to the right to change to the next
track and to the left to start the track again.
27
Page 30 of 64

Audio mode
Selecting a track from the list Fig. 25
Standard representation: menu ME-
DIA. Fig. 26
Standard representation: track list on
a media source. Opening the track list
● In the main MEDIA
menu, press the
Sel
ection button
›››
Fig. 25 to open the track li
s t. The track being played appears highligh-
ted ››› Fig. 26
.
● Search through the track list and press the
desired track.
If the title information is available, this will
be displayed instead of Track + no.
Summary of the function buttons of the track
list
Function
buttonsEffect
SOURCE
CD: internal CD drive unit ››› page 22.
SD card 1, SD card 2: SD memory card
››› page 23.
MEDIA-IN
: MEDIA-IN multimedia interface
››› page 24.
BT audio
: External media player connected
via Bluetooth ®
››› page 26.
Press the function button to open the top
folder in the hierarchy of the media source.
Start playback with the first track.
Repeat all the tracks.
Repeat the current track.
Random play.
SCANWith the scan function active, all the tracks
on the selected track list are played for ap-
proximately 10 seconds. Note
You can also mark a track, folder or playlist
by turning the setup button and open it by
pressing this button. Media setup
●
Select the main menu Media by pressing
the inf ot
ainment button MEDIA .
● Press the function button Setup to open the
menu Media setup
.
Function button: effect
Menu “Sound”: sound setup ››› page 54.
Mix/Repeat incl. subfolders: the subfolders are taken into
account in the playback mode selected.
Bluetooth: Bluetooth setup ››› page 26.
Traffic Information (TP): the TP function (monitoring of
traffic reports) is active ››› page 16.
If the function button is deactivated (in grey), you must
first activate the
Radio data system (RDS) function button
in the Settings menu ››› page 17.
External AUX device: enables the socket.
28
Page 31 of 64

Navigation
Navigation Introduction and operation of
the navigation system Introduction General information
The current position of the vehicle is deter-
mined through the GPS satellite system
(Global Positioning System). Sensors in the
vehicle measure distances driven. With the
detailed material stored in the map, and ac-
cording to the traffic news stored, all the val-
ues obtained are compared. Similarly, the
traffic reports are taken into account to calcu-
late the route (dynamic navigation
››› page 35 ). With all the data available, the
n av
igation system calculates the optimum
route to the destination.
The destination is defined by entering an ad-
dress or a point of interest, e.g. a petrol sta-
tion or hotel.
Spoken instructions and visual guidance on
the navigation unit and the combi-instrument
direct you to your destination.
Depending on the country, some infotain-
ment system functions can no longer be se-
lected when the vehicle is travelling above a
certain speed. This is not an operational er- ror; it is to comply with the legal require-
ments.
Limitations during navigation Possible errors during navigation
When the navigation system cannot receive
data from the GPS satellites (dense tree foli-
age, underground parking areas), it is possi-
ble to proceed with navigation using the sys-
tem of vehicle sensors.
For the navigator to work properly, navigation
should begin when the signal is received
from the satellite.
In areas that are not or only partially digitised
on the data medium (e.g. insufficient defini-
tion of one-way streets and road categories),
the navigation system will still attempt to
provide route guidance.
If navigation data are unavailable or incom-
plete, the navigation system may be unable
to determine the exact vehicle position. As a
result, the navigation may not be as exact as
usual.
Area of navigation and validity of the
navigation data
Roads and streets are subject to constant
change (e.g. new roads, changes to street
names and house numbers). After some
time, navigation data will no longer be up-to-date. This may lead to inaccurate or incorrect
route guidance.
Current navigation data media and versions
for other countries are available from SEAT
dealerships.
Note
The user must pay attention to the road
signs, which take precedence over those
shown on the screen. Use navigation data from a memory
card
Memory cards containing updated navigation
data can be obtained from SEAT dealerships.
●
Insert the memory card ›››
page 23 .
● Do not remove the memory card while test-
ing. Wait for the testing icon to disappear.
If the inserted memory card contains valid
navigation data, the following message ap-
pears: “The source contains a valid naviga-
tion database”. It is now possible to navigate
with the memory card data. When the memo-
ry card is no longer needed by the hardware,
it will be prepared for removal ›››
page 23.
»
29
Page 32 of 64

Navigation
Note
● Do not remove the memory card while the
navigation data is in use. This could damage
the memory card!
● The navigation memory card may not be
used as memory for other files. The infotain-
ment system will not recognise the files
saved.
● SEAT recommends only using original SEAT
memory cards to use navigation data. The
use of other memory cards could limit its op-
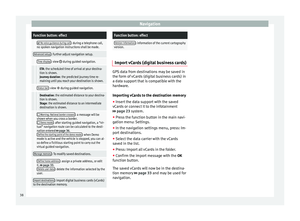
eration. Main menu of navigation
Fig. 27
Standard representation: Main Navi-
gation menu, en route (with active approxi-
mation sensor). The navigation functions can only be used if
the radio navigation system has the naviga-
tion data for the area it is in.
Through the Navigation main menu you can
select a new destination, a destination to
which you have previously been directed, or
a stored destination, and search for points of
interest.
Activate the navigation main menu
● Press the infotainment button NAV to open
the last menu that was active in the naviga-
tion system.
● Insert valid data carrier for navigation - SD
card.
● If it does not display the main menu
Na
vi-
gation, press the infotainment button NAV
until the main menu Navigation is shown.
● ALTERNATIVELY:
Press the function button
BACK to access the main menu Navigation
by passing through the various menus.
Function buttons and indications in the main
menu Navigation
Function
button
››› Fig. 27Effect
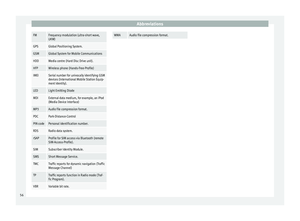
ADisplaying the split screen ››› page 34.
BIndications and function buttons related
to the map display ››› page 34.
Function
button
››› Fig. 27Effect
1
New dest.: enter a new destination
››› page 30.
Route
: during the guided navigation
››› page 32.
2Viewing of GPS data active.
MY DEST.Consult or manage the stored destina-
tions ››› page 33.
POISearch for special destinations (for ex-
ample, hotels, service stations) within a
certain area ››› page 33.
VIEWModify the representation of the map,
or show/hide the split screen A
›››
page 34.
SETTINGSOpen the menu Navigation setup
››› page 37. New destination (enter destination)
●
Press the function button New dest. in the
navigation main menu.
● Press the Options button and select the
destination data you wish to enter ( Address,
POI or Map/GPS coordinates ).
Address
To select an address you must always follow
the sequence shown: first the country, then
30