Page 3333 of 4801

MWI-78
< SYMPTOM DIAGNOSIS >
THE TRUNK OPEN WARNING CONTINUES DISPLAYING, OR DOES NOT DIS-
PLAY
THE TRUNK OPEN WARNING CONTIN UES DISPLAYING, OR DOES NOT
DISPLAY
DescriptionINFOID:0000000009461750
• The trunk ajar warning is displayed continuously even though the trunk lid is closed.
• The trunk ajar warning is not displayed even though the trunk lid is open.
Diagnosis ProcedureINFOID:0000000009461751
1.CHECK BCM INPUT SIGNAL
1. Connect the CONSULT.
2. Check the BCM input signals. Refer to DLK-126, "Component Function Check"
.
Is the inspection result normal?
YES >> GO TO 2.
NO >> GO TO 3.
2.CHECK COMBINATION METER INPUT SIGNAL
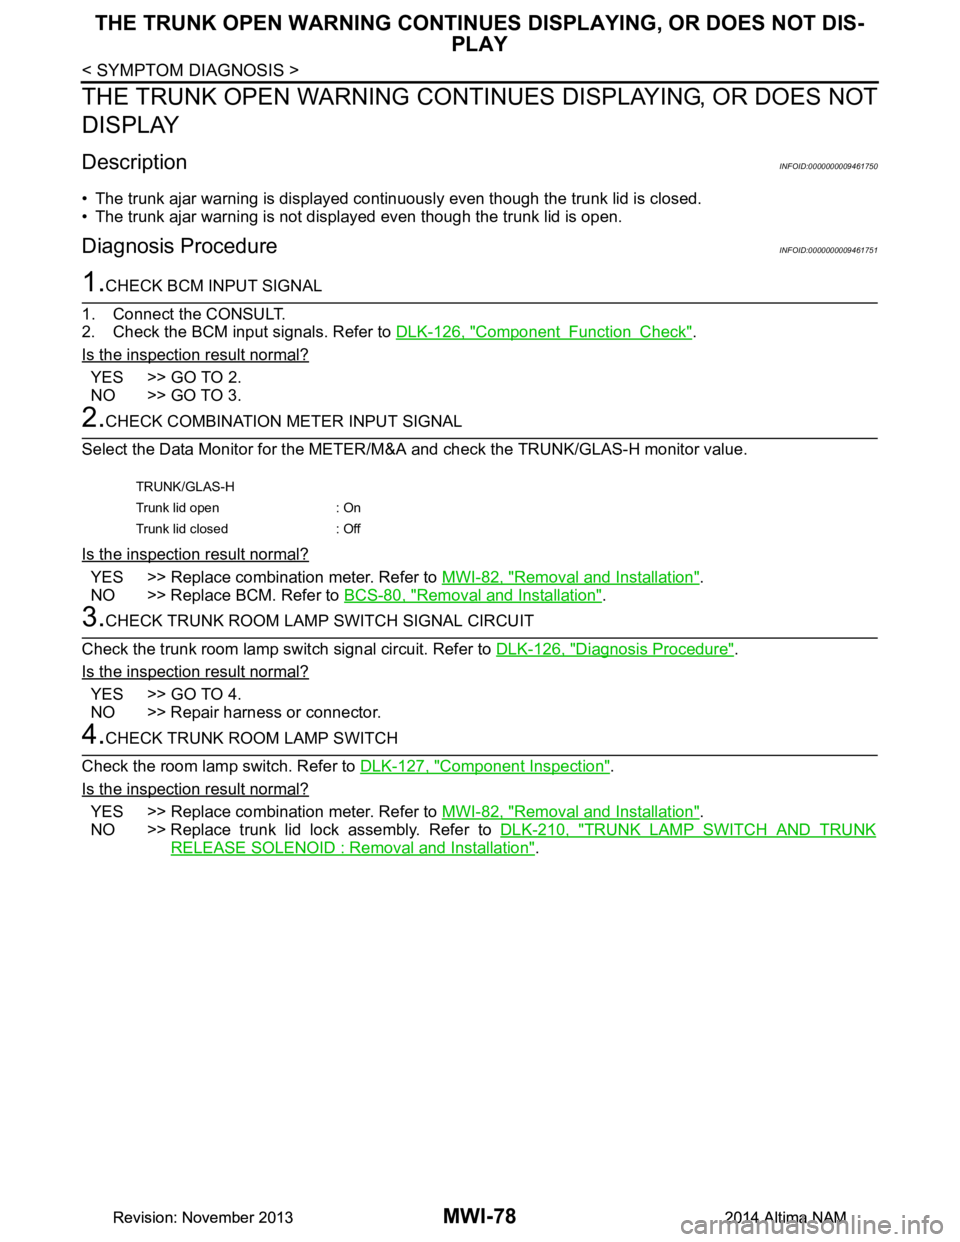
Select the Data Monitor for the METER/M &A and check the TRUNK/GLAS-H monitor value.
Is the inspection result normal?
YES >> Replace combination meter. Refer to MWI-82, "Removal and Installation".
NO >> Replace BCM. Refer to BCS-80, "Removal and Installation"
.
3.CHECK TRUNK ROOM LAMP SWITCH SIGNAL CIRCUIT
Check the trunk room lamp switch signal circuit. Refer to DLK-126, "Diagnosis Procedure"
.
Is the inspection result normal?
YES >> GO TO 4.
NO >> Repair harness or connector.
4.CHECK TRUNK ROOM LAMP SWITCH
Check the room lamp switch. Refer to DLK-127, "Component Inspection"
.
Is the inspection result normal?
YES >> Replace combination meter. Refer to MWI-82, "Removal and Installation".
NO >> Replace trunk lid lock assembly. Refer to DLK-210, "TRUNK LAMP SWITCH AND TRUNK
RELEASE SOLENOID : Removal and Installation".
TRUNK/GLAS-H
Trunk lid open : On
Trunk lid closed : Off
Revision: November 20132014 Altima NAMRevision: November 20132014 Altima NAM
Page 3485 of 4801

PG
HARNESSPG-53
< DTC/CIRCUIT DIAGNOSIS >
C
D E
F
G H
I
J
K L
B
A
O P
N
E2 B8 W/4 : Front door switch LH C5 B46 GR/2 : Rear bumper antenna
G3 B9 Y/22 : Air bag diagnosis sensor unit E4 B47 W/2 : Rear speaker RH (Without BOSE audio
system)
G1 B10 W/12 : To E29 C2 B52 W/1 : Condenser
F2 B11 Y/2 : Front LH side air bag module B2 B53 B/1 : Rear window defogger
F2 B12 W/6 : To B201 D3 B54 B/1 : Rear window defogger
G1 B13 W/6 : Fuse block (J/B) D3 B58 — : Body ground
E2 B14 Y/2 : Front LH seat belt pre-tensioner D3 B61 Y/2 : Rear side air bag satellite sensor LH
E2 B15 Y/2 : Front side air bag satellite sensor LH G3 B65 W/4 : Joint connector-B04
B3 B16 W/12 : Rear view camera washer control unit E3 B66 O/2 : Front LH seat belt pre-tensioner
B4 B17 W/2 : Rear view camera air pump motor Chassis harness
D2 B18 W/4 : Rear door switch LH D4 C1 B/4 : To B43
C2 B19 — : Body ground C4 C2 B/2 : Rear wheel sensor LH
F2 B21 W/4 : Joint connector-B06 D5 C3 B/2 : Rear wheel sensor RH
B2 B22 L/12 : Joint connector-B07 Front seat LH harness
C 3 B 2 5 W / 2 : Rear speaker LH (Without BOSE audio
system) F 3 B 2 0 1 W / 6 : T o B 1 2
C 4 B 2 8 W / 3 : Trunk lamp switch and trunk release
solenoid F3 B202 W/2 : Seat belt buckle switch LH
D3 B29 GR/2 : Rear parcel shelf antenna E2 B203 W/10 : Power seat switch
A3 B30 W/6 : Rear combination lamp LH E2 B205 BR/4 : Lumbar support switch
C4 B32 BR/2 : License plate lamp RH F3 B206 GR/5 : Sliding motor
C4 B33 GR/2 : Trunk opener request switch E3 B207 W/6 : Reclining motor
B3 B34 BR/2 : License plate lamp LH F2 B208 W/6 : Front lifting motor
B4 B35 W/8 : Rear view camera F3 B209 W/6 : Rear lifting motor
C3 B36 W/2 : Trunk room lamp E3 B210 W/3 : Seat cushion heater LH
C 3 B 3 7 B / 2 : High-mounted stop lamp (Without rear
spoiler) D2 B211 W/2 : Seat back heater LH
E1 B38 Y/2 : LH side curtain air bag module G3 B212 B/2 : Lumbar support motor
D4 B39 B/2 : EVAP canister vent control valve
Revision: November 20132014 Altima NAM
Page 3786 of 4801

REAR SEATSE-37
< REMOVAL AND INSTALLATION >
C
D E
F
G H
I
K L
M A
B
SE
N
O P
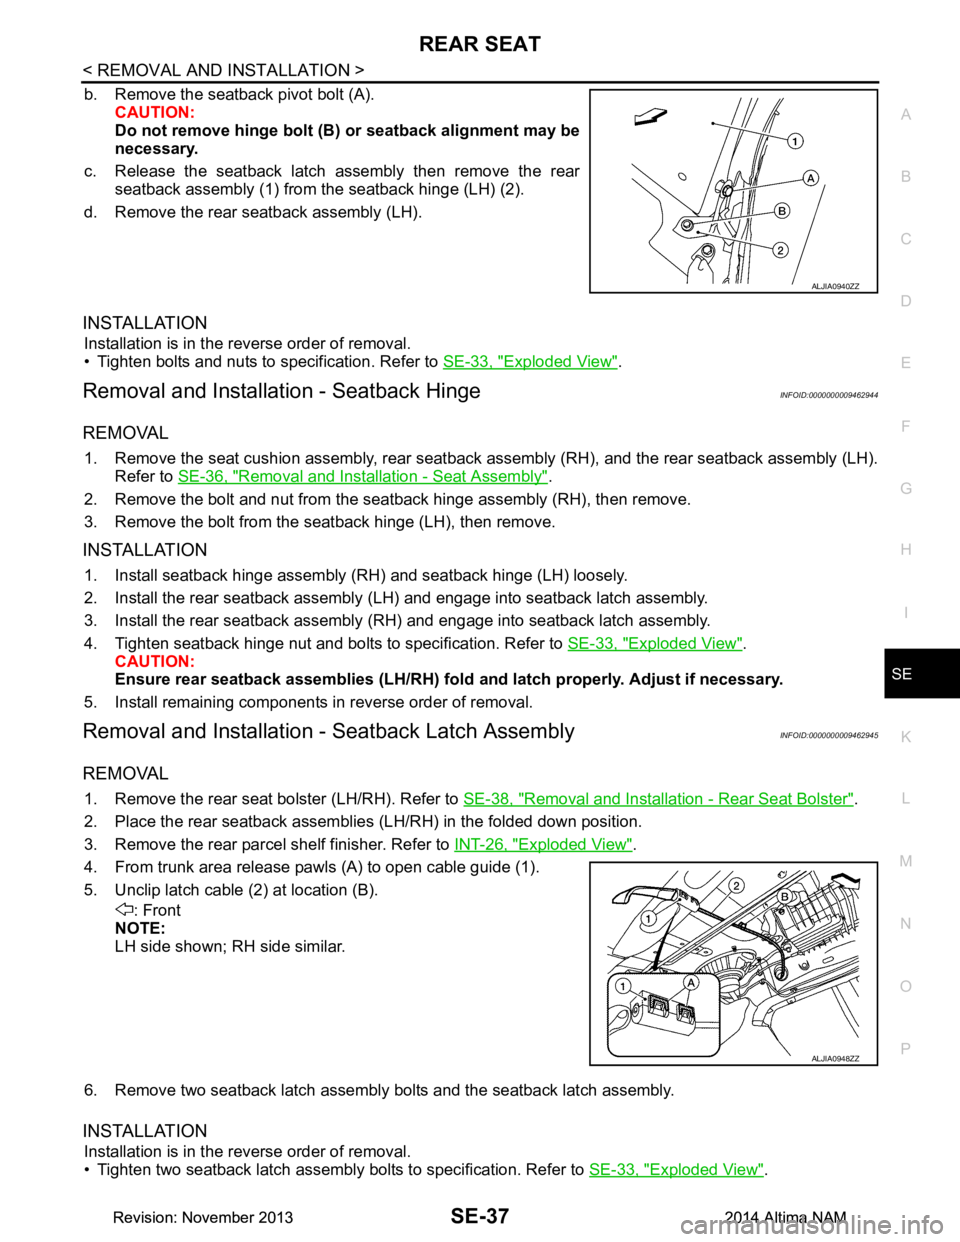
b. Remove the seatback pivot bolt (A). CAUTION:
Do not remove hinge bolt (B) or seatback alignment may be
necessary.
c. Release the seatback latch assembly then remove the rear seatback assembly (1) from the seatback hinge (LH) (2).
d. Remove the rear seatback assembly (LH).
INSTALLATION
Installation is in the reverse order of removal.
• Tighten bolts and nuts to specification. Refer to SE-33, "Exploded View"
.
Removal and Installation - Seatback HingeINFOID:0000000009462944
REMOVAL
1. Remove the seat cushion assembly, rear seatback assembly (RH), and the rear seatback assembly (LH).
Refer to SE-36, "Removal and Installation - Seat Assembly"
.
2. Remove the bolt and nut from the seatback hinge assembly (RH), then remove.
3. Remove the bolt from the s eatback hinge (LH), then remove.
INSTALLATION
1. Install seatback hinge assembly (RH) and seatback hinge (LH) loosely.
2. Install the rear seatback assembly (LH) and engage into seatback latch assembly.
3. Install the rear seatback assembly (RH) and engage into seatback latch assembly.
4. Tighten seatback hinge nut and bolts to specification. Refer to SE-33, "Exploded View"
.
CAUTION:
Ensure rear seatback assemblies (LH/RH) fold and latch properly. Adjust if necessary.
5. Install remaining components in reverse order of removal.
Removal and Installation - Seatback Latch AssemblyINFOID:0000000009462945
REMOVAL
1. Remove the rear seat bolster (LH/RH). Refer to SE-38, "Removal and Installation - Rear Seat Bolster".
2. Place the rear seatback assemblies (LH/RH) in the folded down position.
3. Remove the rear parcel shelf finisher. Refer to INT-26, "Exploded View"
.
4. From trunk area release pawls (A) to open cable guide (1).
5. Unclip latch cable (2) at location (B). : Front
NOTE:
LH side shown; RH side similar.
6. Remove two seatback latch assembly bolts and the seatback latch assembly.
INSTALLATION
Installation is in the reverse order of removal.
• Tighten two seatback latch assembly bolts to specification. Refer to SE-33, "Exploded View"
.
ALJIA0940ZZ
ALJIA0948ZZ
Revision: November 20132014 Altima NAMRevision: November 20132014 Altima NAM