Page 1 of 24
2 0 14
QUICK REFERENCE GUIDE
1276458_14a_GTR_QRG_Cover_113012.indd 311/30/12 1:44 PM
Page 2 of 24
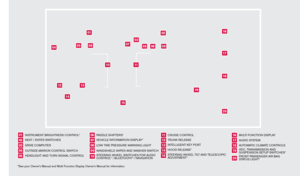
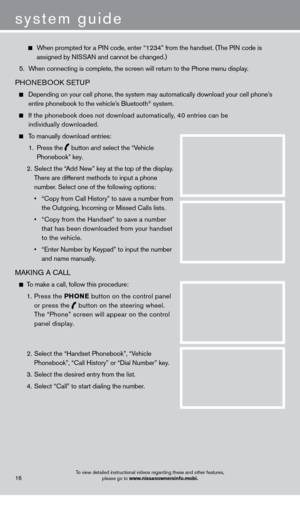
*See your Owner’s Manual and Multi Function Display Owner’s Manual for information.INSTRUMENT BRIGHTNESS CONTROL*
NEXT / ENTER SWITCHES
DRIVE COMPUTER
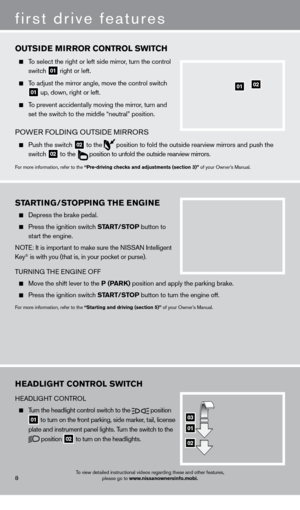
OUTSIDE MIRROR CONTROL SWITCH
HEADLIGHT AND TURN SIGNAL CONTROL
PADDLE SHIFTERS*
VEHICLE INFORMATION DISPLAY*
LOW TIRE PRESSURE WARNING LIGHT
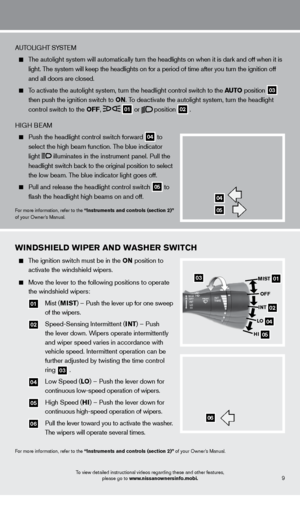
WINDSHIELD WIPER AND WASHER SWITCH
STEERING WHEEL SWITCHES FOR AUDIO
CONTROL* / BLUETOOTH
® / NAVIGATIONCRUISE CONTROL
TRUNK RELEASE
INTELLIGENT KEY PORT
HOOD RELEASE*
STEERING WHEEL TILT AND TELESCOPIC
ADJUSTMENT*
MULTI FUNCTION DISPLAY
AU D I O SYSTE M
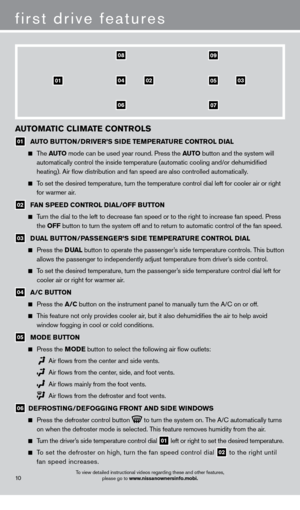
AUTOMATIC CLIMATE CONTROLS
VDC, TRANSMISSION AND
SUSPENSION SETUP SWITCHES*
FRONT PASSENGER AIR BAG
STATUS LIGHT*
0102030504
06
11
16
0709
12
17181920
0810
131415
01
02
03
04
05
09
06
06
12
07
08
14
15
161718
19
20
13
10
11
1276458_14a_GTR_QRG_Cover_113012.indd 411/30/12 1:44 PM
Page 3 of 24

TABLE OF CONTENTS
Additional Information about your vehicle is also available in your Owner’s Manual, Multi Function Display Owner’s Manual and at www.nissanusa.com.
New SYSTeM FeaT ureS
RearV
iew Monitor
...............................................2
USB/iPod
® Interface............................................2
D
VD Player
....................................................2
X
M NavTraffic and XM NavWeather (if so equipped)
..................3
eS
S
eNTI
a
L INFO r
M
a
TI
ON
T
ire Pressure Monitoring System (TPMS)
...........................4
Fuel-Filler Cap . . . . . . . . . . . . . . . . . . . . . . . . . . . . . . . . . . . .\
. . . . . . . . . . . . . 4
Unique Noises
.................................................
5
V
ehicle Modifications
............................................5
V
ehicle Dynamic Control (VDC)
...................................5
Dry Carbon Fiber Rear Spoiler (if so equipped)......................5
FI
rST
D
rIV
e
F
ea
T
ure
S
N
ISSAN Intelligent Key
® System..................................6
T
runk Lid Release
...............................................7
Seat Adjustments
..............................................
7
Outside Mirror Control Switc
h
....................................8
St
arting/Stopping the Engine
.....................................8
Headlight Control Switc
h ........................................
8
W
indshield Wiper and Washer Switch .............................
9
Automatic Climate Controls . . . . . . . . . . . . . . . . . . . . . . . . . . . . . . . . . . . .\
. 10
F
M/AM/XM Satellite Radio with CD/DVD Player
....................11
Cloc
k Set/Adjustment
..........................................12
Cruise Control . . . . . . . . . . . . . . . . . . . . . . . . . . . . . . . . . . . .\
. . . . . . . . . . . . 13
Fuel-Filler Door
...............................................
13
SYST
e
M G
u
ID
e
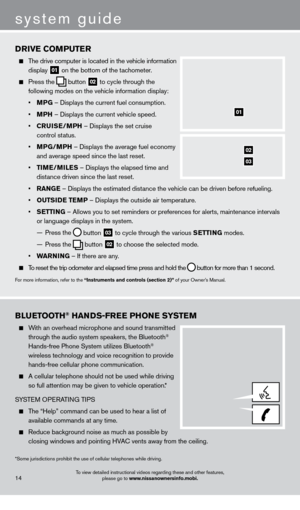
Drive Computer
...............................................
14
Bluetooth
® Hands-free Phone System ............................14
Navigation System.............................................17
HomeLink
® Universal Transceiver.................................20
• A cellular telephone should not be used for any purpose while
driving so full attention may be given to vehicle operation.
• Always wear your seat belt.
• Supplemental air bags do not replace proper seat belt usage.
•
Children
12 and under should always ride in the rear seat
properly secured in child restraints or seat belts according to
their age and weight.
•
Do not drink and drive.
F
or more information, refer to the “Safety –– Seats, seat belts and
supplemental restraint system (section 1)” and the “Starting and
driving (section 5)” of your Owner’s Manual and the “
audio System
(section 3)”
of your Multi Function Display Owner’s Manual. To view detailed
instructional videos, go to
www.nissanownersinfo.mobi/2014/gtr or snap this barcode with an appropriate barcode reader.
1276458_14a_GTR_QRG_Text-Insert_113012.indd 111/30/12 1:44 PM
Page 4 of 24

position, the Multi Function Display will automatically
c
hange to show the area directly behind the vehicle.")
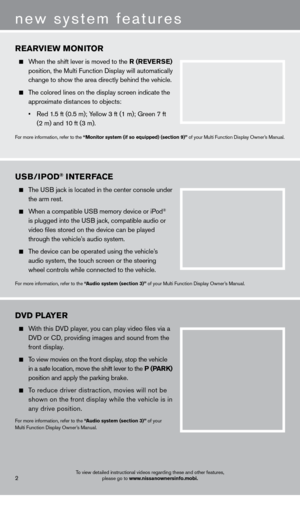
rearVIew MONITO r
When the shift lever is moved to the r ( re V erSe )
position, the Multi Function Display will automatically
c
hange to show the area directly behind the vehicle.
The colored lines on the display screen indicate the
appro
ximate distances to objects:
•
Red 1
.5 ft (0.5 m); Yellow 3 ft (1 m); Green 7 ft
(2 m) and 1
0 ft (3 m).
For more information, refer to the “Monitor system (if so equipped) (section 9)” of your Multi Function Display Owner’s Manual.
uSB/IPOD® INTerFace
The USB jack is located in the center console under
the arm rest.
When a compatible USB memory device or iPod®
is plugged into the U
SB jack, compatible audio or
video files stored on the device can be played
through the vehicle’
s audio system.
The device can be operated using the vehicle’s
audio system, the touc
h screen or the steering
wheel controls while connected to the vehicle.
For more information, refer to the “audio system (section 3)” of your Multi Function Display Owner’s Manual.
2
new system features
DVD PLaYer
With this DVD player, you can play video files via a
D
VD or CD, providing images and sound from the
front display
.
To view movies on the front display, stop the vehicle
in a s
afe location, move the shift lever to the P (P
arK)
position and apply the parking b
rake.
To reduce driver distraction, movies will not be
shown on the front display while the vehicle is in
any drive position.
For more information, refer to the “audio system (section 3)” of your
Multi Function Display Owner’s Manual.
To view detailed instructional videos regarding these and other features, please go to www.nissanownersinfo.mobi.
1276458_14a_GTR_QRG_Text-Insert_113012.indd 211/30/12 1:44 PM
Page 5 of 24
To view detailed instructional videos regarding these and other features, please go to www.nissanownersinfo.mobi.3
XM NaVTra FFIc * a ND X M NaVw eaT her* (if so equipped)
Your vehicle’s Navigation System is equipped with
X
M NavTraffic and XM NavWeather capabilities.
XM NavTraffic enables your vehicle’s Navigation
System to display real-time traffic conditions, suc
h
as accidents or road construction and m
ay provide
a detour to help avoid congestion.
XM NavWeather tracks nationwide weather
i
nformation, provides real-time weather reports and
automatically alerts you to severe weather conditions
around the current vehicle location.
*XM Satellite Radio, NavTraffic and NavWeather are only available on
vehicles equipped with optional XM Satellite subscription service.
For more information, refer to the “Navigation (section 2)” of your Multi
Function Display Owner’s Manual.
1276458_14a_GTR_QRG_Text-Insert_113012.indd 311/30/12 1:44 PM
Page 6 of 24

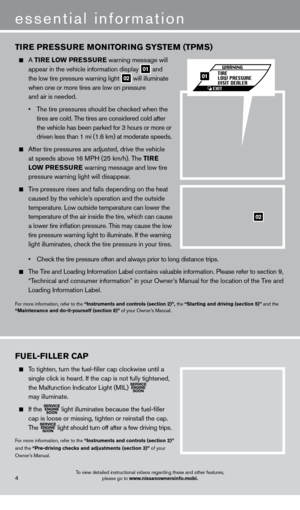
A TI re LOw Pre SSure warning mess age will
appear in the vehicle information display 01 and
the low tire pressure warning light 02 will illu")
TIre P reS Su re MONITO rI NG SYST eM (TPM S)
A TI re LOw Pre SSure warning mess age will
appear in the vehicle information display 01 and
the low tire pressure warning light 02 will illuminate
when one or more tires are low on pressure
and air is n
eeded.
•
T
he tire pressures should be checked when the
tires are cold. T
he tires are considered cold after
the vehicle has been parked for 3 hours or more or
driven less than 1 mi (1.6 km) at moderate speeds.
After tire pressures are adjusted, d rive the vehicle
at speeds above 1
6 MPH (25 km/h). The TI re
L
O
w Pre
SS
ure warning mess
age and low tire
pressure warning light will dis
appear.
Tire pressure rises and falls depending on the heat
caused by the vehicle’
s operation and the outside
temperature. Low outside temperature can lower the
temperature of the air inside the tire, whic
h can cause
a lower tire inflation pressure. T
his may cause the low
tire pressure warning light to illuminate. If the warning
light illuminates, c
heck the tire pressure in your tires.
•
Chec
k the tire pressure often and always prior to long distance trips.
The Tire and Loading Information Label contains valuable information. Please refer to section 9,
“T
echnical and consumer information” in your Owner’s Manual for the location of the Tire and
Loading Information Label.
For more information, refer to the “Instruments and controls (section 2)”, the “Starting and driving (section 5)” and the
“Maintenance and do-it-yourself (section 8)” of your Owner’s Manual.
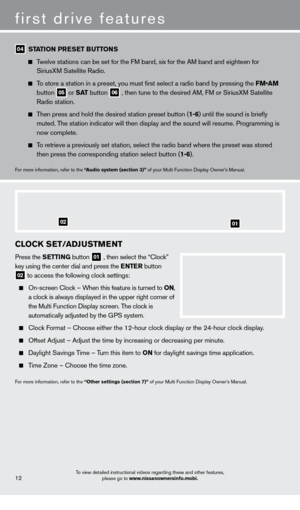
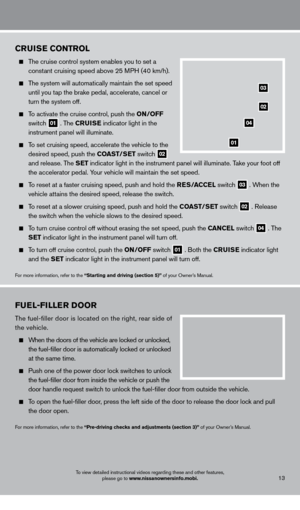
FueL-FILL er ca P
To tighten, turn the fuel-filler cap clockwise until a
single click is heard. If the cap is not fully tightened,
the Malfunction Indicator Light (MIL)
may illuminate.
If the light illuminates because the fuel-filler
cap is loose or missing, tighten or reinstall the cap.
The
light should turn off after a few driving trips.
For more information, refer to the “Instruments and controls (section 2)”
and the “Pre-driving checks and adjustments (section 3)” of your
Owner’s Manual.
4
essential information
02
01
To view detailed instructional videos regarding these and other features, please go to www.nissanownersinfo.mobi.
1276458_14a_GTR_QRG_Text-Insert_113012.indd 411/30/12 1:44 PM
Page 7 of 24

uNIQue NOIS e S
The GT-R is a high-performance vehicle and therefore has unique operating characteristics.
You will hear more noises emitted from this vehicle than from a conventio\
nal passenger car.
For more information, refer to the “GT-r Overview (section GTr)” and the “Starting and driving (section 5)” of your
Owner ’s Manual.
VehIc L e M ODIFIc aTI ONS
Do not modify the vehicle with aftermarket parts or accessories.
To maintain your vehicle’s performance, only use genuine GT-R specific components.
For more information, refer to the “GT-r Overview (section GTr)” of your Owner’s Manual.
VehIcL e D YN a MIc c ONT rOL (VDc)
Always make sure the VDC is ON before driving the vehicle.
The VDC OFF mode should ONLY be used briefly to help free the vehicle if stuck in snow
or mud.
For more information, refer to the “GT-r Overview (section GTr)”, the “Instruments and controls (section 2)” and the
“Starting and driving (section 5)” of your Owner’s Manual.
DrY carB ON FIBe r rear SPOIL er (if so equipped)
Do not wax this type of rear spoiler.
Waxing speeds up the deterioration by allowing water under the carbon lay\
er.
For more information, refer to the “GT-r Overview (section GTr)”, and the “appearance and care (section 7)” of your
Owner’s Manual.
5To view detailed instructional videos regarding these and other features, please go to www.nissanownersinfo.mobi.
1276458_14a_GTR_QRG_Text-Insert_113012.indd 511/30/12 1:44 PM
Page 8 of 24

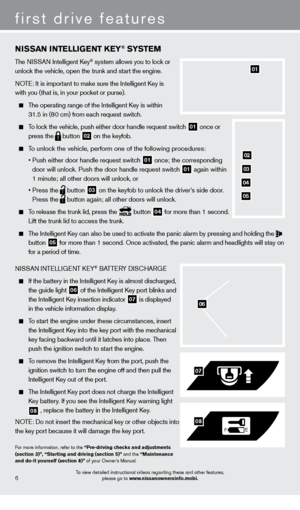
NISSaN INTeLLIGeNT Ke Y® SYSTeM
The NISSAN Intelligent Key® system allows you to lock or
unlock the vehicle, open the trunk and start the engine.
NOTE: It is important to make sure the Intelligent Key is
with you (that is, in your pocket or purse).
The operating range of the Intelligent Key is within
31.5 in (8
0 cm) from each request switch.
To lock the vehicle, push either door handle request switch 01 once or
press the button
02 on the keyfob.
To unlock the vehicle, perform one of the following procedures:
•
Push either door handle request switc
h
01 once; the corresponding
door will unlock. Push the door handle request switch 01 again within
1 minute; all other doors will unlock, or
•
Press the button
03 on the keyfob to unlock the driver’s side door.
Press the button again; all other doors will unlock.
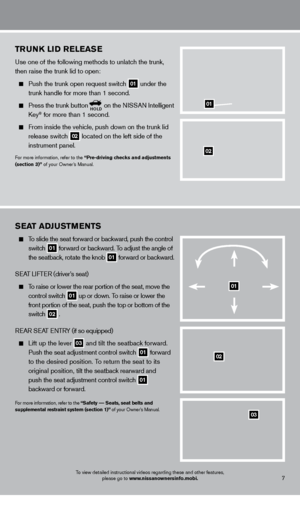
To release the trunk lid, press the button
04 for more than 1 second.
Lift the trunk lid to access the trunk.
The Intelligent Key can also be used to activate the panic alarm by pressing and holding \
the
button 05 for more than 1 second. Once activated, the panic alarm and headlights w\
ill stay on
for a period of time.
NISSAN INTELLIGENT KEY
® BATTERY DISCHARGE
If the battery in the Intelligent K ey is almost discharged,
the guide light 06 of the Intelligent Key port blinks and
the Intelligent K
ey insertion indicator 07 is displayed
in the vehicle information display
.
To start the engine under these circumstances, insert
the Intelligent K
ey into the key port with the mechanical
key facing bac
kward until it latches into place. Then
push the ignition switc
h to start the engine.
To remove the Intelligent Key from the port, push the
ignition switc
h to turn the engine off and then pull the
Intelligent K
ey out of the port.
The Intelligent Key port does not charge the Intelligent
K
ey battery. If you see the Intelligent Key warning light
08 , replace the battery in the Intelligent Key.
NOTE: Do not insert the mechanical key or other objects into
the key port because it will damage the key port.
For more information, refer to the “Pre-driving checks and adjustments
(section 3)”, “Starting and driving (section 5)” and the “Maintenance
and do-it yourself (section 8)” of your Owner’s Manual.
06
F E
07
08
6
first drive features
01
02
03
04
05
To view detailed instructional videos regarding these and other features, please go to www.nissanownersinfo.mobi.
1276458_14a_GTR_QRG_Text-Insert_113012.indd 611/30/12 1:44 PM


Your vehicle’s Navigatio")