2014 MITSUBISHI OUTLANDER SPORT change wheel
[x] Cancel search: change wheelPage 325 of 388
How to change a tyre9-14 For emergencies
9
21. Immediately drive with great care to a
MITSUBISHI MOTORS Authorised Ser-vice Point or another specialist and havetyre repair/replacement performed.
E00801203924
Before changing a tyre, first stop your vehiclein a safe, flat location.1. Park the vehicle on level and stableground, free of loose pebbles, etc.2. Set the parking brake firmly.3. Put the select position in “P” (PARK)position and stop the Plug-in Hybrid EVsystem.4. Have all your passengers get out of thevehicle.
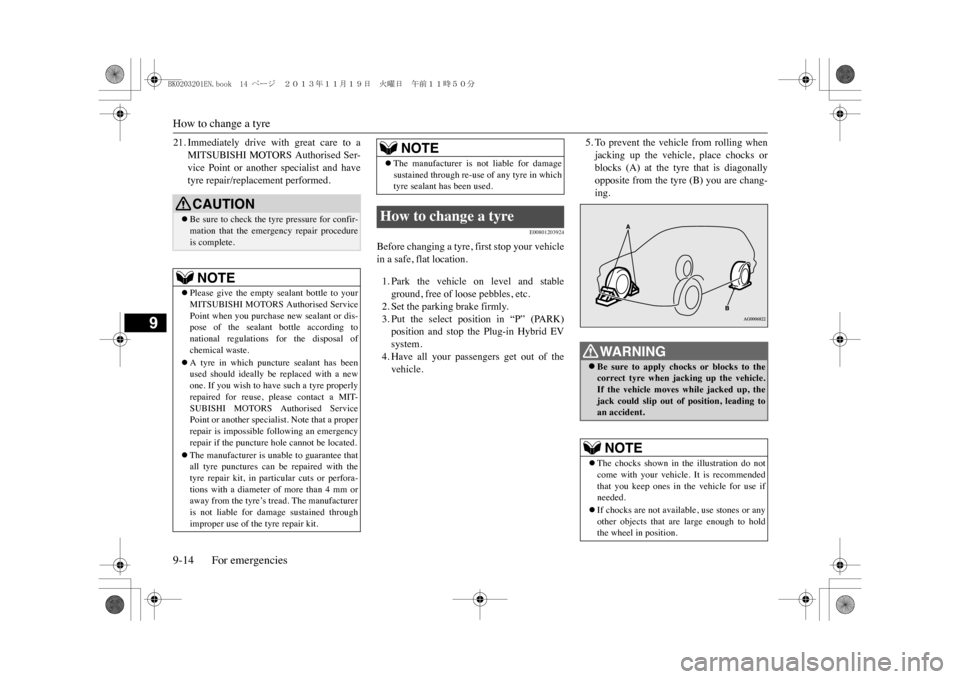
5. To prevent the vehicle from rolling whenjacking up the vehicle, place chocks orblocks (A) at the tyre that is diagonallyopposite from the tyre (B) you are chang-ing.
CAUTION�zBe sure to check the tyre pressure for confir-mation that the emergency repair procedureis complete.NOTE
�zPlease give the empty sealant bottle to yourMITSUBISHI MOTORS Authorised ServicePoint when you purchase new sealant or dis-pose of the sealant bottle according tonational regulations for the disposal ofchemical waste.�zA tyre in which puncture sealant has beenused should ideally be
replaced with a new
one. If you wish to have
such a tyre properly
repaired for reuse, please contact a MIT-SUBISHI MOTORS Authorised ServicePoint or another specialist. Note that a properrepair is impossible fo
llowing an emergency
repair if the puncture hole cannot be located.�zThe manufacturer is unable to guarantee thatall tyre punctures can be repaired with thetyre repair kit, in particular cuts or perfora-tions with a diameter
of more than 4 mm or
away from the tyre’s tread. The manufactureris not liable for damage sustained throughimproper use of the tyre repair kit.
�zThe manufacturer is not liable for damagesustained through re-use of any tyre in whichtyre sealant has been used.
How to change a tyre
NOTE
WA R N I N G�zBe sure to apply choc
ks or blocks to the
correct tyre when jacking up the vehicle.If the vehicle moves while jacked up, thejack could slip out of
position, leading to
an accident.NOTE
�zThe chocks shown in the illustration do notcome with your vehicle. It is recommendedthat you keep ones in the vehicle for use ifneeded.�zIf chocks are not available, use stones or anyother objects that are large enough to holdthe wheel in position.
BK0203201EN.book 14 ページ 2013年11月19日 火曜日 午前11時50分
Page 326 of 388

How to change a tyre
For emergencies 9-15
9
6. Get the jack, jack bar and wheel nutwrench ready.Refer to “Tools and jack” on page 9-6.
E00803201894
1. On vehicles with wheel covers, firstremove the covers (refer to “Wheel cov-ers” on page 9-18).Then loosen the wheel nuts a quarter turnwith the wheel nut wrench. Do notremove the wheel nuts yet.
2. Place the jack under one of the jackingpoints (A) shown in the illustration. Usethe jacking point closest to the tyre youwish to change.
3. Rotate the jack by hand until the flangeportion (B) fits in the groove (C) at the topof the jack.4. Insert the jack bar (D) into the wheel nutwrench (E). Then put the end of the jackbar into the shaft’s jack end, as shown inthe illustration.Slowly rotate the wheel nut wrench untilthe tyre is raised slightly off the groundsurface.
To c h a n g e a t y r e
WA R N I N G�zSet the jack only at the positions shownhere. If the jack is set at a wrong position,it could dent your vehicle or the jackmight fall over and cause personal injury.�zDo not use the jack on a tilted or soft sur-face.Otherwise, the jack might slip and causepersonal injury. Always use the jack on aflat, hard surface. Before setting the jack,make sure there are no sand or pebblesunder the jack base.
BK0203201EN.book 15 ページ 2013年11月19日 火曜日 午前11時50分
Page 327 of 388
How to change a tyre9-16 For emergencies
9
5. Remove the wheel nuts with the wheel nutwrench, then take the wheel off.
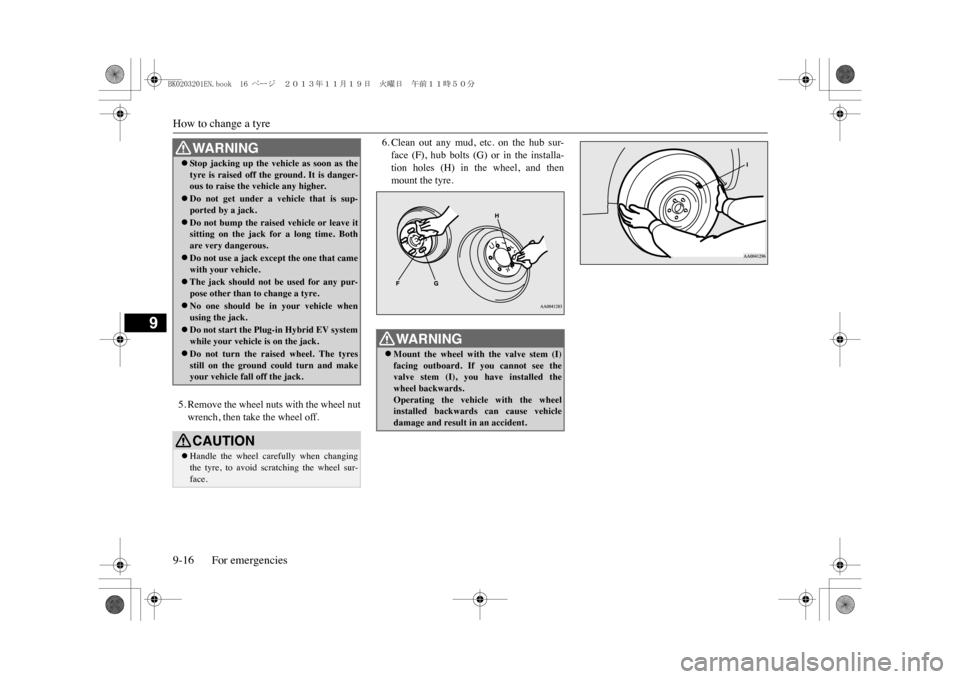
6. Clean out any mud, etc. on the hub sur-face (F), hub bolts (G) or in the installa-tion holes (H) in the wheel, and thenmount the tyre.
WA R N I N G�zSt o p j a c k i n g u p th e v e h i
cle as soon as the
tyre is raised off the ground. It is danger-ous to raise the vehicle any higher.�zDo not get under a vehicle that is sup-ported by a jack.�zDo not bump the raised vehicle or leave itsitting on the jack for a long time. Bothare very dangerous.�zDo not use a jack except the one that camewith your vehicle.�zThe jack should not be used for any pur-pose other than to change a tyre.�zNo one should be in your vehicle whenusing the jack.�zDo not start the Plug-in Hybrid EV systemwhile your vehicle is on the jack.�zDo not turn the raised wheel. The tyresstill on the ground could turn and makeyour vehicle fall off the jack.CAUTION�zHandle the wheel carefully when changingthe tyre, to avoid scratching the wheel sur-face.
WA R N I N G�zMount the wheel with the valve stem (I)facing outboard. If you cannot see thevalve stem (I), you have installed thewheel backwards.Operating the vehicle with the wheelinstalled backwards can cause vehicledamage and result in an accident.
BK0203201EN.book 16 ページ 2013年11月19日 火曜日 午前11時50分
Page 328 of 388
![MITSUBISHI OUTLANDER SPORT 2014 3.G Owners Manual How to change a tyre
For emergencies 9-17
9
7. Turn the wheel nuts clockwise by hand toinitially tighten them.[Type 1: On vehicles with steel wheels]Te m p o r a r i l y t i g h t e n t h e w h MITSUBISHI OUTLANDER SPORT 2014 3.G Owners Manual How to change a tyre
For emergencies 9-17
9
7. Turn the wheel nuts clockwise by hand toinitially tighten them.[Type 1: On vehicles with steel wheels]Te m p o r a r i l y t i g h t e n t h e w h](/manual-img/19/7545/w960_7545-327.png)
How to change a tyre
For emergencies 9-17
9
7. Turn the wheel nuts clockwise by hand toinitially tighten them.[Type 1: On vehicles with steel wheels]Te m p o r a r i l y t i g h t e n t h e w h e e l n u t s b yhand until the tapered parts of the wheelnuts make light contact with the seats ofthe wheel holes and the wheel is notloose.[Type 2: On vehicles with aluminiumwheels]Te m p o r a r i l y t i g h t e n t h e w h e e l n u t s b yhand until the flange parts of the wheelnuts make light contact with the wheeland the wheel is not loose.
8. Lower the vehicle slowly by rotating thewheel nut wrench anticlockwise until thetyre touches the ground.
9. Tighten the nuts in the order shown in theillustration until each nut has been tight-ened to the torque listed here.Tightening torque 88 to 108 N•m
10. On vehicles with wheel covers, install the
covers (refer to “Wheel covers” on page9-18).
11. Lower and remove the jack, then store the
jack, flat tyre, and chocks. Have yourdamaged tyre repaired as soon as possi-ble.
CAUTION�zNever apply oil to either the wheel bolts orthe nuts or they will tighten too much.
Ty p e 1Ty p e 2
NOTE
�zOn vehicles with aluminium wheels, if all 4aluminium wheels are changed to steelwheels. e. g. when fitting winter tyres, usetapered nuts.
CAUTION�zNever use your foot or
a pipe extension for
extra force in the wheel nut wrench. If youdo so, you will tighten the nut too much.
BK0203201EN.book 17 ページ 2013年11月19日 火曜日 午前11時50分
Page 329 of 388
How to change a tyre9-18 For emergencies
9
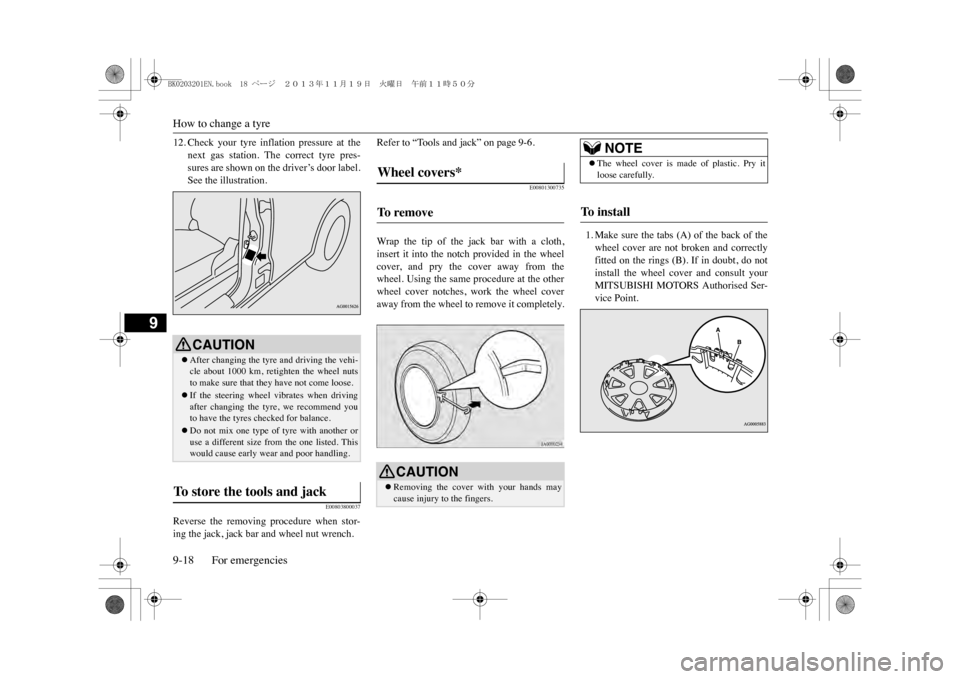
12. Check your tyre inflation pressure at the
next gas station. The correct tyre pres-sures are shown on the driver’s door label.See the illustration.
E00803800037
Reverse the removing procedure when stor-ing the jack, jack bar and wheel nut wrench.
Refer to “Tools and jack” on page 9-6.
E00801300735
Wrap the tip of the jack bar with a cloth,insert it into the notch provided in the wheelcover, and pry the cover away from thewheel. Using the same procedure at the otherwheel cover notches, work the wheel coveraway from the wheel to remove it completely.
1. Make sure the tabs (A) of the back of thewheel cover are not broken and correctlyfitted on the rings (B). If in doubt, do notinstall the wheel cover and consult yourMITSUBISHI MOTORS Authorised Ser-vice Point.
CAUTION�zAfter changing the tyre and driving the vehi-cle about 1000 km, reti
ghten the wheel nuts
to make sure that they have not come loose.�zIf the steering wheel vibrates when drivingafter changing the tyre, we recommend youto have the tyres checked for balance.�zDo not mix one type of
tyre with another or
use a different size from the one listed. Thiswould cause early wear and poor handling.
To s t o r e t h e t o o l s a n d j a c k
Wheel covers* To r e m o v e
CAUTION�zRemoving the cover with your hands maycause injury to the fingers.
NOTE
�zThe wheel cover is made of plastic. Pry itloose carefully.
To i n s t a l l
BK0203201EN.book 18 ページ 2013年11月19日 火曜日 午前11時50分
Page 353 of 388
Wiper blade rubber replacement11-12 Maintenance
11
E01002101882
It is recommended that snow chains are car-ried in snow regions and fitted when requiredto the front wheels in accardance with themanufacture’s instructions.On 4WD vehicles in which the driving poweris distributed preferentially to the frontwheels, ensure that the tyre chains are fittedon the front.The tyres fitted to your vehicle as originalequipment allow you to fit tyre chains if theyare required. When replacing your tyres,check with the tyre distributor or manufac-turer if the fitting of tyre chains will be detri-mental to the tyres being purchased.
Always follow the chain manufacturer’sinstructions when fitting the chains.
E01002600532
1. Lift the wiper arm off the windscreen.
CAUTION�zObserve permissible maximum speed foryour snow tyres and the legal speed limit.NOTE
�zThe laws and regula
tions concerning snow
tyres (driving speed, requi
red use, type, etc.)
vary. Find out and follow the laws and regu-lations in the area you intend to drive.�zIf flange nuts are used on your vehicle,change to tapered nuts when steel wheels areused.
Ty r e c h a i n s
WA R N I N G�zDO NOT use a jack when fitting thechains, as in the conditions, the tyres mayslip on the ic
y road causing the vehicle to
slip off the jack.CAUTION�zChoose a clear straight stretch of road whereyou can pull off and still be seen while youare fitting the chains.�zDo not fit chains before you need them. Thiswill wear out your tyres and the road surface.�zAfter driving around 100-300 metres, stopand retighten the chains.�zCare should be taken with extremes of steer-ing lock to prevent possible contact betweenthe chains and the vehicle body.�zDrive carefully and do not exceed 30 km/h.Remember, fitting chains is not going to stopaccidents from happening.�zWhen tyre chains are installed, take care thatthey do not damage the disc wheel or body.�zAn aluminium wheel can be damaged by atyre chain while driving. When fitting a tyrechain on an aluminium wheel, take care thatany part of the chai
n and fitting cannot be
brought into contact with the wheel.
�zRemove the wheel covers before installing atyre chain, otherwise they may be damagedby the tyre chain. (Refer to page 9-18.)�zWhen installing or removing the tyre chains,take care that hands and other parts of yourbody are not injured by the sharp edges ofthe vehicle body.�zInstall the chains only on the front tyres andtighten them as tightly
as possible with the
ends securely fastened.
Wiper blade rubber replace-ment Windscreen wiper blades
CAUTION
BK0203201EN.book 12 ページ 2013年11月19日 火曜日 午前11時50分
Page 386 of 388
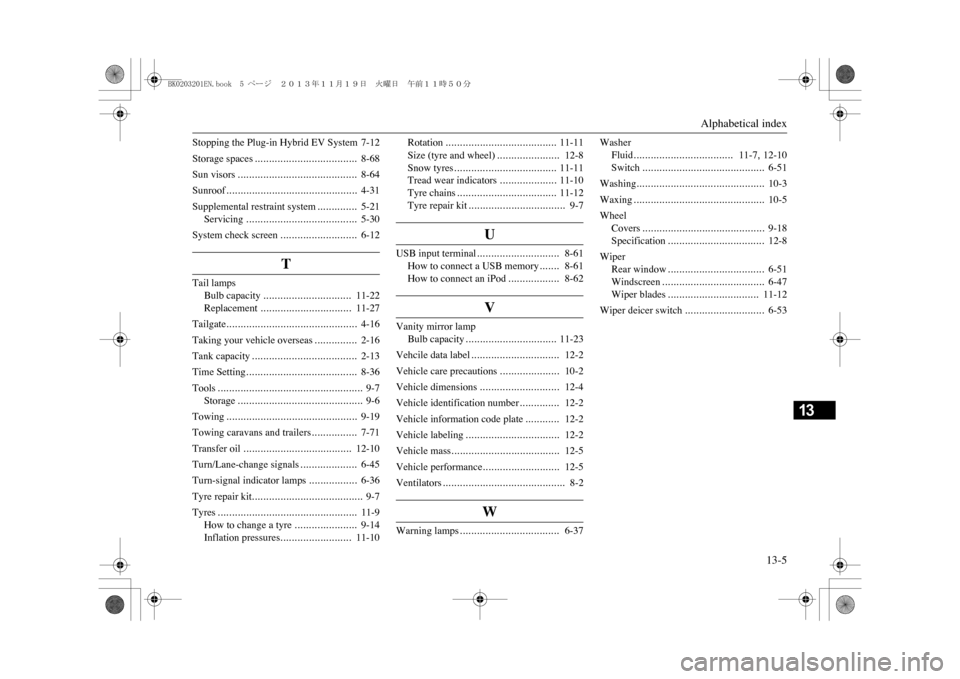
Alphabetical index
13-5
13
Stopping the Plug-in Hybrid EV System 7-12Storage spaces
....................................
8-68
Sun visors
..........................................
8-64
Sunroof
..............................................
4-31
Supplemental restraint system
..............
5-21
Servicing
.......................................
5-30
System check screen
...........................
6-12
T
Tail lamps
Bulb capacity
...............................
11-22
Replacement
................................
11-27
Tailgate
..............................................
4-16
Taking your vehicle overseas
...............
2-16
Tank capacity
.....................................
2-13
Time Setting
.......................................
8-36
Tools
...................................................
9-7
Storage
............................................
9-6
Towing
..............................................
9-19
Towing caravans and trailers
................
7-71
Transfer oil
......................................
12-10
Turn/Lane-change signals
....................
6-45
Turn-signal indicator lamps
.................
6-36
Tyre repair kit
.......................................
9-7
Tyres
.................................................
11-9
How to change a tyre
......................
9-14
Inflation pressures
.........................
11-10
Rotation
.......................................
11-11
Size (tyre and wheel)
......................
12-8
Snow tyres
....................................
11-11
Tread wear indicators
....................
11-10
Tyre chains
...................................
11-12
Tyre repair kit
..................................
9-7
U
USB input terminal
.............................
8-61
How to connect a USB memory
.......
8-61
How to connect an iPod
..................
8-62
V
Vanity mirror lamp
Bulb capacity
................................
11-23
Vehcile data label
...............................
12-2
Vehicle care precautions
.....................
10-2
Vehicle dimensions
............................
12-4
Vehicle identification number
..............
12-2
Vehicle information code plate
............
12-2
Vehicle labeling
.................................
12-2
Vehicle mass
......................................
12-5
Vehicle performance
...........................
12-5
Ventilators
...........................................
8-2
W
Warning lamps
...................................
6-37
Washer
Fluid
...................................
11-7
, 12-10
Switch
...........................................
6-51
Washing
.............................................
10-3
Waxing
..............................................
10-5
Wheel
Covers
...........................................
9-18
Specification
..................................
12-8
Wiper
Rear window
..................................
6-51
Windscreen
....................................
6-47
Wiper blades
................................
11-12
Wiper deicer switch
............................
6-53
BK0203201EN.book 5 ページ 2013年11月19日 火曜日 午前11時50分