2014 MITSUBISHI LANCER SPORTBACK engine
[x] Cancel search: enginePage 223 of 422
Wiper and washer switch 5-156 Features and controls
5
N00523201434
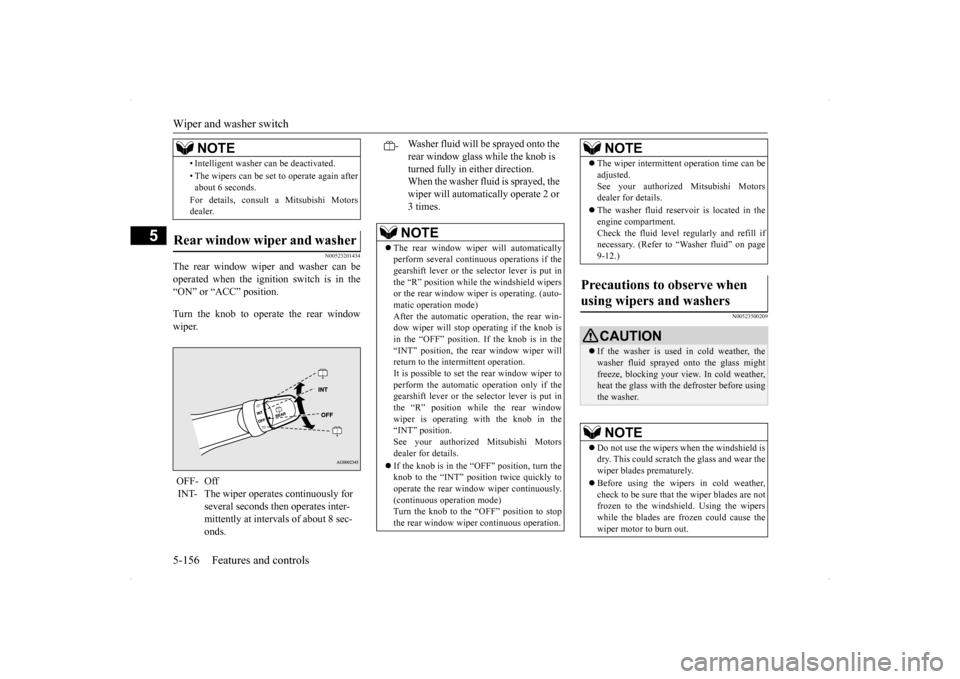
The rear window wiper and washer can be operated when the ignition switch is in the “ON” or “ACC” position. Turn the knob to operate the rear window wiper.
N00523500209
• Intelligent washer can be deactivated. • The wipers can be set to operate again after about 6 seconds. For details, consult a Mitsubishi Motors dealer.
Rear window wiper and washer OFF- Off INT- The wiper operates continuously for
several seconds then operates inter- mittently at intervals of about 8 sec- onds.NOTE
-
Washer fluid will be sprayed onto the rear window glass while the knob is turned fully in either direction. When the washer fluid is sprayed, the wiper will automatically operate 2 or 3 times.NOTE
The rear window wiper will automatically perform several continuous operations if the gearshift lever or the selector lever is put inthe “R” position while the windshield wipers or the rear window wiper is operating. (auto- matic operation mode)After the automatic operation, the rear win- dow wiper will stop operating if the knob is in the “OFF” position. If the knob is in the“INT” position, the rear window wiper will return to the intermittent operation. It is possible to set the rear window wiper toperform the automatic operation only if the gearshift lever or the selector lever is put in the “R” position while the rear windowwiper is operating with the knob in the “INT” position. See your authorized Mitsubishi Motorsdealer for details. If the knob is in the “OFF” position, turn the knob to the “INT” position twice quickly to operate the rear window wiper continuously.(continuous operation mode) Turn the knob to the “OFF” position to stop the rear window wiper continuous operation.
The wiper intermittent operation time can be adjusted. See your authorized Mitsubishi Motors dealer for details. The washer fluid reservoir is located in the engine compartment. Check the fluid level regularly and refill ifnecessary. (Refer to “Washer fluid” on page 9-12.)
Precautions to observe when using wipers and washers
CAUTION If the washer is used in cold weather, the washer fluid sprayed onto the glass might freeze, blocking your view. In cold weather, heat the glass with the defroster before usingthe washer.NOTE
Do not use the wipers when the windshield is dry. This could scratch the glass and wear the wiper blades prematurely. Before using the wipers in cold weather, check to be sure that the wiper blades are not frozen to the windshield. Using the wiperswhile the blades are frozen could cause the wiper motor to burn out.NOTE
BK0200700US.book
156 ページ 2013年2月15日 金曜日 午後12時17分
Page 224 of 422
Electric rear window defogger switch
Features and controls 5-157
5
N00523700315
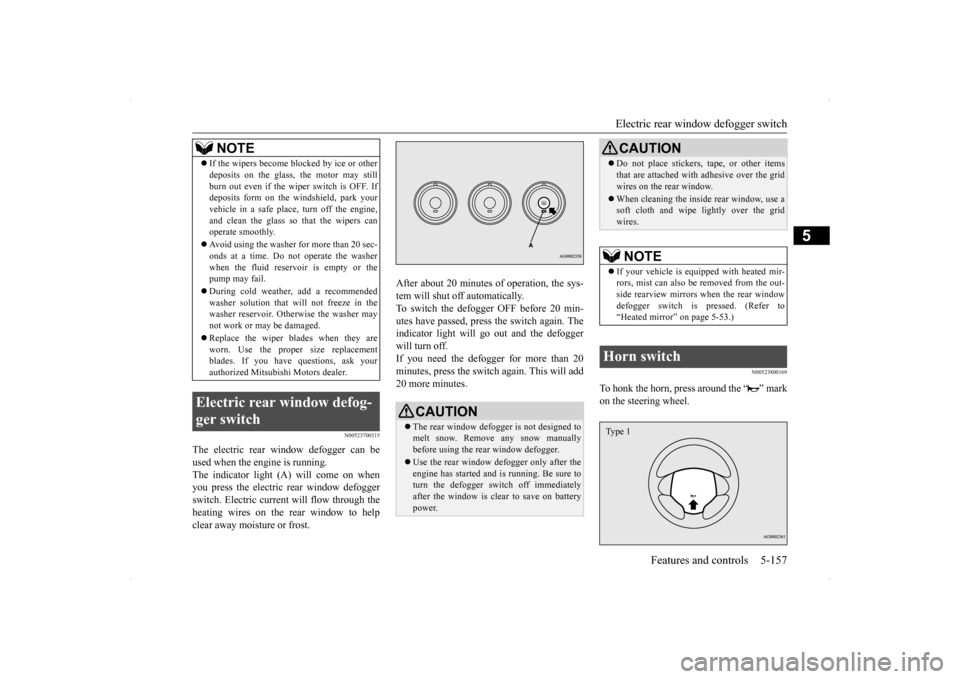
The electric rear window defogger can be used when the engine is running. The indicator light (A) will come on when you press the electric rear window defoggerswitch. Electric current will flow through the heating wires on the rear window to help clear away moisture or frost.
After about 20 minutes of operation, the sys- tem will shut off automatically. To switch the defogger OFF before 20 min-utes have passed, press the switch again. The indicator light will go out and the defogger will turn off. If you need the defogger for more than 20minutes, press the switch
again. This will add
20 more minutes.
N00523800169
To honk the horn, press around the “ ” mark on the steering wheel.
If the wipers become blocked by ice or other deposits on the glass, the motor may still burn out even if the wiper switch is OFF. If deposits form on the windshield, park your vehicle in a safe place, turn off the engine,and clean the glass so that the wipers can operate smoothly. Avoid using the washer for more than 20 sec- onds at a time. Do not operate the washer when the fluid reser
voir is empty or the
pump may fail. During cold weather, add a recommended washer solution that will not freeze in the washer reservoir. Otherwise the washer may not work or may be damaged. Replace the wiper blades when they are worn. Use the proper size replacementblades. If you have questions, ask your authorized Mitsubishi Motors dealer.
Electric rear window defog- ger switch
NOTE
CAUTION The rear window defogger is not designed to melt snow. Remove any snow manuallybefore using the rear window defogger. Use the rear window defogger only after the engine has started and is running. Be sure to turn the defogger switch off immediately after the window is clear to save on batterypower.
Do not place stickers, tape, or other items that are attached with adhesive over the grid wires on the rear window. When cleaning the inside rear window, use a soft cloth and wipe lightly over the grid wires.NOTE
If your vehicle is equipped with heated mir- rors, mist can also be removed from the out-side rearview mirrors when the rear window defogger switch is pressed. (Refer to “Heated mirror” on page 5-53.)
Horn switch
CAUTION
Type 1
BK0200700US.book
157 ページ 2013年2月15日 金曜日 午後12時17分
Page 230 of 422

Bluetooth® 2.0 interface (if so equipped)
Features and controls 5-163
5
If a passcode has been set and the security function is enabled, the voice guide will say“Hands-free system is locked. State the pass- code to continue” when the SPEECH button (except for vehicles with Mitsubishi Multi-Communication System) or PICK-UP button (for vehicles with Mi
tsubishi Multi-Commu-
nication System) is pressed to enter voice rec-ognition mode. Say the 4-digit passcode number to enter the passcode. If the entered passcode is wrong, the voice guide will say “<4-digit passcode>, Incorrectpasscode. Please try again.” Enter the correct passcode.
Use the following procedure to turn off the security function by disabling the passcode. 1. Press the SPEECH button (except for vehicles with Mits
ubishi Multi-Commu-
nication System) or PICK-UP button (forvehicles with Mits
ubishi Multi-Commu-
nication System). 2. Say “Setup.”3. Say “Passcode.” 4. The voice guide will say “Passcode is enabled. Would you like to disable it?”Answer “Yes.” Answer “No” to cancel the disabling of the passcode and return to the main menu.
5. When the disabling of the passcode is completed, the voice guide will say “Pass- code is disabled” and the system will return to the main menu.
N00564700011
The Bluetooth
® 2.0 interface can use the
speaker enrollment function to create a voicemodel for one person per language. This makes it easier for the Bluetooth
® 2.0
interface to recognise voice commands said by you. You can turn a voice model registered with the speaker enrollment function on and off whenever you want.
N00564801093
It takes about 2 to 3 minutes to complete thespeaker enrollment process.To ensure the best results, run through the process while in the driver’s seat, in an envi- ronment that is as quiet as possible (whenthere is no rain or strong winds and the vehi- cle windows are closed). Please turn off your phone while in speaker enrollment to preventinterruption of the process. Use the following procedure for speaker enrollment.
NOTE
Passcode will be required to access the sys- tem after the next ignition cycle. It is required for a little time after engine stop that the entered passcode is actuallyrecorded in the system. If the ignition switch is made to “ACC” or “ON” or the engine is started immediatelyafter engine stop, there is a case when the entered passcode is not recorded in the sys- tem. At this time, please try to enter the pass-code again.
Entering the passcode
NOTE
You can reenter the passcode as many times as you want. If you have forgotten your passcode, say “Cancel” to quit the voice input mode andthen check with an authorized Mitsubishi Motors dealer.
Disabling the passcode
NOTE
System must be unlocked to disable the pass- code.
Speaker enrollment function
Speaker enrollment
BK0200700US.book
163 ページ 2013年2月15日 金曜日 午後12時17分
Page 250 of 422
12 V power outlet
Features and controls 5-183
5
The vanity mirrors are located on the back of the sun visors.
Cards can be slipped into the front (A) of the lid of the vanity mirror.
N00525000569
12 V power outlets are located in front of the floor console (Type 1, Type 2) and inside of the floor console box (Type 3). The accessory can be operated when the igni- tion switch is in the “
ON” or “ACC” position.
To use a “plug-in” type accessory, pull out theplug, then insert the plug in the socket.
Vanity mirror
Card holder 12 V power outlet
CAUTION Be aware that using electronic equipment with the engine off may run the batterydown. When the 12 V power outlet is not in use, be sure to put on the plug or close the 12 V power outlet cover. This will prevent the 12 V power outlet from becoming dirty and pos-sibly short-circuiting.
NOTE
If your vehicle is equipped with two 12 V power outlets, both power outlets can be used simultaneously.CAUTION Be sure to use a “plug-in” type accessory operating at 12 V and 120 W or less. When using two 12 V power outlets simulta- neously, make sure that the total power con-sumption of these does not exceed 120 W at 12 V.
Type 1, Type 2
BK0200700US.book
183 ページ 2013年2月15日 金曜日 午後12時17分
Page 252 of 422
Interior lights
Features and controls 5-185
5
N00553800070
Regardless of the dome light switch position, when you press the lens, the light on the side that is pressed illuminates; when you pressthe lens again, the light goes off.
N00525401502
The dome light can be turned on by sliding the dome light switch.
The doors and the rear hatch are closed while the ignition switch is in the “ON” position. The driver’s door is closed after all the other doors and the rear hatch are closed while the lock knob of the driver’s door is in the lock position. The doors and the rear hatch are closed and the power door lock switch is used to lock the doors. The keyless entry system remote con- trol transmitter is used to lock the doors and the rear hatch. In vehicles equipped with the F.A.S.T.-key, the doors and the rear hatch are locked using the F.A.S.T.- key.NOTE
When the engine is started using the key while the doors and rear hatch are closed, ifyou remove the key, the dome light will illu- minate for approximately 30 seconds before going off. When the engine is started using the F.A.S.T.-key while the doors and rear hatch are closed, if the ignition switch is moved to the “LOCK” position, the dome light willilluminate for approximately 30 seconds before going off. The time until the light goes off can be adjusted. See your authorized Mitsubishi Motors dealer for details.
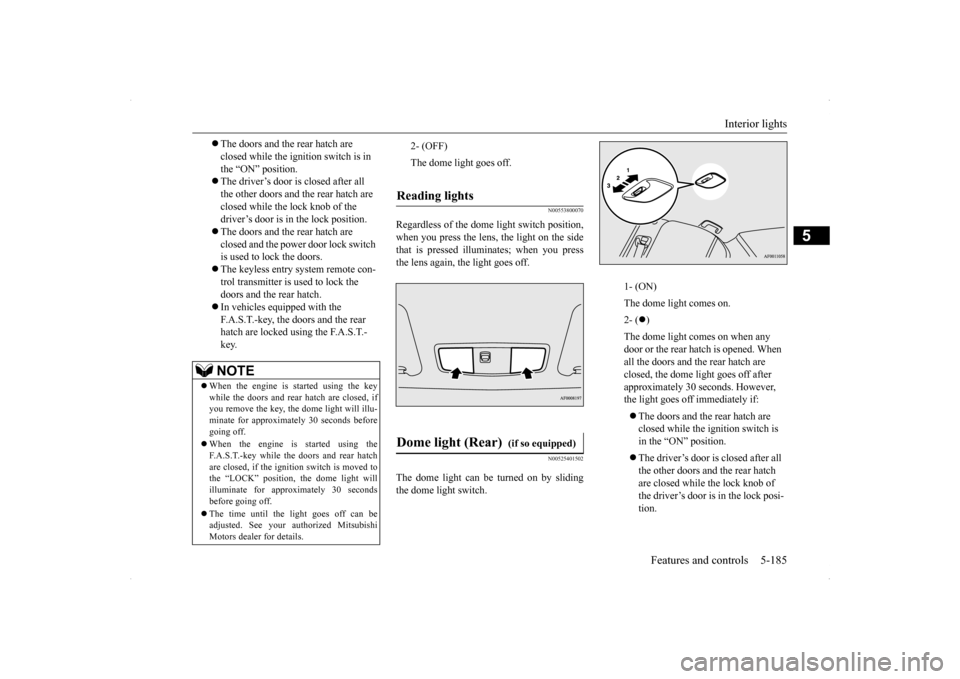
2- (OFF) The dome light goes off.
Reading lights Dome light (Rear)
(if so equipped)
1- (ON) The dome light comes on.2- (
)
The dome light comes on when any door or the rear hatch is opened. When all the doors and the rear hatch are closed, the dome light goes off after approximately 30 seconds. However, the light goes off immediately if: The doors and the rear hatch are closed while the ignition switch is in the “ON” position. The driver’s door is closed after all the other doors and the rear hatch are closed while the lock knob of the driver’s door is in the lock posi- tion.
BK0200700US.book
185 ページ 2013年2月15日 金曜日 午後12時17分
Page 253 of 422
Interior lights 5-186 Features and controls
5
N00526200063
N00526301478
If any of the interior lights are left on with the ignition switch in the “LOCK” position, the lights go off automatically after about 30minutes. The lights come on again if the ignition switch is turned to the “ON” or “ACC” posi-tion, any door or the rear hatch is opened andclosed, or the keyless entry system or F.A.S.T.-key is operated.
The door and the rear hatch are closed and the power door lock switch is used to lock the doors. The keyless entry system remote control transmitter is used to lock the doors and the rear hatch. In vehicles equipped with the F.A.S.T.-key, the doors and the rear hatch are locked using the F. A . S . T. - k e y.
NOTE
When the engine is started using the key while the doors and the rear hatch are closed,if you remove the key, the dome light will illuminate for approximately 30 seconds before going off. When the engine is started using the F.A.S.T.-key while the doors and the rearhatch are closed, if the ignition switch is moved to the “LOCK” position, the dome light will illuminate for approximately 30seconds before going off. The time until the light goes off can be adjusted. See your au
thorized Mitsubishi
Motors dealer for details.3- (OFF) The dome light goes off.
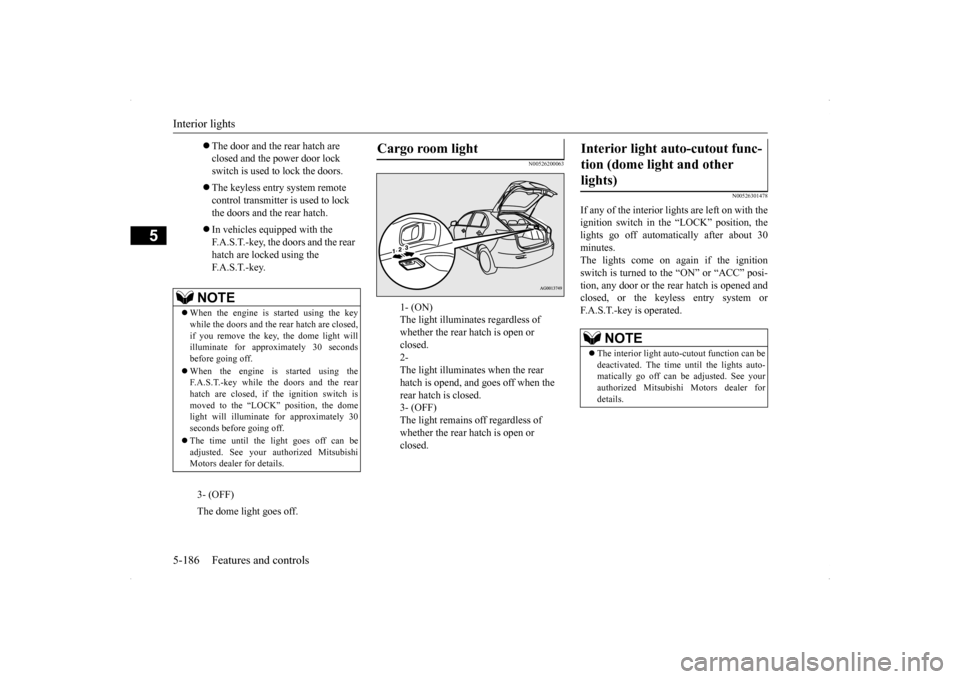
Cargo room light
1- (ON) The light illuminates regardless of whether the rear hatch is open or closed. 2- The light illuminates when the rear hatch is opend, and goes off when the rear hatch is closed. 3- (OFF) The light remains off regardless of whether the rear hatch is open or closed.
Interior light auto-cutout func- tion (dome light and other lights)
NOTE
The interior light auto-cutout function can be deactivated. The time until the lights auto-matically go off can be adjusted. See your authorized Mitsubishi Motors dealer for details.
BK0200700US.book
186 ページ 2013年2月15日 金曜日 午後12時17分
Page 258 of 422
Dual height adjustable cargo
floor board (if so equipped) Features and controls 5-191
5
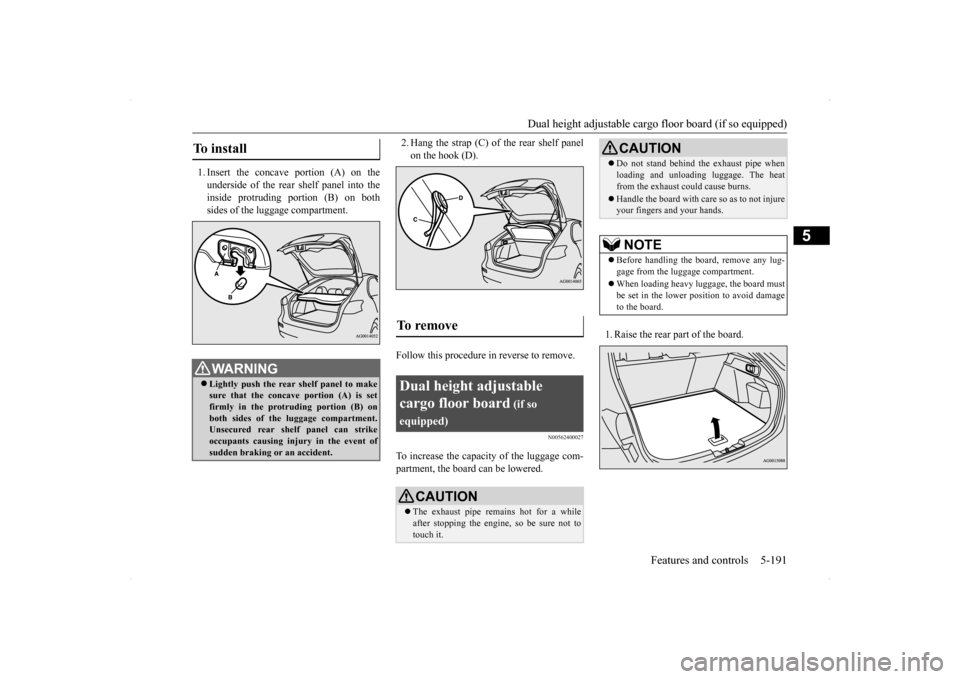
1. Insert the concave portion (A) on the underside of the rear shelf panel into the inside protruding portion (B) on bothsides of the luggage compartment.
2. Hang the strap (C) of the rear shelf panel on the hook (D).
Follow this procedure in reverse to remove.
N00562400027
To increase the capacity of the luggage com- partment, the board can be lowered.
1. Raise the rear part of the board.
To install
WA R N I N G Lightly push the rear shelf panel to make sure that the concave portion (A) is setfirmly in the protruding portion (B) on both sides of the luggage compartment. Unsecured rear shelf panel can strikeoccupants causing injury in the event of sudden braking or an accident.
To remove Dual height adjustable cargo floor board
(if so
equipped)
CAUTION The exhaust pipe remains hot for a while after stopping the engine, so be sure not to touch it.
Do not stand behind the exhaust pipe when loading and unloading luggage. The heat from the exhaust could cause burns. Handle the board with care so as to not injure your fingers and your hands.NOTE
Before handling the board, remove any lug- gage from the luggage compartment. When loading heavy luggage, the board must be set in the lower position to avoid damage to the board.CAUTION
BK0200700US.book
191 ページ 2013年2月15日 金曜日 午後12時17分
Page 261 of 422
Fuel economy 6-2 Driving safety
6
N00628800107
Fuel economy is dependent on many factors. Your personal driving habits can have a sig-nificant effect on your fuel use. Several rec- ommendations for achieving the greatest fuel economy are listed below. Whenever accelerating from a stop, always accelerate slowly and smoothly. When parked for even a short period, do not idle the engine. Shut it off. Plan your trips to avoid unnecessary stops. Keep your tires inflated to the recom- mended pressures. For freeway driving, maintain a speed of approximately 50 mph (80 km/h) when traffic, roadway and weather conditionssafely permit. Keep your air filter clean and your vehicle lubricated according to the recommenda-tions in this manual. Always keep your vehicle well main- tained. A poorly maintained enginewastes fuel and costs money. Do not overload your vehicle.
N00628900052
Drunk driving is one of the most frequent causes of accidents.Your driving ability can be seriously impaired even with blood alcohol levels far below the legal minimum. If you have been drinking,don’t drive. Ride with a designated non- drinking driver, call a cab or a friend, or use public transportation. Drinking coffee or tak-ing a cold shower will not make you sober.Similarly, prescription and nonprescription drugs affect your alertness, perception and reaction time. Consult with your doctor orpharmacist before driving while under the influence of any of these medications.
N00628600017
The original equipment floor mat providedwith your vehicle was specifically designed for your vehicle. Always properly positionthe floor mat and assure it does not interfere with operation of the pedals. Always use the
retaining clip on the driver’s floorboard to secure the floor mat. When used, this clip will help prevent the floor mat from moving for- ward and possibly interfering with the opera-tion of the pedals. To prevent the floor mat from moving forward and possibly interfering with the operation of the pedals, Mitsubishigenuine floor mats are recommended.
N00628700050
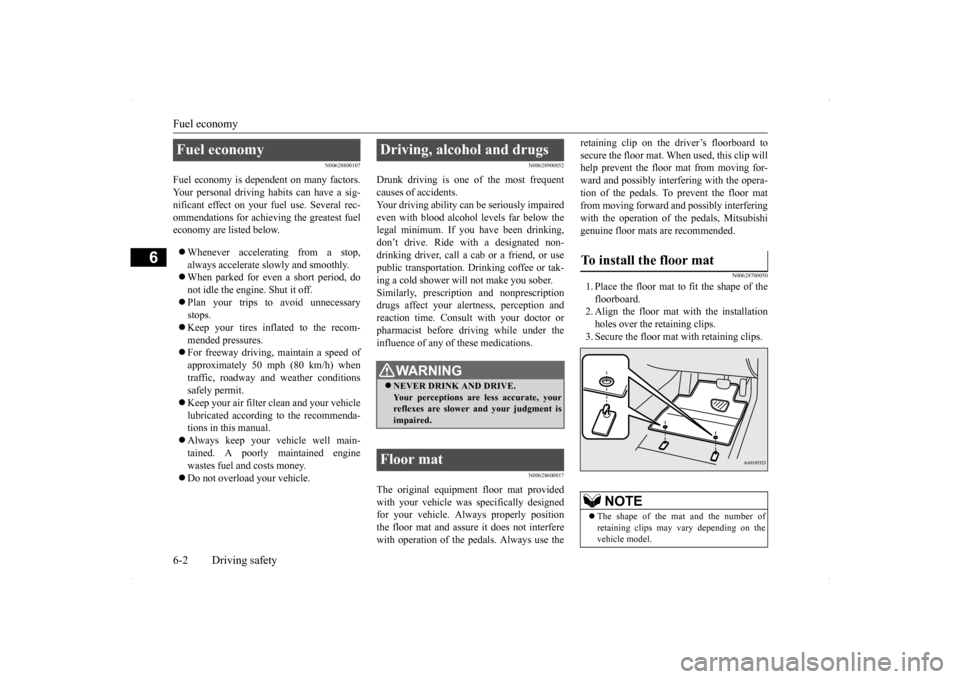
1. Place the floor mat to fit the shape of thefloorboard.2. Align the floor mat with the installation holes over the retaining clips. 3. Secure the floor mat with retaining clips.
Fuel economy
Driving, alcohol and drugs
WA R N I N G NEVER DRINK AND DRIVE. Your perceptions are less accurate, yourreflexes are slower and your judgment is impaired.
Floor mat
To install the floor mat
NOTE
The shape of the mat and the number of retaining clips may vary depending on the vehicle model.
BK0200700US.bo
ok 2 ページ 2013年2月15日 金曜日 午後12時17分