Page 73 of 88

Adjust the Sound Quality 73
INFO/SETTINGSSETTINGS
SETTINGS
Adjust the Sound
Quality
Change audio quality settings.
NOTE
• You cannot adjust the sound quality when
the audio is OFF.
1Press the MENU key.
The top menu is displayed.
2Touch Setting .
3Touch Sound Control .
▼
Displays the sound quality setting screen.
Setting Items
“Set value” bold typeface indicates factory default settings.
Settings name Settings value Settings content
BALANCE/FADER BALANCE:
L11 to L1,0 ,R1 to R11
(Left,Right) The level of the sound output from each
speaker can be adjusted with the cursor
switches.
FADER:
F11 to F1,0 ,R1 to R11
(Front,Rear)
EQUALIZER ROCKAllows you to select the sound type.
Allows you to adjust the level by touching
the cursor switch.(-5 to +5)
* PUNCH is a setting item only for vehicles
with premium audio system.(0 to 6)
POP
HIPHOP
COUNTRY NORMAL
SCV
(Speed Compensated Volume) Off
Allows you to select the volume for automatic
adjustment according to the vehicle speed.
Low
Mid
High
Continued on the next page
13MY_AVC(NAS).indb 732013/02/14 10:58:04
Page 74 of 88

74 Adjust the Sound Quality
Settings nameSettings value Settings content
SURROUND*1SURROUND TYPE DTS Neural*3*4Allows you to select the surround type.
PREMIDIA WIDE Off
SOUND FIELD NORMAL
Allows you to select the sound field type.
STAGE LIVE
Premidia HD
*1*2*3*4Off Allows you to adjust the amount of
compensation for reproducing the feeling of
solidity and depth of the original sound by
forecasting and supplementing for the high-
pass audio information lost during audio
data compression.
Low
High
Dolby Volume
*1*4Off Allows you to select the level for the
automatic real-time adjustment function,
which provides the same output levels for
the different volumes of different sources
and songs.
Low
Mid
High
*1) This is a setting item only for vehicles with premium audio system.
*2) This is also effective for non-compressed sound sources.
*3) “DTS Neural” and “PremiDIA HD” cannot be selected at the same time.
*4) This is disabled when the audio source is analog radio.
ADVICE
• If you feel that the Dolby volume effect does not match the impression of the audio being
played back, switch it OFF.
13MY_AVC(NAS).indb 742013/02/14 10:58:04
Page 75 of 88

System Settings 75
INFO/SETTINGSSETTINGS
System Settings
System related settings, such as the
operation sound and the time, can be made.
1Press the MENU key.
The top menu is displayed.
2Touch Setting , and then
System Setting .
▼
The system setting screen is displayed.
Sound
This is a setting item displayed by touching [Beep/Tel Setting].
“Set value” bold typeface indicates factory default settings.
Settings nameSettings value Settings content
Operation Volume OffTouch from [1] to [3] to adjust the operating volume.
The larger the number, the higher the volume. [Off] mutes
the operation sound.
1
2 3
Tel Speaker Setting
*On MuteDuring a call, the audio is muted.
AT T During a call, the audio is at low volume.
FL The incoming sound for calls is output from the left front
speaker.
FR The incoming sound for calls is output from the right front
speaker.
Front The incoming sound for calls is output from the front
speakers.
Off The vehicle speakers are not used.
* A hands-free kit (available separately) must be connected.
13MY_AVC(NAS).indb 752013/02/14 10:58:04
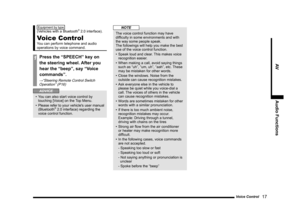
Page 76 of 88
76 System Settings
Time Setting
This is a setting item displayed by touching [Time Setting].
Settings nameSettings value Settings content
Time Adjustment Time
Touch the corresponding
▲ or ▼ and change the
date and time.
Time Display Settings Date
The date and time display format can be set.
Time 12h or 24h display can be set.
Equipment by type
(Vehicles with a Bluetooth® 2.0 interface).
Language
This is a setting item displayed by touching
[Voice Control Language].
You can select the language used for voice
control.
13MY_AVC(NAS).indb 762013/02/14 10:58:05
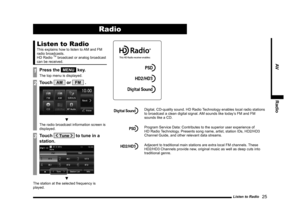
Page 77 of 88
System Settings 77
INFO/SETTINGSSETTINGS
AUX Setting
It allows you to switch the AUX function ON/
OFF.
NOTE
• If you set this to ON, [AUX] will be
displayed in the top menu even if the
vehicle does not support AUX devices.
However, touching it does not output any
audio.
13MY_AVC(NAS).indb 772013/02/14 10:58:05
Page 78 of 88

78 Other Settings
Other Settings
The setting can be made on the screen or
on the Bluetooth device.
Display Off
This turns off the screen display.
1Press the MENU key.
The top menu is displayed.
2Touch Setting , and then
Display Off .
▼
This turns off the screen display.
ADVICE
• To display it again, touch the screen or press the [MENU] key.
Color Contrast
You can adjust the color tone and brightness
for the menu screen and the rear view camera
picture.
1Press the MENU key.
The top menu is displayed.
2Touch Setting , and then
Color Contrast .
▼
The color contrast screen is displayed.
RGB Screen Regulation
With “Color Contrast”, touching “RGB Screen
Regulation” displays this.
Adjusts the brightness, contrast, and black
level for the menu screen, etc.
Settings name Settings content
Brightness Adjusts the brightness.
Touching [+] makes the display
brighter, touching [-] makes
it dimmer. You may continue
touching the adjustment until the
setting is acceptable.
Contrast Adjusts the contrast. Touching [+]
increases the contrast, touching
[-] decreases it. You may continue
touching the adjustment until the
setting is acceptable.
Black Level Adjusts the black level.
Touching [+] increases the black
level, touching [-] decreases it.
You may continue touching the
adjustment until the setting is
acceptable.
13MY_AVC(NAS).indb 782013/02/14 10:58:06
Page 79 of 88

Other Settings 79
INFO/SETTINGSSETTINGS
Camera Image Regulation
With “Color Contrast”, touching “Camera
Image Regulation” displays this.
Adjusts the brightness, contrast, and black
level for the rear view camera picture.
Settings name Settings content
Brightness Adjusts the brightness.
Touching [+] makes the display
brighter, touching [-] makes
it dimmer. You may continue
touching the adjustment until the
setting is acceptable.
Contrast Adjusts the contrast. Touching [+]
increases the contrast, touching
[-] decreases it. You may continue
touching the adjustment until the
setting is acceptable.
Black Level Adjusts the black level.
Touching [+] increases the black
level, touching [-] decreases it.
You may continue touching the
adjustment until the setting is
acceptable.
Tint Adjusts the color tone.
Touching [+] makes the display
more greenish, touching [-]
makes it more reddish. You may
continue touching the adjustment
until the setting is acceptable.
Color
Intensity Adjusts the color intensity.
Touching [+] increases the color
intensity, touching [-] decreases
it. You may continue touching
the adjustment until the setting is
acceptable.Clock Screen
Displays the clock over the entire screen.
1Press the MENU key.
The top menu is displayed.
2Touch Setting , and then
Clock Screen .
▼
The clock is displayed.
ADVICE
• Touching the screen returns the display
to the original screen.
• With [System Setting], [Time Setting], and
[Time Display Settings], you can change
the format for time display.
→“Time Setting” (P76)
13MY_AVC(NAS).indb 792013/02/14 10:58:06
Page 80 of 88
80 Other Settings
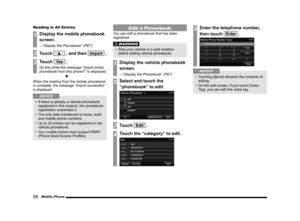
Radio Setting
You can change the radio reception mode and
the display language for PTY filter.
You can set this for both FM and AM.
1Press the MENU key.
The top menu is displayed.
2Touch Setting , and then
Radio Setting .
3Set individual items.
ADVICE
• Radio settings can also be accessed from
the radio broadcast information screen
(P26) sub-menu. “Set value” bold typeface indicates factory default settings.
Settings name
Settings value Settings content
PTY Language EnglishYou can change the display language for PTY filter.
Francais Espanol
HD Radio Receive OnSet whether or not to receive digital radio.
Off
HD Radio Setting AutoReceive mode can be set when the HD Radio Receive
settings are “On”.
If “Auto” is set, digital reception is used. If digital reception \
is no longer possible, it will automatically switch to analog
reception.
Digital
Analog
13MY_AVC(NAS).indb 802013/02/14 10:58:06


![MITSUBISHI LANCER EVOLUTION 2014 10.G Display Audio Manual 76 System Settings
Time Setting
This is a setting item displayed by touching [Time Setting].
Settings nameSettings value Settings content
Time Adjustment Time
Touch the corresponding
▲ or ▼](/manual-img/19/7473/w960_7473-75.png "MITSUBISHI LANCER EVOLUTION 2014 10.G Display Audio Manual 76 System Settings
Time Setting
This is a setting item displayed by touching [Time Setting].
Settings nameSettings value Settings content
Time Adjustment Time
Touch the corresponding
▲ or ▼")
![MITSUBISHI LANCER EVOLUTION 2014 10.G Display Audio Manual System Settings 77
INFO/SETTINGSSETTINGS
AUX Setting
It allows you to switch the AUX function ON/
OFF.
NOTE
• If you set this to ON, [AUX] will be
displayed in the top menu even if the
vehicle](/manual-img/19/7473/w960_7473-76.png "MITSUBISHI LANCER EVOLUTION 2014 10.G Display Audio Manual System Settings 77
INFO/SETTINGSSETTINGS
AUX Setting
It allows you to switch the AUX function ON/
OFF.
NOTE
• If you set this to ON, [AUX] will be
displayed in the top menu even if the
vehicle")
