2014 MERCEDES-BENZ S-CLASS COUPE remote start
[x] Cancel search: remote startPage 8 of 413
Alarm
ATA (Anti-Theft Alarm system) ........ .80
Switching off (ATA) .......................... 80
Switching the function on/off
(ATA) ................................................ 80
Alarm system
see ATA (Anti-Theft Alarm system)
Anti-glare film .................................... 334
Anti-lock braking system
see ABS (Anti-lock Braking System)
Anti-Theft Alarm system
see ATA (Anti-Theft Alarm system)
Aquaplaning ....................................... 184
Armrest
Stowage compartment .................. 316
Ashtray ............................................... 322
Assistance display (on-board com-
puter) .................................................. 256
Assistance menu (on-board com-
puter) .................................................. 257
ASSYST PLUS
Displaying a service message ........ 342
Hiding a service message .............. 342
Notes ............................................. 342
Resetting the service interval dis-
play ................................................ 342
Service message ............................ 342
Special service requirements ......... 343
ATA (Anti-Theft Alarm system)
Activating/deactivating ................... 80
Function ........................................... 80
Switching off the alarm .................... 80
ATTENTION ASSIST
Activating/deactivating ................. 259
Display message ............................ 285
Function/note s............................. 225
Authorised workshop
see Qualified specialist workshop
AUTO lights
Display message ............................ 281
see Lights
Automatic engine start (ECO start/
stop function) .................................... 164
Automatic engine switch-off (ECO
start/stop function) .......................... 163 Automatic front-passenger front
airbag deactivation
Display message ............................ 278
Automatic front-passenger front
airbag deactivation system
Operation ......................................... 52
Problems ......................................... 56
System self-test ............................... 54
Automatic headlamp mode .............. 125
Automatic transmission
Accelerator pedal position ............. 170
Automatic drive program ............... 172
Changing gear ............................... 170
DIRECT SELECT lever ..................... 167
Display message ............................ 295
Driving tips .................................... 170
Emergency running mode .............. 175
Engaging drive position .................. 169
Engaging neutral ............................ 168
Engaging park position automati-
cally ............................................... 168
Engaging reverse gear ................... 168
Engaging the park position ............ 168
Kickdown ....................................... 171
Manual drive progra m.................... 172
Manual drive program (AMG vehi-
cles) ............................................... 173
Overview ........................................ 167
Problem (fault) ............................... 175
Program selector button ................ 171
Pulling away ................................... 162
Starting the engine ........................ 161
Steering wheel gearshift paddle s... 172
Transmission position display ........ 169
Transmission positions .................. 170
Automatic transmission emer-
gency running mode ......................... 175
Auxiliary heating
Display message ............................ 297
Auxiliary heating/ventilation
Heater booster function ................. 152
Important safety notes .................. 148
Problem (display message) ............ 154
Remote control .............................. 150
Setting the departure time ............. 151
Switching on/off (on the centre
console) ......................................... 149 Index
5
Page 19 of 413

Perfume atomizer
Operating ....................................... 146
Perfume vial ................................... 146
Problem (malfunction) ...................1 48
Petrol ................................................. .403
Pets in the vehicle ............................... 69
Plastic trim (cleaning instruc-
tions) ................................................. .349
Power closing ...................................... 92
Power socket
Boot ............................................... 324
Power windows
see Side windows
PRE-SAFE ®
(anticipatory occupant
protection)
Operation ......................................... 59
PRE-SAFE ®
(preventive occupant
safety system)
Display message ............................ 272
PRE-SAFE ®
Brake
Activating/deactivating ................. 258
Display message ............................ 273
Function/notes ................................ 77
Important safety notes .................... 78
Warning lamp ................................. 309
PRE-SAFE ®
PLUS (anticipatory
occupant protection PLUS)
Operation ......................................... 59
Program selector button .................. 171
Protection against theft
ATA (Anti-Theft Alarm system) ......... 80
Immobiliser ...................................... 80
Interior motion sensor ..................... 81
Tow-away protectio n ........................81
Protection of the environment
General notes .................................. 22
Pulling away
Automatic transmission ................. 162
General notes ................................ 162
Hill start assist ............................... 162 Q
Qualified specialist workshop ........... 25R
Radiator cover ................................... 338 Radio
Selecting a station ......................... 251
Radio-based vehicle components
Declaration of conformity ................ 24
Reading lamp ..................................... 130
Rear compartment
Setting the air vents ..................... .156
Stowage compartment .................. 317
Rear foglamp
Display message ............................ 280
Switching on/off ........................... 125
Rear lamps
see Lights
Rear seats
Overview .......................................... 40
Rear window blind ............................ 322
Rear window heating
Problem (fault) ............................... 145
Switching on/off ........................... 144
Rear-compartment seat belt sta-
tus indicator ........................................ 48
Rear-view mirror
Anti-dazzle mode (automatic) ....... .119
Dipping (manual )........................... 117
Recuperation display ........................ 247
Refuelling
Fuel gaug e....................................... 32
Important safety notes .................. 175
Refuelling process ......................... 176
see Fuel
Remote control
Auxiliary heating/ventilation .......... 150
Changing the batteries (auxiliary
heating) ......................................... 152
Garage door opener ....................... 328
Programming (garage door
opener) .......................................... 328
Replacing bulbs
General notes ................................ 131
Replacing the battery (auxiliary
heating remote control) .................... 152
Reserve (fuel tank)
see Fuel
Reserve fuel
Display message ............................ 284
Warning lamp ................................. 307
Residual heat (climate control) ........ 14616
Index
Page 87 of 413
Useful information
i This Owner's Manual describes all mod-
els, series and optional equipment for your
vehicle that were available at the time of
going to press. National variations are pos- sible. Note that your vehicle may not be
equipped with all of the functions descri-
bed. This is also the case for systems and
functions relevant to safety.
i Read the information on qualified special-
ist workshops: (Y page 25). Key
Important safety notes
United Kingdom only: G
WARNING
When the double locks are activated, the
doors can no longer be opened from the
inside. People in the vehicle can no longer get out, e.g. in hazardous situations. There is a
risk of injury.
Therefore, do not leave any people unsuper-
vised in the vehicle, particularly children, eld-
erly people or people in need of special assis-
tance. Do not activate the double lock when
people are in the vehicle.
If the vehicle has been locked from the out-
side, the double-lock function is activated as
standard. It is then not possible to open the
doors from inside the vehicle. You can deac-
tivate the double lock function by deactivat-
ing the interior motion sensor . The doors can
then be opened from the inside after the vehi- cle has been locked from the outside. The
anti-theft alarm system is triggered if the door
is opened from the inside. Switch off the
alarm (Y page 80).
All countries: G
WARNING
If children are left unsupervised in the vehicle, they can:
R open doors and endanger other persons or
road users
R climb out and be injured by the traffic
R operate vehicle equipment and, for exam-
ple, trap themselves.
Children could also set the vehicle in motion, for example by:
R releasing the parking brake
R shifting the automatic transmission out of
park position P
R starting the engine.
There is a risk of an accident and injury.
When leaving the vehicle, always take the key
with you and lock the vehicle. Never leave
children unattended in the vehicle. Always
keep the key out of reach of children. G
WARNING
If you attach heavy or large objects to the key, the key could be unintentionally turned in the
ignition lock. This could cause the engine to
be switched off. There is a risk of an accident.
Do not attach any heavy or large objects to the
key. Remove any bulky keyrings before insert-
ing the key into the ignition lock.
! Keep the key away from strong magnetic
fields. Otherwise, the remote control func-
tion could be affected.
Strong magnetic fields can occur in the
vicinity of powerful electrical installations.
Do not keep the key: R with electronic devices, e.g. a mobile
phone or another key
R with metallic objects, e.g. coins or metal
film
R inside metallic objects, e.g. a metal case
This can affect the key's functionality.
Vehicles with KEYLESS-GO start function: do not keep the key on the parcel shelf or in 84
KeyOpening and closing
Page 88 of 413
the boot. Otherwise, the key may not be
detected, e.g. when starting the engine using
the Start/Stop button.
A check which periodically establishes a radio
connection between the vehicle and the key
determines whether a valid key is in the vehi- cle. This occurs, for example:
R when starting the engine
R whilst driving
R when the external door handles are
touched
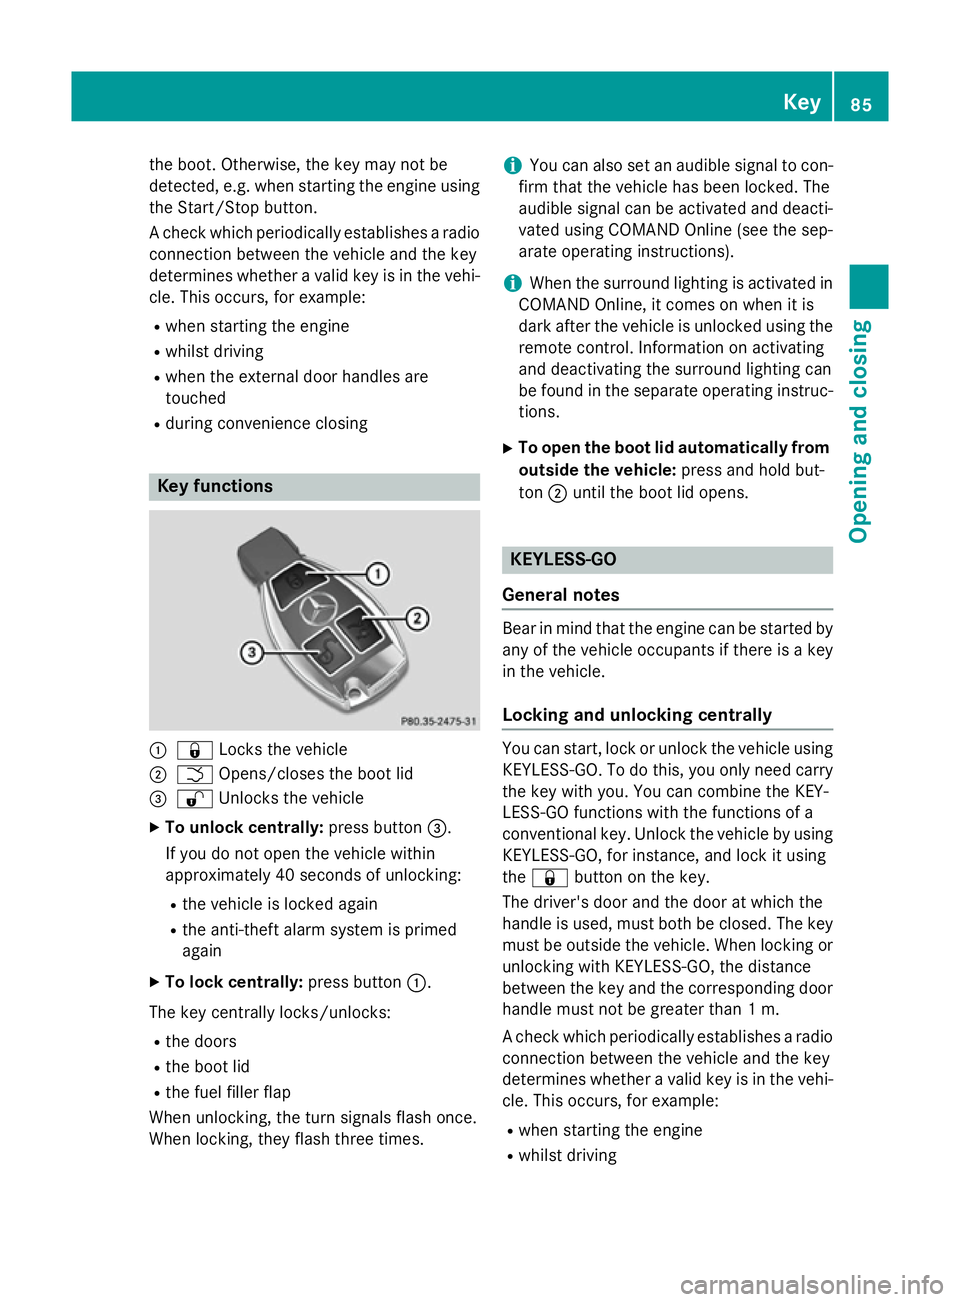
R during convenience closing Key functions
:
& Locks the vehicle
; F Opens/closes the boot lid
= % Unlocks the vehicle
X To unlock centrally: press button=.
If you do not open the vehicle within
approximately 40 second s of unlocking:
R the vehicle is locked again
R the anti-theft alarm system is primed
again
X To lock centrally: press button:.
The key centrally locks/unlocks: R the doors
R the boot lid
R the fuel filler flap
When unlocking, the turn signals flash once.
When locking, they flash three times. i
You can also set an audible signal to con-
firm that the vehicle has been locked. The
audible signal can be activated and deacti-
vated using COMAND Online (see the sep-
arate operating instructions).
i When the surround lighting is activated in
COMAND Online, it comes on when it is
dark after the vehicle is unlocked using the remote control. Information on activating
and deactivating the surround lighting can
be found in the separate operating instruc-
tions.
X To open the boot lid automatically from
outside the vehicle: press and hold but-
ton ;until the boot lid opens. KEYLESS-GO
General notes Bear in mind that the engine can be started by
any of the vehicle occupants if there is a key
in the vehicle.
Locking and unlocking centrally You can start, lock or unlock the vehicle using
KEYLESS-GO. To do this, you only need carry
the key with you. You can combine the KEY-
LESS-GO functions with the functions of a
conventional key. Unlock the vehicle by using KEYLESS-GO, for instance, and lock it using
the & button on the key.
The driver's door and the door at which the
handle is used, must both be closed. The key
must be outside the vehicle. When locking or unlocking with KEYLESS-GO, the distance
between the key and the corresponding door
handle must not be greater than 1 m.
A check which periodically establishes a radio
connection between the vehicle and the key
determines whether a valid key is in the vehi- cle. This occurs, for example:
R when starting the engine
R whilst driving Key
85Opening and closing Z
Page 98 of 413
again automatically. The automatic obstacle
recognition with reversing function is only an aid. It is not a substitute for your attentive-
ness when opening and closing the boot lid. G
WARNING
The reversing function does not react:
R to soft, light and thin objects, e.g. small fin-
gers
R over the last 8 mm of the closing path
This means that the reversing feature cannot
prevent someone being trapped in these sit-
uations. There is a risk of injury.
When closing make sure that no parts of the
body are in the closing area.
If someone is trapped:
R press the Fbutton on the key or
R press the remote operating switch on the
driver's door or
R press the closing or locking button on the
boot lid. Opening/closing automatically from
the outside
Important safety notes G
WARNING
Parts of the body could become trapped dur-
ing automatic closing of the boot lid. More-
over, people, e.g. children, may be standing in the closing area or may enter the closing area
during the closing process. There is a risk of
injury.
Make sure that nobody is in the vicinity of the closing area during the closing process.
Use one of the following options to stop the
closing process:
R Press the Fbutton on the key.
R press the remote operating switch on the
driver’s door.
R Press the closing or locking button on the
boot lid. !
The boot lid swings upwards when
opened. Therefore, make sure that there is
sufficient clearance above the boot lid.
i The opening dimensions of the boot lid
can be found in the "Vehicle data" section
(Y page 408).
Opening You can open the boot lid automatically using
the key.
X Press and hold the Fbutton on the key
until the boot lid opens.
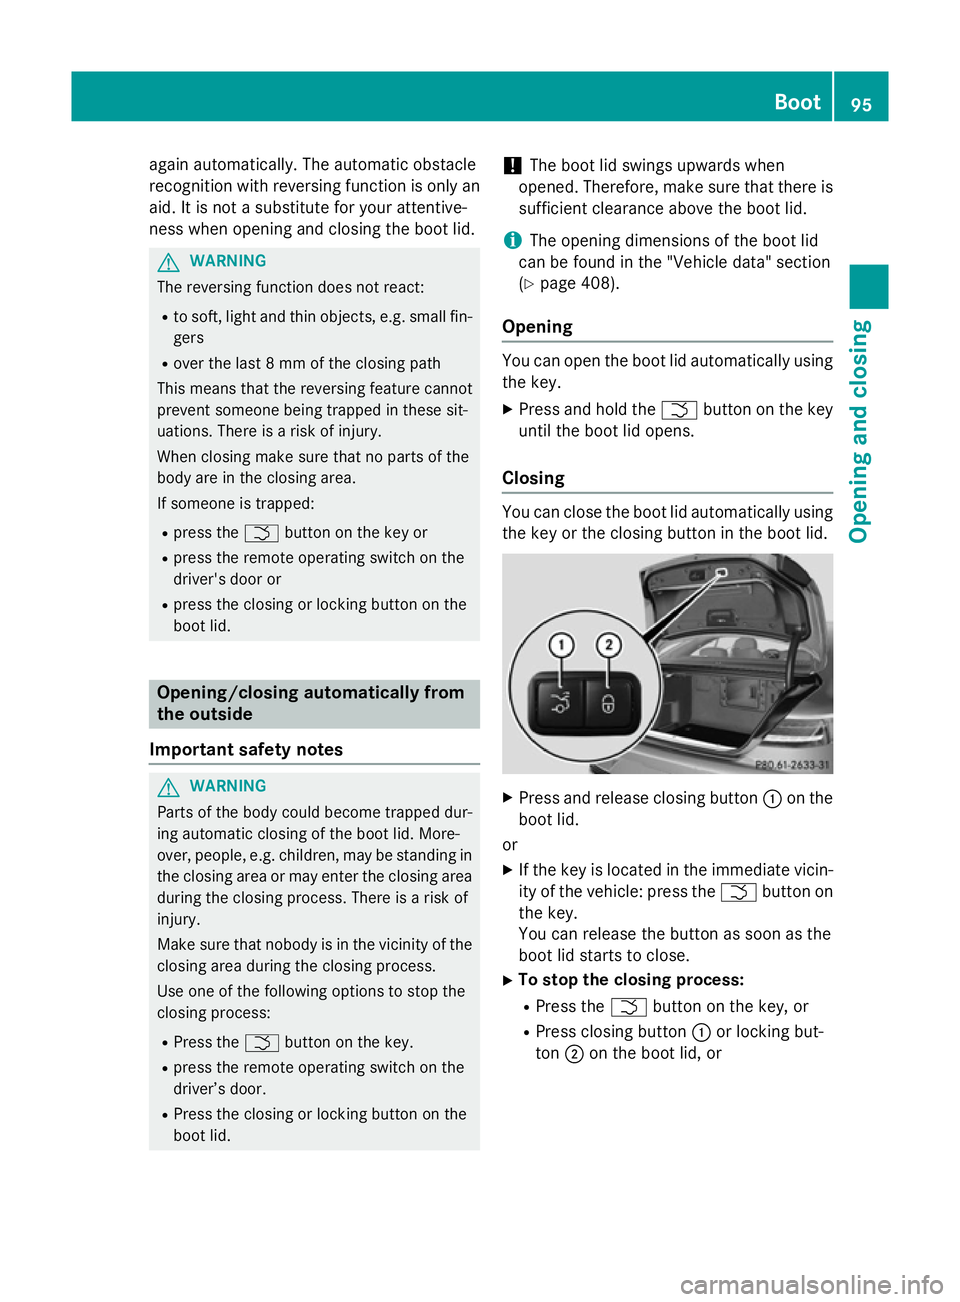
Closing You can close the boot lid automatically using
the key or the closing button in the boot lid. X
Press and release closing button :on the
boot lid.
or X If the key is located in the immediate vicin-
ity of the vehicle: press the Fbutton on
the key.
You can release the button as soon as the
boot lid starts to close.
X To stop the closing process:
R Press the Fbutton on the key, or
R Press closing button :or locking but-
ton ;on the boot lid, or Boot
95Opening and closing Z
Page 99 of 413
R
Press the remote operating switch on the
driver's door, or
R In vehicles with HANDS-FREE ACCESS:
kick into the sensor detection range
under the bumper with your foot.
i If the
F button on the key is pressed or
HANDS-FREE ACCESS is initiated after the
closing process is stopped, the boot lid
opens.
Vehicles with boot lid remote closing fea- ture and KEYLESS-GO: when all the doors
are closed, you can simultaneously close the
boot lid and lock the vehicle. The key must be located to the rear of the vehicle.
X Press and release locking button ;on the
boot lid.
If a KEYLESS-GO key is detected outside
the vehicle, the boot lid closes and the vehi-
cle locks.
i If KEYLESS-GO detects a key in the boot,
the boot lid opens again after it is closed.
If KEYLESS-GO detects a second key out-
side the vehicle, the boot lid remains
closed. HANDS-FREE ACCESS
Important safety notes G
WARNING
The vehicle exhaust system can become very
hot. If you use HANDS-FREE ACCESS, you
could burn yourself by touching the exhaust
system. There is a risk of injury. Always
ensure that you only make a leg movement
within the detection range of sensors.
! If the key is within the rear detection
range of KEYLESS-GO, the following situa-
tions, for example, could lead to the boot lid opening unintentionally:
R using a car wash
R using a high-pressure cleaner
Make sure that the key is at least 3 m away
from the vehicle. General notes With KEYLESS-GO and HANDS-FREE
ACCESS, you can open or close the boot lid or
stop the procedure without using your hands. This is useful if you have your hands full. To do
this, make a kicking movement under the
bumper with your foot.
Observe the following points:
R Carry your KEYLESS-GO key about your
person. The KEYLESS-GO key must be in
the rear detection range of the vehicle.
R When making the kicking movement, make
sure that you are standing firmly on the
ground and that there is sufficient clear-
ance to the rear of the vehicle. You could
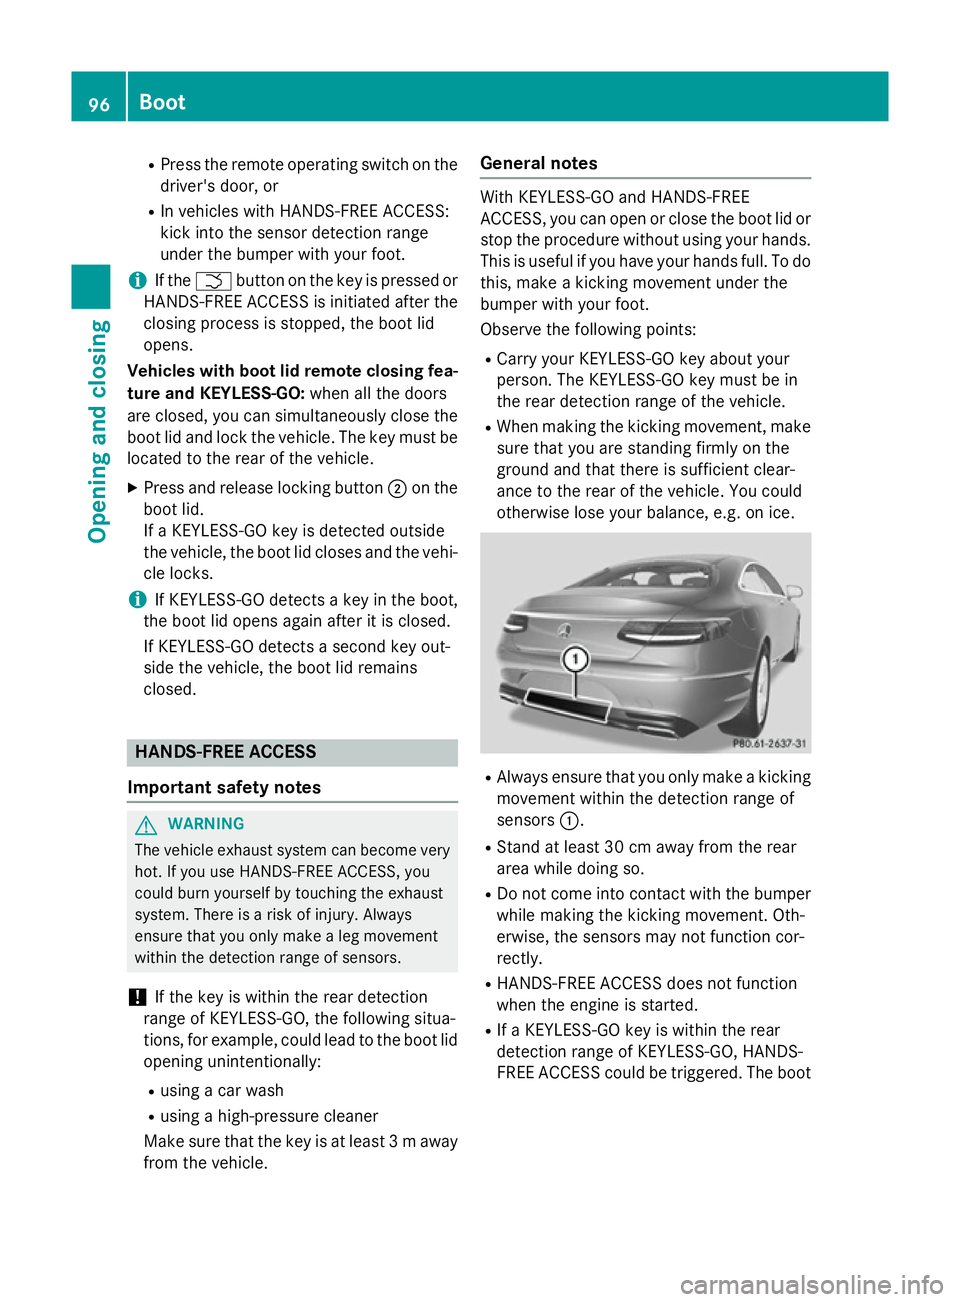
otherwise lose your balance, e.g. on ice. R
Always ensure that you only make a kicking
movement within the detection range of
sensors :.
R Stand at least 30 cm away from the rear
area while doing so.
R Do not come into contact with the bumper
while making the kicking movement. Oth-
erwise, the sensors may not function cor-
rectly.
R HANDS-FREE ACCESS does not function
when the engine is started.
R If a KEYLESS-GO key is within the rear
detection range of KEYLESS-GO, HANDS-
FREE ACCESS could be triggered. The boot 96
BootOpening and closing
Page 154 of 413
X
To switch on: press and hold the u
button.
ON ON is shown in the remote control display.
X To switch off: press and hold the ^
button.
OFF OFF is shown in the remote control display.
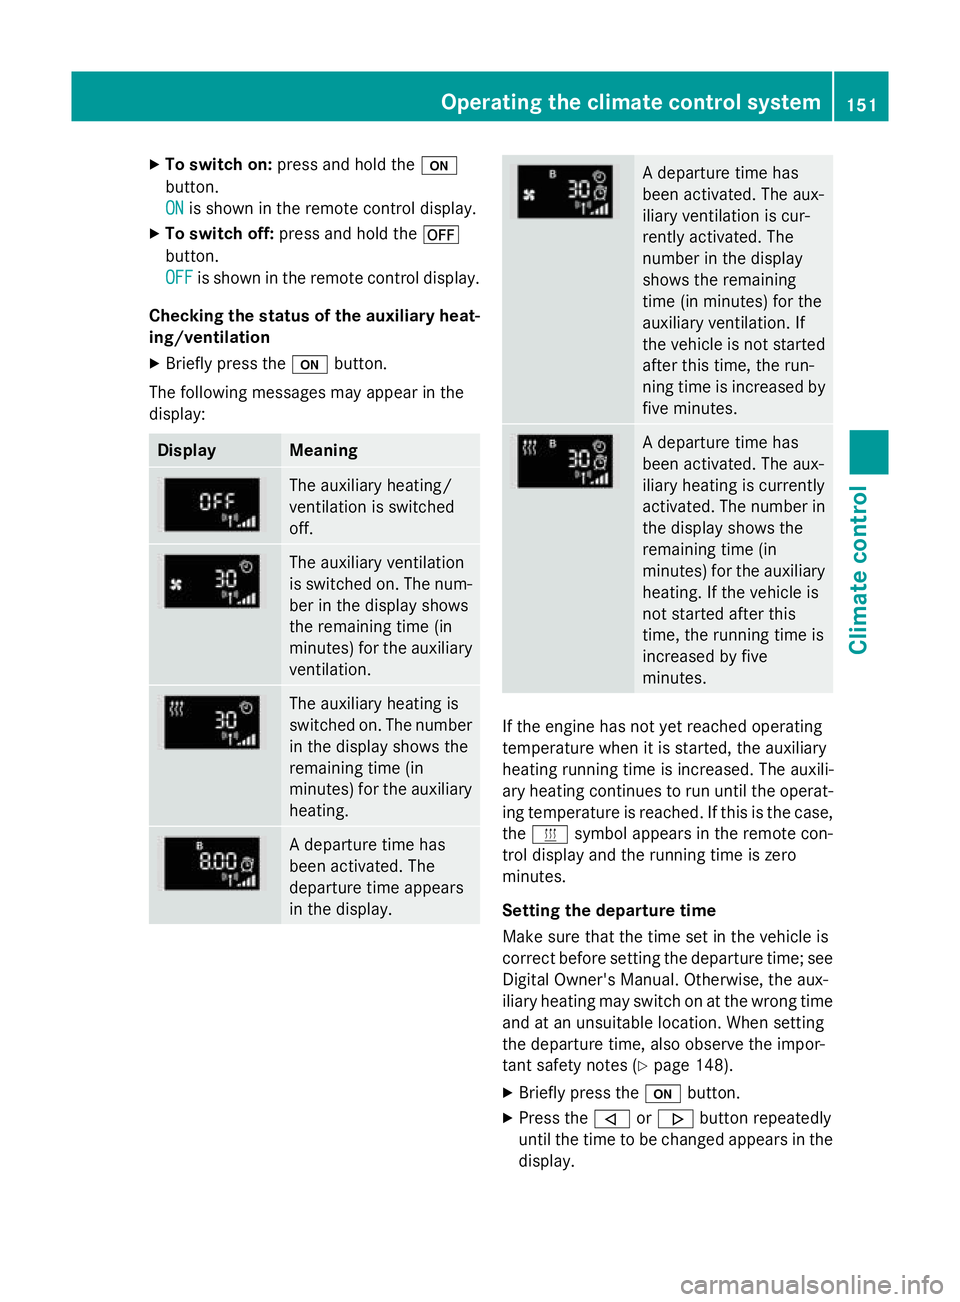
Checking the status of the auxiliary heat- ing/ventilation
X Briefly press the ubutton.
The following messages may appear in the
display: Display Meaning
The auxiliary heating/
ventilation is switched
off.
The auxiliary ventilation
is switched on. The num-
ber in the display shows
the remaining time (in
minutes) for the auxiliary
ventilation. The auxiliary heating is
switched on. The number
in the display shows the
remaining time (in
minutes) for the auxiliary heating. A departure time has
been activated. The
departure time appears
in the display. A departure time has
been activated. The aux-
iliary ventilation is cur-
rently activated. The
number in the display
shows the remaining
time (in minutes) for the
auxiliary ventilation. If
the vehicle is not started
after this time, the run-
ning time is increased by
five minutes. A departure time has
been activated. The aux-
iliary heating is currently
activated. The number in
the display shows the
remaining time (in
minutes) for the auxiliary heating. If the vehicle is
not started after this
time, the running time is
increased by five
minutes. If the engine has not yet reached operating
temperature when it is started, the auxiliary
heating running time is increased. The auxili-
ary heating continues to run until the operat- ing temperature is reached. If this is the case,
the y symbol appears in the remote con-
trol display and the running time is zero
minutes.
Setting the departure time
Make sure that the time set in the vehicle is
correct before setting the departure time; see Digital Owner's Manual. Otherwise, the aux-
iliary heating may switch on at the wrong time
and at an unsuitable location. When setting
the departure time, also observe the impor-
tant safety notes (Y page 148).
X Briefly press the ubutton.
X Press the ,or. button repeatedly
until the time to be changed appears in the display. Operating the climate control system
151Climate control Z
Page 155 of 413
X
Press the uand^ buttons simulta-
neously.
The Îsymbol in the remote control dis-
play flashes.
X Press the ,or. button to set the
desired departure time.
i The longer you press the
,or.
button, the faster the time changes.
X Press the uand^ buttons simulta-
neously.
The new departure time is stored.
When setting the departure time, observe the important safety notes (Y page 148).
Activating the set departure time X Briefly press the ubutton.
X Press the ,or. button repeatedly
until the desired departure time appears in
the display.
X Press the ubutton.
The Ísymbol, the departure time and,
depending on the selected departure time, the letter A, BorCappear in the display.
Deactivating the set departure time
X Briefly press the ubutton.
X Press the ,or. button.
The status of the auxiliary heating is shown in the display.
X Press the .button.
The first departure time stored appears in
the display.
X Press the ^button.
OFF
OFF is shown in the remote control display.
Switching the heater booster function
on/off The heater booster function helps the engine
reach its operating temperature faster during
its warm-up phase. This helps to heat the
vehicle interior faster. The heater booster
function switches on at lower outside tem-
peratures and lower coolant temperatures.
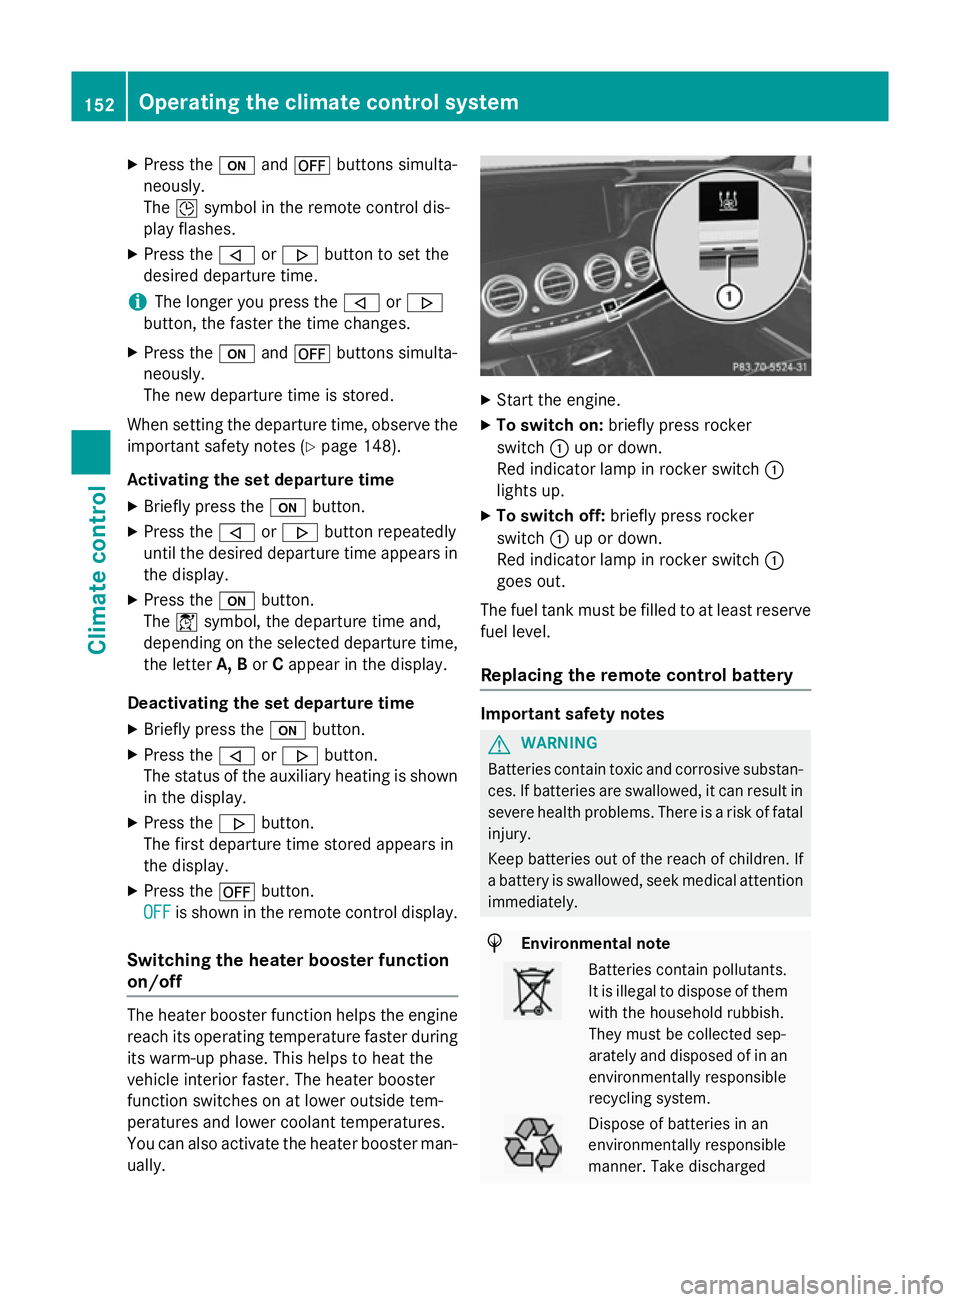
You can also activate the heater booster man- ually. X
Start the engine.
X To switch on: briefly press rocker
switch :up or down.
Red indicator lamp in rocker switch :
lights up.
X To switch off: briefly press rocker
switch :up or down.
Red indicator lamp in rocker switch :
goes out.
The fuel tank must be filled to at least reserve fuel level.
Replacing the remote control battery Important safety notes
G
WARNING
Batteries contain toxic and corrosive substan- ces. If batteries are swallowed, it can result in
severe health problems. There is a risk of fatal injury.
Keep batteries out of the reach of children. If
a battery is swallowed, seek medical attention immediately. H
Environmental note Batteries contain pollutants.
It is illegal to dispose of them
with the household rubbish.
They must be collected sep-
arately and disposed of in anenvironmentally responsible
recycling system. Dispose of batteries in an
environmentally responsible
manner. Take discharged152
Operating the climate control systemClimate control