2014 MERCEDES-BENZ B-CLASS SPORTS center console
[x] Cancel search: center consolePage 181 of 360
If you back up after activation, the steering
wheelism oved to the straight-ahead
position.
X Drive forward sand back up as prompted by
the PARKTRONIC warning displays, several
times if necessary.
X Stop as soon as PARKTRONIC sounds the
continuous warning tone, if not before.
Once you have exited the parking space
completely, the steering wheelism oved to
the straight-ahead position. You hear atone
and the message Park Assist Finished appears in the multifunction display. You will
then have to steer and merge into traffic on
your own. PARKTRONIC is still available. You
can take over the steering, before the vehicle
has exited the parking space completely. This
is useful,f or example when you recognize
that it is already possible to pull out of the
parking space.
Canceling Active Parking Assist You can cancel Active Parking Assist at any
time.
X Stop the movement of the multifunction
steering wheel or steer yourself.
Active Parking Assist will be canceled at
once. The Park Assist Canceled message appears in the multifunction
display.
or
X Press the PARKTRONIC button on the
center console (Y page 174).
PARKTRONIC is switched off and Active
Parking Assist is immediately canceled.
The Park Assist Canceled message
appears in the multifunction display.
Active Parking Assist is canceled
automaticallyi f:
R the electric parking brake is engaged
R transmission position Pis selected
R parking using Active Parking Assist is no
longer possible R
you are driving faster than 6mph
(10 km/h)
R aw heel spins, ESP ®
intervenes or fails. The
000A warning lamp lights up in the
instrument cluster.
Aw arning tone sounds. The parking symbol
disappears and th emultifunction display
shows the ParkA ssist Canceled message.
If Activ
eParking Assist is canceled, you must
steer again yourself. Rea
rview camera
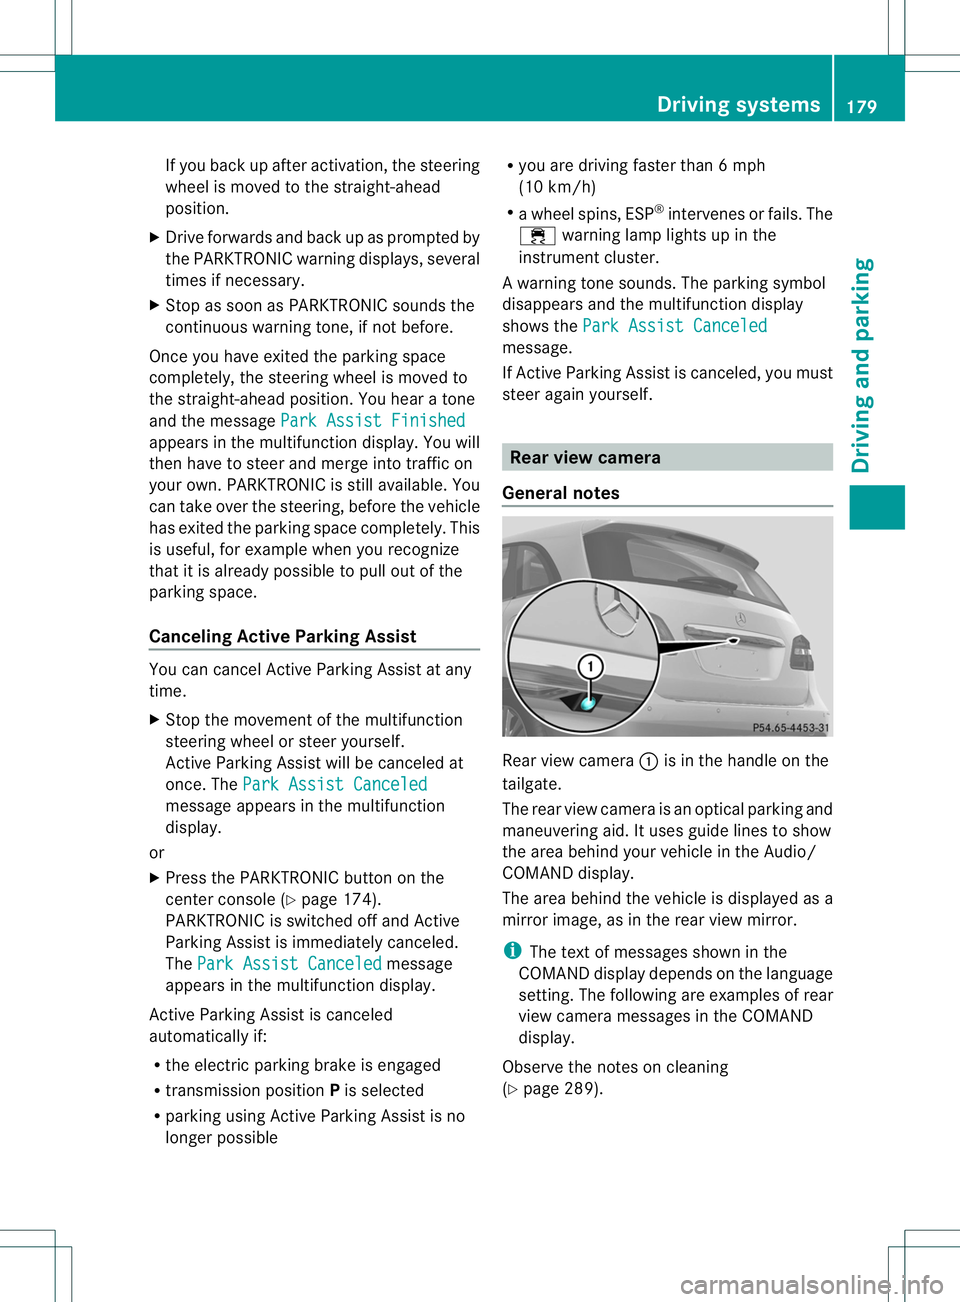
General notes Rear view camera
001Ais in th ehandle on the
tailgate.
The rear view camera is an optical parking and
maneuvering aid. It uses guide lines to show
th ea rea behin dyour vehicle in th eAudio/
COMAND display.
The area behin dthe vehicle is displayed as a
mirror image ,asintherear view mirror.
i The text of messages shown in the
COMAND display depends on th elanguage
setting. The followin gare example sofrear
view camera messages in th eCOMAND
display.
Observe the notes on cleaning
(Y page 289). Driving systems
179Driving and parking Z
Page 220 of 360
Display messages Possible causes/consequences and
000B Solutions
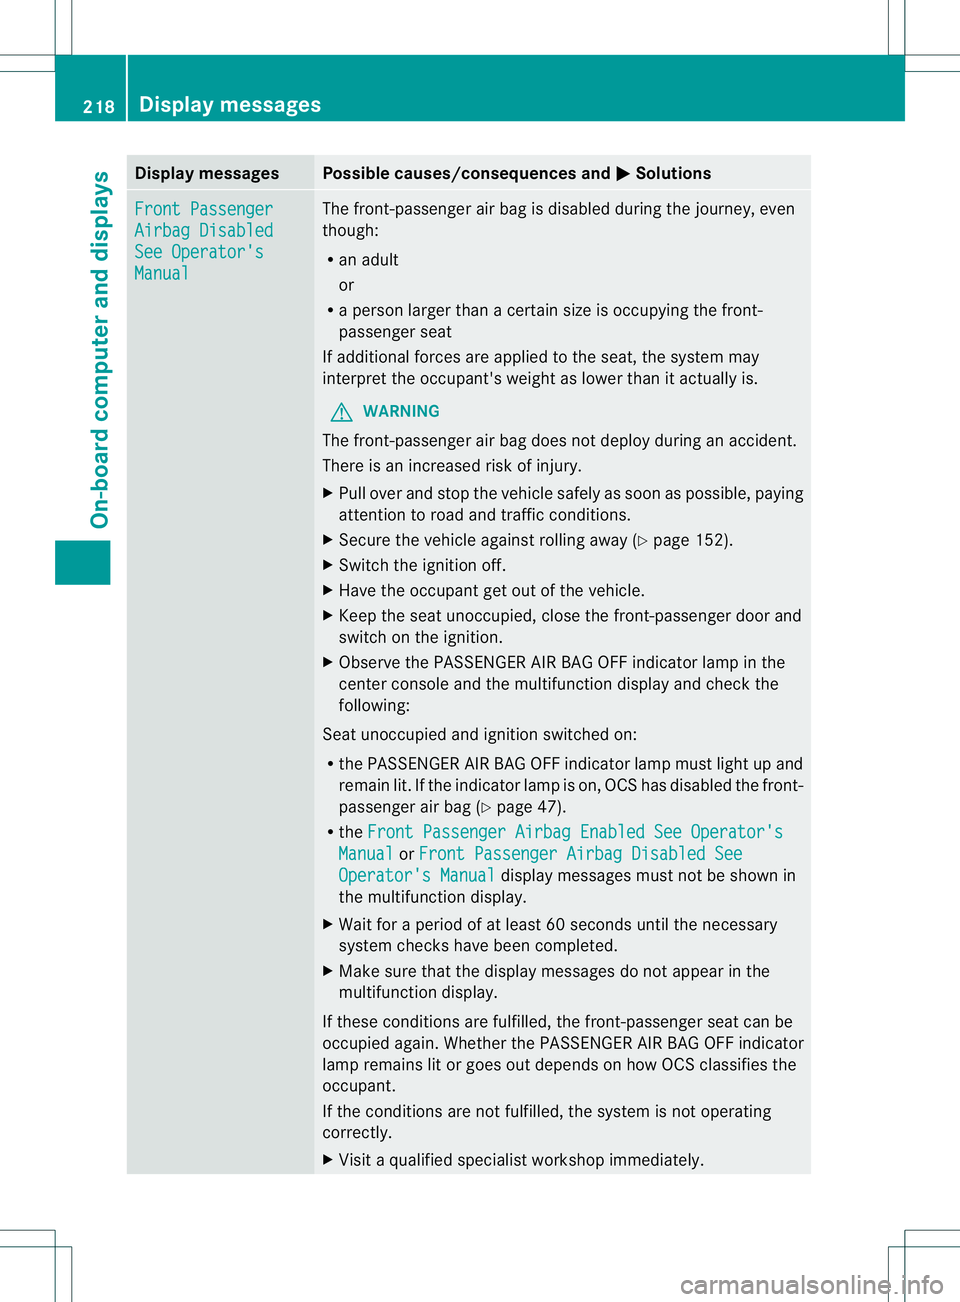
Front Passenger
Airbag Disabled
See Operator's
Manual The front-passenger air bag is disabled during th
ejou rney, even
though:
R an adult
or
R ap erson larger than acertai nsizeiso ccupyin gthe front-
passenger seat
If additional forces are applied to th eseat ,the system may
interpret th eoccupant's weight as lowe rthan it actually is.
G WARNING
The front-passenger air bag does not deploy during an accident.
There is an increased risk of injury.
X Pull over and stop the vehicle safely as soon as possible, paying
attention to road and traffic conditions.
X Secure the vehicle against rolling away (Y page 152).
X Switch the ignition off.
X Have the occupant get out of the vehicle.
X Keep the seat unoccupied, close the front-passenger door and
switch on the ignition.
X Observe the PASSENGER AIR BAG OFF indicator lamp in the
center console and the multifunction displaya nd check the
following:
Seat unoccupied and ignition switched on:
R the PASSENGER AIR BAG OFF indicator lamp must light up and
remain lit. If the indicator lamp is on, OCS has disabled the front-
passenger air bag (Y page 47).
R the Front Passenger Airbag Enabled See Operator's Manual or
Front Passenger Airbag Disabled See Operator's Manual displaym
essages must not be shown in
the multifunction display.
X Wait for aperiod of at least 60 seconds until the necessary
system checksh ave been completed.
X Make sure that the displaym essages do not appearinthe
multifunction display.
If these conditionsa re fulfilled,the front-passenger seat can be
occupied again. Whether the PASSENGER AIR BAG OFF indicator
lamp remains lit or goes out depends on how OCS classifies the
occupant.
If the conditionsa re not fulfilled,the system is not operating
correctly.
X Visit aqualified specialist workshop immediately. 218
Display messagesOn-board computer and displays
Page 221 of 360
Display messages Possible causes/consequences and
000B Solutions
Fo
rfurther information about th eOccupant Classification System,
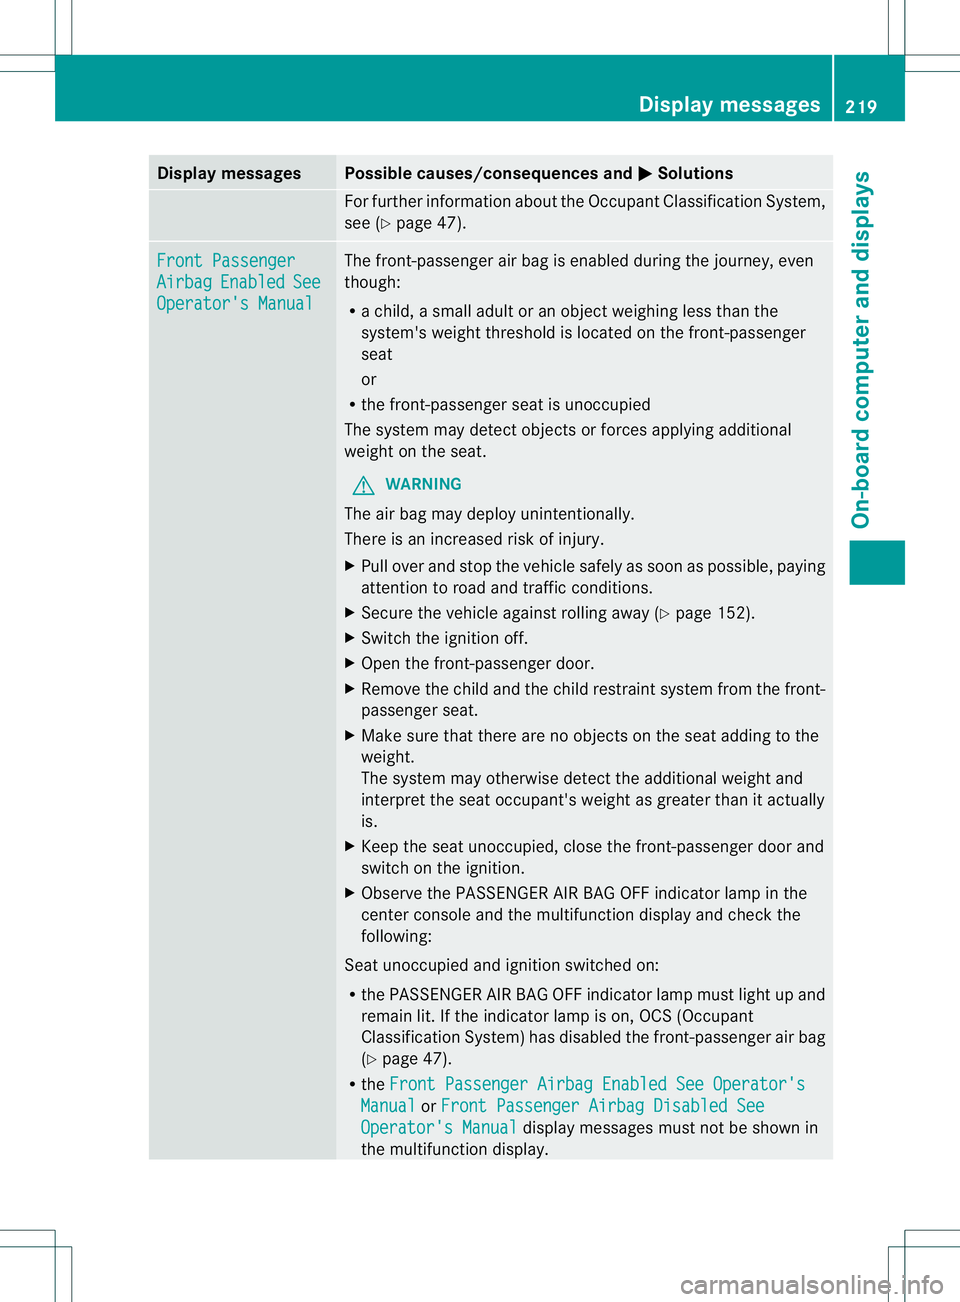
see (Y page 47). Front Passenger
Airbag Enabled See
Operator'
sManual The front-passenger air bag is enabled durin
gthe journey, even
though:
R ac hild, asmal ladult or an object weighing less than the
system' sweigh tthreshold is located on the front-passenger
seat
or
R the front-passenger seat is unoccupied
The system may detect objectsorf orces applying additional
weight on the seat.
G WARNING
The air bag may deploy unintentionally.
There is an increased risk of injury.
X Pull over and stop the vehicle safely as soon as possible, paying
attention to road and traffic conditions.
X Secure the vehicle against rolling away (Y page 152).
X Switch the ignition off.
X Open the front-passenger door.
X Remove the child and the child restraint system from the front-
passenger seat.
X Make sure that there are no objectsont he seat adding to the
weight.
The system may otherwise detect the additional weight and
interpret the seat occupant's weight as greater than it actually
is.
X Keep the seat unoccupied, close the front-passenger door and
switch on the ignition.
X Observe the PASSENGER AIR BAG OFF indicator lamp in the
center console and the multifunction displaya nd check the
following:
Seat unoccupied and ignition switched on:
R the PASSENGER AIR BAG OFF indicator lamp must light up and
remain lit. If the indicator lamp is on, OCS (Occupant
Classification System) has disabled the front-passenger air bag
(Y page 47).
R the Front Passenger Airbag Enabled See Operator's Manual or
Front Passenger Airbag Disabled See Operator's Manual displaym
essages must not be shown in
the multifunction display. Display messages
219On-board computer and displays Z
Page 253 of 360
Stowage areas
Stowage space
Important safety notes G
WARNING
If objectsint he passenger compartmen tare
stowed incorrectly, they can slide or be
thrown around and hit vehicle occupants.
There is arisk of injury, particularly in the
event of sudden braking or asudden change
in direction.
R Always stow objectssot hat they cannot be
thrown around in such situations.
R Always make sure that objectsdon ot
protrude from stowage spaces, parcel nets
or stowage nets.
R Close the lockable stowage spaces while
driving.
R Stow and secure objectst hat are heavy,
hard, pointy, sharp-edged, fragile or too
large in the cargo compartment.
Observe the loading guidelines (Y page 250).
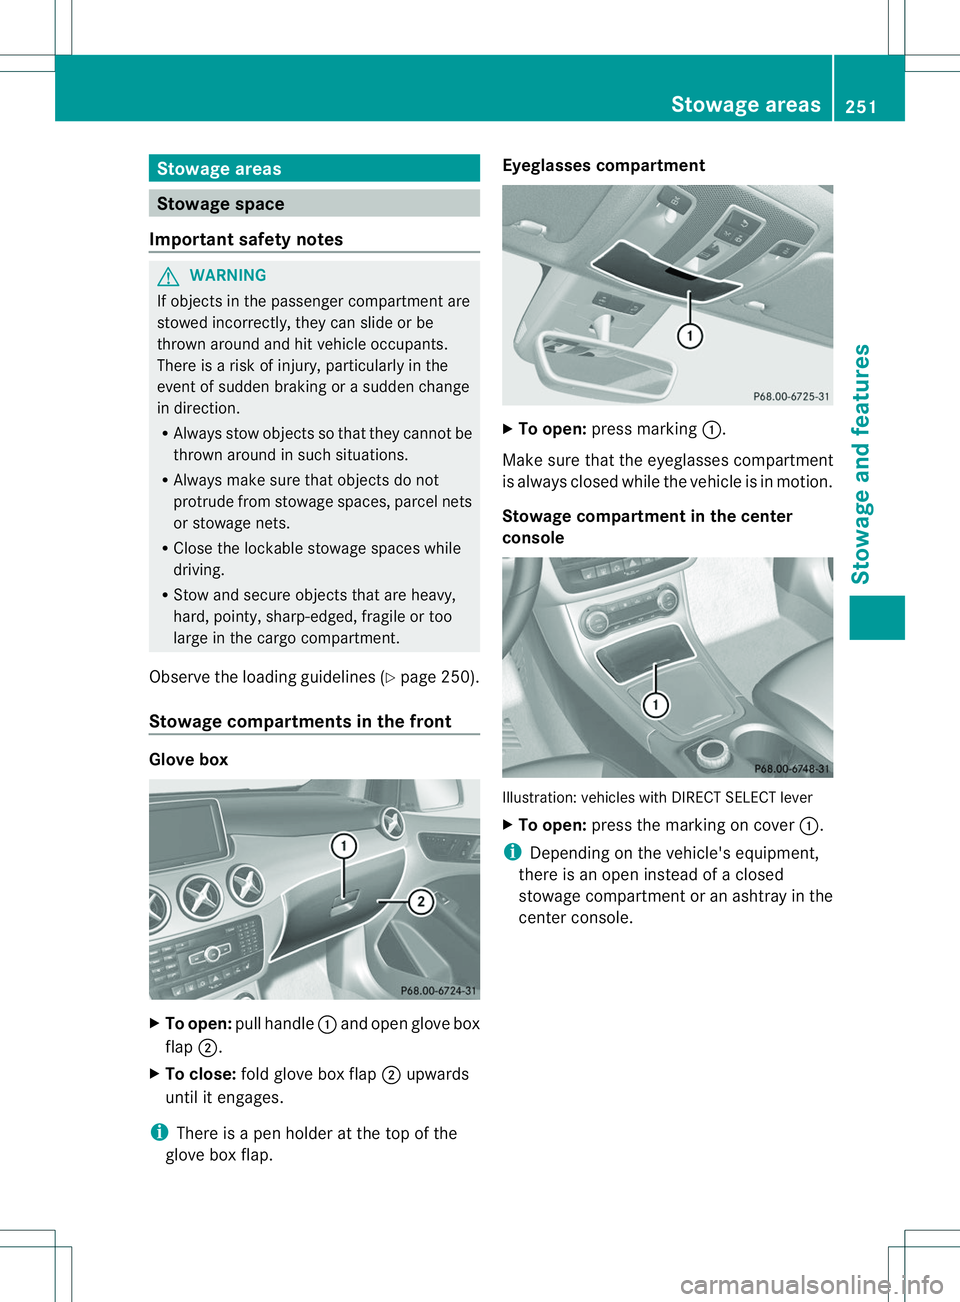
Stowage compartments in the front Glove box
X
To open: pull handle 001Aand open glove box
flap 0010.
X To close: fold glove box flap 0010upwards
until it engages.
i There is apen holder at the top of the
glove box flap. Eyeglasses compartment
X
To open: press marking 001A.
Make sure that the eyeglasses compartment
is always closed while the vehicle is in motion.
Stowage compartment in the center
console Illustration: vehicles with DIRECT SELECT lever
X
To open: press the marking on cover 001A.
i Depending on the vehicle's equipment,
there is an open instead of aclosed
stowage compartmen toranashtray in the
center console. Stowage areas
251Stowage and features Z
Page 254 of 360
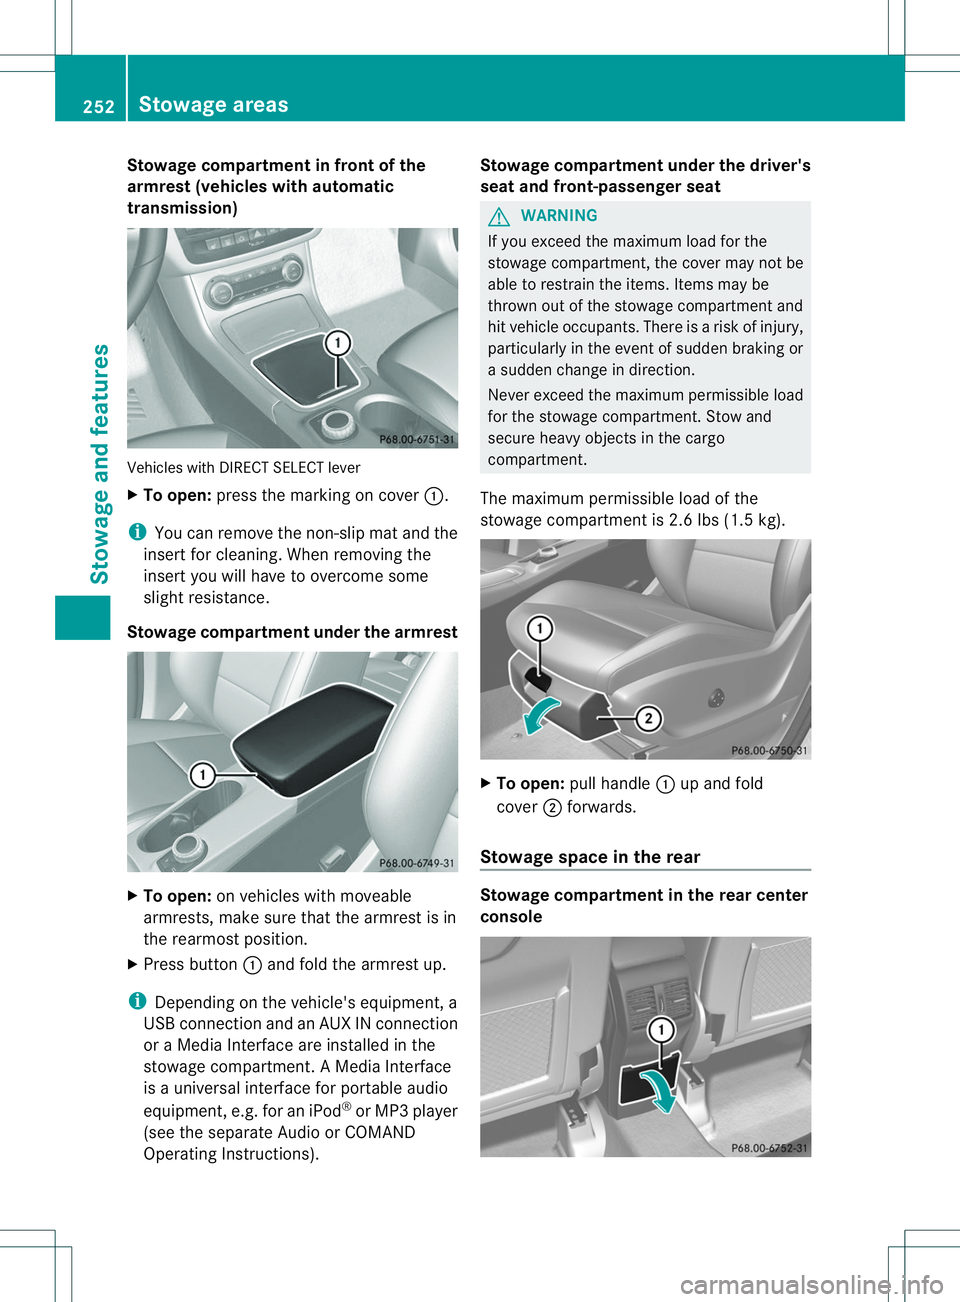
Stowage compartment in front of the
armrest (vehicles with automatic
transmission)
Vehicles with DIRECT SELECT lever
X
To open: press the marking on cover 001A.
i You can remove the non-slip mat and the
insert for cleaning. When removing the
insert you will have to overcome some
slight resistance.
Stowage compartment under the armrest X
To open: on vehicles with moveable
armrests, make sure that the armrest is in
the rearmost position.
X Press button 001Aand fold the armrest up.
i Depending on the vehicle's equipment, a
USB connection and an AUX IN connection
or aM edia Interface are installed in the
stowage compartment. AMedia Interface
is au niversal interface for portable audio
equipment, e.g. for an iPod ®
or MP3 player
(see the separate Audio or COMAND
Operating Instructions). Stowage compartment under the driver's
seat and front-passenger seat G
WARNING
If you exceed the maximum load for the
stowage compartment, the cover may not be
able to restrain the items. Items may be
thrown out of the stowage compartmen tand
hit vehicle occupants. There is arisk of injury,
particularly in the event of sudden braking or
as udden change in direction.
Never exceed the maximum permissible load
for the stowage compartment. Stow and
secure heavy objectsint he cargo
compartment.
The maximum permissible load of the
stowage compartmen tis2.6 lbs (1.5 kg). X
To open: pull handle 001Aup and fold
cover 0010forwards.
Stowage space in the rear Stowage compartment in the rear center
console252
Stowage areasStowage and features
Page 264 of 360
R
Close th elockable stowage spaces while
driving.
R Stow and secure object sthata re heavy,
hard ,pointy, sharp-edged ,fra gile or too
large in th ecargo compartment.
! Only use th ecup holders for containers of
th er igh tsize and which have lids. The
drinks could otherwise spill.
The stowage compartments in the doors
provide space for bottles:
R front :capacity up to 51 fl. oz. (1. 5l)
R rear: capacity up to 17 fl. oz. (0. 5l)
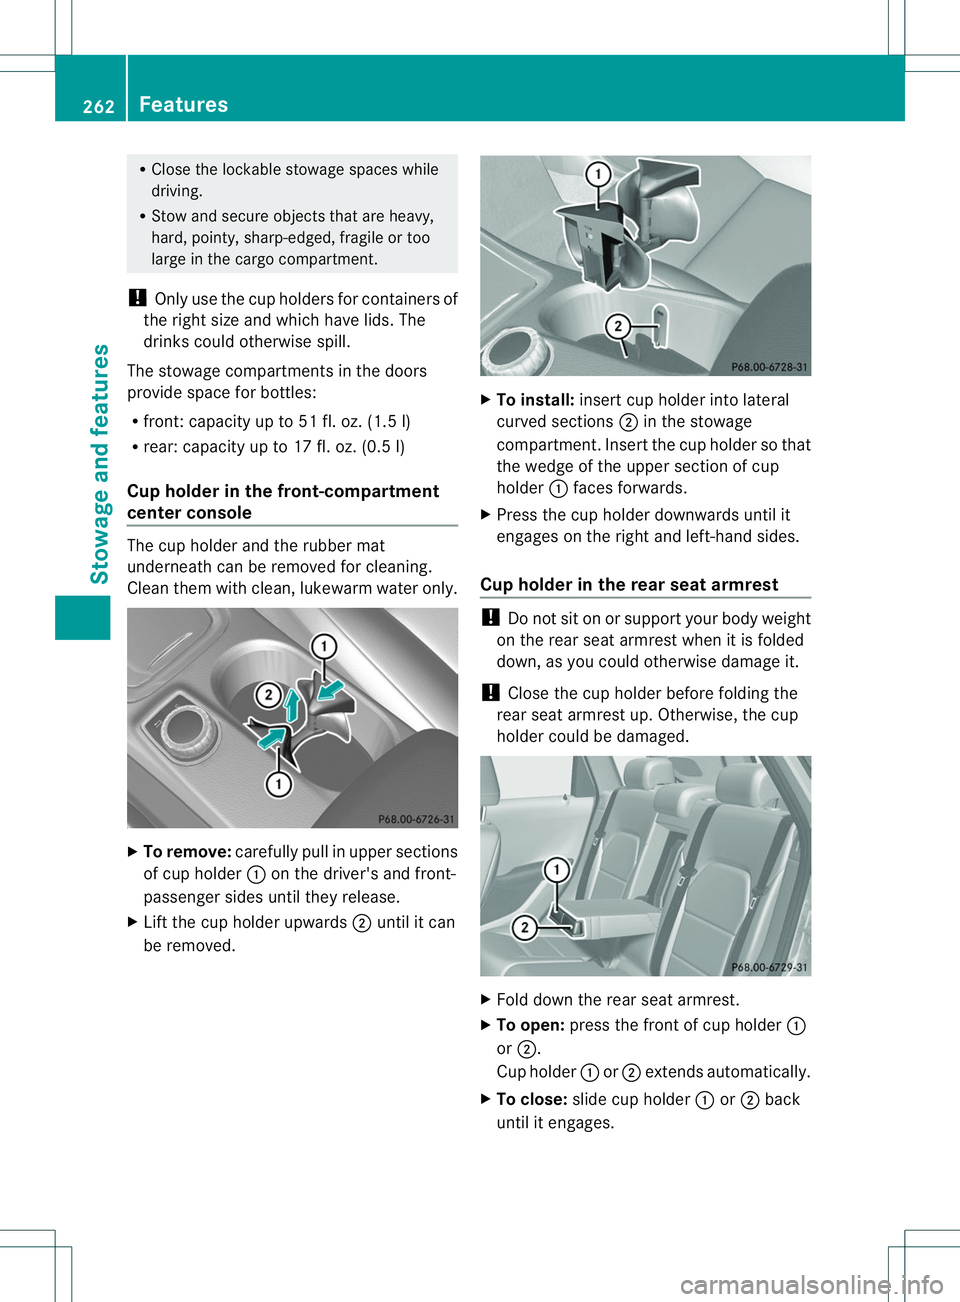
Cup holder in th efront-compartment
center console The cup holder and the rubber mat
underneat
hcan be removed for cleaning.
Clean the mwith clean ,lukewarm water only. X
To remove: carefully pull in upper sections
of cup holder 001Aon the driver's and front-
passenger sides until the yrelease.
X Lift the cup holder upwards 0010until it can
be removed. X
To install: insert cup holder int olateral
curved sections 0010in the stowage
compartment. Insert the cup holder so that
the wedge of the upper section of cup
holder 001Aface sforwards.
X Press the cup holder downwards until it
engages on the right and left-han dsides.
Cup holder in th erears eat armrest !
Do not sit on or support your body weight
on the rear seat armrest when it is folded
down, as you could otherwise damage it.
! Close the cup holder befor efoldin gthe
rear seat armrest up. Otherwise ,the cup
holder could be damaged. X
Fold down the rear seat armrest.
X To open: press the front of cup holder 001A
or 0010.
Cup holder 001Aor0010 extends automatically.
X To close: slide cup holder 001Aor0010 back
until it engages. 262
FeaturesStowage and features
Page 266 of 360
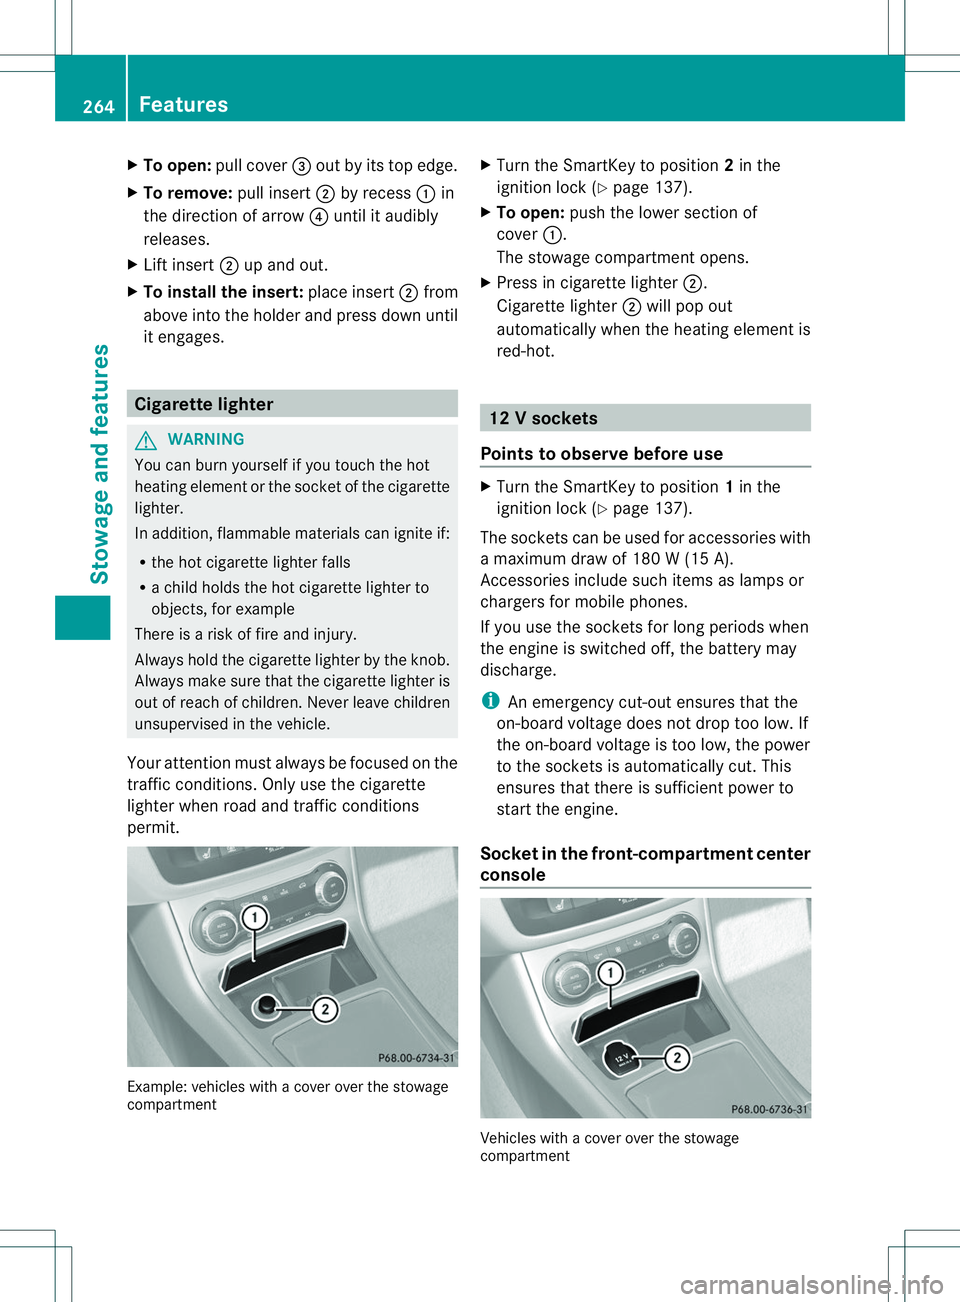
X
To open: pull cover 0023outbyi tstope dge.
X To remove: pull insert0010by recess 001Ain
th ed irection of arrow 0021until it audibly
releases.
X Lif tins ert 0010up and out.
X To install th einsert: placeinsert 0010from
abov eintot he holder and press down until
it engages. Cigarett
elighter G
WARNING
You can burn yoursel fifyou touch the hot
heating element or the socket of the cigarette
lighter.
In addition, flammable materials can ignite if:
R the hot cigarett elighter falls
R ac hild holds the hot cigarett elighter to
objects, for example
There is arisk of fire and injury.
Always hold the cigarett elighter by the knob.
Always make sure that the cigarett elighter is
out of reach of children. Never leave children
unsupervised in the vehicle.
Your attention must always be focused on the
traffic conditions. Only use the cigarette
lighter when road and traffic conditions
permit. Example: vehicles with
acover over the stowage
compartment X
Turn the SmartKey to position 2in the
ignition lock (Y page 137).
X To open: push the lower section of
cover 001A.
The stowage compartment opens.
X Press in cigarett elighter 0010.
Cigarette lighter 0010will pop out
automatically when the heating element is
red-hot. 12
Vsockets
Point stoo bserve befor euse X
Turn th eSmartKey to position 1in the
ignitio nlock (Y page 137).
The socket scan be used for accessories with
am aximum draw of 180 W(15 A).
Accessories include such items as lamps or
chargers for mobile phones.
If you use the socket sfor long periods when
the engine is switched off, the battery may
discharge.
i An emergenc ycut-out ensures that the
on-board voltage does not drop too low. If
the on-board voltage is too low, the power
to the socket sisautomatically cut. This
ensures that there is sufficient power to
start the engine.
Socket in the front-compartment center
console Vehicles with
acover over the stowage
compartment 264
FeaturesStowage and features
Page 267 of 360
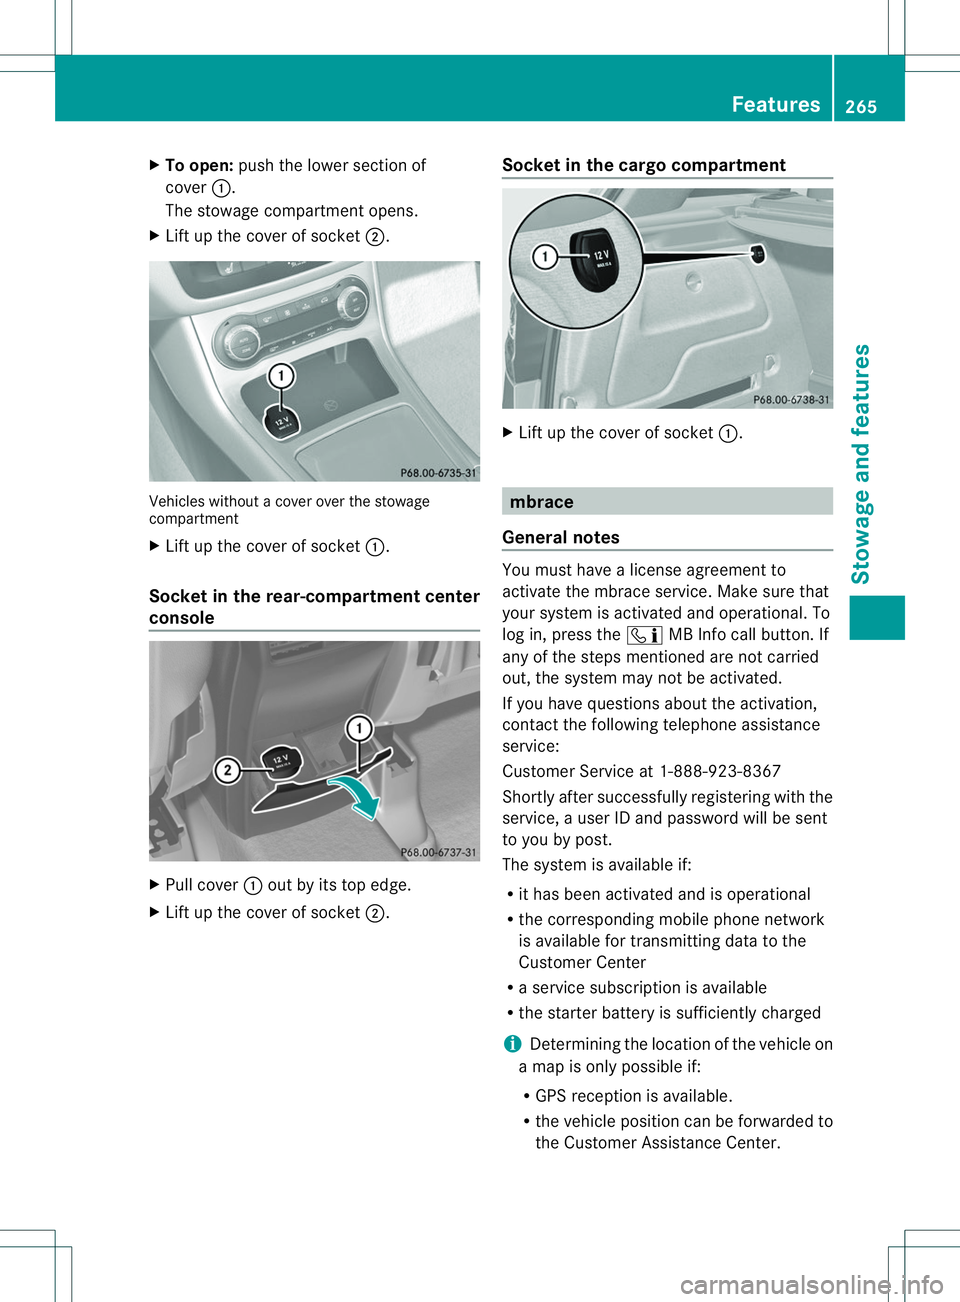
X
To open: push the lowe rsection of
cover 001A.
The stowage compartment opens.
X Lift up the cover of socket 0010.Vehicles without
acover over the stowage
compartment
X Lift up the cover of socket 001A.
Socket in the rear-compartment center
console X
Pull cover 001Aout by its top edge.
X Lift up the cover of socket 0010.Socket in the cargo compartment X
Lift up the cover of socket 001A. mbrace
General notes You must have
alicense agreement to
activat ethe mbrace service. Make sure that
your system is activated and operational. To
log in, press the 001FMB Infoc all button.If
any of the steps mentioned are not carried
out, the system may not be activated.
If you have questions about the activation,
contact the following telephon eassistance
service:
Customer Service at 1-888-923-8367
Shortly after successfully registering with the
service, auser ID and password will be sent
to you by post.
The system is available if:
R it has been activated and is operational
R the correspondin gmobile phone network
is available for transmitting data to the
Customer Center
R as ervic esubscription is available
R the starter batter yissufficiently charged
i Determinin gthe location of the vehicle on
am ap is only possible if:
R GPS reception is available.
R the vehicle position can be forwarded to
the Customer Assistance Center. Features
265Stowage and features Z