2014 LINCOLN MKZ HYBRID lock
[x] Cancel search: lockPage 3 of 445

Introduction
About This Manual........................................7
Symbols Glossary..........................................7
Data Recording
..............................................9
California Proposition 65
............................11
Perchlorate
.....................................................11
Lincoln Credit
................................................11
Replacement Parts Recommendation....................................12
Special Notices
............................................12
Mobile Communications Equipment.................................................13
Export Unique Options..............................13
Child Safety
General Information
....................................14
Installing Child Seats
..................................16
Booster Seats
..............................................24
Child Seat Positioning
...............................26
Child Safety Locks.....................................28
Safety Belts
Principle of Operation...............................29
Fastening the Safety Belts.......................30
Safety Belt Height Adjustment................34
Safety Belt Warning Lamp and Indicator Chime........................................................35
Safety Belt Minder
......................................35
Child Restraint and Safety Belt Maintenance............................................37
Personal Safety System ™
Personal Safety System ™
..........................38Supplementary Restraints
System
Principle of Operation...............................39
Driver and Passenger Airbags................40
Front Passenger Sensing System...........41
Side Airbags
.................................................43
Driver Knee Airbag
....................................45
Side Curtain Airbags
..................................45
Crash Sensors and Airbag Indicator....................................................46
Airbag Disposal
...........................................47
Keys and Remote Controls
General Information on Radio Frequencies.............................................48
Remote Control...........................................48
Replacing a Lost Key or Remote Control......................................................52
MyKey™
Principle of Operation
...............................53
Creating a MyKey
.......................................54
Clearing All MyKeys...................................54
Checking MyKey System Status.............55
Using MyKey With Remote Start Systems....................................................55
MyKey Troubleshooting............................55
Locks
Locking and Unlocking.............................58
Keyless Entry...............................................63
Interior Luggage Compartment Release
.....................................................65
Security
Passive Anti-Theft System
........................67
1
MKZ (CC9) Table of Contents
Page 5 of 445

Storage Compartments
Center Console.........................................146
Overhead Console...................................146
Starting and Stopping the Engine
General Information..................................147
Keyless Starting
.........................................147
Starting a Gasoline Engine
.....................148
Engine Block Heater................................150
Unique Driving Character- istics
Hybrid Electric Vehicle............................152
Fuel and Refueling
Safety Precautions
....................................158
Fuel Quality................................................159
Running Out of Fuel.................................159
Refueling......................................................161
Fuel Consumption
....................................163
Emission Control System........................164
High Voltage Battery
General Information..................................167
High Voltage Battery Cut-Off Switch......................................................169
Transmission
Automatic Transmission
..........................170
Brakes
General Information..................................174
Hints on Driving With Anti-Lock Brakes......................................................175 Electric Parking Brake..............................175
Hill Start Assist...........................................177
Traction Control
Principle of Operation
..............................179
Using Traction Control.............................179
Stability Control
Principle of Operation.............................180
Using Stability Control..............................181
Parking Aids
Parking Aid
.................................................182
Active Park Assist
.....................................184
Rear View Camera....................................188
Cruise Control
Principle of Operation...............................191
Using Cruise Control.................................191
Using Adaptive Cruise Control.............192
Driving Aids
Driver Alert
.................................................199
Lane Keeping System.............................200
Blind Spot Information System.............205
Steering......................................................209
Collision Warning System.......................210
Drive Control
..............................................212
Load Carrying
Load Limit
....................................................214
Towing
Towing a Trailer.........................................221
Transporting the Vehicle
.........................221
3
MKZ (CC9) Table of Contents
Page 10 of 445

Air conditioning system
Anti-lock braking system
Avoid smoking, flames or sparks
Battery
Battery acid
Brake fluid - non petroleum
based
Brake system
Cabin air filter
Check fuel cap
Child safety door lock or unlock
Child seat lower anchor
Child seat tether anchor
Cruise control
Do not open when hot Engine air filter
Engine coolant
Engine coolant temperature
Engine oil
Explosive gas
Fan warning
Fasten safety belt
Front airbag
Front fog lamps
Fuel pump reset
Fuse compartment
Hazard warning flashers
Heated rear window
Heated windshield
8
MKZ (CC9) IntroductionE162384 E71340 E91392
Page 11 of 445

Interior luggage compartment
release
Jack
Keep out of reach of children
Lighting control
Low tire pressure warning
Maintain correct fluid level
Note operating instructions
Panic alarm
Parking aid
Parking brake
Power steering fluid
Power windows front/rear
Power window lockout
Service engine soon Side airbag
Shield the eyes
Stability control
Windshield wash and wipe
DATA RECORDING
Service Data Recording
Service data recorders in your vehicle are
capable of collecting and storing
diagnostic information about your vehicle.
This potentially includes information about
the performance or status of various
systems and modules in the vehicle, such
as engine, throttle, steering or brake
systems. In order to properly diagnose and
service your vehicle, Ford Motor Company,
Ford of Canada, and service and repair
facilities may access or share among them
vehicle diagnostic information received
through a direct connection to your vehicle
when diagnosing or servicing your vehicle.
Additionally, when your vehicle is in for
service or repair, Ford Motor Company,
Ford of Canada, and service and repair
facilities may access or share among them
data for vehicle improvement purposes.
For U.S. only (if equipped), if you choose
to use the SYNC Vehicle Health Report,
you consent that certain diagnostic
9
MKZ (CC9) Introduction E161353 E139213 E167012
Page 18 of 445

•
You are required by law to properly
use safety seats for infants and
toddlers in the United States and
Canada.
• Many states and provinces require that
small children use approved booster
seats until they reach age eight, a
height of 4 feet 9 inches (1.45 meters)
tall, or 80 pounds (36 kilograms).
Check your local and state or
provincial laws for specific
requirements about the safety of
children in your vehicle.
• When possible, always properly
restrain children 12 years of age and
under in a rear seating position of your
vehicle. Accident statistics suggest that
children are safer when properly
restrained in the rear seating positions
than in a front seating position. See
Front Passenger Sensing System
(page
41).
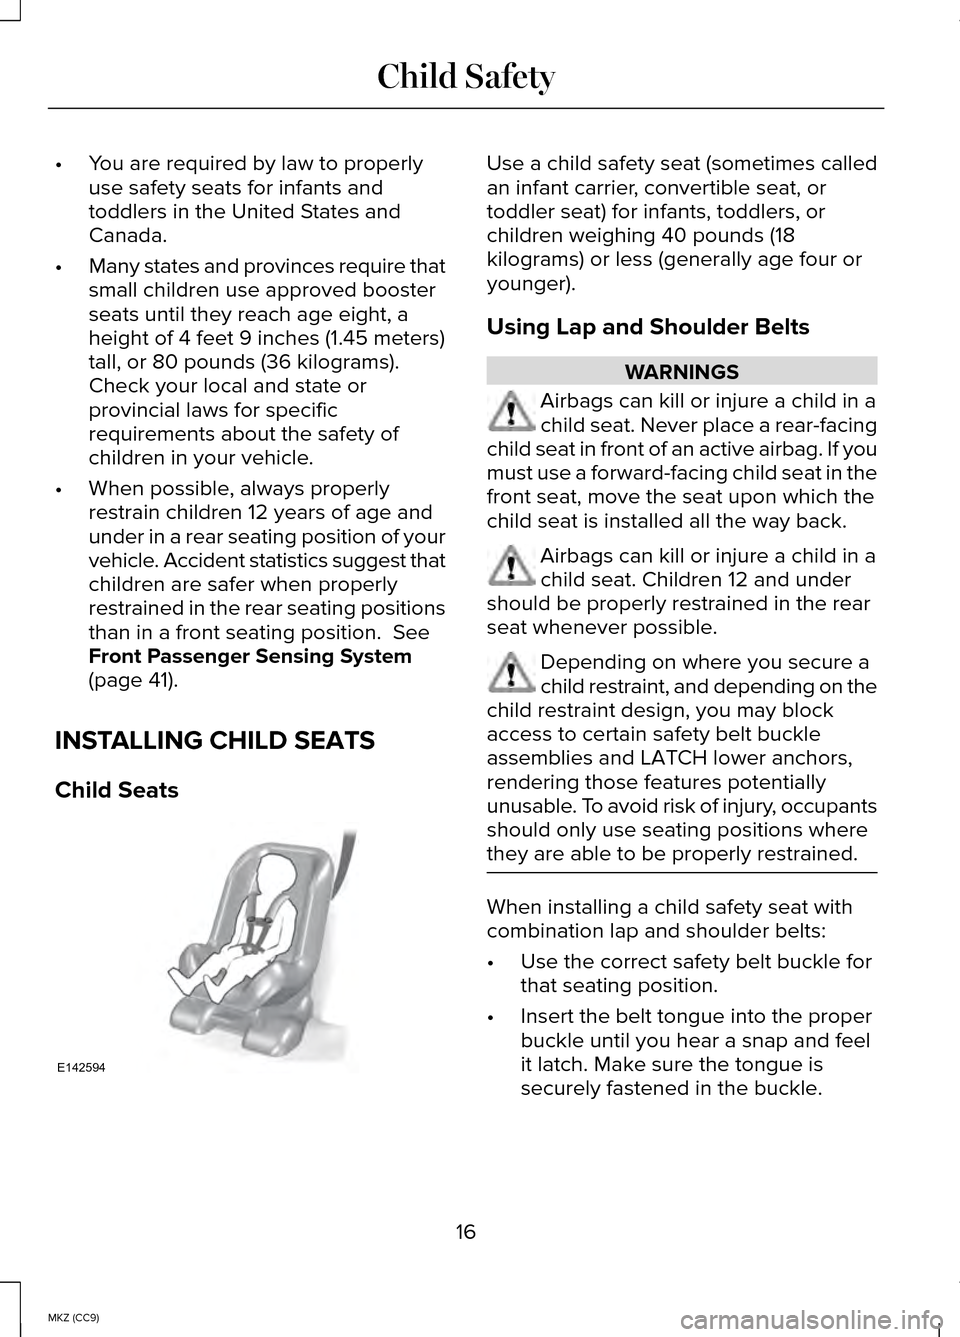
INSTALLING CHILD SEATS
Child Seats Use a child safety seat (sometimes called
an infant carrier, convertible seat, or
toddler seat) for infants, toddlers, or
children weighing 40 pounds (18
kilograms) or less (generally age four or
younger).
Using Lap and Shoulder Belts
WARNINGS
Airbags can kill or injure a child in a
child seat. Never place a rear-facing
child seat in front of an active airbag. If you
must use a forward-facing child seat in the
front seat, move the seat upon which the
child seat is installed all the way back. Airbags can kill or injure a child in a
child seat. Children 12 and under
should be properly restrained in the rear
seat whenever possible. Depending on where you secure a
child restraint, and depending on the
child restraint design, you may block
access to certain safety belt buckle
assemblies and LATCH lower anchors,
rendering those features potentially
unusable. To avoid risk of injury, occupants
should only use seating positions where
they are able to be properly restrained. When installing a child safety seat with
combination lap and shoulder belts:
•
Use the correct safety belt buckle for
that seating position.
• Insert the belt tongue into the proper
buckle until you hear a snap and feel
it latch. Make sure the tongue is
securely fastened in the buckle.
16
MKZ (CC9) Child SafetyE142594
Page 19 of 445

•
Keep the buckle release button
pointing up and away from the safety
seat, with the tongue between the
child seat and the release button, to
prevent accidental unbuckling.
• Place the vehicle seat upon which the
child seat will be installed in the upright
position.
• Put the safety belt in the automatic
locking mode. See Step 5. This vehicle
does not require the use of a locking
clip.
Perform the following steps when installing
the child seat with combination lap and
shoulder belts:
Note: Although the child seat illustrated
is a forward facing child seat, the steps
are the same for installing a rear facing
child seat.
Standard safety belts 1. Position the child safety seat in a seat
with a combination lap and shoulder
belt. 2. After positioning the child safety seat
in the proper seating position, pull
down on the shoulder belt and then
grasp the shoulder belt and lap belt
together behind the belt tongue. 3.
While holding the shoulder and lap belt
portions together, route the tongue
through the child seat according to the
child seat manufacturer's instructions.
Be sure the belt webbing is not
twisted.
17
MKZ (CC9) Child SafetyE142528 E142529 E142530
Page 20 of 445

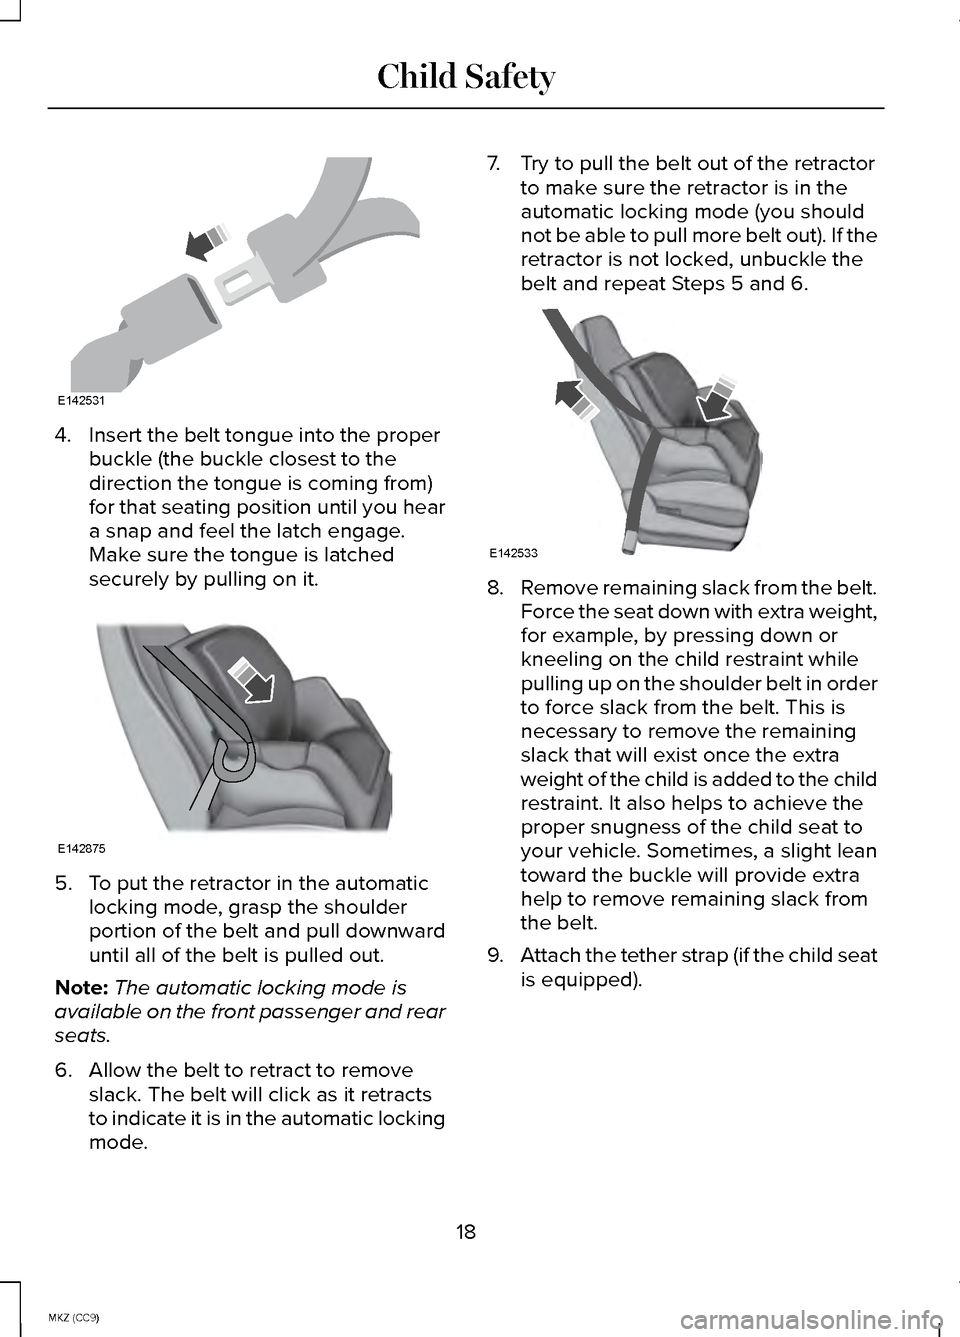
4. Insert the belt tongue into the proper
buckle (the buckle closest to the
direction the tongue is coming from)
for that seating position until you hear
a snap and feel the latch engage.
Make sure the tongue is latched
securely by pulling on it. 5. To put the retractor in the automatic
locking mode, grasp the shoulder
portion of the belt and pull downward
until all of the belt is pulled out.
Note: The automatic locking mode is
available on the front passenger and rear
seats.
6. Allow the belt to retract to remove slack. The belt will click as it retracts
to indicate it is in the automatic locking
mode. 7. Try to pull the belt out of the retractor
to make sure the retractor is in the
automatic locking mode (you should
not be able to pull more belt out). If the
retractor is not locked, unbuckle the
belt and repeat Steps 5 and 6. 8.
Remove remaining slack from the belt.
Force the seat down with extra weight,
for example, by pressing down or
kneeling on the child restraint while
pulling up on the shoulder belt in order
to force slack from the belt. This is
necessary to remove the remaining
slack that will exist once the extra
weight of the child is added to the child
restraint. It also helps to achieve the
proper snugness of the child seat to
your vehicle. Sometimes, a slight lean
toward the buckle will provide extra
help to remove remaining slack from
the belt.
9. Attach the tether strap (if the child seat
is equipped).
18
MKZ (CC9) Child SafetyE142531 E142875 E142533
Page 22 of 445

4. Insert the belt tongue into the proper
buckle (the buckle closest to the
direction the tongue is coming from)
for that seating position until you hear
a snap and feel the latch engage.
Make sure the tongue is latched
securely by pulling on it. 5. To put the retractor in the automatic
locking mode, grasp the grasp the lap
portion of the inflatable safety belt and
pull upward until all of the belt is pulled
out.
Note: The automatic locking mode is
available on the front passenger and rear
seats. Note:
Unlike the standard safety belt, the
inflatable safety belt's unique lap portion
locks the child seat for installation. The
ability for the shoulder portion of the belt
to move freely is normal, even after the
lap belt has been put into the automatic
locking mode.
6. Allow the belt to retract to remove slack. The belt will click as it retracts
to indicate it is in the automatic locking
mode.
7. Try to pull the belt out of the retractor to make sure the retractor is in the
automatic locking mode (you should
not be able to pull more belt out). If the
retractor is not locked, unbuckle the
belt and repeat Steps 5 and 6. 8.
Remove remaining slack from the belt.
Force the seat down with extra weight,
for example, by pressing down or
kneeling on the child restraint while
pulling down on the lap belt in order
to force slack from the belt. This is
necessary to remove the remaining
slack that will exist once the extra
weight of the child is added to the child
20
MKZ (CC9) Child SafetyE146523 E146524 E146525