Page 201 of 236
Using Setup
Setup l
8-15
i Information
• If the settings of an option are reset, then
all settings will be restored to the default
factory state.
• Heed caution as Home, Office and other
user locations may become deleted.
My Places
Press the key ▶ Press Setup
▶ Press
My Places
.
My Places
Press the My Places button ▶ Press
My Place ▶ Set and press Done
.
1
2
3
4
5
From the My Places list, select the desired
menu to either add, delete, or edit My
Places.
Name Description
1 Store current
position Add the current vehicle po-
sition as a My Place
2 Add My Places Add a My Place by using
search functions
3 Edit My
Places Edit information pertaining
to saved My Places, such
as name, location, and tele-
phone number
4 Delete selected
My Places Delete one or all saved My
Places
5 Edit group
name Edit name of corresponding
group
i Information
• By default, names of folders have been
set as "Group".
Page 202 of 236
8-16
Using Setup
Favorite Places
Press the My Places button ▶
Press
Favorite Places ▶ Set and press
Done
.
A total of 4 Favorite Places can be saved.
Favorite Places can be selected at the
bottom of the Destination Search main
screen.
Name Description
1 Store current
position Adds the current vehicle po-
sition as a Favorite Place
2 Add Favorite
Place Add a Favorite Place by us-
ing search functions
3 Edit FavoritePlace
Edit information pertaining
to saved Favorite Places,
such as name, location, and
telephone number
4 Delete Favorite Place Delete one or all saved Fa-
vorite Places
i Information
• If Favorite Places have not been added,
the
Edit Favorite Place and
Delete Favorite Place buttons will be
disabled.
Home and Office
Press the My Places button ▶
Press
Home or Office .
One Home and Office can each be saved.
The set Home and Office positions can be
selected at the bottom of the Destination
Search main screen.
1
2
3
4
Page 203 of 236
Using Setup
Setup l
8-17
i Information
• If the Home and Office has not been set,
these buttons will be disabled within the
Destination Search screen.
Speed Alerts
Press the My Places button ▶
Press
Speed Alert ▶ Set and press
Done
.
In the Edit Speed Alert screen, Name ,
View Map, and Speed Limit speed can
be set and edited.
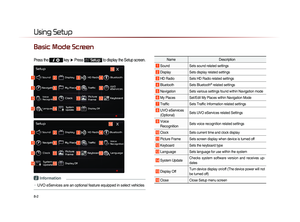
Traffic Setup
Press the key ▶ Press Setup
▶ Press
Traffic
.
This menu is used to set options related
to traffic and flow data, voice prompts, and
re-routing options based on traffic condi-
tions.
1
2
3
4
Page 204 of 236

8-18
Using Setup
Name Description
1 Data Radio ID C h e c k i n f o r m a t i o n o n
SIRIUS traffic data service
activation and activation ID
2 Display Traffic
and Flow Data
on Map Sets whether to display real-
time traffic information on
map
3 Voice Prompt
for Traffic and
Flow Warning S e t s w h e t h e r t o r e c e i v e
voice prompts for real-time
traffic information and condi-
tions
4 Provide
Re-Routing
Options S e t s w h e t h e r t o u s e r e -
routing options by reflecting
traffic conditions
i Information
• SIRIUS Traffic Data service requires a
separate subscription. To subscribe to
this service, please contact the number
displayed on the screen.
UVO eServices Settings
(Optional)
UVO eServices Settings
Within the eServices Settings screen,
UVO eServices related features can be
set, such as activating UVO eServices and
changing the Registered Phone.
For safety reasons, Settings can not be
adjusted while driving. Park the vehicle
b e f o r e m a k i n g a n y c h a n g e s t o y o u r
Settings.
Press the
key, then press
Setup icon on the touch screen.
P r e s s UVO eServices ic o n o n t h e
touch screen.
Page 205 of 236
Using Setup
Setup l
8-19
UVO eServices Activation
If UVO eServices has not yet been activated,
press the
UVO eServices Activation but-
ton to start the activation process.
If UVO eServices has been activated, you
can change the registered phone by press-
ing
Change Registered Phone button
on the touch screen.
Crash Notification Assist Setting
This feature is used to turn on or off the
Crash Notification Assist feature.
From the UVO eServices Setting screen,
Press
Crash Notification Assist .
T o e n a b l e C r a s h N o t i f i c a t i o n A s s i s t ,
ensure that the
On button is selected.
To disable this feature, ensure the
Off
button is selected. When enabling this feature, you must
first agree to the Crash Notification Assist
terms of use.
After reading the terms of use, press the
Agree b u t t o n o n t h e t o u c h s c r e e n t o
accept.
Page 206 of 236
8-20
Using Setup
Changing Registered Phone
The Registered Phone is the Primary
Phone used for communication with UVO
eServices.
From the UVO eServices Setting screen
you can change the registered phone by
pressing
Change Registered Phone but-
ton on the touch screen.
Press the Change button to change the
Registered Phone to the smartphone cur-
rently connected via Bluetooth.
NOTICE
• When changing the Registered Phone,
the smartphone you wish to set as the
Registered Phone must first be connected
through Bluetooth.
System Information
From the UVO eServices Setting screen
you can view the System Information by
pressing [System Information] button on
the touch screen.
Page 207 of 236
Using Setup
Setup l
8-21
Voice Recognition
Settings
Press the key
▶ Press Setup
▶ Press
Voice Recognition ▶ Set and
press
Done .
This menu is used to set voice recognition
mode between Normal and Expert mode.
Name Description
1 Normal When using voice recognition,
provides detailed prompts and
is suited for beginner users
2 Expert When using voice recognition,
omits certain prompts and is
suited for experienced users
Clock Settings
Press the key
▶ Press Setup
▶ Press
Clock ▶ Set and press
Done
.
This menu is used to set the time used
within the Navigation system.
Name Description
1 GPS Time Displays time according to
the received GPS time
2 Daylight
Saving Time Turns on/off daylight saving
time feature
3 Time Format
Converts the digital clock
display to 12 or 24 hours
i Information
• When Daylight Savings Time is turned on,
the clock is moved forward one hour.
1
2
1
2
3
Page 208 of 236
8-22
Using Setup
Picture Frame
Press the
key ▶ Press Setup
▶ Press
Picture Frame ▶ Set and
Press
Done .
This menu is used to select the screen dis-
played when the system power is turned off.
Name Description
1 Image Displays an image when the
system power is turned off
2 No Image No image is displayed when
the system power is turned off
i Information
• When the picture frame is set to Image,
images saved within a USB can be set as
the picture frame by pressing the
Browse
button.
Keyboard
Press the
key ▶ Press Setup
▶ Press
Keyboard ▶ Set and Press
Done
.
This option allows you to change the type
of keyboard used within the system.
1
2
12