2014 FORD FUSION (AMERICAS) light
[x] Cancel search: lightPage 133 of 458

3.Using both hands, simultaneously,press and hold the desired HomeLinkbutton and the hand-held transmitterbutton. DO NOT release either one untilthe HomeLink indicator light flashesslowly and then rapidly. When theindicator light flashes rapidly, bothbuttons may be released. The rapidflashing indicates successful training.
4.Press and hold the HomeLink buttonyou programmed for five seconds, thenrelease. You may need to do this twiceto activate the door. If your garage doordoes not operate, watch the HomeLinkindicator light.
If the indicator light stays on, theprogramming is complete. SeeProgramming your garage door motorlater in this section.
If the indicator light flashes rapidly for 2seconds and then turns to a constant light,the HomeLink button is not programmedyet. Do the following:
Press and hold the HomeLink button whileyou press and release the hand-heldtransmitter button every 2 seconds. TheHomeLink indicator light will flash slowlyand then rapidly once the HomeLinkfunction button recognizes and acceptsthe hand-held transmitter’s radiofrequency signal.
After programming the HomeLink button,begin programming your garage dooropener motor.
Note:You may need a ladder to reach theunit and you may need to remove the coveror lamp lens on your garage door opener.
To program additional buttons, repeatSteps 1 – 4.
For questions or comments, please contactHomeLink at www.homelink.com or1-800-355-3515.
Programming your garage door openermotor
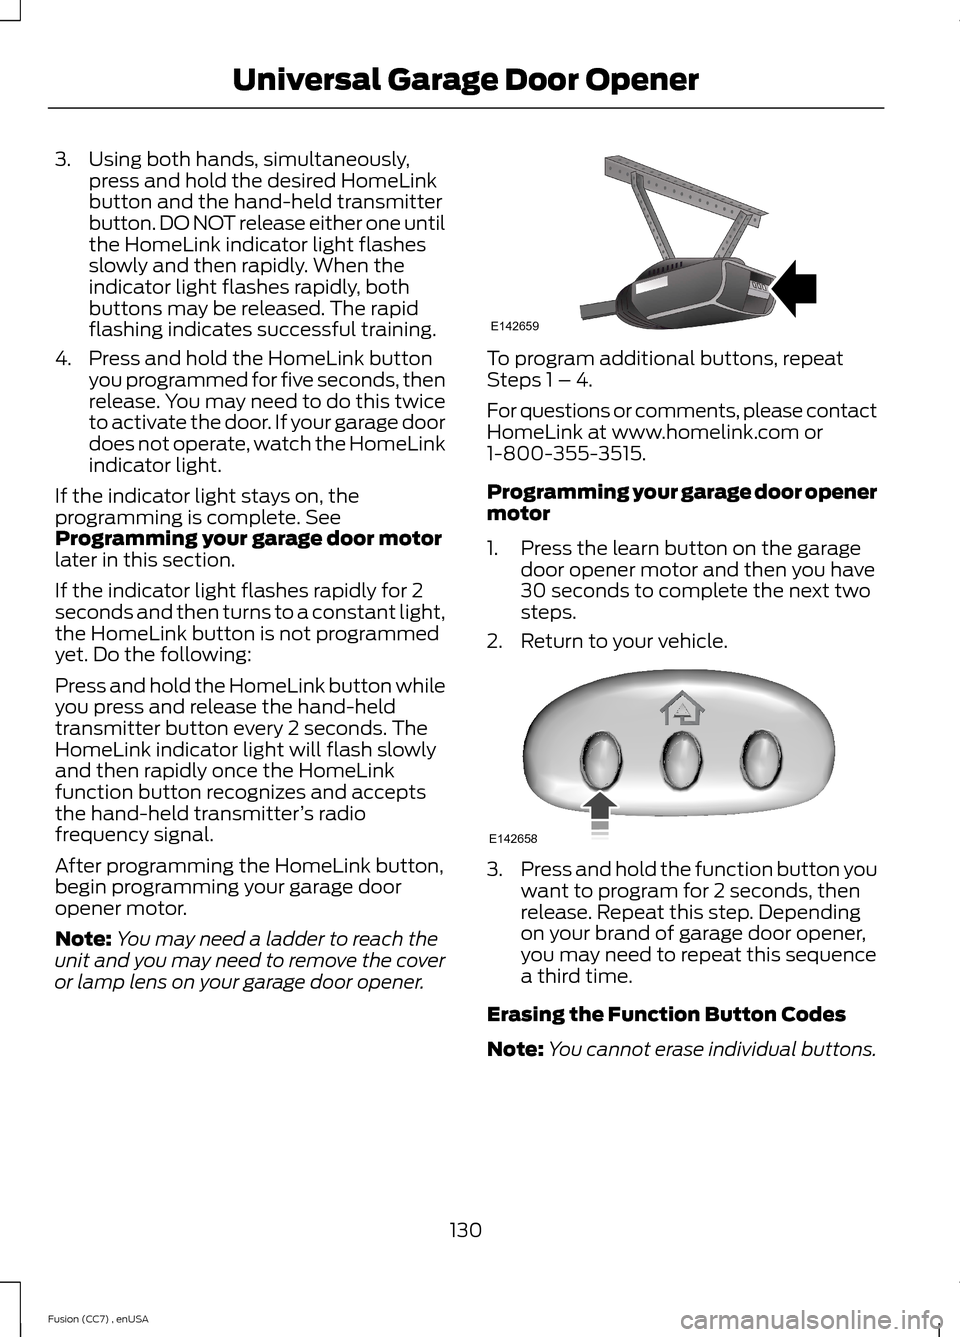
1.Press the learn button on the garagedoor opener motor and then you have30 seconds to complete the next twosteps.
2.Return to your vehicle.
3.Press and hold the function button youwant to program for 2 seconds, thenrelease. Repeat this step. Dependingon your brand of garage door opener,you may need to repeat this sequencea third time.
Erasing the Function Button Codes
Note:You cannot erase individual buttons.
130Fusion (CC7) , enUSAUniversal Garage Door OpenerE142659 E142658
Page 134 of 458

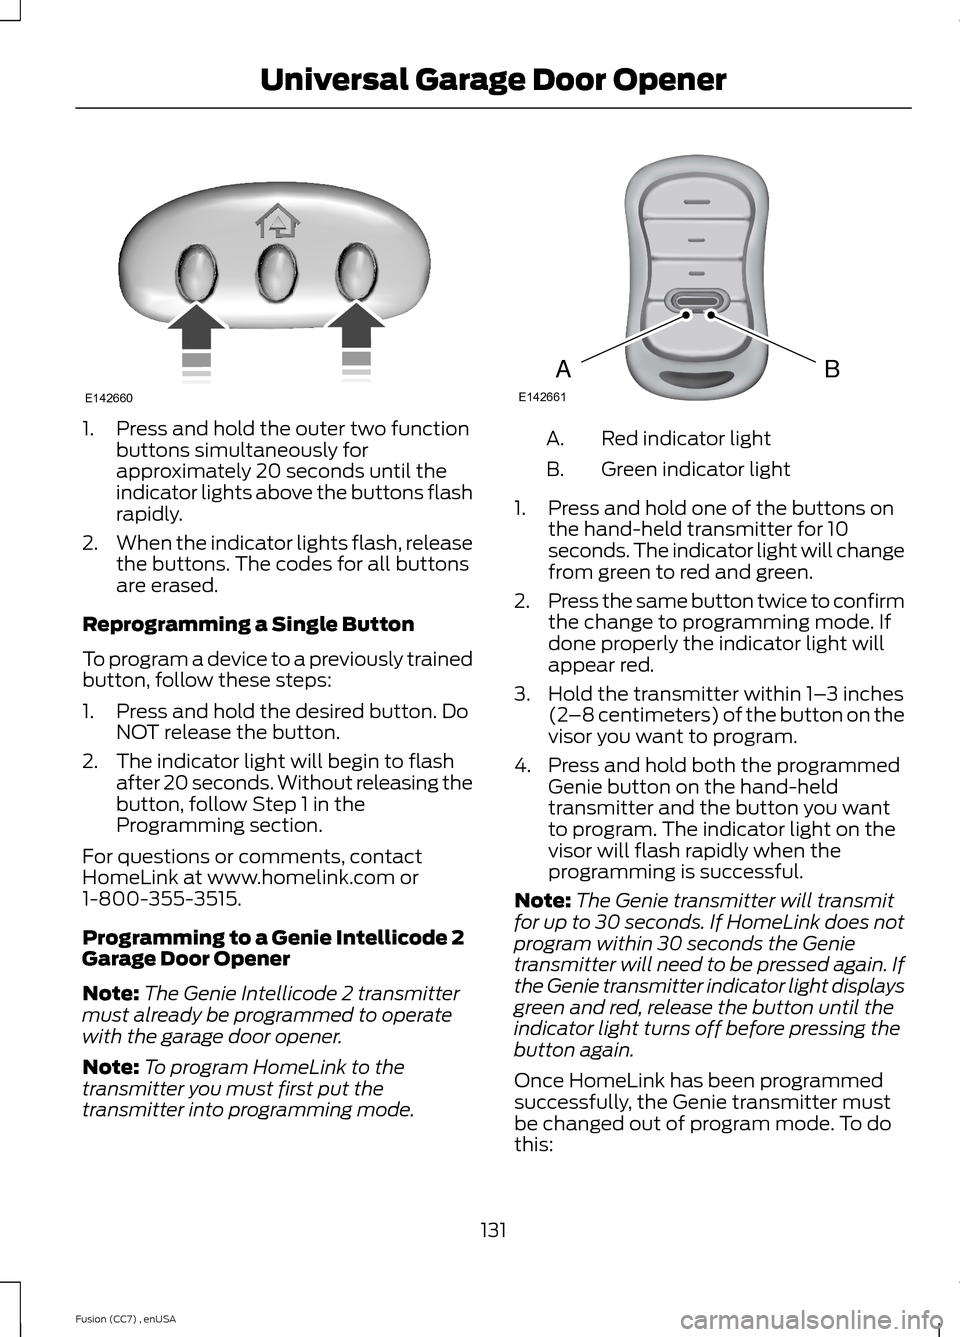
1.Press and hold the outer two functionbuttons simultaneously forapproximately 20 seconds until theindicator lights above the buttons flashrapidly.
2.When the indicator lights flash, releasethe buttons. The codes for all buttonsare erased.
Reprogramming a Single Button
To program a device to a previously trainedbutton, follow these steps:
1.Press and hold the desired button. DoNOT release the button.
2.The indicator light will begin to flashafter 20 seconds. Without releasing thebutton, follow Step 1 in theProgramming section.
For questions or comments, contactHomeLink at www.homelink.com or1-800-355-3515.
Programming to a Genie Intellicode 2Garage Door Opener
Note:The Genie Intellicode 2 transmittermust already be programmed to operatewith the garage door opener.
Note:To program HomeLink to thetransmitter you must first put thetransmitter into programming mode.
Red indicator lightA.
Green indicator lightB.
1.Press and hold one of the buttons onthe hand-held transmitter for 10seconds. The indicator light will changefrom green to red and green.
2.Press the same button twice to confirmthe change to programming mode. Ifdone properly the indicator light willappear red.
3.Hold the transmitter within 1–3 inches(2–8 centimeters) of the button on thevisor you want to program.
4.Press and hold both the programmedGenie button on the hand-heldtransmitter and the button you wantto program. The indicator light on thevisor will flash rapidly when theprogramming is successful.
Note:The Genie transmitter will transmitfor up to 30 seconds. If HomeLink does notprogram within 30 seconds the Genietransmitter will need to be pressed again. Ifthe Genie transmitter indicator light displaysgreen and red, release the button until theindicator light turns off before pressing thebutton again.
Once HomeLink has been programmedsuccessfully, the Genie transmitter mustbe changed out of program mode. To dothis:
131Fusion (CC7) , enUSAUniversal Garage Door OpenerE142660 BAE142661
Page 135 of 458

1.Press and hold the previouslyprogrammed Genie button on thehand-held transmitter for 10 seconds.The indicator light will change from redto red and green.
2.Press the same button twice to confirmthe change. If done correctly theindicator light will turn green.
Programming HomeLink to the GenieIntellicode Garage Door Opener Motor
Note:You may need a ladder to access thegarage door opener motor.
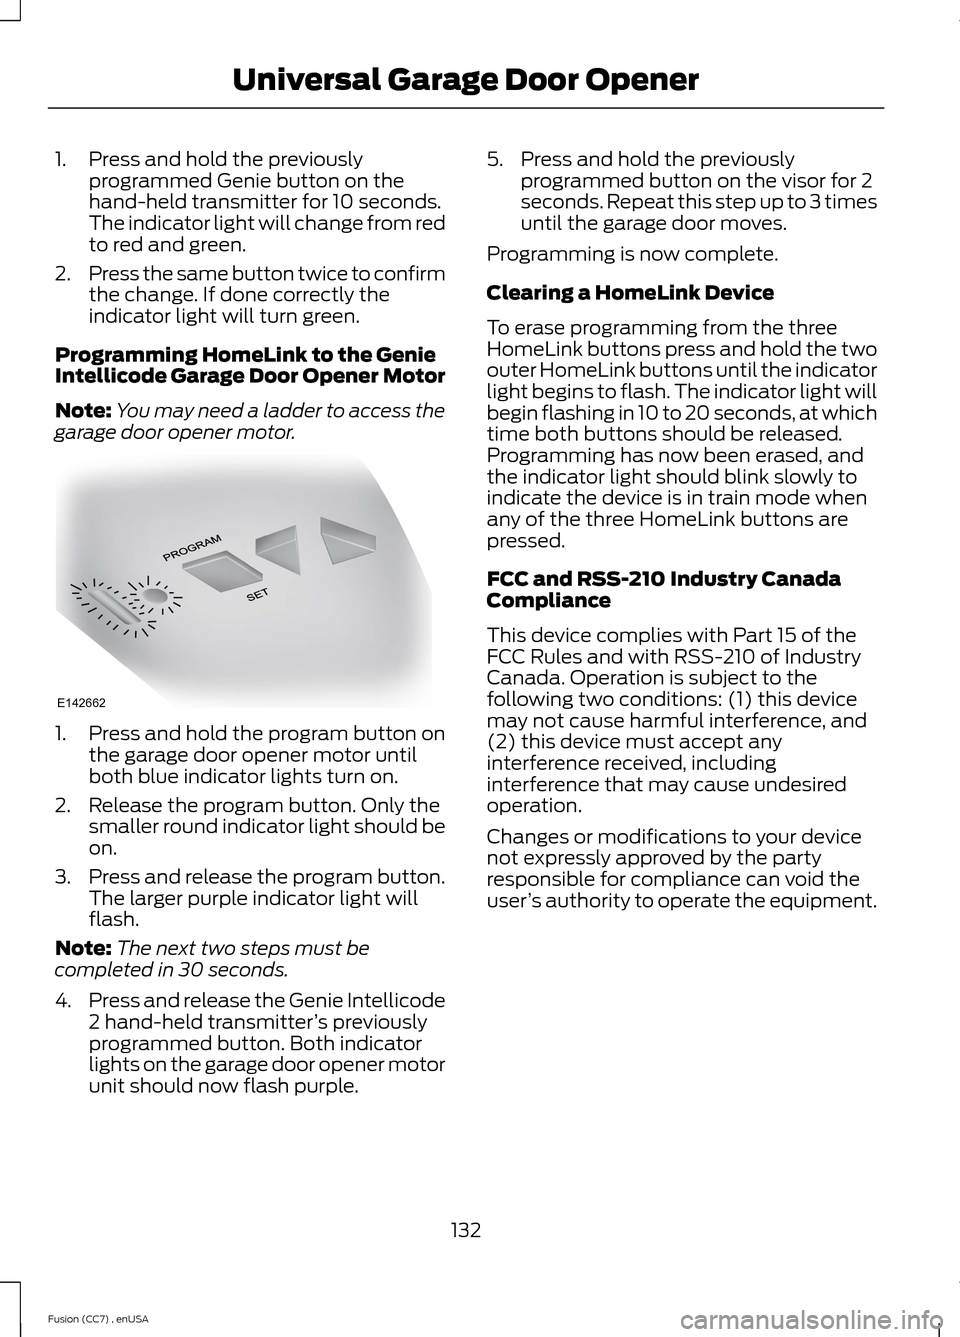
1.Press and hold the program button onthe garage door opener motor untilboth blue indicator lights turn on.
2.Release the program button. Only thesmaller round indicator light should beon.
3.Press and release the program button.The larger purple indicator light willflash.
Note:The next two steps must becompleted in 30 seconds.
4.Press and release the Genie Intellicode2 hand-held transmitter’s previouslyprogrammed button. Both indicatorlights on the garage door opener motorunit should now flash purple.
5.Press and hold the previouslyprogrammed button on the visor for 2seconds. Repeat this step up to 3 timesuntil the garage door moves.
Programming is now complete.
Clearing a HomeLink Device
To erase programming from the threeHomeLink buttons press and hold the twoouter HomeLink buttons until the indicatorlight begins to flash. The indicator light willbegin flashing in 10 to 20 seconds, at whichtime both buttons should be released.Programming has now been erased, andthe indicator light should blink slowly toindicate the device is in train mode whenany of the three HomeLink buttons arepressed.
FCC and RSS-210 Industry CanadaCompliance
This device complies with Part 15 of theFCC Rules and with RSS-210 of IndustryCanada. Operation is subject to thefollowing two conditions: (1) this devicemay not cause harmful interference, and(2) this device must accept anyinterference received, includinginterference that may cause undesiredoperation.
Changes or modifications to your devicenot expressly approved by the partyresponsible for compliance can void theuser’s authority to operate the equipment.
132Fusion (CC7) , enUSAUniversal Garage Door OpenerE142662
Page 136 of 458

12 Volt DC Power Point
WARNING
Do not plug optional electricalaccessories into the cigar lightersocket (if equipped). Improper useof the lighter can cause damage notcovered by your warranty, and can resultin fire or serious injury.
Note:If used when the vehicle is notrunning, the battery will discharge. Theremay be insufficient power to restart yourvehicle.
Note:Do not insert objects other than anaccessory plug into the power point. Thiswill damage the outlet and blow the fuse.
Note:Do not hang any type of accessory oraccessory bracket from the plug.
Note:Do not use the power point over thevehicle capacity of 12 volt DC 180 watts ora fuse may blow.
Note:Do not use the power point foroperating a cigar lighter element.
Note:Improper use of the power point cancause damage not covered by yourwarranty.
Note:Always keep the power point capsclosed when not in use.
Run the vehicle for full capacity use of thepower point. To prevent the battery fromdischarging accidentally:
•Do not use the power point longer thannecessary when the vehicle is notrunning.
•Do not leave devices plugged inovernight or when you park your vehiclefor extended periods.
Locations
Power points may be in the followinglocations:
•in the front of the center console
•inside the center console storage bin
•on the rear of the center console.
110 Volt AC Power Point (If Equipped)
WARNING
Do not keep electrical devicesplugged in the power point wheneverthe device is not in use. Do not useany extension cord with the 110 volt ACpower point, since it will defeat the safetyprotection design. Doing so my cause thepower point to overload due to poweringmultiple devices that can reach beyondthe 150 watt load limit and could result infire or serious injury.
Note:Keep the vehicle running to use thepower point.
You can use the power point for poweringelectrical devices that require up to 150watts. It is on the rear of the centerconsole.
When the indicator light, located on thepower point, is:
•on — power point is ready to supplypower.
•off — power point power supply is off;ignition is not on.
•flashing — power point is in fault mode.
133Fusion (CC7) , enUSAAuxiliary Power PointsE143941
Page 140 of 458

Ignition Modes
The keyless starting system has threemodes:
Off: Turns the ignition off.
•Without applying the brake pedal,press and release the button oncewhen the ignition is in the on mode, orwhen the engine is running but thevehicle is not moving.
On: All electrical circuits are operationaland the warning lamps and indicatorsilluminate.
•Without applying the brake pedal,press and release the button once.
Start: Starts the engine.
•Press the brake pedal, and then pressthe button for any length of time. Anindicator light on the button illuminateswhen then ignition is on and when theengine starts.
STARTING A GASOLINE
ENGINE
When you start the engine, the idle speedincreases, this helps to warm up theengine. If the engine idle speed does notslow down automatically, have yourvehicle checked by an authorized dealer.
Note:You can crank the engine for a totalof 60 seconds (without the engine starting)before the starting system temporarilydisables. The 60 seconds does not have tobe all at once. For example, if you crank theengine three times for 20 seconds eachtime, without the engine starting, youreached the 60-second time limit. Amessage appears in the information displayalerting you that you exceeded the crankingtime. You cannot attempt to start the enginefor at least 15 minutes. After 15 minutes, youare limited to a 15-second engine crankingtime. You need to wait 60 minutes beforeyou can crank the engine for 60 secondsagain.
Before starting the engine, check thefollowing:
•Make sure all occupants have fastenedtheir safety belts.
•Make sure the headlamps andelectrical accessories are off.
•Make sure the parking brake is on.
•Move the transmission selector leverto position P (automatic transmission)or neutral (manual transmission).
•Turn the ignition key to position II. Ifyour vehicle is equipped with a keylessignition, see the following instructions.
Vehicles with an Ignition Key
Note:Do not touch the accelerator pedal.
1.Fully press the brake pedal. If yourvehicle is equipped with a manualtransmission, fully press the clutchpedal also.
2.Turn the key to position III to start theengine. Release the key when theengine starts.
Note:The engine may continue crankingfor up to 15 seconds or until it starts.
Note:If you cannot start the engine on thefirst try, wait for a short period and try again.
137Fusion (CC7) , enUSAStarting and Stopping the EngineE144447
Page 145 of 458

AUTO-START-STOP (IF EQUIPPED)
The system helps reduce fuel consumptionby automatically shutting off and restartingthe engine while your vehicle is stopped.The engine will restart automatically whenyou release the brake pedal. In somesituations, your vehicle may restartautomatically, for example:
•To maintain interior comfort
•To recharge the battery
Note:Power assist steering is turned offwhen the engine is off.
WARNINGS
The engine may restartautomatically if required by thesystem.
Switch the ignition off beforeopening the hood or performing anymaintenance. Failure to do so mayresult in serious injuries due to automaticengine restart.
Always switch the ignition off beforeleaving your vehicle, as the systemmay have turned the engine off, butthe ignition will still be on and automaticrestart may occur.
The Auto StartStop system status isavailable at a glance within the informationdisplay. See Information Displays (page87).
Enabling Auto StartStop
The system is automatically enabled everytime you start your vehicle if the followingconditions are met:
•The Auto StartStop button is notpressed (not illuminated).
•Your vehicle exceeds an initial speedof 3 mph (4 km/h) after the vehicle hasbeen initially started.
•Your vehicle is stopped.
•Your foot is on the brake pedal.
•The transmission is in drive (D).
•The driver's door is closed.
•There is adequate brake vacuum.
•The interior compartment has beencooled or warmed to an acceptablelevel.
•The front windshield defroster and rearwindow defroster are off.
•The steering wheel is not turned rapidlyor is not at a sharp angle.
•The vehicle is not on a steep roadgrade.
•The battery is within optimal operatingconditions (battery state of charge andtemperature in range).
•The engine coolant is at operatingtemperature.
•Elevation is below approximately10000 feet (3048 meters).
•Ambient temperature is moderate.
Note:The system allows multiplesuccessive Auto StartStop events, but itmay not operate in conditions of heavytraffic or in extended low speed operation.
Note: The green Auto StartStopindicator light on the instrumentcluster will illuminate to indicatewhen the automatic engine stop occurs.
Note: If the instrument clusteris equipped with a grey AutoStartStop indicator light, it isilluminated when automatic engine stopis not available due to one of the abovenoted conditions not being met.
Automatic Engine Restart
Any of the following conditions will resultin an automatic restart of the engine:
142Fusion (CC7) , enUSAUnique Driving Characteristics E146361
Page 146 of 458

•Your foot is removed from the brakepedal.
•You press the accelerator pedal.
•You press the accelerator and thebrake pedal at the same time.
•The driver seat belt becomesunfastened or the driver door is ajar.
•The transmission is moved from drive(D).
•Your vehicle is moving.
•The interior compartment does notmeet customer comfort when airconditioning or heat is on.
•Fogging of the windows could occurand the air conditioning is on.
•The battery is not within optimaloperating conditions.
•The maximum engine off time isexceeded.
•When you press the Auto StartStopbutton while the engine is stoppedautomatically.
•Either the front or rear defroster isturned on.
Any of the following conditions may resultin an automatic restart of the engine:
•The blower fan speed is increased orthe climate control temperature ischanged.
•An electrical accessory is turned on orplugged in.
Disabling Auto StartStop
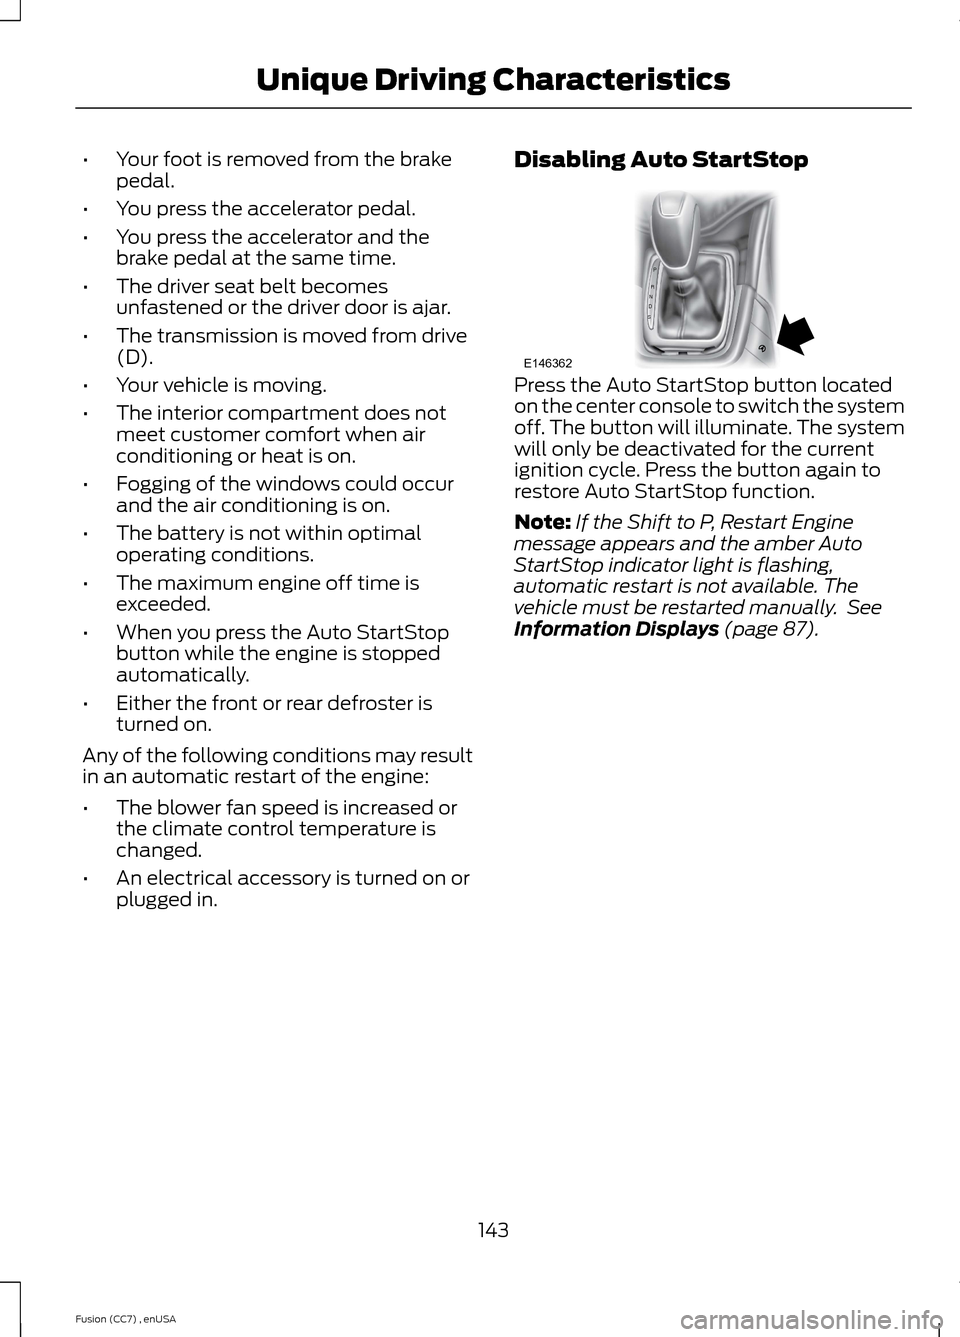
Press the Auto StartStop button locatedon the center console to switch the systemoff. The button will illuminate. The systemwill only be deactivated for the currentignition cycle. Press the button again torestore Auto StartStop function.
Note:If the Shift to P, Restart Enginemessage appears and the amber AutoStartStop indicator light is flashing,automatic restart is not available. Thevehicle must be restarted manually. SeeInformation Displays (page 87).
143Fusion (CC7) , enUSAUnique Driving CharacteristicsPRNDSE146362
Page 149 of 458

Regular unleaded gasoline with a pump(R+M)/2 octane rating of 87 isrecommended. Some stations offer fuelsposted as "Regular" with an octane ratingbelow 87, particularly in high altitude areas.Fuels with octane levels below 87 are notrecommended. Premium fuel will provideimproved performance and isrecommended for severe duty usage suchas trailer tow.
Do not be concerned if your enginesometimes knocks lightly. However, if itknocks heavily while you are using fuel withthe recommended octane rating, see yourauthorized dealer to prevent any enginedamage.
RUNNING OUT OF FUEL
Avoid running out of fuel because thissituation may have an adverse effect onpowertrain components.
If you have run out of fuel:
•You may need to cycle the ignition fromoff to on several times after refuelingto allow the fuel system to pump thefuel from the tank to the engine. Onrestarting, cranking time will take a fewseconds longer than normal. Withkeyless ignition, just start the engine.Crank time will be longer than usual.
•Normally, adding 1 gallon (3.8 liters) offuel is enough to restart the engine. Ifthe vehicle is out of fuel and on a steepgrade, more than 1 gallon (3.8 liters)may be required.
•The service engine soon indicator maycome on. For more information on theservice engine soon indicator, SeeWarning Lamps and Indicators(page 82).
Refilling With a Portable FuelContainer
WARNINGS
Do not insert the nozzle of portablefuel containers or aftermarketfunnels into the capless fuel system.This could damage the fuel system and itsseal, and may cause fuel to run onto theground instead of filling the tank, whichcould result in serious personal injury.
Do not try to pry open or push openthe capless fuel system with foreignobjects. This could damage the fuelsystem and its seal and cause injury to youor others.
Note:Do not use aftermarket funnels; theywill not work with the capless fuel systemand can damage it. The included fuel funnelhas been specially designed to work safelywith your vehicle.
When filling the vehicle’s fuel tank from aportable fuel container, use the funnelincluded with the vehicle.
146Fusion (CC7) , enUSAFuel and Refueling