2014 FORD FUSION (AMERICAS) light
[x] Cancel search: lightPage 93 of 458

Settings (cont’d)
On or OffVolumeLimiter
On or OffDo NotDisturb
Hold OK to Clear All MyKeysClear MyKeys
Choose your applicable settingLanguageDisplay
Choose yourapplicable settingDistanceUnits
Choose yourapplicable settingTemperature
Information Display Controls(Type 3)
•Press the up and down arrow buttonsto scroll through and highlight theoptions within a menu.
•Press the right arrow button to enter asub-menu.
•Press the left arrow button to exit amenu.
•Press and hold the left arrow button atany time to return to the main menudisplay (escape button).
•Press the OK button to choose andconfirm settings or messages.
Main menu
From the main menu bar on the left sideof the information display, you can choosefrom the following categories:
Display Mode
Trip 1 & 2
Fuel Economy
Information
Settings
Scroll up/down to highlight one of thecategories, then press the right arrow keyor OK to enter into that category. Press theleft arrow key as needed to exit back to themain menu.
90Fusion (CC7) , enUSAInformation DisplaysE144638 E144639 E138660 E144640 E144642 E100023
Page 94 of 458

Display ModeUse the up/down arrow buttonsto choose between the followingdisplay options.
Option 4Option 3Option 2Option 1Display mode
--XXXXX mi (km) to empty
XXXXFuel gauge
XX--Round tachometer
--X-Vertical tachometer
X---Engine coolant temp gauge
•XXX mi (km) to empty: Shows the approximate distance the vehicle will travel.
•Fuel gauge: Indicates approximately how much fuel is left in the fuel tank. The fuelgauge may vary slightly when the vehicle is in motion or on a grade. When the fuellevel becomes low, the level indicator will change to amber. When the fuel levelbecomes critically low, the level indicator will change to red. Note: When a MyKey®is in use, low fuel warnings will display earlier. The fuel icon and arrow indicates whichside of the vehicle the fuel filler door is located.
•Round tachometer: Indicates the engine speed in revolutions per minute. Driving withyour tachometer pointer continuously at the top of the scale may damage the engine.During SelectShift Automatic™ transmission (SST) use, the currently selected gearwill appear in the display.
•Engine coolant temperature gauge: Indicates engine coolant temperature. At normaloperating temperature, the level indicator will be in the normal range. If the enginecoolant temperature exceeds the normal range, stop the vehicle as soon as safelypossible, switch off the engine and let the engine cool.
Trip 1 & 2
Choose between the standardor enhanced trip display.
Enhanced displayStandard displayTrip 1 & 2
XXTrip Odometer
XXTrip Timer
X-Average Fuel
91Fusion (CC7) , enUSAInformation DisplaysE144639 E138660
Page 97 of 458

Settings (cont’d)
On or OffEasy Entry/Exit
Auto HighbeamLighting
Off or XX SecondsAutolamp Delay
On or OffDRL
On or OffAutolockLocks
On or OffAutounlock
On or OffMislock
All doors or Driver’s doorRemote Unlocking
Set to XXX % - Hold OK to ResetOil Life Reset
Settings (cont’d)
Auto or LastSettingsHeater – A/CClimate Control(using this featureallows you toselect differentclimate controlmodes when thevehicle is startedusing the remotestart feature)
Remote StartVehicle(cont’d)
Auto or OffSteering Wheel
Auto or OffFront Defrost
Auto or OffRear Defrost
Auto or OffDriver Seat
Auto or OffPassenger Seat
5, 10 or 15 minutesDuration
On or OffQuiet Start
Enable or DisableSystem
Settings (cont’d)
On or OffSwitch InhibitVehicle(cont’d)On or OffRemote OpenWindows
On or OffRemote Close
On or OffCourtesy WipeWipers
94Fusion (CC7) , enUSAInformation Displays
Page 103 of 458
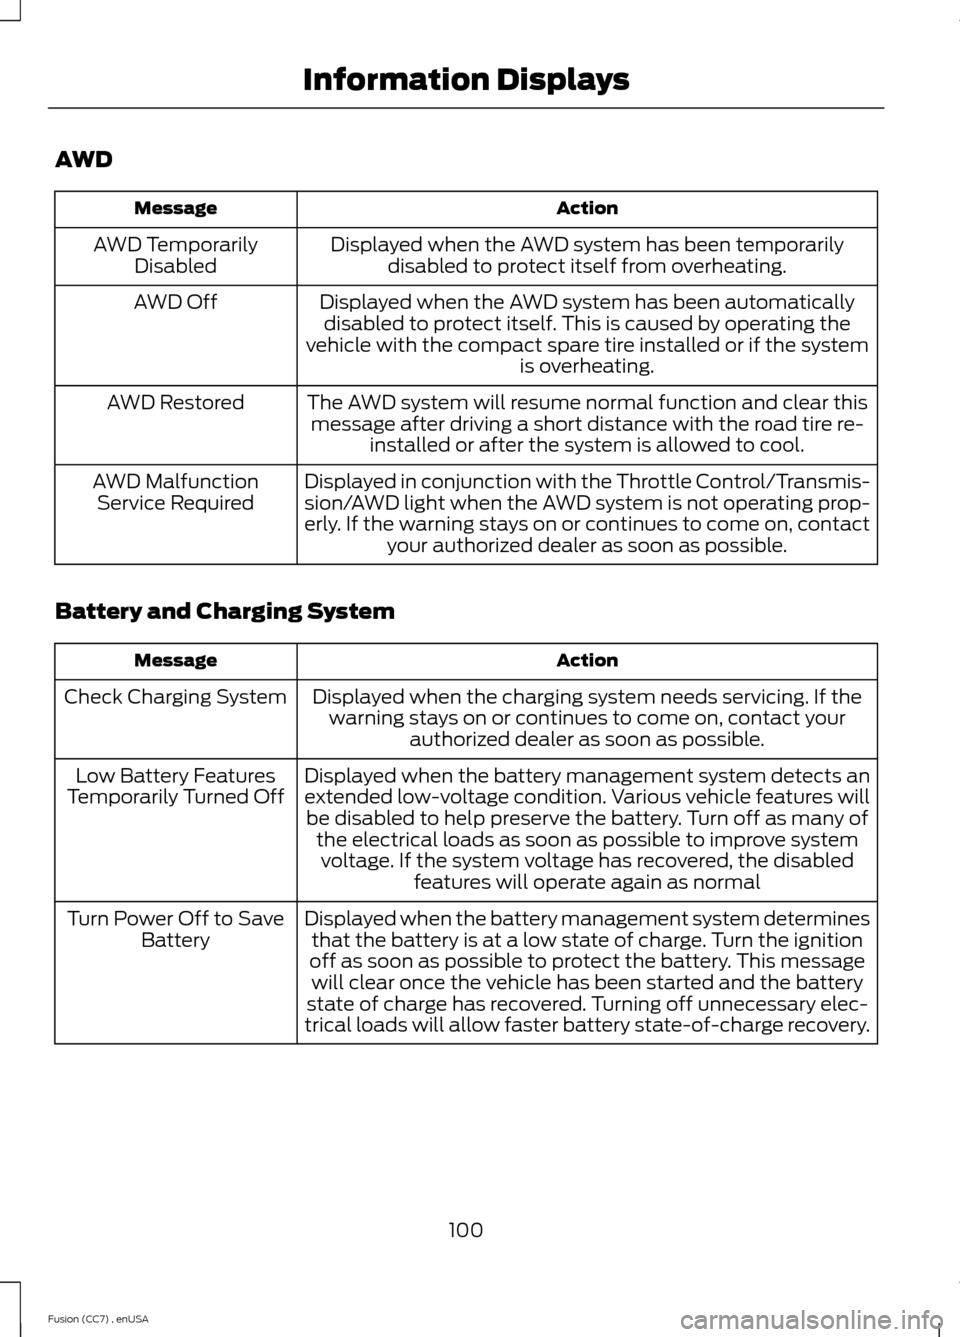
AWD
ActionMessage
Displayed when the AWD system has been temporarilydisabled to protect itself from overheating.AWD TemporarilyDisabled
Displayed when the AWD system has been automaticallydisabled to protect itself. This is caused by operating thevehicle with the compact spare tire installed or if the systemis overheating.
AWD Off
The AWD system will resume normal function and clear thismessage after driving a short distance with the road tire re-installed or after the system is allowed to cool.
AWD Restored
Displayed in conjunction with the Throttle Control/Transmis-sion/AWD light when the AWD system is not operating prop-erly. If the warning stays on or continues to come on, contactyour authorized dealer as soon as possible.
AWD MalfunctionService Required
Battery and Charging System
ActionMessage
Displayed when the charging system needs servicing. If thewarning stays on or continues to come on, contact yourauthorized dealer as soon as possible.
Check Charging System
Displayed when the battery management system detects anextended low-voltage condition. Various vehicle features willbe disabled to help preserve the battery. Turn off as many ofthe electrical loads as soon as possible to improve systemvoltage. If the system voltage has recovered, the disabledfeatures will operate again as normal
Low Battery FeaturesTemporarily Turned Off
Displayed when the battery management system determinesthat the battery is at a low state of charge. Turn the ignitionoff as soon as possible to protect the battery. This messagewill clear once the vehicle has been started and the batterystate of charge has recovered. Turning off unnecessary elec-trical loads will allow faster battery state-of-charge recovery.
Turn Power Off to SaveBattery
100Fusion (CC7) , enUSAInformation Displays
Page 120 of 458
HINTS ON CONTROLLING THE
INTERIOR CLIMATE
General Hints
Note:Prolonged use of recirculated air maycause the windows to fog up.
Note:You may feel a small amount of airfrom the footwell air vents regardless of theair distribution setting.
Note:To reduce humidity build-up insideyour vehicle, do not drive with the systemswitched off or with recirculated air alwaysswitched on.
Note:Do not place objects under the frontseats as this may interfere with the airflowto the rear seats.
Note:Remove any snow, ice or leaves fromthe air intake area at the base of thewindshield.
Note:To improve the time to reach comfortin hot weather, drive with the windowsslightly open for 2-3 minutes after start-upor until your vehicle airs out.
Manual Climate Control
Note:To reduce fogging of the windshieldduring humid weather, adjust the airdistribution control to the windshield airvents position.
Automatic Climate Control
Note:Adjusting the settings when yourvehicle interior is extremely hot or cold isnot necessary. The system automaticallyadjusts to heat or cool the cabin to yourselected temperature as quickly as possible.For the system to function efficiently, theinstrument panel and side air vents shouldbe fully open.
Note:If you select AUTO during coldoutside temperatures, the system directsairflow to the windshield and side windowvents. In addition, the fan may run at aslower speed until the engine warms up.
Note:If you select AUTO during hot outsidetemperatures, or when the inside of thevehicle is hot, the system automatically usesrecirculated air to maximize interior cooling.When the interior reaches the selectedtemperature, the system automaticallyswitches to using outside air.
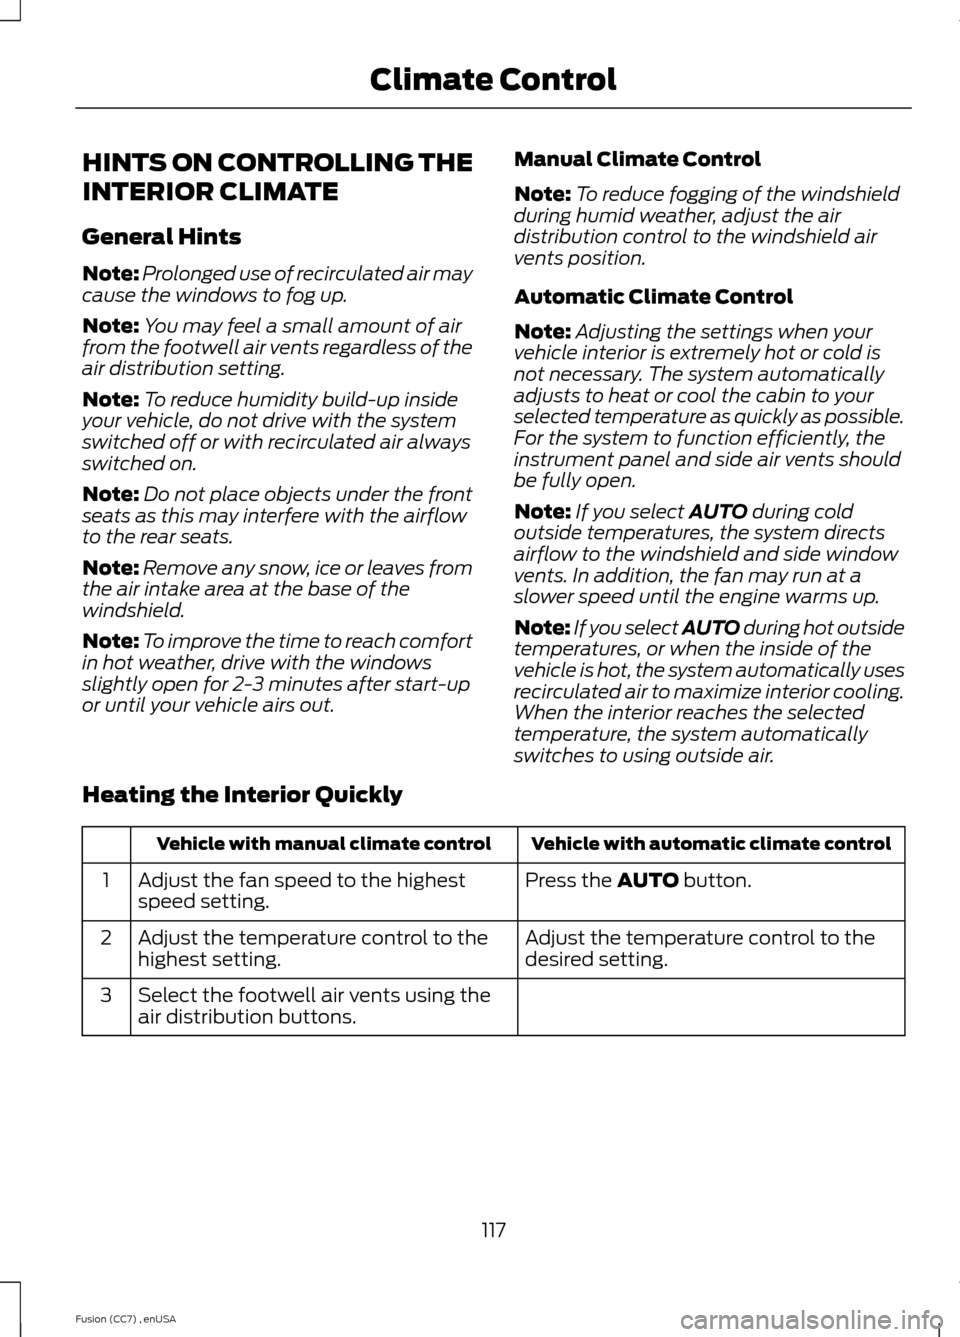
Heating the Interior Quickly
Vehicle with automatic climate controlVehicle with manual climate control
Press the AUTO button.Adjust the fan speed to the highestspeed setting.1
Adjust the temperature control to thedesired setting.Adjust the temperature control to thehighest setting.2
Select the footwell air vents using theair distribution buttons.3
117Fusion (CC7) , enUSAClimate Control
Page 124 of 458
SITTING IN THE CORRECT
POSITION
WARNINGS
Sitting improperly, out of position orwith the seat back reclined too farcan take weight off the seat cushionand affect the decision of the passengersensing system, resulting in serious injuryor death in the event of a crash. Always situpright against your seat back, with yourfeet on the floor.
Do not recline the seat back as thiscan cause the occupant to slideunder the safety belt, resulting inserious injury in the event of a crash.
Do not place objects higher than theseat back to reduce the risk ofserious injury in the event of a crashor during heavy braking.
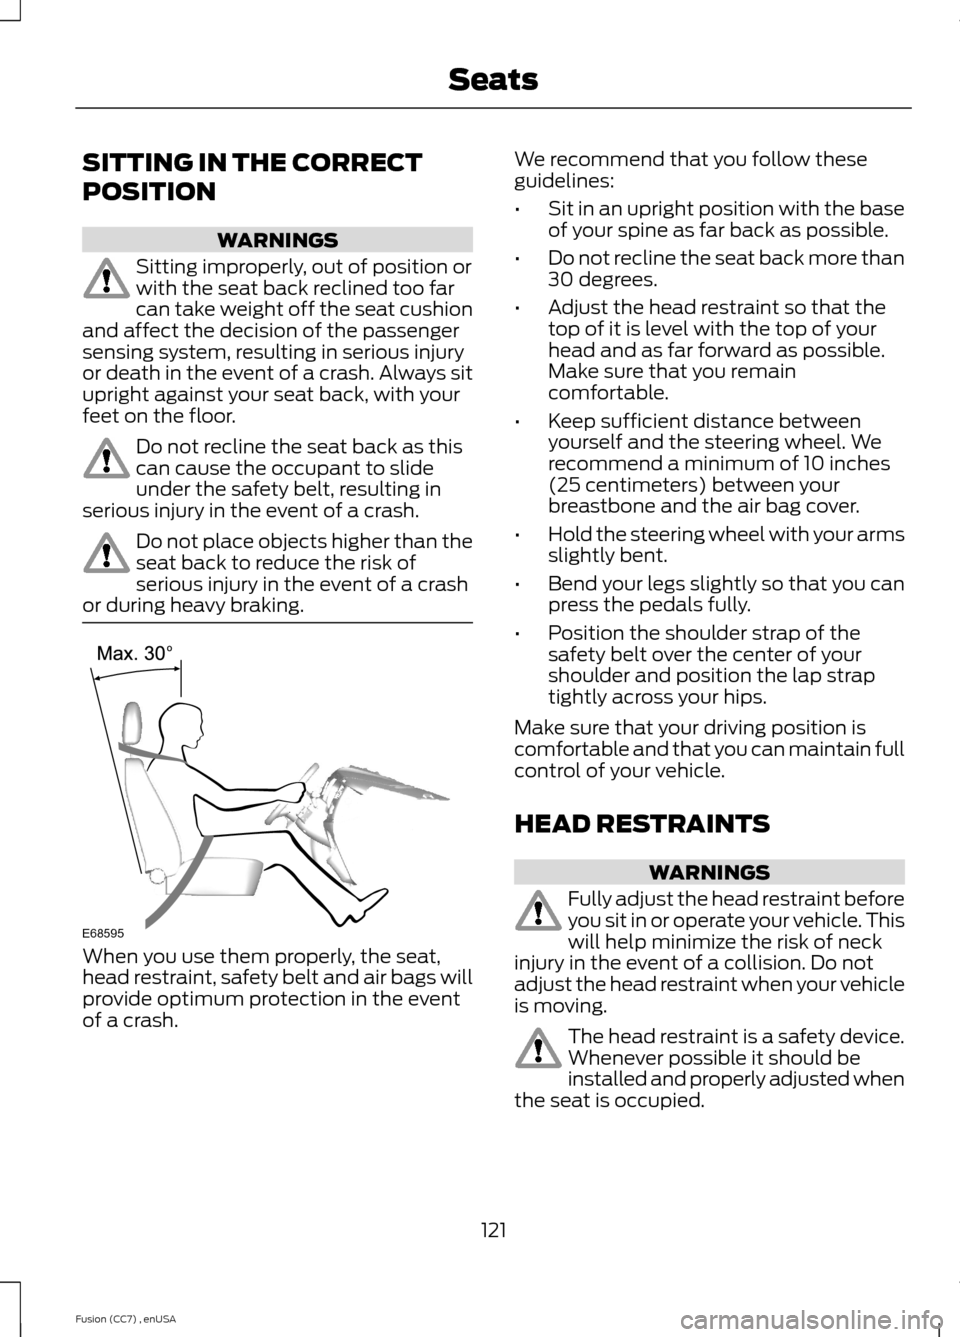
When you use them properly, the seat,head restraint, safety belt and air bags willprovide optimum protection in the eventof a crash.
We recommend that you follow theseguidelines:
•Sit in an upright position with the baseof your spine as far back as possible.
•Do not recline the seat back more than30 degrees.
•Adjust the head restraint so that thetop of it is level with the top of yourhead and as far forward as possible.Make sure that you remaincomfortable.
•Keep sufficient distance betweenyourself and the steering wheel. Werecommend a minimum of 10 inches(25 centimeters) between yourbreastbone and the air bag cover.
•Hold the steering wheel with your armsslightly bent.
•Bend your legs slightly so that you canpress the pedals fully.
•Position the shoulder strap of thesafety belt over the center of yourshoulder and position the lap straptightly across your hips.
Make sure that your driving position iscomfortable and that you can maintain fullcontrol of your vehicle.
HEAD RESTRAINTS
WARNINGS
Fully adjust the head restraint beforeyou sit in or operate your vehicle. Thiswill help minimize the risk of neckinjury in the event of a collision. Do notadjust the head restraint when your vehicleis moving.
The head restraint is a safety device.Whenever possible it should beinstalled and properly adjusted whenthe seat is occupied.
121Fusion (CC7) , enUSASeatsE68595
Page 130 of 458
HEATED SEATS (IF EQUIPPED)
WARNING
People who are unable to feel painto their skin because of advancedage, chronic illness, diabetes, spinalcord injury, medication, alcohol use,exhaustion or other physical conditions,must exercise care when using the heatedseat. The heated seat may cause burnseven at low temperatures, especially ifused for long periods of time. Do not placeanything on the seat that insulates againstheat, such as a blanket or cushion. Thismay cause the heated seat to overheat.Do not puncture the seat with pins, needlesor other pointed objects. This may damagethe heating element which may cause theheated seat to overheat. An overheatedseat may cause serious personal injury.
Do not do the following:
•Place heavy objects on the seat.
•Operate the heated seat if water or anyother liquid is spilled on the seat. Allowthe seat to dry thoroughly.
•Operate the heated seats unless theengine is running. Doing so can causethe battery to lose charge.
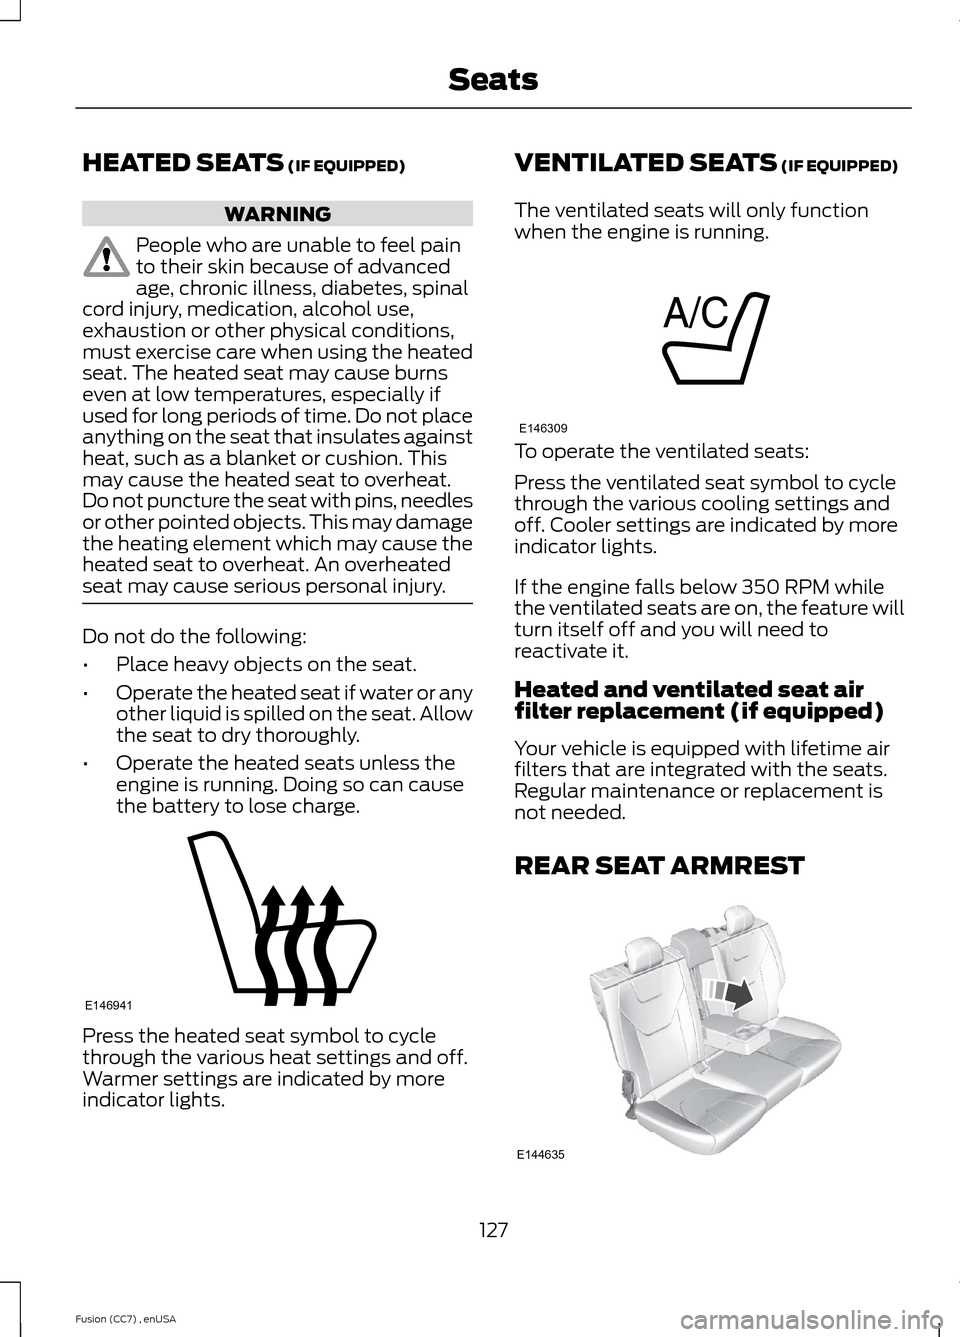
Press the heated seat symbol to cyclethrough the various heat settings and off.Warmer settings are indicated by moreindicator lights.
VENTILATED SEATS (IF EQUIPPED)
The ventilated seats will only functionwhen the engine is running.
To operate the ventilated seats:
Press the ventilated seat symbol to cyclethrough the various cooling settings andoff. Cooler settings are indicated by moreindicator lights.
If the engine falls below 350 RPM whilethe ventilated seats are on, the feature willturn itself off and you will need toreactivate it.
Heated and ventilated seat airfilter replacement (if equipped)
Your vehicle is equipped with lifetime airfilters that are integrated with the seats.Regular maintenance or replacement isnot needed.
REAR SEAT ARMREST
127Fusion (CC7) , enUSASeatsE146941 E146309 E144635
Page 132 of 458
HomeLink Wireless ControlSystem (If Equipped)
WARNING
Do not use the system with anygarage door opener that does nothave the safety stop and reversefeature as required by U.S. Federal SafetyStandards (this includes any garage dooropener manufactured before April 1, 1982).A garage door opener which cannot detectan object, signaling the door to stop andreverse, does not meet current federalsafety standards. Using a garage dooropener without these features increasesthe risk of serious injury or death.
Note:Make sure that the garage door andsecurity device are free from obstructionwhen you are programming. Do not programthe system with the vehicle in the garage.
Note:Make sure you keep the originalremote control transmitter for use in othervehicles as well as for future systemprogramming.
Note:We recommend that upon the saleor lease termination of your vehicle, youerase the programmed function buttons forsecurity reasons. See Erasing the functionbutton codes later in this section.
Note:You can program a maximum ofthree devices. To change or replace any ofthe three devices after it has been initiallyprogrammed, you must first erase thecurrent settings. See Erasing the functionbutton codes later in this section.
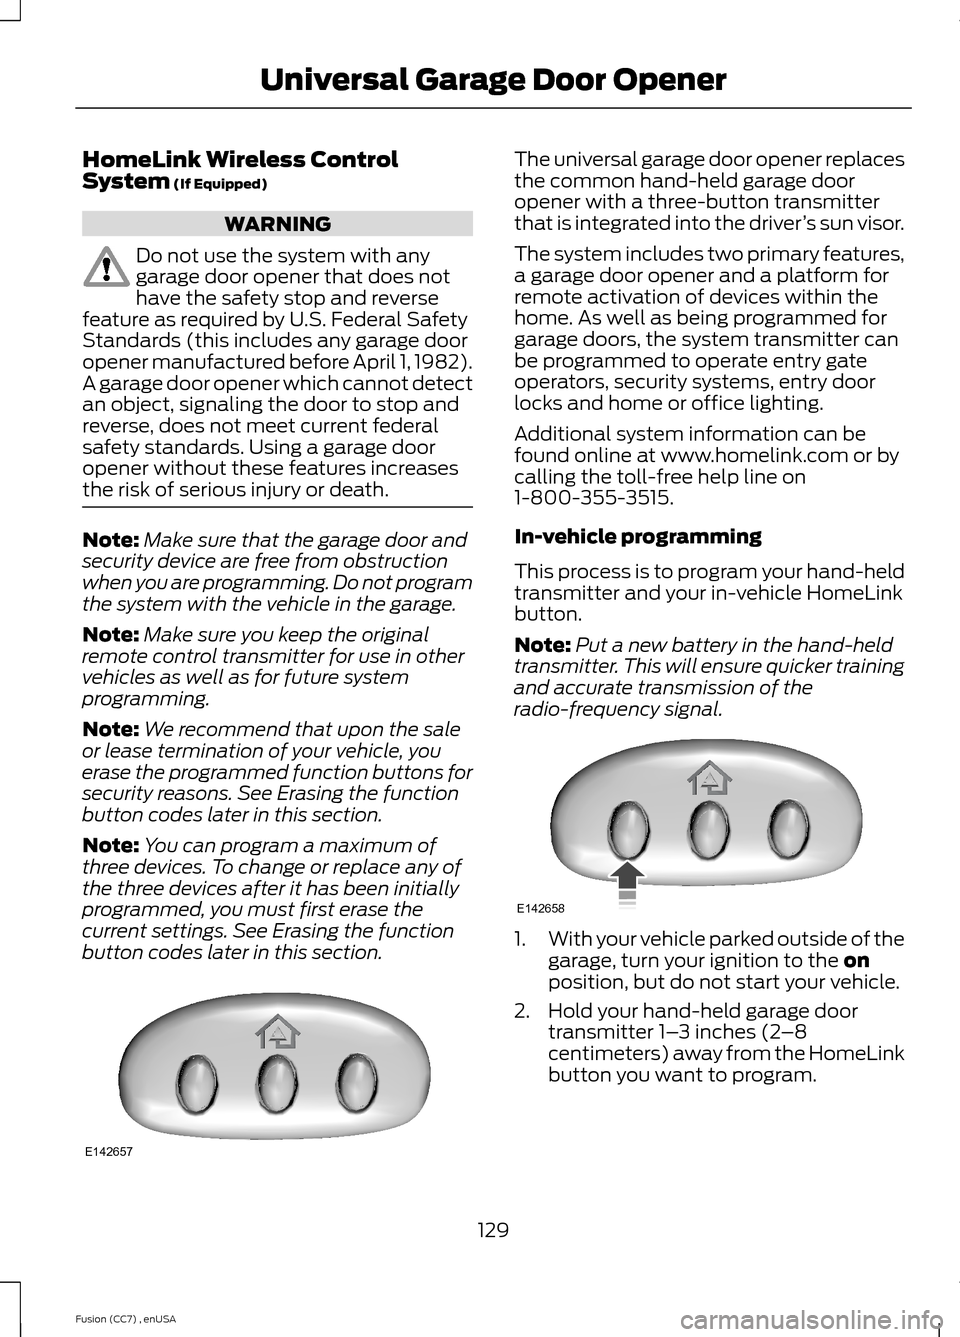
The universal garage door opener replacesthe common hand-held garage dooropener with a three-button transmitterthat is integrated into the driver’s sun visor.
The system includes two primary features,a garage door opener and a platform forremote activation of devices within thehome. As well as being programmed forgarage doors, the system transmitter canbe programmed to operate entry gateoperators, security systems, entry doorlocks and home or office lighting.
Additional system information can befound online at www.homelink.com or bycalling the toll-free help line on1-800-355-3515.
In-vehicle programming
This process is to program your hand-heldtransmitter and your in-vehicle HomeLinkbutton.
Note:Put a new battery in the hand-heldtransmitter. This will ensure quicker trainingand accurate transmission of theradio-frequency signal.
1.With your vehicle parked outside of thegarage, turn your ignition to the onposition, but do not start your vehicle.
2.Hold your hand-held garage doortransmitter 1–3 inches (2–8centimeters) away from the HomeLinkbutton you want to program.
129Fusion (CC7) , enUSAUniversal Garage Door OpenerE142657 E142658