2014 FORD F150 open hood
[x] Cancel search: open hoodPage 7 of 472

Fuses
Fuse Specification Chart...........................225
Changing a Fuse
...........................................233
Maintenance
General Information
...................................235
Opening and Closing the Hood..............235
Under Hood Overview -
3.5L
Ecoboost™................................................236
Under Hood Overview - 3.7L....................237
Under Hood Overview - 5.0L..................238
Under Hood Overview -
6.2L...................239
Engine Oil Dipstick
......................................240
Engine Oil Check..........................................240
Engine Coolant Check
................................241
Automatic Transmission Fluid Check...........................................................245
Transfer Case Fluid Check........................245
Brake Fluid Check........................................246
Power Steering Fluid Check....................246
Washer Fluid Check
....................................246
Fuel Filter
........................................................246
Changing the 12V Battery.........................246
Checking the Wiper Blades
.....................249
Changing the Wiper Blades.....................249
Adjusting the Headlamps........................249
Removing a Headlamp
...............................251
Changing a Bulb...........................................252
Bulb Specification Chart...........................254
Changing the Engine Air Filter -
3.5L
Ecoboost™................................................256
Changing the Engine Air Filter -
3.7L/
5.0L/6.2L.....................................................257
Vehicle Care
General Information...................................259
Cleaning Products.......................................259
Cleaning the Exterior
..................................259
Waxing............................................................260
Cleaning the Engine
...................................260 Cleaning the Windows and Wiper
Blades...........................................................261
Cleaning the Interior....................................261
Cleaning the Instrument Panel and Instrument Cluster Lens........................261
Cleaning Leather Seats.............................262
Repairing Minor Paint Damage
..............263
Cleaning the Alloy Wheels.......................264
Vehicle Storage............................................264
Wheels and Tires
General Information...................................266
Tire Care
..........................................................268
Using Snow Chains
.....................................283
Tire Pressure Monitoring System...........283
Changing a Road Wheel...........................289
Technical Specifications
...........................294
Capacities and Specific- ations
Engine Specifications................................296
Motorcraft Parts
..........................................298
Vehicle Identification Number
...............298
Vehicle Certification Label.......................299
Transmission Code Designation...........300
Technical Specifications
............................301
Audio System
General Information...................................306
Audio unit - Vehicles With: AM/FM.......307
Audio unit -
Vehicles With: AM/FM/CD/
SYNC/Satellite Radio...........................308
Audio unit -
Vehicles With: AM/FM/CD/
SYNC/Satellite Radio.............................312
Audio unit - Vehicles With: Sony AM/FM/ CD...................................................................315
Digital Radio...................................................316
Satellite Radio
...............................................318
Audio Input Jack............................................321
USB Port
..........................................................322
Media Hub......................................................322
4
F150 (TF6) , enUSA Table of Contents
Page 50 of 472

WARNINGS
Do not attempt to service, repair, or
modify the curtain airbags, its fuses,
the A, B, or C pillar trim, or the
headliner on a vehicle containing curtain
airbags as you could be seriously injured
or killed. Contact your authorized dealer
as soon as possible. All occupants of your vehicle
including the driver should always
wear their safety belts even when an
airbag supplemental restraint system and
curtain airbag is provided. Failure to
properly wear your safety belt could
seriously increase the risk of injury or death. To reduce risk of injury, do not
obstruct or place objects in the
deployment path of the curtain
airbag. If the curtain airbags have deployed,
the curtain airbags will not function
again. The curtain airbags (including
the A, B and C pillar trim and headliner)
must be inspected and serviced by an
authorized dealer. If the curtain airbag is
not replaced, the unrepaired area will
increase the risk of injury in a crash. The Safety Canopy will deploy during
significant side crashes or when a certain
likelihood of a rollover event is detected
by the rollover sensor. The Safety Canopy
is mounted to the roof side-rail sheet
metal, behind the headliner, above each
row of seats. In certain sideways crashes
or rollover events, the Safety Canopy will
be activated, regardless of which seats are
occupied. The Safety Canopy is designed
to inflate between the side window area
and occupants to further enhance
protection provided in side impact crashes
and rollover events. The system consists of the following:
•
Safety canopy curtain airbags located
above the trim panels over the front
and rear side windows identified by a
label or wording on the headliner or
roof-pillar trim.
• A flexible headliner which opens above
the side doors to allow air curtain
deployment •
The crash sensors and monitoring
system have a readiness indicator. See
Crash Sensors and Airbag Indicator
(page 48).
Children 12 years old and under should
always be properly restrained in the rear
seats. The Safety Canopy will not interfere
with children restrained using a properly
installed child or booster seat because it
is designed to inflate downward from the
headliner above the doors along the side
window opening.
The design and development of the Safety
Canopy included recommended testing
procedures that were developed by a
group of automotive safety experts known
as the Side Airbag Technical Working
Group. These recommended testing
procedures help reduce the risk of injuries
related to the deployment of side airbags
(including the Safety Canopy).
47
F150 (TF6) , enUSA Supplementary Restraints SystemE75004
Page 54 of 472

Sounding a Panic Alarm
Note:
The panic alarm will only operate
when the ignition is off. Press the button to activate the
alarm. Press the button again or
turn the ignition on to deactivate
it.
Remote Start (If Equipped) WARNING
To avoid exhaust fumes, do not use
remote start if your vehicle is parked
indoors or areas that are not well
ventilated. Note:
Do not use remote start if your vehicle
is low on fuel. The remote start button is on the
transmitter.
This feature allows you to start your
vehicle from outside the vehicle. The
transmitter has an extended operating
range.
Vehicles with automatic climate control
can be set to operate when you remote
start the vehicle. See
Climate Control
(page 106). A manual climate control
system will run at the setting it was set to
when you switch the vehicle off.
Many states and provinces have
restrictions for the use of remote start.
Check your local and state or provincial
laws for specific requirements regarding
remote start systems.
The remote start system will not work if
any of the following occur:
• The ignition is on.
• The alarm system triggers.
• You disable the feature.
• The hood is open. •
The transmission is not in
P.
• The vehicle battery voltage is too low.
• The service engine soon indicator is on.
Remote Starting the Vehicle
Note: You must press each button within
three seconds of each other. Your vehicle
will not remote start and the horn will not
sound if you do not follow this sequence. The label on your transmitter details the
starting procedure.
To remote start your vehicle:
1. Press the lock button to lock all the
doors.
2. Press the remote start button twice. The exterior lamps will flash twice.
The horn will sound if the system fails to
start, unless quiet start is on. Quiet start
will run the blower fan at a slower speed
to reduce noise. You can switch it on or off
in the information display. See
General
Information (page 87).
Note: If you remote start your vehicle with
an integrated keyhead transmitter, you must
switch the ignition on before driving your
vehicle. If you remote start your vehicle with
an intelligent access transmitter, you must
press the
START/STOP button on the
instrument panel once while applying the
brake pedal before driving your vehicle.
The power windows will not work during
the remote start and the radio will not turn
on automatically.
51
F150 (TF6) , enUSA Keys and Remote ControlsE138624 E138625 E138626
Page 60 of 472
LOCKING AND UNLOCKING
You can use the power door lock control
or the remote control to lock and unlock
your vehicle.
Power Door Locks (If Equipped)
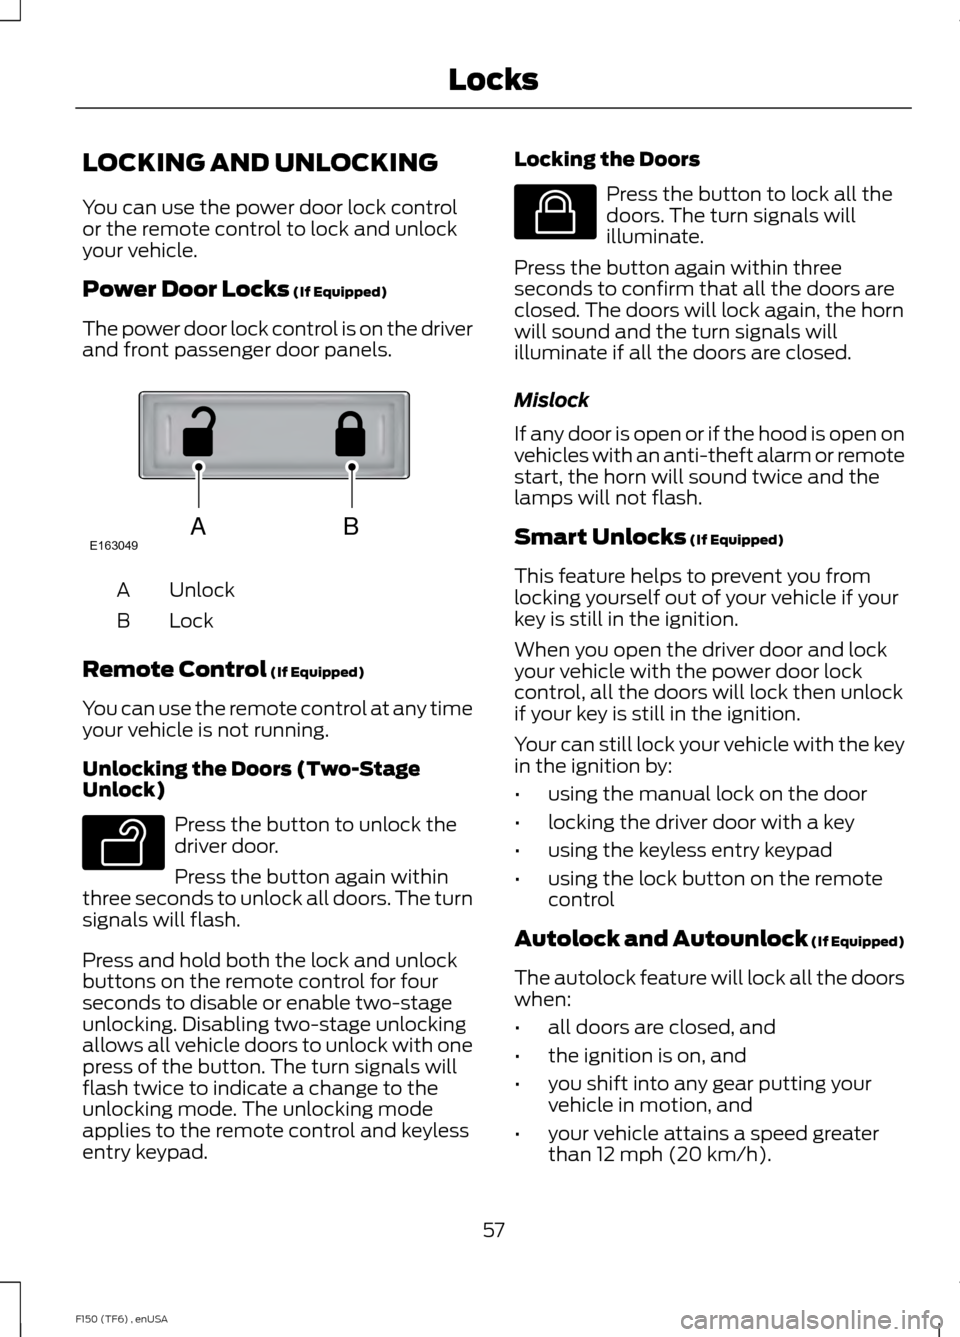
The power door lock control is on the driver
and front passenger door panels. Unlock
A
Lock
B
Remote Control
(If Equipped)
You can use the remote control at any time
your vehicle is not running.
Unlocking the Doors (Two-Stage
Unlock) Press the button to unlock the
driver door.
Press the button again within
three seconds to unlock all doors. The turn
signals will flash.
Press and hold both the lock and unlock
buttons on the remote control for four
seconds to disable or enable two-stage
unlocking. Disabling two-stage unlocking
allows all vehicle doors to unlock with one
press of the button. The turn signals will
flash twice to indicate a change to the
unlocking mode. The unlocking mode
applies to the remote control and keyless
entry keypad. Locking the Doors Press the button to lock all the
doors. The turn signals will
illuminate.
Press the button again within three
seconds to confirm that all the doors are
closed. The doors will lock again, the horn
will sound and the turn signals will
illuminate if all the doors are closed.
Mislock
If any door is open or if the hood is open on
vehicles with an anti-theft alarm or remote
start, the horn will sound twice and the
lamps will not flash.
Smart Unlocks
(If Equipped)
This feature helps to prevent you from
locking yourself out of your vehicle if your
key is still in the ignition.
When you open the driver door and lock
your vehicle with the power door lock
control, all the doors will lock then unlock
if your key is still in the ignition.
Your can still lock your vehicle with the key
in the ignition by:
• using the manual lock on the door
• locking the driver door with a key
• using the keyless entry keypad
• using the lock button on the remote
control
Autolock and Autounlock
(If Equipped)
The autolock feature will lock all the doors
when:
• all doors are closed, and
• the ignition is on, and
• you shift into any gear putting your
vehicle in motion, and
• your vehicle attains a speed greater
than 12 mph (20 km/h).
57
F150 (TF6) , enUSA LocksABE163049 E138629 E138623
Page 65 of 472
1.
Insert the first previously programmed
coded key into the ignition.
2. Switch the ignition from off to on. Keep
the ignition on for at least three
seconds, but no more than 10 seconds.
3. Switch the ignition off and remove the
first coded key from the ignition.
4. After three seconds but within 10 seconds of switching the ignition off,
insert the second previously coded key
into the ignition.
5. Switch the ignition from off to on. Keep
the ignition on for at least three
seconds, but no more than 10 seconds.
6. Switch the ignition off and remove the
second previously programmed coded
key from the ignition.
7. After three seconds but within 10 seconds of switching the ignition off
and removing the previously
programmed coded key, insert the new
unprogrammed key into the ignition.
8. Switch the ignition from off to on. Keep
the ignition on for at least six seconds
until you hear the door locks cycle.
9. Remove the newly programmed coded
key from the ignition.
The key will start the engine if
programming is successful. You can
operate the remote entry system if the new
key is an integrated keyhead transmitter.
If programming was not successful, wait
20 seconds and repeat Steps 1 through 8.
If you are still unsuccessful, take your
vehicle to an authorized dealer.
ANTI-THEFT ALARM (IF EQUIPPED)
The system warns you of an unauthorized
entry to your vehicle. It triggers if any door
or the hood opens without using the key,
remote control or keyless entry keypad. The direction indicators flash and the horn
sounds if the system triggers while the
alarm is armed.
Take all remote controls to an authorized
dealer if there is any potential alarm
problem with your vehicle.
Arming the Alarm
The alarm is ready to arm when there is
not a key in the ignition. Electronically lock
the vehicle to arm the alarm.
The direction indicators flash once after
you lock the vehicle. This indicates the
alarm is in the pre-armed mode. It will fully
arm in 20 seconds.
Disarming the Alarm
Disarm the alarm by any of the following
actions:
•
Press the power door unlock button
within the 20-second pre-armed mode.
• Unlock the doors with the remote
control or keyless entry keypad.
• Switch the ignition on or start the
vehicle.
• Use a key in the driver door to unlock
the vehicle, then switch the ignition on
within 12 seconds.
Note: Pressing the panic button on the
remote control will stop the horn and signal
indicators, but will not disarm the system.
62
F150 (TF6) , enUSA Security
Page 238 of 472
GENERAL INFORMATION
Have your vehicle serviced regularly to help
maintain its roadworthiness and resale
value. There is a large network of Ford
authorized dealers that are there to help
you with their professional servicing
expertise. We believe that their specially
trained technicians are best qualified to
service your vehicle properly and expertly.
They are supported by a wide range of
highly specialized tools developed
specifically for servicing your vehicle.
To help you service your vehicle, we
provide scheduled maintenance
information which makes tracking routine
service easy. See Scheduled
Maintenance (page 438).
If your vehicle requires professional service,
your authorized dealer can provide the
necessary parts and service. Check your
warranty information to find out which
parts and services are covered.
Use only recommended fuels, lubricants,
fluids and service parts conforming to
specifications. Motorcraft® parts are
designed and built to provide the best
performance in your vehicle.
Precautions
• Do not work on a hot engine.
• Make sure that nothing gets caught in
moving parts.
• Do not work on a vehicle with the
engine running in an enclosed space,
unless you are sure you have enough
ventilation.
• Keep all open flames and other burning
material (such as cigarettes) away
from the battery and all fuel related
parts. Working with the Engine Off
1. Set the parking brake and shift to
P
(Park).
2. Turn off the engine and remove the key
(if equipped).
3. Block the wheels.
Working with the Engine On WARNING
To reduce the risk of vehicle damage
and/or personal burn injuries, do not
start your engine with the air cleaner
removed and do not remove it while the
engine is running. 1. Set the parking brake and shift to
P
(Park).
2. Block the wheels
OPENING AND CLOSING THE
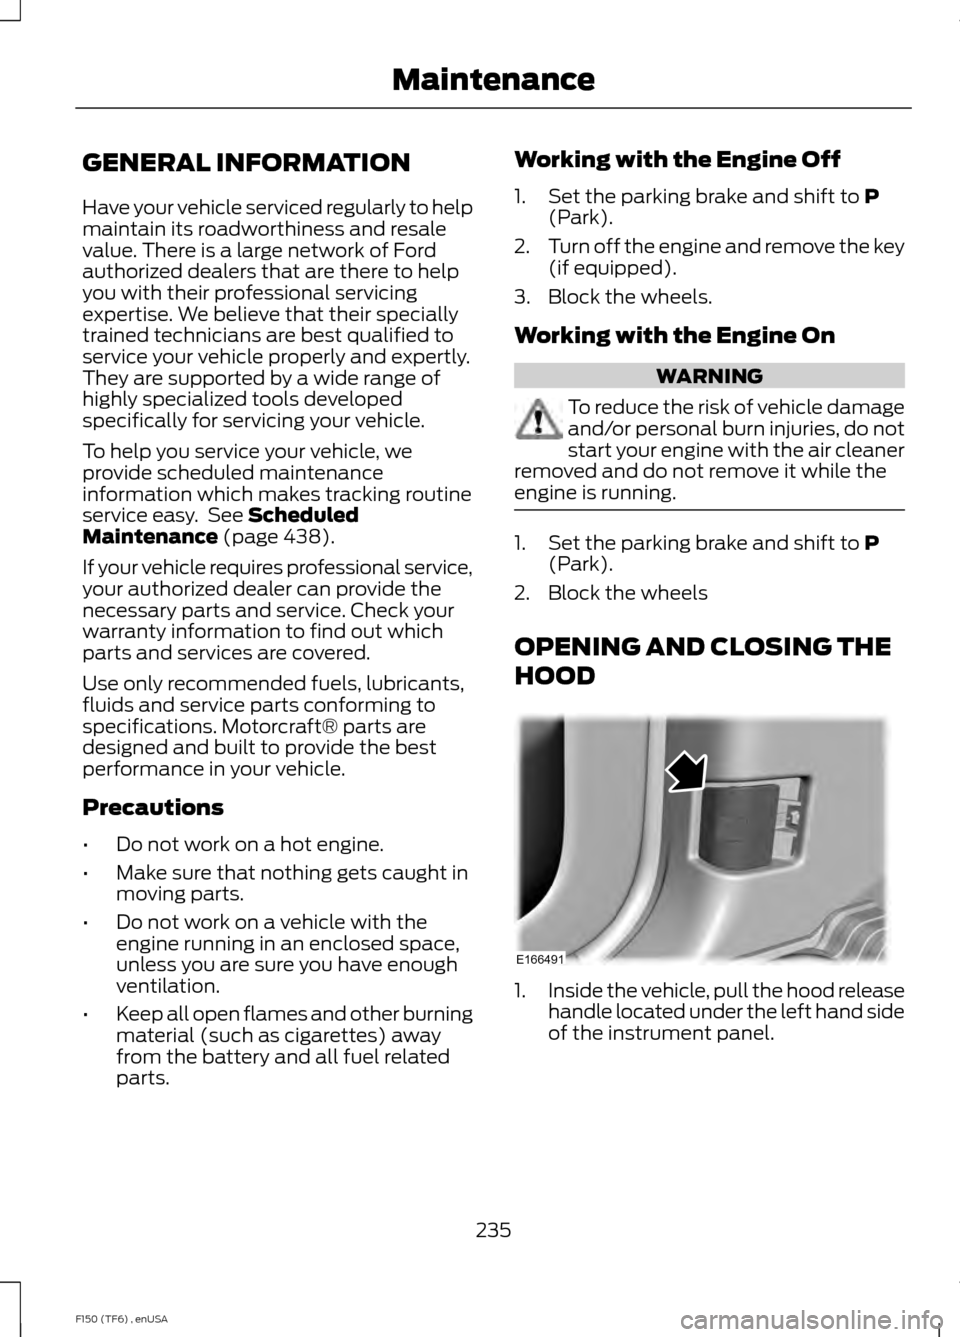
HOOD 1.
Inside the vehicle, pull the hood release
handle located under the left hand side
of the instrument panel.
235
F150 (TF6) , enUSA MaintenanceE166491
Page 239 of 472
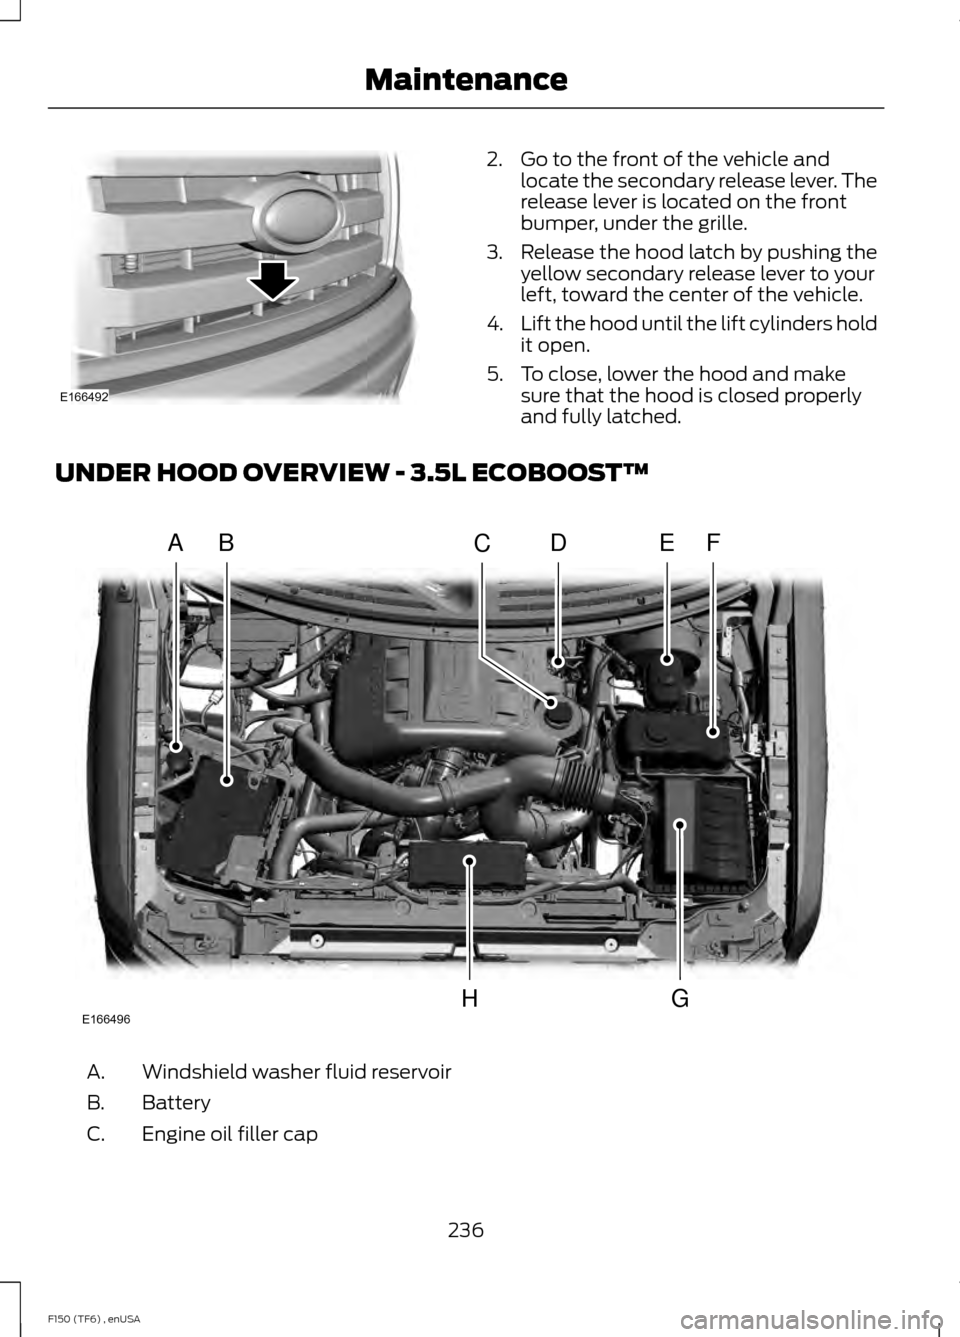
2. Go to the front of the vehicle and
locate the secondary release lever. The
release lever is located on the front
bumper, under the grille.
3. Release the hood latch by pushing the yellow secondary release lever to your
left, toward the center of the vehicle.
4. Lift the hood until the lift cylinders hold
it open.
5. To close, lower the hood and make sure that the hood is closed properly
and fully latched.
UNDER HOOD OVERVIEW - 3.5L ECOBOOST™ Windshield washer fluid reservoir
A.
Battery
B.
Engine oil filler cap
C.
236
F150 (TF6) , enUSA MaintenanceE166492 A
A
BDEFC
GHE166496
Page 243 of 472
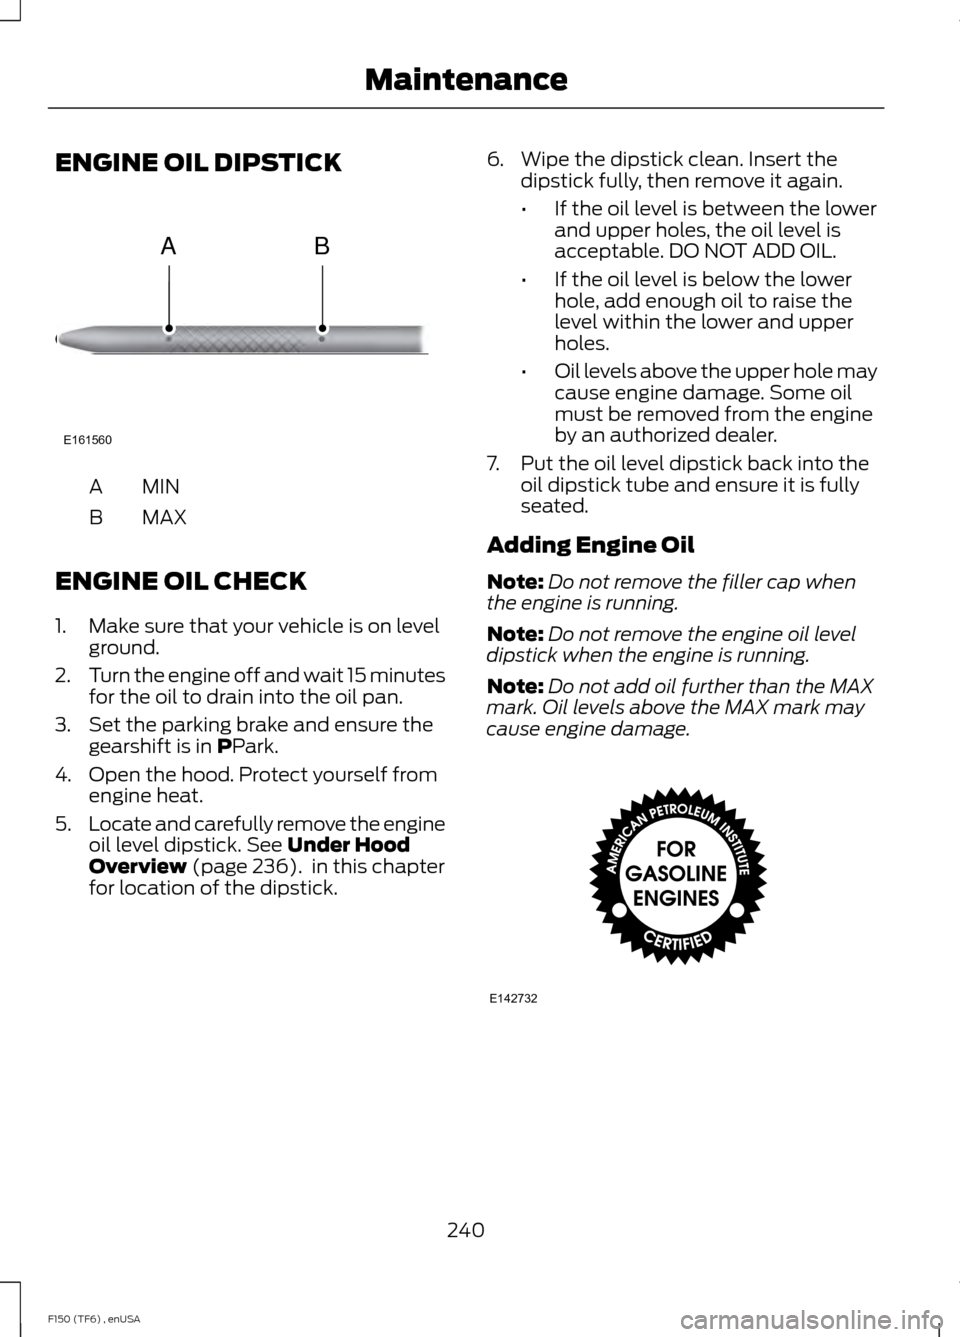
ENGINE OIL DIPSTICK
MINA
MAX
B
ENGINE OIL CHECK
1. Make sure that your vehicle is on level ground.
2. Turn the engine off and wait 15 minutes
for the oil to drain into the oil pan.
3. Set the parking brake and ensure the gearshift is in PPark.
4. Open the hood. Protect yourself from engine heat.
5. Locate and carefully remove the engine
oil level dipstick.
See Under Hood
Overview (page 236). in this chapter
for location of the dipstick. 6. Wipe the dipstick clean. Insert the
dipstick fully, then remove it again.
•If the oil level is between the lower
and upper holes, the oil level is
acceptable. DO NOT ADD OIL.
• If the oil level is below the lower
hole, add enough oil to raise the
level within the lower and upper
holes.
• Oil levels above the upper hole may
cause engine damage. Some oil
must be removed from the engine
by an authorized dealer.
7. Put the oil level dipstick back into the oil dipstick tube and ensure it is fully
seated.
Adding Engine Oil
Note: Do not remove the filler cap when
the engine is running.
Note: Do not remove the engine oil level
dipstick when the engine is running.
Note: Do not add oil further than the MAX
mark. Oil levels above the MAX mark may
cause engine damage. 240
F150 (TF6) , enUSA MaintenanceE161560
AB E142732