2014 FORD F150 clock
[x] Cancel search: clockPage 32 of 472
Left-Hand Side
Turn counterclockwise to lock and
clockwise to unlock.
Right-Hand Side
Turn clockwise to lock and
counterclockwise to unlock.
29
F150 (TF6) , enUSA Child Safety
Page 74 of 472

LIGHTING CONTROL
•
Rotate the headlamp control clockwise
to the first position to turn on the
parking lamps, instrument panel lamps,
license plate lamps and tail lamps.
• Rotate clockwise to the second
position to also turn on the headlamps.
High Beams Push the lever toward the instrument panel
to switch the high beams on.
Push the lever toward the instrument panel
again or pull the lever towards you to
switch the high beams off. Headlamp Flasher
Pull the lever toward you to flash the
headlamps and release the lever to switch
the headlamps off.
AUTOLAMPS (IF EQUIPPED)
The autolamp system provides light
sensitive automatic on-off control of the
exterior lights normally controlled by the
headlamp control.
The autolamp system also keeps the lights
on for a predetermined amount of time
after the ignition switch is turned to off.
Using the message center, you can select
a delay from 0–
180 seconds.
71
F150 (TF6) , enUSA LightingE163267 E167827 E163268 E163269
A
Page 125 of 472
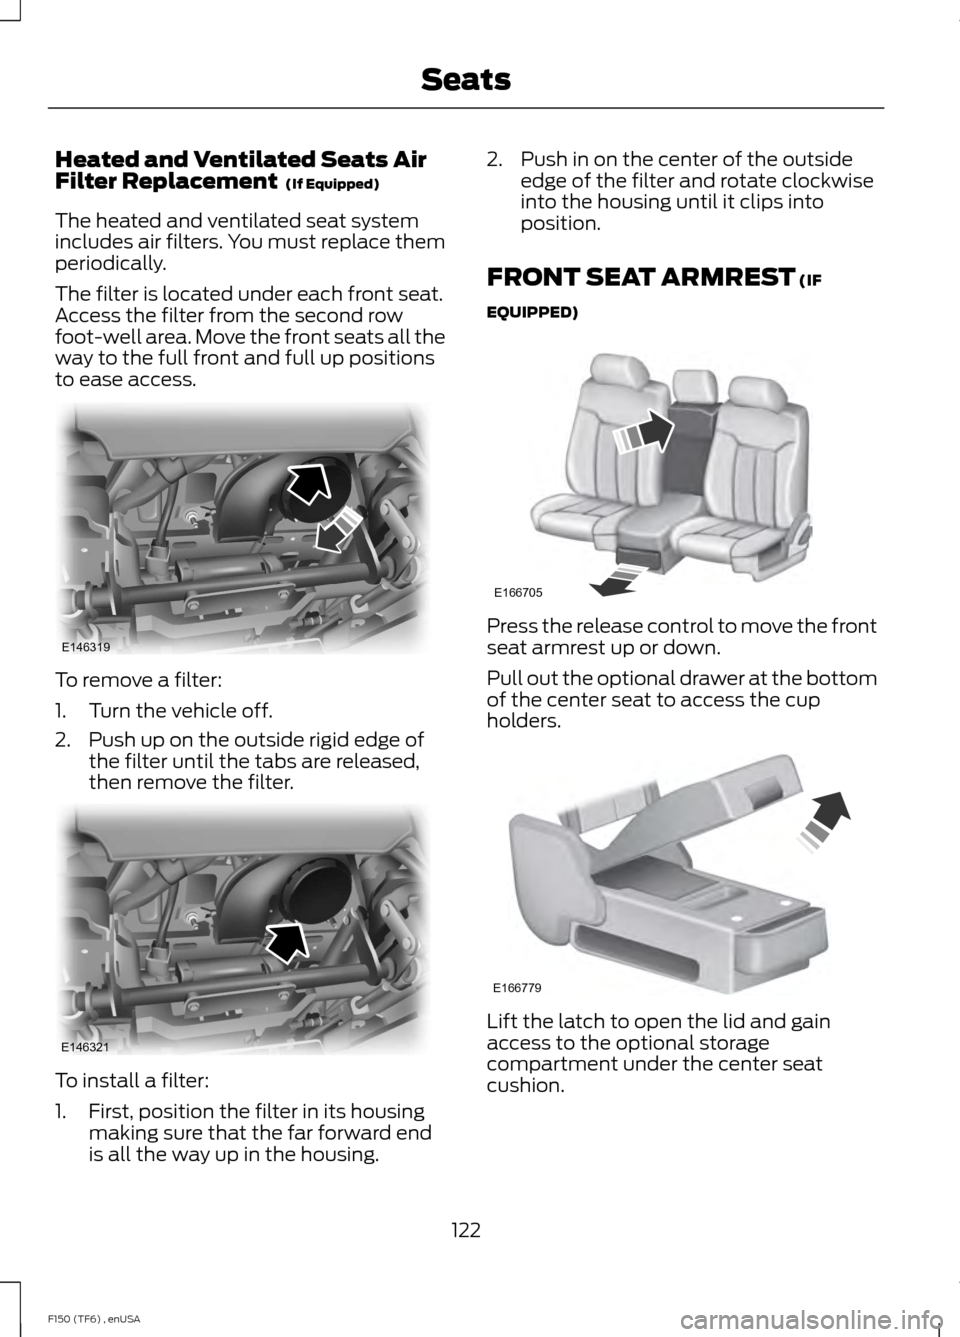
Heated and Ventilated Seats Air
Filter Replacement (If Equipped)
The heated and ventilated seat system
includes air filters. You must replace them
periodically.
The filter is located under each front seat.
Access the filter from the second row
foot-well area. Move the front seats all the
way to the full front and full up positions
to ease access. To remove a filter:
1. Turn the vehicle off.
2. Push up on the outside rigid edge of
the filter until the tabs are released,
then remove the filter. To install a filter:
1. First, position the filter in its housing
making sure that the far forward end
is all the way up in the housing. 2. Push in on the center of the outside
edge of the filter and rotate clockwise
into the housing until it clips into
position.
FRONT SEAT ARMREST
(IF
EQUIPPED) Press the release control to move the front
seat armrest up or down.
Pull out the optional drawer at the bottom
of the center seat to access the cup
holders.
Lift the latch to open the lid and gain
access to the optional storage
compartment under the center seat
cushion.
122
F150 (TF6) , enUSA SeatsE146319 E146321 E166705 E166779
Page 193 of 472
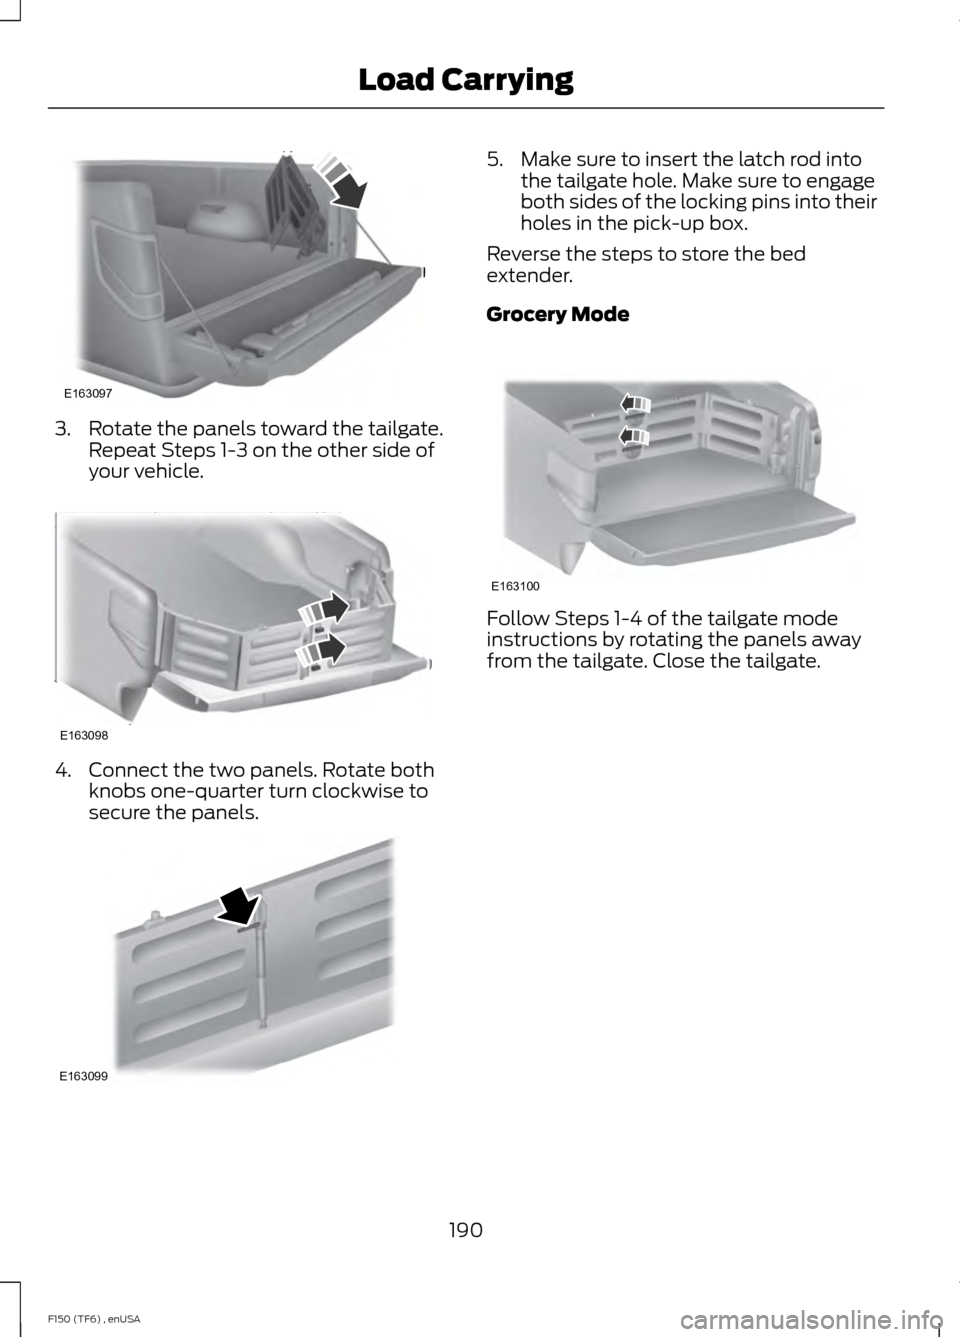
3. Rotate the panels toward the tailgate.
Repeat Steps 1-3 on the other side of
your vehicle. 4. Connect the two panels. Rotate both
knobs one-quarter turn clockwise to
secure the panels. 5. Make sure to insert the latch rod into
the tailgate hole. Make sure to engage
both sides of the locking pins into their
holes in the pick-up box.
Reverse the steps to store the bed
extender.
Grocery Mode Follow Steps 1-4 of the tailgate mode
instructions by rotating the panels away
from the tailgate. Close the tailgate.
190
F150 (TF6) , enUSA Load CarryingE163097 E163098 E163099 E163100
Page 244 of 472
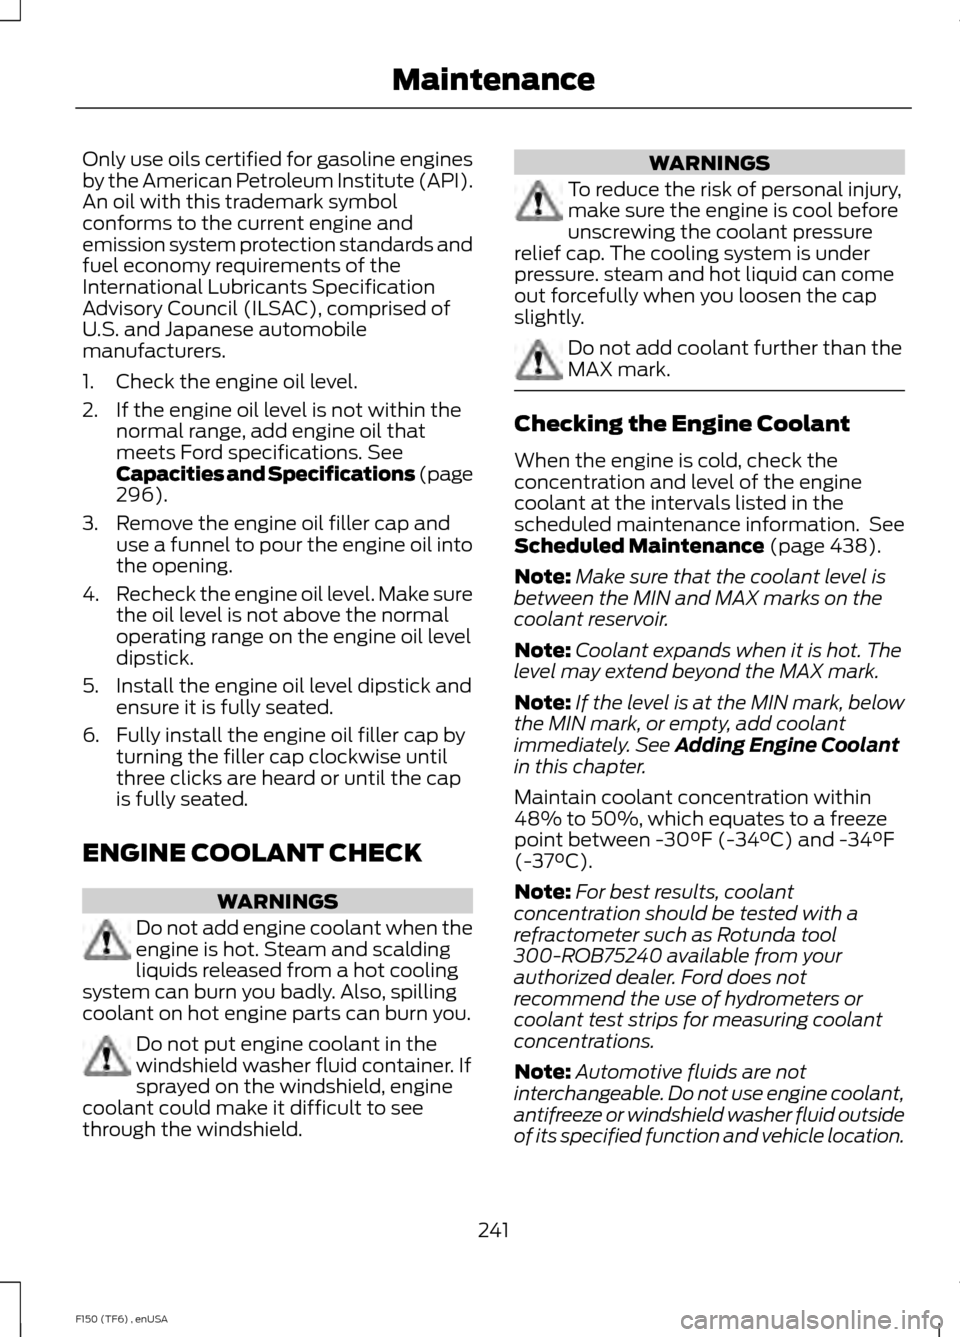
Only use oils certified for gasoline engines
by the American Petroleum Institute (API).
An oil with this trademark symbol
conforms to the current engine and
emission system protection standards and
fuel economy requirements of the
International Lubricants Specification
Advisory Council (ILSAC), comprised of
U.S. and Japanese automobile
manufacturers.
1. Check the engine oil level.
2. If the engine oil level is not within the
normal range, add engine oil that
meets Ford specifications. See
Capacities and Specifications (page
296
).
3. Remove the engine oil filler cap and use a funnel to pour the engine oil into
the opening.
4. Recheck the engine oil level. Make sure
the oil level is not above the normal
operating range on the engine oil level
dipstick.
5. Install the engine oil level dipstick and ensure it is fully seated.
6. Fully install the engine oil filler cap by turning the filler cap clockwise until
three clicks are heard or until the cap
is fully seated.
ENGINE COOLANT CHECK WARNINGS
Do not add engine coolant when the
engine is hot. Steam and scalding
liquids released from a hot cooling
system can burn you badly. Also, spilling
coolant on hot engine parts can burn you. Do not put engine coolant in the
windshield washer fluid container. If
sprayed on the windshield, engine
coolant could make it difficult to see
through the windshield. WARNINGS
To reduce the risk of personal injury,
make sure the engine is cool before
unscrewing the coolant pressure
relief cap. The cooling system is under
pressure. steam and hot liquid can come
out forcefully when you loosen the cap
slightly. Do not add coolant further than the
MAX mark.
Checking the Engine Coolant
When the engine is cold, check the
concentration and level of the engine
coolant at the intervals listed in the
scheduled maintenance information. See
Scheduled Maintenance
(page 438).
Note: Make sure that the coolant level is
between the MIN and MAX marks on the
coolant reservoir.
Note: Coolant expands when it is hot. The
level may extend beyond the MAX mark.
Note: If the level is at the MIN mark, below
the MIN mark, or empty, add coolant
immediately. See
Adding Engine Coolant
in this chapter.
Maintain coolant concentration within
48% to 50%, which equates to a freeze
point between -30°F (-34°C) and -34°F
(-37°C).
Note: For best results, coolant
concentration should be tested with a
refractometer such as Rotunda tool
300-ROB75240 available from your
authorized dealer. Ford does not
recommend the use of hydrometers or
coolant test strips for measuring coolant
concentrations.
Note: Automotive fluids are not
interchangeable. Do not use engine coolant,
antifreeze or windshield washer fluid outside
of its specified function and vehicle location.
241
F150 (TF6) , enUSA Maintenance
Page 251 of 472
6. Release the parking brake. With your
foot on the brake pedal and with the
air conditioning on, put your vehicle in
D (Drive) and allow the engine to idle
for at least one minute.
• If you do not allow the engine to
relearn its idle trim, the idle quality
of your vehicle may be adversely
affected until the idle trim is
eventually relearned.
7. Drive your vehicle to complete the relearning process
•Your vehicle may need to be driven
10 miles (16 kilometers) or more to
relearn the idle and fuel trim
strategy along with the ethanol
content for flexible fuel vehicles.
• For flexible fuel vehicles, if you are
operating on E85, you may
experience poor starts or an
inability to start the engine and
driveability problems until the fuel
trim and ethanol content have been
relearned.
If the battery has been disconnected or a
new battery has been installed, the clock
and radio settings must be reset once the
battery is reconnected.
Always dispose of automotive
batteries in a responsible manner.
Follow your local authorized standards
for disposal. Call your local authorized
recycling center to find out more about
recycling automotive batteries.
Battery Management System (If
Equipped)
The battery management system (BMS)
monitors battery conditions and takes
actions to extend battery life. If excessive
battery drain is detected, the system may
temporarily disable certain electrical
features to protect the battery. Those
electrical accessories affected include the
rear defrost, heated/cooled seats, climate control fan, heated steering wheel, audio
and navigation system. A message may be
shown in the information displays to alert
the driver that battery protection actions
are active. These messages are only for
notification that an action is taking place,
and not intended to indicate an electrical
problem or that the battery requires
replacement.
Electrical accessory installation
To ensure proper operation of the Battery
Management System, any electrical
devices that are added to your vehicle
should not have their ground connection
made directly at the negative battery post.
A connection at the negative battery post
can cause inaccurate measurements of
the battery condition and potential
incorrect system operation.
Note:
Electrical or electronic accessories
added to your vehicle by the dealer or the
owner, may adversely affect battery
performance and durability, and may affect
the performance of other electrical systems
in your vehicle.
When a battery replacement is required,
the battery should only be replaced with
a Ford-recommended replacement battery
that matches the electrical requirements
of your vehicle. After battery replacement,
or in some cases after charging the battery
with the external charger, the Battery
Management System requires eight hours
of vehicle sleep time (key off with doors
closed) to relearn the new battery state of
charge. Prior to relearning the state of
charge, the Battery Management System
may disable electrical features (to protect
the battery) earlier than normal.
248
F150 (TF6) , enUSA Maintenance
Page 253 of 472

Headlamp Aiming Target
8 feet (2.4 meters)
A
Center height of lamp to ground
B
25 feet (7.6 meters)
C
Horizontal reference line
D
Vertical Aim Adjustment
1. Park the vehicle directly in front of a wall or screen on a level surface,
approximately 25 feet (7.6 meters)
away.
2. Measure the height from the center of your headlamp (indicated by a 3.0
millimeter circle on the lens) to the
ground and mark an 8 foot (2.4 meter)
horizontal reference line on the vertical
wall or screen at this height (a piece of
masking tape works well).
Note: To see a clearer light pattern for
adjusting, you may want to block the light
from one headlamp while adjusting the
other.
3. Turn on the low beam headlamps to illuminate the wall or screen and open
the hood. Cover one of the headlamps
so no light hits the wall. 4.
For vehicles with halogen
headlamps: on the wall or screen you
will observe a light pattern with a
distinct horizontal edge toward the
right. If this edge is not at the horizontal
reference line, you will need to adjust
the beam so the edge is at the same
height as the horizontal reference line. 5. Locate the vertical adjuster on each
headlamp. Use a #2 Phillips
screwdriver to turn the adjuster either
counterclockwise or clockwise in order
to adjust the vertical aim of the
headlamp.
250
F150 (TF6) , enUSA MaintenanceE142592 E167358 E163806
Page 254 of 472

6.
For vehicles with HID headlamps:
there is a distinct cut-off (change from
light to dark) in the left portion of the
beam pattern. Position the top edge of
this cut-off 2 inches (5 centimeters)
below the horizontal reference line. 7. Locate the vertical adjuster on each
headlamp. Use a Phillips #2
screwdriver to turn the adjuster either
clockwise or counterclockwise to
adjust the vertical aim of the
headlamp. The horizontal edge of the
brighter light should touch the
horizontal reference line.
8. Repeat Steps 3 through 7 to adjust the
other headlamp.
9. Close the hood and turn off the lamps.
Horizontal Aim Adjustment
Horizontal aim is not required for this
vehicle and is not adjustable. REMOVING A HEADLAMP WARNING
Handle a halogen headlamp bulb
carefully and keep out of children
’s
reach. Grasp the bulb only by its
plastic base and do not touch the glass.
The oil from your hand could cause the
bulb to break the next time the headlamps
are operated. Note:
If the bulb is accidentally touched,
clean it with rubbing alcohol before
installing it.
Note: This procedure is for replacing the
headlamps, park lamps, turn lamps or side
marker lamps.
Replacing Halogen Headlamp
Bulbs (If Equipped)
1. Make sure the headlamp control is in the off position and open the hood. 2.
Remove the pushpin that holds the air
deflector or protective cover to the
upper inboard corner of the lamp.
251
F150 (TF6) , enUSA MaintenanceE142465 E167359 E167360