2014 AUDI RS7 SPORTBACK light
[x] Cancel search: lightPage 79 of 292
Electromechanical
parking brake
Operation
The electromechanical parking brake replaces
the hand brake.
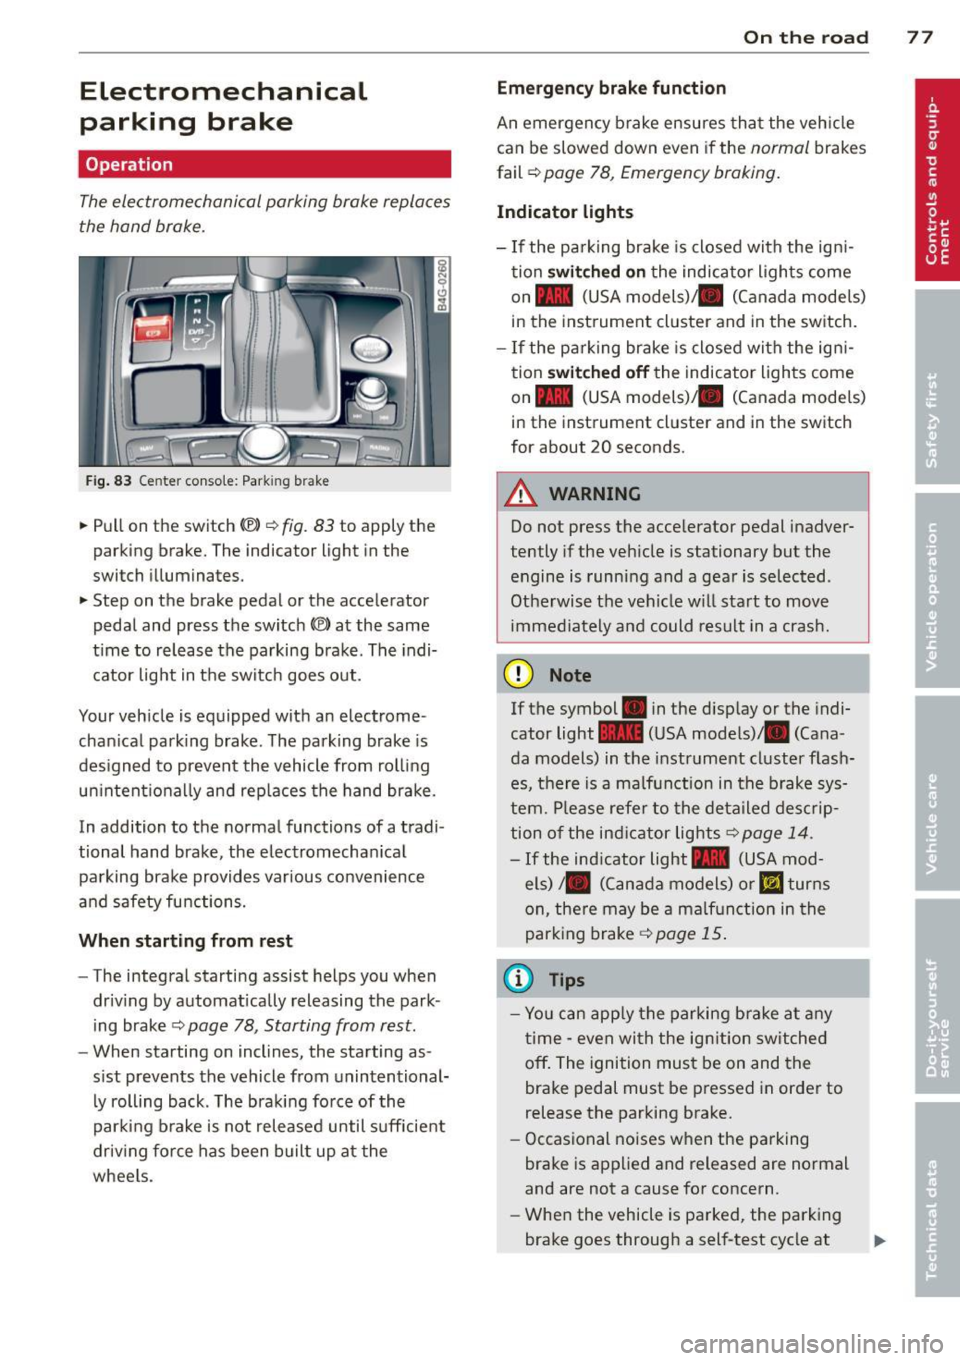
Fig. 83 Center conso le: Park in g brake
.. Pull on the switch (®) c:::> fig . 83 to apply the
parking brake. The indicator light in the
switch illuminates.
.. Step on the brake pedal or the accelerator
pedal and press the switch
(®) at the same
t ime to release the parking brake. The indi
cator light in the switch goes out.
Your vehicle is equipped with an electrome
chan ical park ing brake . The parking brake is
designed to prevent the vehicle from rolling
un intent ionally and rep laces the hand brake.
In addition to the normal functions of a tradi
tional hand brake, the electromechan ical
parking brake provides var ious convenience
and safety functions.
When starting from rest
-The integral starting assist helps you when
driving by automat ically releasing the park
ing brake ¢
page 78, Starting from rest.
- When starting on inclines, the starting as
sist prevents the vehicle from unintentional
ly rolling back . The braking force of the
parking brake is not released until suff icient
driv ing force has been built up at the
wheels.
On the road 77
Emergency brake function
An emergency brake ensures that the vehicle
can be slowed down even if the
normal brakes
fail ¢
page 78, Emergency braking.
Indicator lights
-If the parking brake is closed with the ign i
tion
switched on the indicator lights come
on - (USA
models) ,1111 (Canada models)
in the instrument cluster and in the switch.
- If the parking brake is closed with the ign i
tion
switched off the indicator lights come
on - (USA
models) ,1111 (Canada models)
in the instrument cluster and in the switch
for about 20 seconds.
A WARNING
Do not press the accelerator pedal inadver
tently if the veh icle is stationary but the
engine is running and a gear is selected .
Otherwise th e vehicle w ill start to move
immediately and could result in a crash.
(D Note
If the symbol . in the disp lay or the indi
cator light
1111 (USA models)/ . (Cana
da models) in the instrument cluster flash
es, there is a malfunction in the brake sys
tem. Please refer to the deta iled desc rip
tion of the indicat or lights
r::::>page 14.
-If the ind icator light - (USA mod-
els) /. (Canada models) or
mJ turns
on, there may be a malfunction in the
parking brake
c:::> page 15.
(0 Tips
-Yo u can apply the parking brake at any
time -even with the ignition switched
off. The ignition must be on and the
brake pedal must be pressed in order to
release the parking brake.
- Occasional noises when the parking
brake is applied and released are normal
and are not a cause for concern.
- When the vehicle is parked, the parking
brake goes through a self-test cycle at
Page 81 of 292
even with ESC and its associated
components (ABS, ASR, EDL). In corners
and when road or weather conditions are
bad, a full brake application can cause the
vehicle to skid or the rear end to break
away· risking an accident.
Speed warning system
Introduction
The speed warning system helps you to stay
under a specified maximum speed.
The speed warning system wa rns you if you
are exceeding the maximum speed that you
have set. You will hear a warn ing tone when
your speed exceeds the stored value by ap
proximately 3 mph (3 km/h). An indicator
light . (USA models)/ . (Canada models) in
the instrument cluster display also turns on at
the same time. The indicator light ••
turns off when the speed decreases below the
stored maximum speed .
Setting a threshold is recommended if you
would like to be reminded when you reach a certain max imum speed . Situations where you
may want to do so include driving in a country
with a general speed limit or if there is a
specified maximum speed for winter tires.
@ Tips
Even though your vehicle is equipped with
a speed warning system, you should st ill
watch the speedometer to make sure you
are not driving faster than the speed limit.
Setting the threshold
You can set, change and delete the threshold
in the MMI.
.. Se lect : I CARI function button > (Car)* sys
tems
control button > Driver assist > Speed
warning .
You can set any threshold between 20 mph
(30 km/h) and lS0 mph (240 km/h) . Settings
can each be adjusted in inc rements of 6 mph
(10 km/h).
On the road 79
Cruise control
Switching on
Applies to veh icles: w ith cruise control
The cruise control system makes it possible to
drive at a constant speed starting at 20 mph (30km/h) .
0
f
®t
0
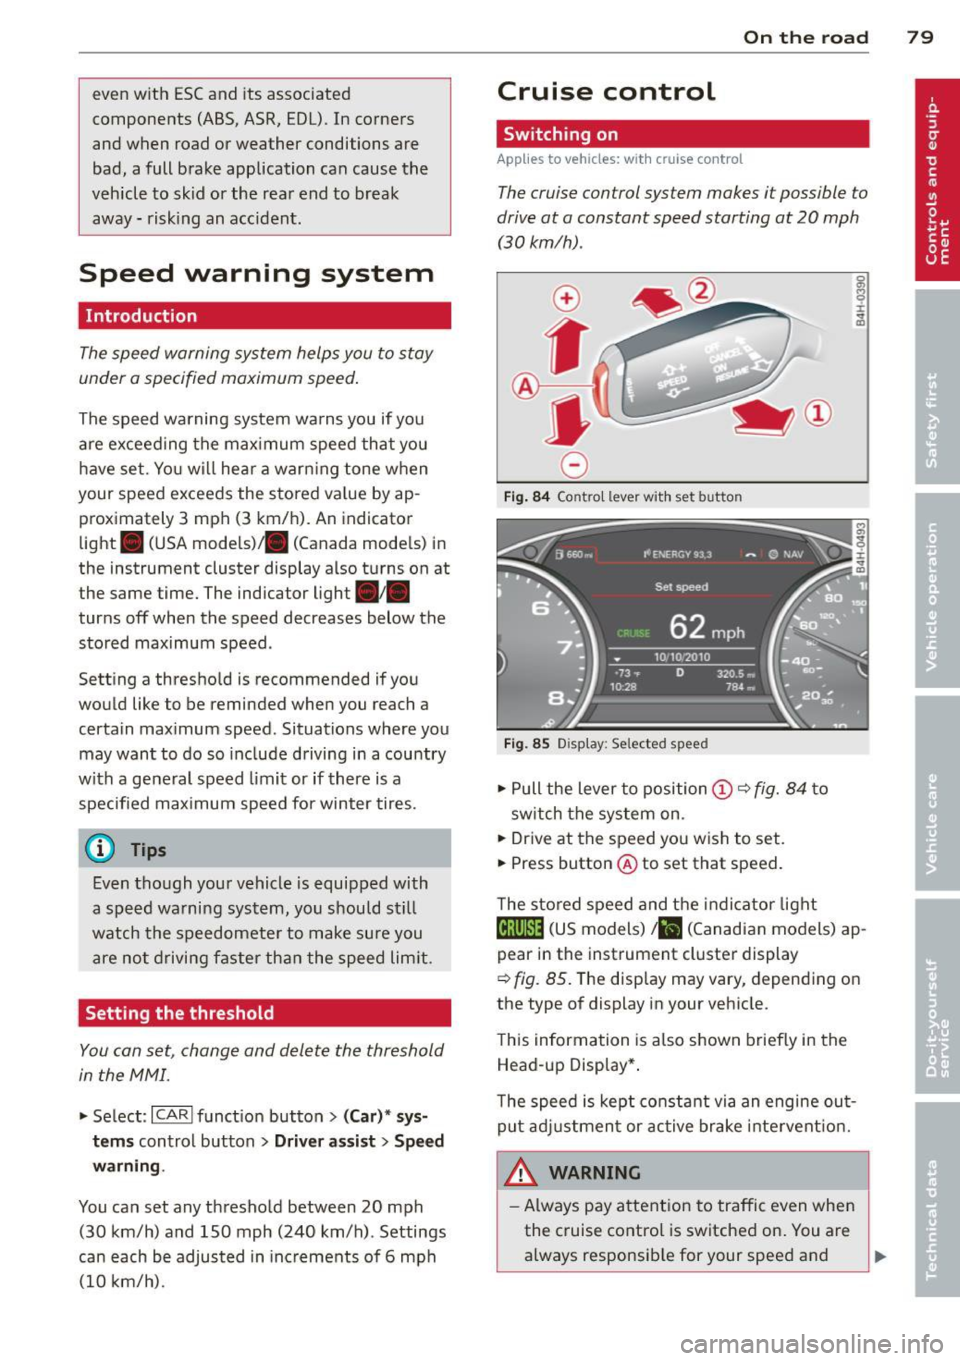
Fig. 84 Contro l lever w ith set b utto n
Fig. 85 Display: Se lected speed
.. Pull the lever to position@¢ fig. 84 to
sw itch the system on .
.. Drive at the speed you wish to set.
.. Press button @ to set that speed.
T he stored speed and the indicator light
@;\1)~14 (US models) Iii (Canadian models) ap
pear in the instrument cluster display
¢
fig. 85. The disp lay may vary, depending on
the type of display in your veh icle.
This information is also shown briefly in the
Head -up Display*.
T he speed is kept constant via an engine out
put adjustment or active brake intervent ion.
A WARNING .c
- Always pay attention to traffic even when
the cruise control is switched on. You are always responsib le for your speed and ...
Page 82 of 292
80 On the road
th e dista nce between yo ur vehicle and
other vehicles .
- For safet y rea son s, the cruise control
should not be used in the city, i n stop
and-go traff ic, on twist ing roads and
when road conditions are poor (such as ice, fog, gravel, heavy rain and hydro
planing) -risk of accident .
- Turn off the cruise control temporar ily
when ente ring turn lanes, highway exit
lanes or in construct ion zones.
- Please note that inadvertent ly "rest ing"
yo ur foot on the accelerator pedal causes
the cruise control not to brake. This is
because t he cr uise con trol is overridden
by the d river 's a cce le rat ion.
- If a bra ke system malfunction such as
overheat ing occurs when the cru ise con
t ro l system is sw itched on, the braking
f unction in the system may be switched
off. The other cruise control f unctions re
ma in active as long as the indicator light
[~ jrn~14 (US models) !El (Canad ian mod
els) is on.
The brake lights illuminate as soon as the brakes decelerate a utomat ica lly.
Changing speed
Applies to vehicles: with cru ise control
.,. To increase/decrease the speed in incre
me nts, tap the lever in t he
0 10 d irection
¢ page 79, fig . 84
.,. To increase/dec rease the speed qu ickly, hold
the leve r in the
010 direction until the de
s ir ed speed is d isplayed.
You can a lso p ress the accelerato r pedal down
to inc rease your speed, e .g . if you want to
pass someone. The speed yo u saved earlier
will resume as soon as you release the acceler
ator peda l.
I f, however, you exceed your saved speed by
6 mp h (1 0 km/h) fo r longe r th an 5 m inutes,
the cruise cont ro l w ill tu rn off tempora rily.
The green symbo l
@;\1)~14 (US models) !El
(Canadian mode ls) in the display will go out
but the saved speed remains the same .
Presetting your speed
Applies to vehicles: with cruise control
You can preset your desired speed while the
vehicle is not moving .
.,. Swi tch on the ign ition.
.,. Pull lever in to posi tion @¢
page 79,
fig. 84.
.,. Press the lever in the 0 or 0 direction to
increase or decrease your speed .
.,. Release the lever to save that speed.
This function makes it possib le, for examp le,
to save the speed you want before driving on
the highway. Once on the h ighway, act ivate
the cru ise control by pulling the lever toward
@ .
Switching the system off
Applies to vehicles: with cruise control
Temporary deactivation
.,. Press the brake pedal, or
.,. Press the lever into position @(not cl icked
into place)
~ page 79, fig . 84, or
.,. Dr ive fo r longer t han 5 m inutes at mo re
t han 5 mph (10 km/h) above the stored
spee d.
Switching off completely
.,. Press lever into position @ (clicked into
p lace), or
.,. Switch the ignit ion off .
The system retains t he saved speed if you de
activate the c ruise control temporar ily . To re
s u me the saved speed, re lease the brake ped
al a nd pull the leve r to pos it ion @.
Switch ing the ignition off erases the saved
speed .
A WARNING
-You sho ul d only ret urn to the saved speed
if it is no t too fast for the cur ren t traffi c
condi tions -ris k of an a cci dent!
Page 86 of 292
84 Audi adaptive cruise control and braking guard
tachometer ® and is also shown briefly in
the display @¢fig.
91.
• You must also press the brake pedal when
the vehicle is stopped.
Switching adaptive cruise control off
• Push the lever away from you into position
@ until it clicks into place. The message
ACC off appears.
@ Indicator lights
f. j. Adap tive cruise control is switched on . No
vehicles are detected up ahead. The stored
speed is ma intained.
I -A moving vehicle is detected up ahead.
The adaptive cruise control system regulates
the speed and distance to the moving veh icle
ahead and acce lerates/brakes automat ica lly.
Si-Adaptive cruise control is switched on. A
moving vehicle up ahead was detected. You r
vehi cle remains stopped.
I-When automatic braking is not able to
keep enough distance to a previously detected
moving vehicle up ahead, you must take con
trol and brake ¢
page 86, Prompt for driver
intervention.
© Display
If adaptive cruise control is not shown in the
display, you can call it up with the multifunc
tion steering wheel buttons¢
page 23.
Based on the symbols in the display, you can
determ ine if the system is maintaining a dis
tance to the vehicle ahead and what that dis
tance is.
No vehicle -No vehicle ahead was detected .
White vehicle -A vehicle ahead was detected.
Red vehicle -Prompt for the driver to take ac
tion
c:::> page 86.
Both arrows on the scale © indicate the dis
tance to the vehicle ahead. No arrow appears
when the vehicle is on an open road and there
is no object ahead . If an object is detected
ahead, the arrow moves on the scale . T
he green zone on the scale shows the stored
distance. For information on changing the
stored distance, refer to ¢
page 85. If the
distance se lected is too close or may soon be
come too close, the arrows move into the red
zone on the sca le .
_&. WARNING
Improper use of the adaptive cruise con
trol can cause collisions, other accidents
and serious personal injur ies.
- Pressing the
ISET ! button when driv ing at
speeds be low 20 mph (30 km/h), will au
tomatically accelerate the vehicle to 20
mph (30 km/h), which is the minimum
speed that can be set.
© Tips
-If you switch the ignit ion or the adaptive
cruise control off, the set speed is erased
from the system memory.
- Th e electronic stabilizat ion contro l (ESC)
and the anti-s lip-regulat ion (ASR) are au
tomatically turned on when the adaptive
cruise control is turned on. Both systems
cannot be turned off if the adaptive
cruise contro l is turned on.
Changing the speed
Applies to veh icles: w ith Aud i adaptive cruise control
0
f
jJ
0
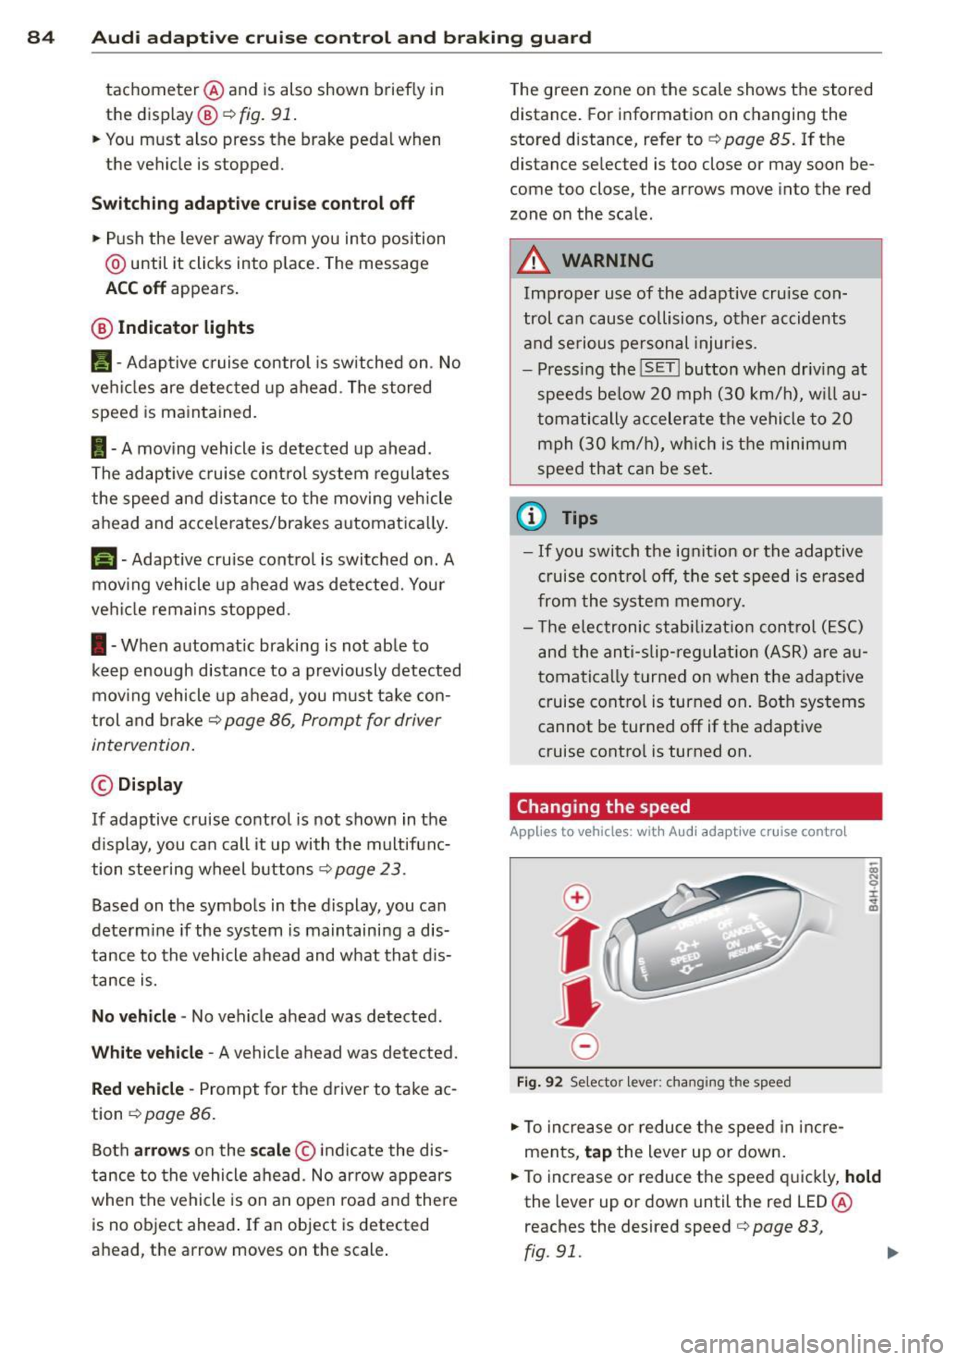
Fi g. 92 Selecto r lever: chang ing t he speed
• To increase or reduce the speed in incre
ments,
tap the lever up or down.
• To increase or reduce the speed quickly,
hold
the lever up or down until the red LED ®
reaches the desired speed
c:::> page 83,
rg . 91. ~
Page 88 of 292

86 Audi adaptive cruise control and braking guard
When approaching a moving vehicle up ahead,
the adaptive cruise control system automati
cally brakes to match that object's speed and
then maintains the stored distance. If the ve
h icle ahead accelerates, adaptive cruise con
trol will also accelerate up to the stored
speed.
The higher the speed , the greater the distance
in yards (meters)
c::> & . The Distance 3 setting
is recommended .
The distances prov ided are spec ified values .
Depending on the driving situation and the
how the vehicle ahead is driving, the actual
d istance may be more or less than these tar
get distances.
The various symbols for the time increments
appear briefly in the information line @
c::> page 83, fig . 91 when you change the set
tings .
~-~- --Distance 1 : This setting corre
sponds to a distance of 92 feet/28 meters
when traveling at 62 mph (100 km/h), or a
time interval of 1 second.
~--~- -Distance 2: This setting corre
sponds to a distance of 118 feet/36 meters
when traveling at 62 mph (100 km/h), or a
time inte rval of 1.3 seconds .
~--- ~-Distance 3: This setting corre
sponds to a distance of 164 feet/SO meters
when traveling at 62 mph (100 km/h), or a
time interval of 1.8 seconds .
~---- ~ Distance 4: This setting corre
sponds to a distance of 210 feet/64 meters
when traveling at 62 mph (100 km/h), or a
time interval of 2.3 seconds .
A WARNING ,. -
Following other vehicles too closely in
creases the risk of collisions and serious
personal inj ury.
- Setting short distances to the traffic
ahead reduces the time and distance
available to bring your vehicle to a safe
stop and makes it even more necessary
to pay close attention to traffic. -
Always obey applicable traffic laws, use
good judgment, and select a safe follow ing d istance for the traff ic, road and
weather conditions.
@ Tips
- Distance 3 is set automatically each time
you switch the ignition on.
- Your standard settings are automatically
stored and assigned to the remote con
trol key being used.
Selecting the driving mode
Applies to veh icles: w ith Audi adaptive cruise co ntrol
.,. Select the desired driving mode in drive se
lect
c::> page 96 .
(D Tips
Your settings are automatically stored and
ass igned to the remote control key being
used.
Prompt for dr iver intervention
Applies to veh icles: w ith Audi adaptive cruise co ntro l
Fig. 95 Instrume nt cluster: req uest fo r drive r inte rven
t ion
In certain situations, the system will prompt
yo u to take action . This could happen, for ex
amp le, if braking by the adap tive cruise con
tro l system is not enough to maintain enough
distance to the veh icle ahead .
T he indicator light
I and the symbol in the
display will war n you abo ut the situat ion
c::>fig. 95 . You wi ll also hear an acoustic signal.
- Press the brake pedal to slow yo ur vehicle
down.
Page 89 of 292

Audi adaptive cruise control and braking guard 87
Audi braking guard
Description
Applies to vehicles: with Audi adaptive cruise control
Fig. 96 Instrument cluster: approach warning
Braking guard uses radar sensors and a video
camera . It also functions within the limits of
the system when adaptive cruise control is
switched off .
What can braking guard do?
When detected in time, the system can assess
situations when a vehicle ahead brakes sud
denly or if your own vehicle is t raveling at a
high speed and approaching a vehicle up
ahead that is moving more slowly . Braking
guard does not react if it cannot detect the
situation.
The system advises you of various situations:
- The
distance warning is given if you are too
close to the vehicle ahead for a long time. If
the vehicle ahead brakes sharply, you will not be able to avoid a collision . The indicator
light
I in the display comes on .
- The
approach warning is given when a de
tected vehicle up ahead in your lane is mov
i ng much more slowly than you are or if it
brakes sharply . When this warning is given,
it may only be possible to avoid a collision
by swerving or braking sharply. The indicator
l ight
I and indicator in the display will warn
you about the danger
c::> fig . 96. You will a lso
hear an acoustic signal.
11 This is not ava ilable in som e coun tri es.
If you do not react fast enough or do not react
at all to the situation, braking guard will inter
vene by braking.
- I f a collision is imminent, the system will
first provide an
acute warning by briefly and
sharply applying the brakes.
- If you do not react to the acute warning,
braking g uard can brake with increasing
force within the limits of the system . This
reduces the vehicle speed in the event of a
collision.
- The system can initiate maximum braking
shortly before a collision
1 ) . Full deceleration
at high speeds occurs only in vehicles with
adaptive cru ise control and side assist (pre
sense plus) .
- If the braking guard senses that you are not
braking hard enough when a collision is im
minent, it can increase the brak ing force .
- The pre sense functions also engage when a
collision is imm inent
c::> page 187 .
Which function s can be controlled?
You can switch braking guard and the dis
tance/approach warning on or off in the MMI
c::> page 88, Settings in the MMI.
A WARNING
Lack of attention can cause collisions, oth
er accidents and serious personal injuries .
The braking guard is an assist system and
cannot prevent a collision by itself. The
driver must always intervene. The driver is
always responsible for braking at the cor
rect time.
- Always pay close attent ion to traffic,
even when the braking guard is switched
on. Be ready to intervene and be ready to
take comp lete control whenever necessa
ry . Always keep the safe and legal dis
tance between your vehicle and vehicles up ahead .
- Braking guard works within limits and
will not respond outside the system lim its, for example when approaching a
Page 92 of 292
90 Audi acti ve lane a ssi st
Audi active lane assist
Active lane assist
Description
App lies to vehicles: with active lane assist
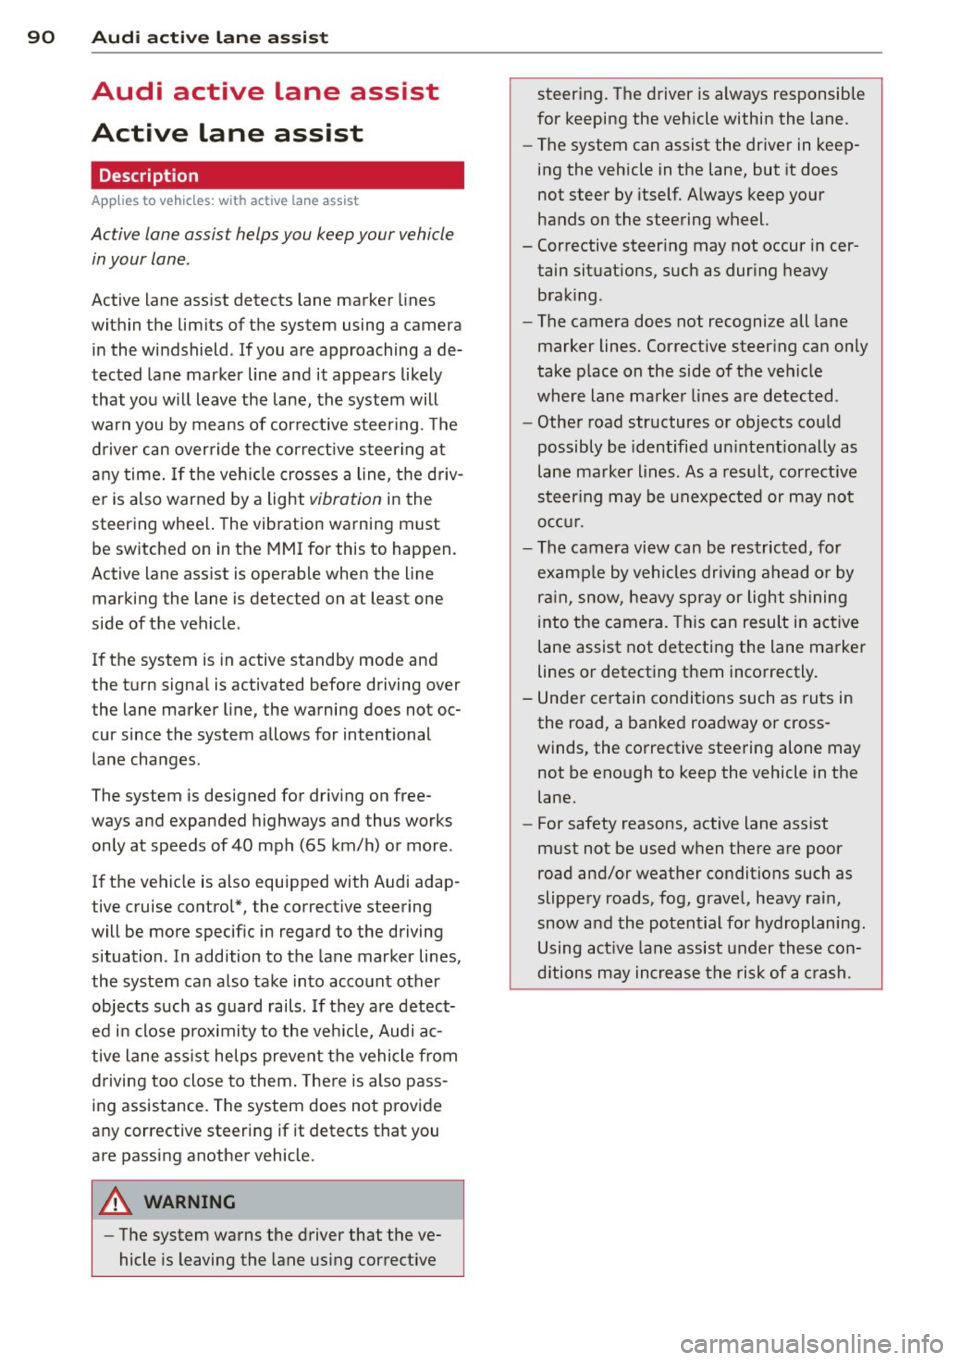
Active lane assist helps you keep your vehicle
in your lane .
Active lane assist detects lane marker lines
within the limits of the system using a camera
in the windshield . If you are approaching a de
tected lane marker line and it appears likely
that you w ill leave the lane, the system will
warn you by means of corrective steer ing . T he
d river can over ride the correct ive steer ing at
any time. If the veh icle crosses a line, the d riv
er is also warned by a light
vibration in the
steering wheel. The vibration warning must be switched on in the MMI for this to happen.
Active lane ass ist is operable when the line
marking the lane is detected on at least one
side of the vehicle .
If the system is in active standby mode and
the turn signa l is activated before driving over
the lane marker line, the warning does not oc
cur since the system allows for intentional lane changes.
The system is designed for driv ing on free
ways and expanded highways and thus works
only at speeds of 40 mph (65 km/h) or more .
If the vehicle is also equ ipped with Audi adap
tive cruise control*, the corrective steering
will be more specific in regard to the driving
situation . In addition to the lane marker lines,
the system can also take into account other
objects such as guard rails . If they are detect
ed i n close prox imity to the veh icle, Audi ac
tive lane ass ist helps prevent the vehicle from
driving too close to them . There is also pass
ing assistance. The system does not provide
any corrective steering if it detects that you
are passing another vehicle.
A WARNING , ~
- The system warns the driver that the ve
hicle is leaving the lane us ing corrective steer
ing. The driver is always responsible
for keeping the vehicle within the lane .
- The system can assist the driver in keep
ing the vehicle in the lane, but it does
not steer by itself. Always keep your
hands on the steering wheel.
- Corrective steer ing may not occur in cer
tain situat ions, such as dur ing heavy
brak ing .
- The camera does not recognize all lane
marker lines. Corrective steer ing can only
take p lace on the side of the vehicle
where lane marker lines are detected .
- Other road structures or objects cou ld
possibly be identified un intent ional ly as
lane marker lines . As a res ult, correct ive
steer ing may be unexpected or may not
occ ur.
- The camera view can be restricted, for
examp le by vehicles driving ahead o r by
r ai n, snow, heavy spray or light shining
into the camera. T his can result in act ive
lane assist not detecting the lane marker
lines or detect ing them incorrectly .
- Unde r ce rtain condi tions such as ruts in
the road, a banked roadway or cross
winds, the co rrective steering alone may
not be eno ugh to keep the vehicle in the
lane.
- For safety reasons, active lane ass ist
must not be used when there are poor
road and/or weather conditions such as
slippery roads, fog, grave l, heavy rain,
snow and the potential for hydroplaning.
Using act ive lane assist under these con
d itions may increase the risk of a crash.
Page 93 of 292
Activating and deactivating
Applies to vehicles: with active lane assist
•
Fig. 97 Turn signal leve r: Act ive lan e ass ist button
Fig . 98 Windsh ield: Active lane assist came ra v iew ing
window
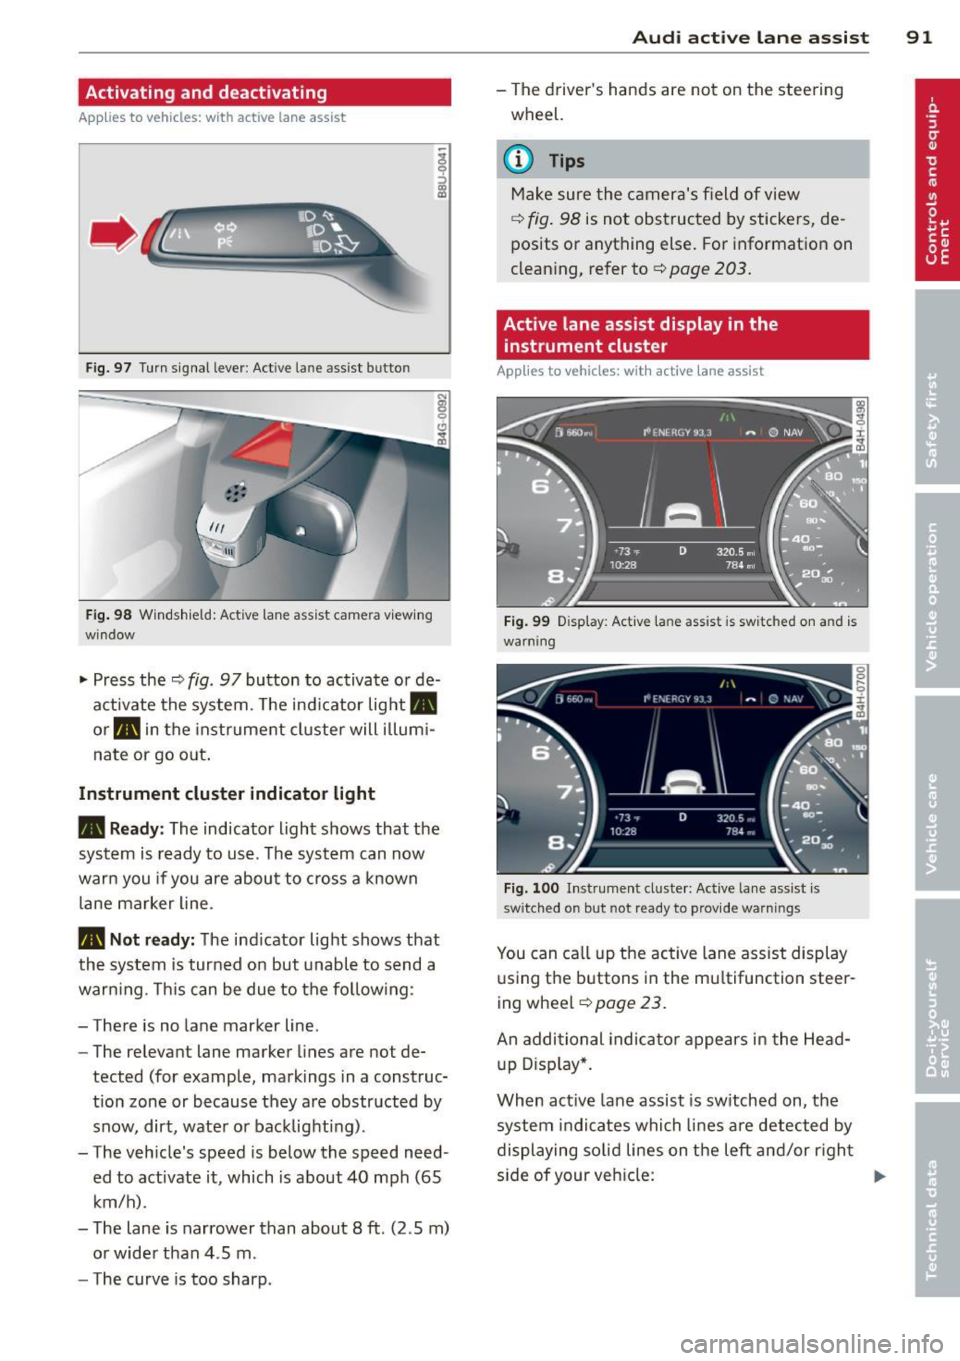
.. Press the¢ fig. 97 button to activate or de
activate the system. The ind icator light.
or . in the instrume nt cluster will illumi
nate or go o ut.
Instrument cluster indicator li ght
• Read y:
The indicator light shows that the
system is ready to use . T he system can now
warn you if you are about to cross a known
l ane marker line .
• Not r ead y: The ind icator light shows that
the system is turned on but unabl e to send a
warning. This can be due to the follow ing :
- There is no lane marker line.
- The relevant lane marker lines are not de-
tected (for example, markings in a construc
t ion zone or because they a re obstructed by
snow, dirt, wate r or backlighting) .
- The vehicle 's speed is below the speed need
ed to activate it , which is about 40 mph (65
km/h) .
- The lane is narrower than about 8
ft. (2 .5 m)
or wide r than 4 .5 m.
- The curve is too sharp.
Audi acti ve lane a ssis t 91
- The driver 's hands are not on the stee ring
wheel.
a) Tips
Make sure the camera's field of view
¢ fig . 98 is not obstructed by stickers, de
posits or anything else. For information on
clean ing, refer to¢
page 203.
Active lane assist display in the
instrument cluster
App lies to vehicles: with active lane assist
Fi g. 99 D isplay: Act ive lane assist is switched on and is
warning
Fi g. 100 I nstrument clus ter: Act ive lane ass ist is
switched on but not re ady to provid e warnings
You can ca ll up the active lane ass ist display
u sing t he buttons in the multifunction steer
ing wheel
¢ page 23.
An additional indica to r appears in the Head
up D isp lay*.
When act ive lane assist is sw itched on, the
system i ndi cates which lines are detected by
displaying so lid lines on the left and/or righ t
s ide of your veh icle: ..,.