2014 AUDI RS7 SPORTBACK battery replacement
[x] Cancel search: battery replacementPage 35 of 292

Removing the mechanical key
Fig. 21 Remote control maste r key : re mov ing the me
c han ical key
• Press the release button @ c:> fig. 21.
• Pull the mechanica l key @ out of the master
key.
Using the mechan ica l key, you can:
- lock and unlock the storage compartment
on the passenger's side
c::> page 61.
- lock and unlock the vehicle manually
c::>page 37 .
-lock the front and rear passenger doors me
chanically
c:> page 38.
Master key battery replacement
Fig . 22 Remote master key : Re mov ing the ba ttery
holde r
Check light in the master key
The check light @ in the master key provides
information about different cond itions .
• The check light comes on briefly once when
a button is pressed, and during an "inquiry"
by the conven ience key system .
• If the check light does not come on, the bat
tery is dead and has to be replaced . In add i
t ion, when the battery is dead the
I!! sym
bol appears in the instrument cluster dis-
Opening and closing 33
play as well as the message : Please change
key battery .
Master key battery replacement
• Pull the mechanical key out of the master
key
c::> page 33.
• Press the release button @ on the battery
holder and at the same time pull the battery
holder out of the master key in the direction
of the arrow.
• Install the new battery CR 2032 with the
"+ " sign facing down.
• Push the battery holder carefully into the
maste r key .
• Install the mechanical key.
@ For the sake of the environment
Dispose of dead batteries properly so as
not to poll ute the environment .
(D Tips
The replacement battery must be the
same specification as the original.
, Electronic immobilizer
The immobilizer helps to prevent unauthor
ized use of your vehicle .
A computer chip inside your key automatically
deactivates the electronic immobilizer when
the key is inside the vehicle. When you remove
the key from the vehicle, the electronic immo
bilizer is automatically activated once again .
A WARNING
-
Always take the key with you when you
leave the vehicle. The key can disarm the
e lectronic engine immobilizer and permit
an unauthorized person to start the engine
and enable operation of the vehicle sys
tems such as power window or power sun
roof leading to serious personal injury.
(D Tips
- Th e veh icle cannot be started if an unau
thorized key is used. The vehicle may not
start if another radio device such as a key .,.
Page 62 of 292

60 Seats and st o rage
12-volt sockets
Appl ies to vehicles: wit h 12-volt sockets
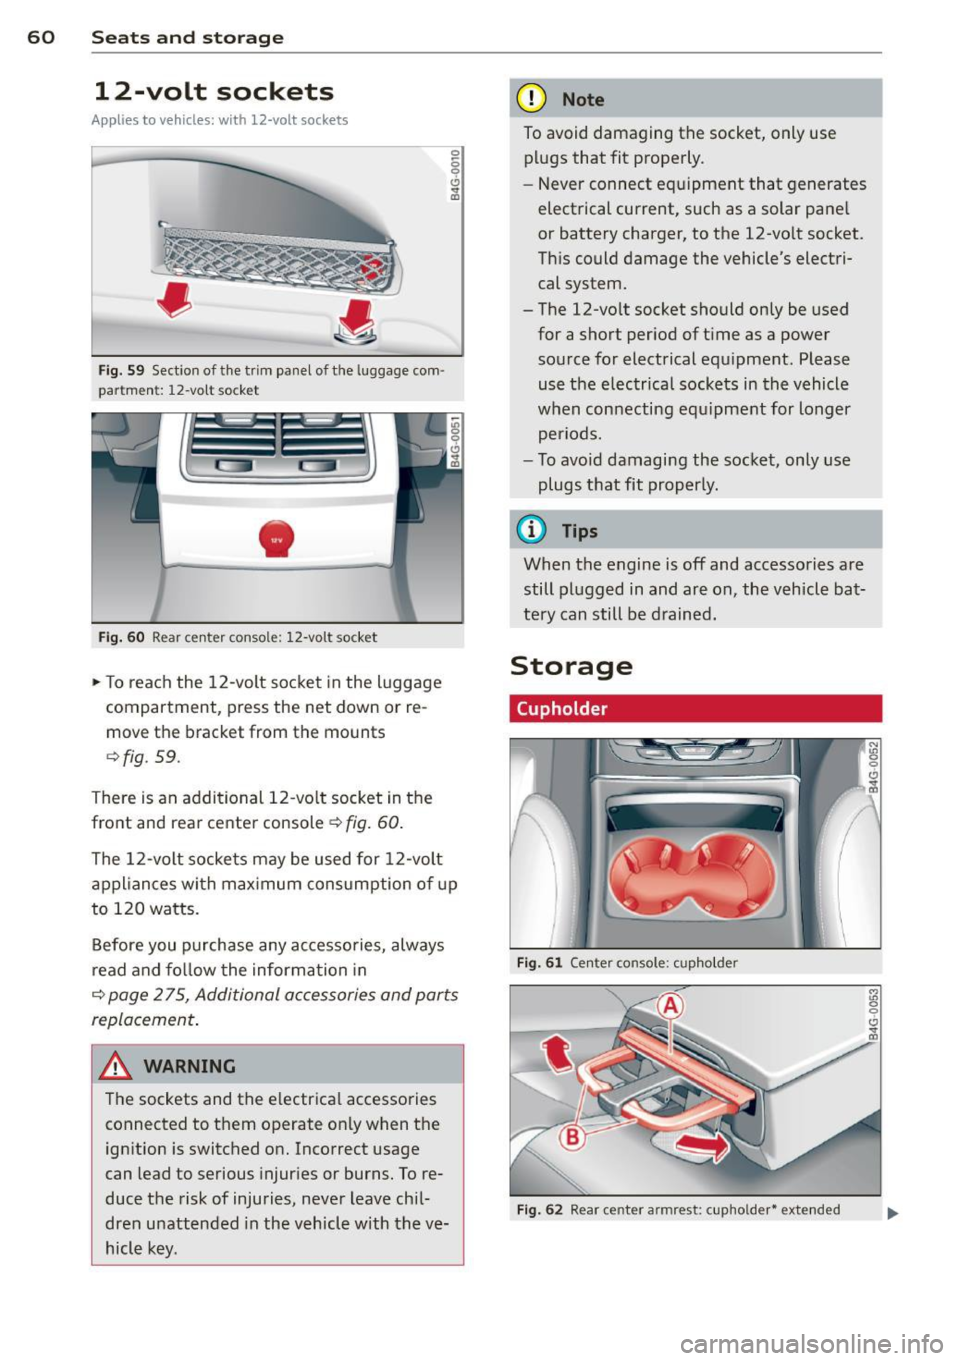
Fig. 59 Sect ion of the trim panel o f th e luggage com ·
par tm ent: 12-vol t so cket
-
Fig. 60 R ear cente r co nso le: 12-vo lt socke t
,. To reach the 12-volt socket in the luggage
compartment, press the net down or re
move the bracket from the mounts
¢ fig . 59.
There is an additional 12-vo lt socket in the
front and rear center console~
fig. 60.
0 5 0 6
~
The 12-volt sockets may be used for 12-volt
appliances with maximum consumption of up
to 120 watts.
Before you purchase any accessories, always
read and fo llow the information in
¢ page 2 75, Additional accessories and parts
replacement .
A WARNING
The sockets and the e lectrical accessories
connected to them operate only when the
ign ition is switched on. Incorrect usage
can lead to serious injur ies or burns. To re·
duce the risk of injuries, never leave chi l
dren unattended in the vehicle w ith the ve
hicle key.
(D Note
To avoid damaging the socket, only use plugs that fit properly.
- Never connect equipment that generates
electrical current, such as a solar pane l
or battery charger, to the 12-vo lt socket.
This could damage the vehicle's electri cal system.
- The 12-vo lt socket should on ly be used
for a short period of ti me as a power
source for electrical equ ipment . Please
use the electrical sockets in the vehicle
when connecting equ ipment for longer
periods.
- To avoid damaging the socket , only use
plugs that fit properly.
(0 Tips
When the engine is off and accessories are
still plugged in and are on , the vehicle bat
tery can still be drained.
Storage
Cupholder
F ig. 6 1 Ce nter co ns ole: c upho lde r
Fig. 62 Rear ce nter a rmrest : cupho ld er* extend ed
Page 160 of 292

158 Airb ag sys te m
- Have the airbag system inspected by
your Audi dealer before transporting
anyone on the front passenger seat.
If the capacitive passenger detection sys
tem determines that the front passenger seat is empty, the frontal airbag on the
passenger side will be turned off, and the
P ASS ENGER AIR BA G OFF light w ill stay
on .
Repair, care and disposal of the airbags
Parts of the a irbag system are installed at
many different pla ces on your Audi . Installing,
removing, servicing or repairing a part in an
area of the vehicle can damage a part of an
airbag system and prevent that system from
working properly in a co llision.
There are some important things you have to know to make sure that the effectiveness of
the system will not be impaired and that dis
carded components do not cause injury or po l
lute the environment.
A WARNING
Improper care, servicing and repair proce
dures can increase the risk of personal in
jury and death by preventing an airbag from deploy ing when needed or deploying
an airbag unexpectedly:
- Never cover, obstruct, or change the
steering wheel ho rn pad or airbag cover
or the instrument pane l or modify them
in any way .
- Never attach any objects such as cup
holders or telephone mountings to the
surfaces covering the airbag uni ts.
- For cleaning the horn pad or instrument
pane l, use only a soft, dry cloth or one
moistened w ith plain water. Solvents or
cleaners co uld damage the airbag cover
or change the stiffness or strength of the
material so that the airbag cannot de
ploy and protect properly. -
Never repair, adjust, or change any parts
of the a irbag system.
- All work on the steering wheel, instru
ment panel, front seats or e lectr ica l sys
tem (including the installation of audio
equ ipment, cellu lar telephones and CB
radios, etc.) must be performed by a
qualified technic ian who has the training
and specia l equipment necessary.
- For any wo rk on the airbag system, we
strongly recommend that yo u see your
author ized Audi dealer or qualified work
shop.
- Never modify the front bumper or parts
of the vehicle body.
- Always make sure that the s ide airbag
can inf late without inte rfe rence:
- Never install seat covers or rep lace
ment upholstery over the front seat
backs that have not been specifically
approved by Audi.
- Never use additional seat c ushions that
cover the areas where the side a irbags
inflate.
- Damage to the orig inal seat covers or
to the seam in the area of the side a ir
bag module must a lways be repaired
immediately by an author ized Audi
dealer .
- The airbag system can deploy on ly once .
After an a irbag has been deployed, it
must be replaced w ith new replacement
pa rts des igned and app roved es pecially
for your Aud i mo del ve rsion. Replace
ment of comple te airbag systems or air
bag components must be performed by
qualified wor kshops only . Make sure that
any airbag service action is entered in
your Audi Warranty
& Maintenance book
let under
AIRBAG REPLACEMENT RE
CORD .
-For safety reasons in severe accidents,
the alternator and starter a re sepa rated
from the veh icle battery with a pyrotech
n ic circuit inte rrupte r.
- Work on the pyrotechnic circuit inter
rupter must only be performed by a
qualified technicians who have the
llll-
Page 202 of 292

200 Driving and en vir onm ent
_& WARNING
The temperature o f the exhaust system is
high, both when driving and after stopping
the engine .
- Never touch the exha ust tail pipes once
they have become hot. This could result in burns .
- Do not park or operate the veh icle in
areas where the hot exhaust system may
come in contact with dry grass, brush,
fuel spill or other material which can cause a fire .
- Do not apply additional undercoating or
rustproofing on or near the exhaust
man ifold , exhaust p ipes, catalytic con
verter or heat shie lds. D uri ng d riving, the
substance used for undercoating cou ld
over heat and cause a fire .
(I) Note
- Be aware that just one tank filling with
l eaded fuel will already seriously de
grade the perfo rmance of the cata lytic
conve rter.
- Do not exceed the correct engine oil leve l
¢page 218.
- Do not d rive until the fuel tank becomes
completely empty. The eng ine could mis
fire. Unburned f uel could a lso ge t in to
t h e exhaus t sys tem and this could cause
the ca talyt ic converte r to ove rheat.
- Do no t switch off the ign ition wh ile the
vehicle is moving.
- Do no t continue to operate yo ur vehicle
u nder these condi tions, as otherw ise fuel
can reach the catalytic converter . This
could result in overheating of the co n
verter, req uiring its replacement.
- To assure efficient operation of the Emis
sion Control System :
- Have your veh icle maintained properly
and in accordance with the service rec
ommendations in your Wa rranty
&
Ma intenance booklet.
- Lack of proper maintenance as well as
improper use of the vehicle will impa ir the function of the em
ission cont ro l
system and could lead to damage .
~ For the sake of the env ironment
Even when the Emiss ion Con trol Sys tem is
operat ing proper ly, the exha ust gas can
have a sulfur-li ke ex haust gas smell under
some operat ing states . This depends on
the sulfur content of the fuel being used .
Using a different brand of fue l may help,
or filling the tank with lead -free super
grade gasoline .
Shutting down vehicle
If you would like you r vehicle to remain inop
erative for a longer per iod of t ime, contact an
Audi o r other spec ia lized dealer. They can ad
v ise you on ne cessa ry precautions e .g. co rro
s io n preven tion , maintena nce and s to rage.
Pay a ttent ion to addi tional in fo rmat ion con
cerning the battery. Refer to ¢
page 223 .
Operate your vehicle
economically and
minimize pollution
General
Your p ersonal style of driving will determine
the economy of your vehicle , as well as ex
haust and nois e le ve ls .
Fu el economy, environmenta l impact, and
wear on your engine , brakes and tires largely
depend on three factors:
- your personal d riving style
- operati ng conditions
- technical limitat ions
If you an tic ip ate what you need to do next and
drive economically, you can easily cut your
fuel consumpt io n by 10 -15 percent . This sec
t ion w ill give you some tips on how you can
help the e nvir onment and your pocketbook .
Page 229 of 292

CD Note
Never use a fast charger as a booster to
start the engine. This will seriously dam
age sensitive electronic components, such
as control units, relays, radio, etc., as well
as the battery charger .
Battery replacement
The new battery must have the same specifi
cations and dimensions as the original equip
ment battery .
Intelligent energy management in your vehi
cle is respons ible for distributing the electri
cal energy throughout your vehicle
c::> page 195. The intelligent energy manage
ment system w ill keep the engine battery
charged bette r than vehicles w ithout t his sys
tem. To make sure the additional electr ica l en
ergy is available once again after you have
changed the battery, we recommend that you
install batteries of the same type and manu
facture only (the same as those installed at
the time your vehicle was delivered). Specifi
cations are listed on the battery hous ing. Your
author ized dealer must code the battery in
the energy management system to enable you
to use the energy management functions cor
rectly after replac ing the battery.
The new battery must have the same capacity,
voltage (12-volts), amperage, const ruct ion
and p lug sealing.
When installing the battery, make sure the ig
n ition and all electr ical consumers are sw itch
ed off .
CD Note
Make sure the ventilation hose on the s ide
of the battery is connected, otherwise
fumes or battery ac id can leak out.
@ For the sake of the environment
Because of the problem of proper d isposal
of a battery, we recommend your author
ized Aud i dealer change the battery for
you . Batteries contain su lfuric ac id and
Checkin g and fillin g 22 7
lead and must always be disposed o f prop
erly in compliance with a ll environmental
regulations. Disposing of vehicle batter ies
i mproperly is very dangerous to the envi
ronment .
Windshield/headlight*
washer container
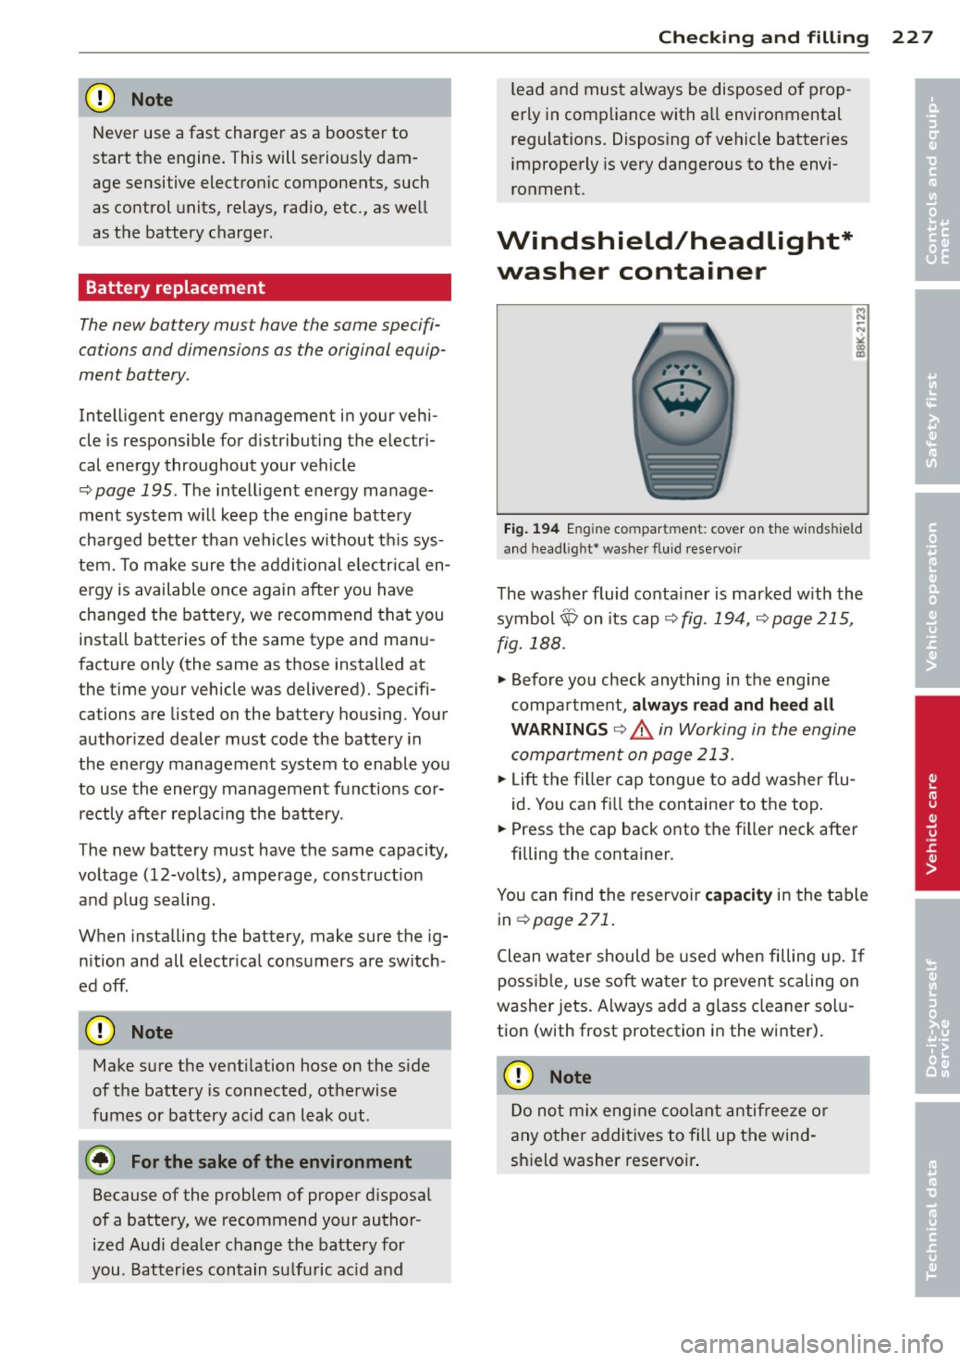
Fig. 194 Engine compart ment: cover on th e windshield
and headl ig ht* washer fluid reservo ir
The washer fluid conta iner is marked w ith the
symbol~ on its cap
c::> fig. 194, c::>page 215,
fig. 188.
.,. Before you check anything in the engine
compartment, always read and heed all
WARNINGS c::> &. in Working in the engine
compartment on page 213.
.. Lift the filler cap tongue to add washer flu
id. You can f ill the container to the top .
.. Press the cap back onto the fi ller neck after
filling the container.
You can find the reservoir
capacity in the table
in
c::> page 271.
Clean water should be used when filling up. If
possible, use soft water to prevent scaling on
washer jets. Always add a g lass cleaner solu
tion (with frost protection in the winter).
([) Note
Do not mix engine coolant antifreeze or
any other additives to fill up the wind
shield washer reservoir .
•
•
Page 284 of 292

282 Index
Gauges Engin e coolant t emp erature .. .... .. .. 10
F ue l gauge . . . . . . . . . . . . . . . . . . . . . . . . 11
Speedometer . . . . . . . . . . . . . . . . . . . . . . 26
Tachometer . . . . . . . . . . . . . . . . . . . . . . . 11
T rip odometer . . . . . . . . . . . . . . . . . . . . . 26
Gene ral i llustration ..... ... .. .. .... .. . 8
Gene rato r (warn ing/ indicato r lights) .... 16
Glossary of t ire and load ing termino logy 229
Glove compartmen t (cooled) ... .. .... . . 61
Gross Veh icle Weig ht Rat ing (GVWR) .. . 270
H
Head-up Display . . . . . . . . . . . . . . . . . . . . . 28
Headlig hts
C leaning .... .. .. ..... ... .. .. .... . 204
C leaning system .......... .. .. .. .. .. 48
Defective . . . . . . . . . . . . . . . . . . . . . . . . . 21
H eadlig ht range control . . . . . . . . . 21, 44
Washer rese rvoir .. ........ ... .. .. . 227
H ead restraints . . . . . . . . . . . . . . . . . S6, 127
Ad justing .... ........... .. .. .. .. . 127
Front seats . . . . . . . . . . . . . . . . . . . . . . . . 56
Rear seats ................. .. .... .. 57
Remov ing .. .......... .... ... .. .. .. 57
H eated
exterior m irrors ... .... ... .. .. .. .. .. 50
rear window (automa tic climate contro l) 71
seats (au tomatic climate control) . . . . . . 71
windshie ld washer spray nozzles .. .. . . 48
Heating ..... ... .. ..... ... .. .. .... .. 69
H eavy clothing and safety belts . .. .. .. . 136
High beam . .. .. . ... ....... .. .. .. .. .. 46
H igh voltage wa rn ing la bel .. .. .... .. . 270
H ill desce nt co ntrol ......... ... .. ... 107
H omelink universa l remote contro l ... . 12 1
H ood (relea se lever) ........ .. .. .. .. . 213
H ooks .. .. .. .... ........... .. .... .. 67
Ho rn ..... .. ... .. ..... ... .. .. .... .. . 8
H ow ar e chi ld restra int sys tem anchors re-
l ated to child safety . ..... .. .. .. .. .. . 18 2
H ow many airbags does my vehicle have? 150
H ow often sho uld I check my t ire pres -
sures? . ...... .. .. ..... ... .. .. .... . 235
H ow safety belt pretensione rs wo rk . ... 139
Hydroplaning ............. .. .. .. .. . 238
I
Immobilizer . . . . . . . . . . . . . . . . . . . . . . . . 26
Important t hings to do before drivi ng .. 123
Improperly worn safety belts .... .. .. .. 139
In dic ator lights
D ynam ic steer ing ............ .... .. 19 4
also refer to Warning/indicator lights .. 11
Infan t seats .. .. .. .......... ...... . 17 4
Installing child safety seats Safety be lt s . . . . . . . . . . . . . . . . . . . . . . 179
Installing the upper te ther s trap on the
anchorage . . . . . . . . . . . . . . . . . . . . . . . . . 185
Instruments Adjus ting t he light ing .......... .... . 47
Instruments and controls General illustration . . . . . . . . . . . . . . . . . . 8
I n strument cluster ................ .. 10
Interior lighting
Amb ience light ing ............. .... . 47
Front and rear . .. ............. .. .. . 47
Intermit ten t (w indshie ld w ipers) . .. . .. . 48
J
Jack ... .. .. .. .. .. .... ......... .... 250
Jump-starting . .. .. ..... ........... . 264
Jumper cables ..... .. ... ..... ... .. .. 265
K
Key ........ .... .. ................. . 32
Battery replacement maste r key . . . . . . . 33
Emergency key ... .. ... ..... ... .. .. . 32
Key not recogn ized . ..... .... ... .. .. . 76
Key rep lacement . ............. .. .. . 32
Master key . . . . . . . . . . . . . . . . . . . . . . . . 32
Mecha nica l key . .. .......... ...... .. 33
Valet key ...... .. .. ........ ...... .. 32
Kick -down
t iptron ic .. .. .. .. ............. .... 108
Kn ee airbags .. .. .. ............. .. .. 159
D esc rip tion .... .. ... .. ..... .... . .. 159
How they work ... .. ... ..... ... .. .. 161
Impo rtant safety instructions . ... .. .. 161
L
Lane assist ..... .. ... .. ..... .... . .. . 90