Page 145 of 327

143
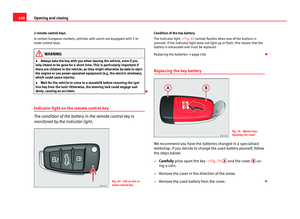
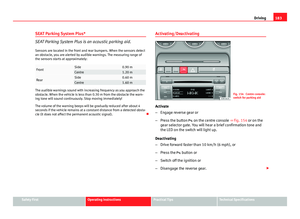
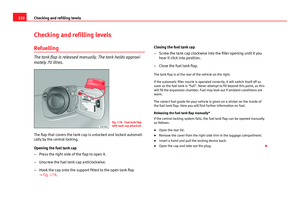
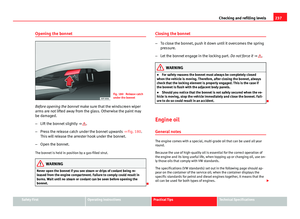
Seats and storage
– Press button A
and pull out the head restraint.
Fitting the head restraint
– Insert the head restraint in its guides until it clicks into place.
Press button A
and lower the head restraint.
The height of the head restraints is adjustable. They should be set to suit
the height of the occupant. In combination with the seat belts, the head re-
straints offer effective protection, provided they are properly adjusted.
For best protection, the top of the head restraint should be at least at eye
level or higher.
Head restraints on the side rear seats
Fig. 112 Outer rear
seats: Head restraints
Raising the head restraint
– Take hold of the sides of the head restraint with both hands.
– Pull the head restraint up as far as it will go. Lowering the head restraint
–
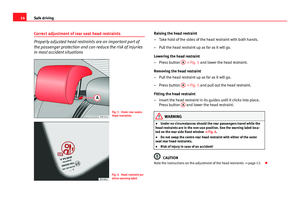
Press button A
⇒ Fig. 112 and lower the head restraint.
Removing the head restraint
– Pull the head restraint up as far as it will go.
– Press button A
⇒ Fig. 112 and pull out the head restraint.
Fitting the head restraint
– Insert the head restraint in its guides until it clicks into place.
Press button A
and lower the head restraint.
When the rear seats are not occupied, the head restraints should be moved
to the lowest position so that they do not obstruct the driver's field of vi-
sion.
Rear seat central head restraint
Fig. 113 Centre rear
seat: Head restraints
Safety FirstOperating instructionsPractical TipsTechnical Specifications
Page 146 of 327

144Seats and storage
Raising the head restraint
–Take hold of the sides of the head restraint with both hands.
– Pull the head restraint up as far as it will go.
Lowering the head restraint
– Press button A
⇒ Fig. 113 and lower the head restraint.
Removing the head restraint
– Pull the head restraint up as far as it will go.
– Press button A
⇒ Fig. 113 and pull out the head restraint.
Fitting the head restraint
– Insert the head restraint in its guides until it clicks into place.
Press button A
and lower the head restraint.
When the rear seats are not occupied the head restraints should be moved
to the lowest position so that they do not obstruct the driver's field of vi-
sion. Armrests
The armrest can be adjusted to several positions and incor-
porates a storage compartment.
Fig. 114 Armrest be-
tween the driver seat and
front passenger seat
Adjusting the armrest
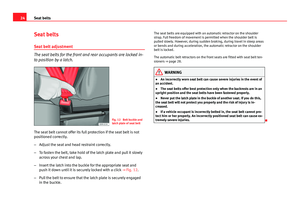
– To adjust the position of the armrest, fold the armrest all the
way down.
– Then lift the armrest gradually until it engages in the desired
position.
Opening the storage compartment
– Press the release lever ⇒ Fig. 114.
Please note that the armrest can restrict the driver's movements when it is
lowered. The armrest should therefore be raised when driving in city traffic.
Page 147 of 327

145
Seats and storage
Luggage compartment
Loading the luggage compartment
Loads in the luggage compartment should be safely se-
cured.
Fig. 115 Position heavy
items as far forward as
possible.
To maintain safe handling on the road, please observe the follow-
ing points:
– Distribute the load evenly.
– Position heavy items as far forward as possible ⇒ Fig. 115.
– Secure the load with a luggage net* or with non-elastic straps
secured to the fastening rings ⇒ page 146.
WARNING
● Unsecured objects in the luggage compartment can suddenly shift
and cause changes in the handling of the vehicle.
● In an accident or a sudden manoeuvre, loose objects in the passenger
compartment can be flung forward and might injure vehicle occupants.
● Always keep all objects in the luggage compartment and use appro-
priate grips to secure them, particularly in the case of heavy objects.
● When you transport heavy objects, always bear in mind that a change
of the centre of gravity can also cause changes in vehicle handling.
● Please refer to the notes on ⇒ page 7.
CAUTION
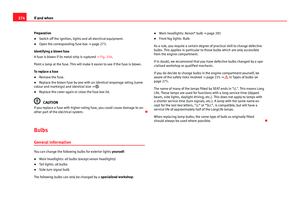
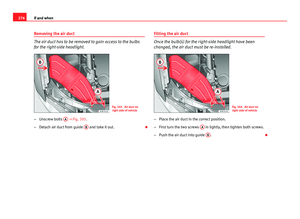
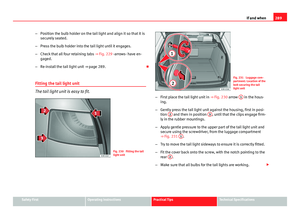
Make sure that no hard objects chafe against the wires of the heating ele-
ment in the rear window and damage them.
Note
The tyre pressure must be adjusted according to the load. If necessary, con-
sult the tyre pressure label on the door pillar ⇒ page 251.
Safety FirstOperating instructionsPractical TipsTechnical Specifications
Page 148 of 327
146Seats and storage
Fastening rings
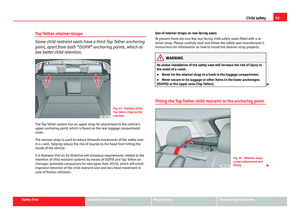
There are four fastening rings in the luggage compartment,
which can be used to secure loads.
Fig. 116 Location of fas-
tening rings in luggage
compartment
– Use the fastening rings to secure the load ⇒ Fig. 116 -arrows-.
– Please refer to the safety notes ⇒ page 17. Luggage net*
The luggage net can be used to secure and retain light items
in the luggage compartment.
Fig. 117 Stretched lug-
gage net
Luggage net
– Secure the luggage net to the four fastening rings -arrows-
⇒ Fig. 117.
The luggage net can be attached to the fastening rings in the bottom of the
luggage compartment panel.
WARNING
The luggage net should only be used to hold objects weighing up to 5 kg.
Heavier objects cannot be safely secured (risk of injury).
Page 149 of 327

147
Seats and storage
Retaining strap*
The retaining strap can be used to secure items of luggage
to the right-hand side lining in the luggage compartment.
Fig. 118 Retaining strap
attached to right-hand
side lining
– Hook the retaining strap into housing A
or B ⇒ Fig. 118.
You can attach the strap to the top or bottom housing, depending on the
size of the object you wish to secure.
To secure shorter objects, the retaining strap can also be attached to the
centre. However, this is only possible if the strap is attached to housing B
.
WARNING
The retaining strap should only be used to hold objects weighing up to
5 kg. Heavier objects cannot be safely secured (risk of injury).
Luggage compartment cover*
The cover blocks the view into the luggage compartment.
Fig. 119 Rear lid open
with luggage compart-
ment cover closed
Pulling out the luggage compartment cover
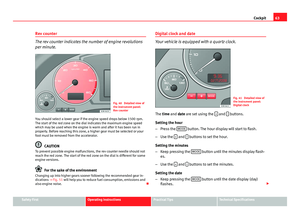
– Using handle A
⇒ Fig. 119, pull the rolled-up cover evenly to-
wards the rear of the vehicle.
– Insert the ends of the bar into the grooves in the left and right-
hand side trim ⇒ Fig. 119 (arrows).
Retracting the luggage compartment cover
– Lift the bar out of the grooves in the side trim.
– Let the cover roll up slowly.
Removing and installing the luggage compartment cover ⇒ page 149
Safety FirstOperating instructionsPractical TipsTechnical Specifications
Page 150 of 327
148Seats and storage
WARNING
The luggage compartment cover should not be used as a storage shelf.
Articles placed on this cover could cause injury to vehicle occupants in an
accident or if the brakes are applied suddenly.
Net partition*
The net partition prevents loose objects in the luggage com-
partment from being thrown forward into the passenger
compartment (e.g. under sudden braking).
Fig. 120 Retainers for
the net partition
Pulling out and securing the net partition
– Pull the net up as far as it will go.
– Engage the ends of the bar in the retainers B
⇒
Fig. 120. Using the net partition with the rear backrest folded down
–
Fold down the rear backrests ⇒ page 151.
– Pull the net upwards.
– Engage the ends of the bar in the retainers A
⇒ Fig. 120.
Retracting the net partition
– Unhook the bar from the retainers.
– Let the net retract slowly.
Removing and installing the net partition ⇒ page 149.
Page 151 of 327

149
Seats and storage
Removing and installing luggage compartment cover / net
partition
The luggage compartment cover / net partition can only be
removed when the rear backrests are folded forwards.
Fig. 121 Removing lug-
gage compartment cov-
er / net partition
Fig. 122 Installing lug-
gage compartment cov-
er / net partition Removing luggage compartment cover / net partition
–
Open the right-hand rear door.
– Fold down the backrests ⇒ page 151.
– Pull the net partition in the direction indicated ⇒ Fig. 121 and
lift it out of the retaining rails.
Installing luggage compartment cover / net partition
– Open the right-hand rear door.
– Fold down the backrests ⇒ page 151.
– Fit the net partition A
on the backrest so that the retainers Bare located next to the retaining rails C ⇒ Fig. 122.
– Push the luggage compartment cover / net partition towards
the left-hand side of the vehicle as far as it will go.
Safety FirstOperating instructionsPractical TipsTechnical Specifications
Page 152 of 327

150Seats and storage
Luggage compartment liner*
You can use the liner to protect the inside of the luggage
compartment when carrying wet or dirty items.
Fig. 123 Floor panel
raised
Fig. 124 Floor panel re-
moved for increased lug-
gage space Lifting the floor panel
–
Open the rear lid.
– Take hold of handle A
⇒ Fig. 123, lift the floor panel B and
line up the bottom corners of the floor panel with the recesses C
.
– Put the items you are transporting onto the luggage compart-
ment liner
Folding the floor panel
– Open the rear lid.
– Take hold of the handle A
⇒ Fig. 123 and fold out the floor
panel as far as the rear backrest.
Removing the floor panel
– Open the rear lid.
– Take hold of the handle A
⇒ Fig. 123 and fold out the floor
panel as far as the rear backrest.
– Pull the complete floor panel towards the rear of the vehicle so
it comes out of the retainers D
⇒ Fig. 124.
Small items can also be stored under floor panel B
⇒ Fig. 123.
The space available for carrying items in the luggage compartment liner can
be increased by folding out the floor panel or removing it completely.
CAUTION
When the luggage compartment floor panel is folded out to the upright po-
sition you should not transport items weighing more than 7.5 kg, or items
which exceed 2/3 of the height of the upright floor panel.