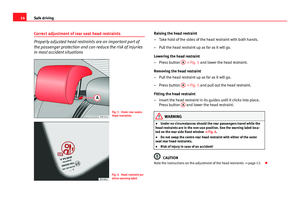
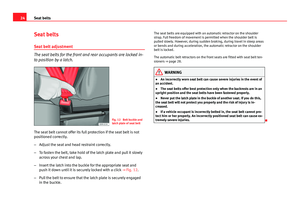
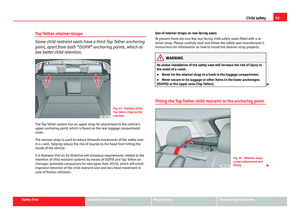
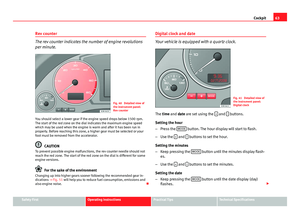
Page 121 of 327

119
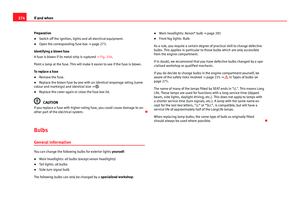
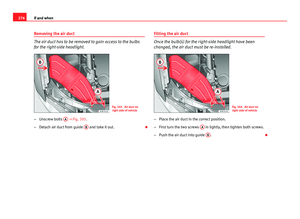
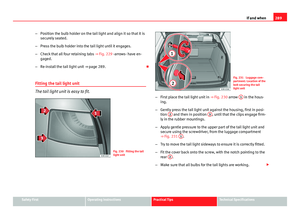
Lights and visibility
● The warning symbol will appear on the instrument panel if a malfunc-
tion occurs ⇒ page 84.
● Observe all relevant legal requirements when using the signalling and
lighting systems described here.
Front fog lights
The light switch can also be used to turn on the front fog
lights.
Switching on the front fog lights
– Do ⇒ Fig. 84 not turn the light switch to the symbol .
– First turn the light switch to the position or .
– Then pull the light switch out to the first stop 1
.
The front fog light symbol next to the switch will light up when the front
fog lights are on.
Rear fog light
The light switch can also be used to turn on the rear fog
light.
– Do ⇒ Fig. 84 not turn the light switch to the symbol .
– First turn the light switch ⇒ Fig. 84 to the position or .
– Then pull out the light switch to the second stop 2
to switch
on the rear fog light. The symbols
and next to the switch will light up when the rear fog light
is switched on.
If you are towing a trailer or caravan equipped with a rear fog light on a vehi-
cle with a factory-fitted towing bracket*, only the rear fog light on the trailer
or caravan will light up.
CAUTION
To avoid dazzling the traffic behind you, the rear fog light should only be
used in accordance with legal regulations.
Coming home / leaving home function*
The coming home and leaving home functions are used to
light up the surroundings in the dark. The front fog lights,
the rear side lights and the number plate light switch on.
Fig. 86 Detailed view of
the dash panel: Coming
home and leaving home
functions
Safety FirstOperating instructionsPractical TipsTechnical Specifications
Page 122 of 327

120Lights and visibility
Activating the function
–Briefly press the knob ⇒ Fig. 86 to release it from its set posi-
tion.
– Turn the knob to position 1.
– Press the knob in again to prevent the setting from being
changed unintentionally.
Deactivating the function
– Briefly press the knob ⇒ Fig. 86 to release it from its set posi-
tion.
– Turn the knob to position 0.
– Press the knob in again to prevent the setting from being
changed unintentionally.
The coming home and leaving home functions are controlled by light sen-
sors in the interior mirror housing. The system will function when the follow-
ing requirements are met:
● The knob is set to position 1.
● The headlights and the ignition are switched off.
● Dark conditions; the sensors register little or no light.
Coming home
When the system is enabled and it is dark, the corresponding exterior lights
switch on as soon as the driver door is opened.
The exterior lights will stay on for up to a maximum of 2 minutes as long as
one of the doors or the rear lid is open.
The exterior lights stay on for about 30 seconds to light up the area around
the vehicle after all the doors and the rear lid have been closed. This time interval is factory-set, but you can have it changed by a special-
ised workshop to suit your own requirements (max. setting is 60 seconds).
Leaving home
The exterior lights are switched on when the vehicle is unlocked with the
button on the remote control key.
The exterior lights go out when the driver door is opened or after 60 sec-
onds when the vehicle locks itself again automatically
⇒ page 108.
WARNING
Before leaving the vehicle, remove the key from the ignition, as the lights
will not go out if the coming home function is activated. This will lead to
battery discharge and vehicle breakdown.
Note
● If you always wish to use the coming home and leaving home functions,
you can leave them permanently switched on. As the system is controlled
via a photosensor, it will only work in dark conditions.
● Permanent use of the coming home and leaving home functions, partic-
ularly on short journeys, will increase the load on the battery. To make sure
the battery is always sufficiently charged, occasionally drive longer distan-
ces.
● If the fog lights have been switched on by the coming home and leaving
home functions, they will always be switched off when you switch on the ig-
nition.
● Observe all relevant legal requirements when using the signalling and
lighting systems described here.
Page 123 of 327

121
Lights and visibility
Instrument lighting
The brightness of the instrument lighting, displays and cen-
tre console lighting can be varied as required.
Fig. 87 Instrument panel
lighting
– Press the +
button to increase the brightness.
– Press the -
button to reduce the brightness.
With the ignition switched on
The lighting of the digital displays will adjust automatically, depending on
the ambient light.
With the vehicle's lights switched on
When the vehicle's lights are switched on, the brightness of the instrument
lighting, displays and centre console lighting can be varied by pressing the +
and - buttons. Headlight range control
When the dipped beam headlights are switched on, the
range of the headlights can be adjusted to suit the load of
the vehicle.
Fig. 88 Headlight range
control
– Briefly press the knob ⇒ Fig. 88 to release it from its set posi-
tion.
– Turn the knob to the required setting.
– Press the knob in again to prevent the setting from being
changed unintentionally.
Settings
The settings roughly correspond to the following load conditions: Two front occupants, luggage compartment empty
All seats occupied, luggage compartment empty
O
1
Safety FirstOperating instructionsPractical TipsTechnical Specifications
Page 124 of 327

122Lights and visibility
All seats occupied, luggage compartment loaded
Driver only, luggage compartment loaded
CAUTION
Always adjust the headlights to avoid dazzling oncoming traffic. Make sure
you lower the headlights when the vehicle is more heavily laden.
Dynamic headlight range control
On vehicles with xenon lamps, the headlights automatically adapt to suit
the load being carried when the ignition is switched on and when the vehi-
cle is moving, depending on the load of the vehicle and the type of driving
(e.g. when accelerating and braking).
2
3Daytime driving lights*
The daytime running lights turn on automatically when the
ignition is switched on.
Fig. 89 Daytime running
lights switch
Activating the function
– Briefly press the knob ⇒ Fig. 89 to release it from its set posi-
tion.
– Turn the knob to position 1.
– Press the knob in again to prevent the setting from being
changed unintentionally.
Deactivating the function
– Briefly press the knob ⇒ Fig. 89 to release it from its set posi-
tion.
– Turn the knob to position 0.
Page 125 of 327

123
Lights and visibility
– Press the knob in again to prevent the setting from being
changed unintentionally.
This button activates or deactivates the daytime running lights function.
With the function activated, when the ignition is switched on the daytime
running lights are turned on automatically.
Note
Please observe any relevant legal requirements which may apply in your
country.
Adaptive headlights* (for driving around bends)
When driving around bends, the headlights will light the
most important areas of the road.
Fig. 90 Adaptive head-
lights when driving
The dynamic cornering light gives better illumination of the curve area and
the side of the road when driving around a bend ⇒ Fig. 90. The dynamic cor-nering light is controlled automatically depending on the speed and the
steering wheel angle.
The dipped beam headlights are regulated automatically when you drive
around a bend, depending on how far you turn the steering wheel. The two
main headlights move at different angles to avoid that the front of the vehi-
cle is left completely in the dark.
Note
The system operates from a speed of about 10 km/h (6 mph).
Hazard warning lights
The hazard warning lights are used to draw the attention of
other road users to your vehicle in emergencies.
Fig. 91 Centre console:
Switch for hazard warn-
ing lights
– Press the switch
⇒
Fig. 91 to switch the hazard warning
lights on or off.
Safety FirstOperating instructionsPractical TipsTechnical Specifications
Page 126 of 327

124Lights and visibility
All four turn signals flash simultaneously when the hazard warning lights
are switched on. The turn signal indicators and the hazard control lamp
indicator flash at the same time. The hazard warning lights also work
when the ignition is switched off.
In an accident in which the airbags are triggered, the hazard warning lights
are switched on automatically.
Note
You should switch on the hazard warning lights to warn other road users,
e.g.
● When reaching the tail end of a traffic jam
● If your vehicle breaks down or there is an emergency
● If your vehicle is being towed away or if you are towing another vehicle Turn signal
and main beam headlight lever
The turn signal and main beam headlight lever also oper-
ates the parking lights and the headlight flasher.
Fig. 92 Turn signal and
main beam headlight lev-
er
The turn signal and main beam headlight lever has the following
functions:
Turn signals
– Move the lever all the way up to indicate right or all the way
down to indicate left ⇒ Fig. 92.
– Move the lever up or down just as far as the point of resistance
and hold it there: the turn signals flash for as long as you hold
the lever (for instance when changing a lane).
– Move the lever briefly up or down as far as the point of resist-
ance and release it to signal briefly (the turn signals flash three
times).
Page 127 of 327

125
Lights and visibility
Main beam headlights
– Press the lever forward to switch on the main beams.
– Pull the lever back towards you to switch the main beam head-
lights off again.
Headlight flasher
– Pull the lever towards the steering wheel to operate the flasher.
Parking light
– Switch the ignition off.
– Move the lever up or down to turn on the right or left-hand park-
ing lights respectively.
Notes on these functions
● The turn signals only work when the ignition is switched on. The turn
signal lamp or flashes in the instrument panel when the turns signals
⇒ page 67 are working.
● The turn signals are cancelled automatically when the steering wheel is
returned to the straight-ahead position.
● The main beam headlights can only be switched on if the dipped beam
headlights are already on. The main beam headlight indicator lamp then
comes on in the instrument panel.
● The headlight flasher comes on for as long as you pull the lever, even if
no other lights are switched on. The main beam headlight indicator lamp
then comes on in the instrument panel.
● When the parking lights are switched on, the headlight and the tail light
on one side of the vehicle light up with reduced intensity. The parking lights
will only work with the ignition off.
CAUTION
Never use the main beam headlights or the headlight flasher if this would
dazzle oncoming traffic.
Interior lights
Front interior lights and glove compartment light
The front interior light also incorporates the reading lights
for the driver and passenger.
Fig. 93 Detail of headlin-
er: front interior lights
The rocker switch A
⇒
Fig. 93 for the front interior light has the
following functions:
Door light position
– Move switch A
to the centre position.
Safety FirstOperating instructionsPractical TipsTechnical Specifications
Page 128 of 327

126Lights and visibility
Interior light switched on
–Move switch A
to position I.
Interior light switched off
– Move switch A
to position O.
Front reading lights
– Press one of the switches B
to turn the left and right reading
lights on and off.
Glove compartment light
– Open the glove compartment on the front passenger side. The
glove compartment light will come on automatically if the side
lights or headlights are switched on, and will go out again
when the glove compartment is closed.
Footwell* and door lighting
– This is switched on when the doors are opened and off when
they are closed.
If the switch is in the courtesy light position, the interior light comes on au-
tomatically when the vehicle is unlocked or the doors are opened. The light
also comes on when the key is pulled out of the ignition. The light turns off
about 30 seconds after closing the doors. The interior light is switched off
immediately when the vehicle is locked or when the ignition is switched on.
If a door is left open, the light is switched off after about 10 minutes to pre-
vent the battery from running flat.
The brightness of the lights is automatically adjusted by a dimmer when
they are switched on. Ambient lighting*
The ambient lighting illuminates a number of important
controls.
Fig. 94 Detail of headlin-
er: Ambient lighting
The lights in the door handles come on automatically when the ignition is
switched on.
The lighting above the windscreen* also comes on when the side lights or
headlights are switched on. The centre console is illuminated from above.
The background lighting cannot be switched off manually.