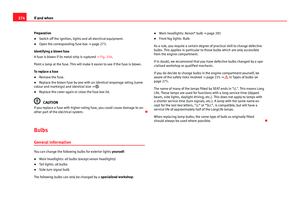
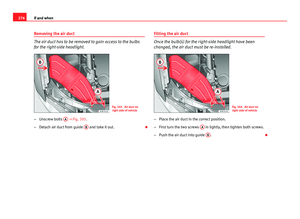
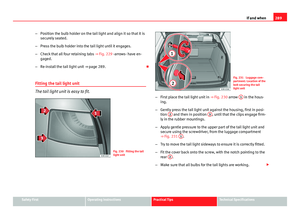
Page 153 of 327

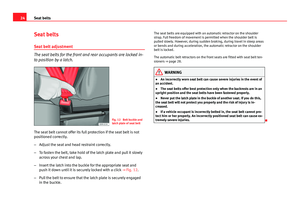
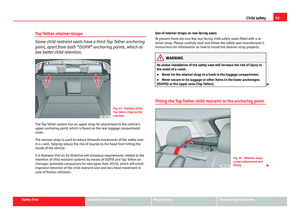
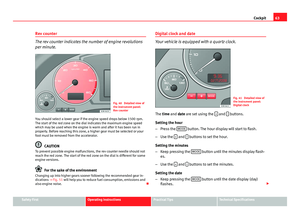
151
Seats and storage
Note
It is advisable to secure the items by means of a strap secured to the fasten-
ing rings on the left and the right hand side.
Side storage compartment
The CD-ROM player for the navigation system* is located in
the left side compartment of the luggage compartment.
Fig. 125 Luggage com-
partment: Side trim with
closed storage compart-
ment
– To open the storage compartment, pull the handle forwards
⇒
Fig. 125.
CD-ROM player for navigation system*
The CD-ROM player for the navigation system is located in this storage com-
partment in the luggage compartment. Separate operating instructions are
enclosed for this system. Extending the luggage compartment
The two sections of the backrest can be folded forwards ei-
ther together or separately to increase the capacity of the
luggage compartment.
Fig. 126 Backrest re-
lease lever
Folding the backrest forwards
– Press the release lever A
⇒ Fig. 126 in the direction indicated
by the arrow.
– Fold down the backrest.
Returning the backrest to its upright position
– Push the backrest up until it engages securely ⇒
. The red
marking on the tab B should no longer be visible when the
backrest is properly secured.
Safety FirstOperating instructionsPractical TipsTechnical Specifications
Page 154 of 327

152Seats and storage
WARNING
● Make sure that the rear backrest is securely locked in position so that
the seat belt can provide proper protection on the centre rear seat.
● The rear backrest must always be securely latched so that objects
stored in the luggage compartment will not fly forward through the inte-
rior during sudden braking.
CAUTION
When returning the backrest to an upright position, make sure that the seat
belts for the outer rear seats are in their guides, so that they cannot be
caught up and damaged in the catches for the backrest.
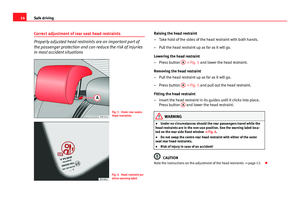
Ski bag*
You can use the ski bag to transport skis or other extra-long
objects safely inside the vehicle without soiling or damag-
ing the upholstery.
Fig. 127 Detailed view of
the rear of the rear back-
rest: Ski bag cover
Fig. 128 Fastening the
ski bag in the seatbelt
buckle
Loading
– Open the rear lid.
– Press the release catch for the ski bag cover (arrow) and fold the
cover downwards ⇒ Fig. 127.
– Pull down the centre rear armrest.
– From the passenger compartment, press down the release catch
for the ski bag cover and pull out the cover.
– Pull out and unfold the ski bag.
– The long items can now be loaded through the luggage com-
partment into the ski bag ⇒
.
Securing
– Insert the fastening belt A
⇒ Fig. 128 of the ski bag into the
centre seat belt buckle B.
– Pull the free end of belt C
to tighten.
Page 155 of 327

153
Seats and storage
Storing
– Close the cover of the load-through hatch in the luggage com-
partment.
– Carefully fold away the ski bag.
– Close the inside cover of the load-through hatch from the pas-
senger compartment.
WARNING
The ski bag must be secured in place with the fastening belt after it has
been loaded.
Note
Do not fold away the ski bag after use if it is still damp.
Roof rack / roof rails* Description
Additional luggage can be carried on the roof rack.
Note the following points if you intend to carry loads on the roof:
● We recommend using the cross bars from the of SEAT Genuine Accesso-
ries range.
● These cross bars form the basic elements of a complete roof rack sys-
tem. For safety reasons, however, the corresponding additional fastenings
must be fitted to carry luggage, bicycles, surfboards, skis and boats. All the
components of this system are available from a Technical Service.
CAUTION
Any damage to the vehicle caused by the use of other types of roof rack or
incorrect installation will not be covered by the factory warranty. The roof
rack system must therefore be installed exactly according to the instructions
provided.
Attachment points
The roof rack must be attached at the marked points only.
Fig. 129 Attachment
points for cross bars
The cross-bars must be fitted exactly between the points marked on the roof
railings ⇒ Fig. 129. The markings are visible on the inside of the railings.
CAUTION
A roof rack unit must not be used if the vehicle is not equipped with roof
rails (basic support).
Safety FirstOperating instructionsPractical TipsTechnical Specifications
Page 156 of 327

154Seats and storage
Roof load
Loads carried on the roof must be securely attached. The ve-
hicle's handling is affected whenever you carry loads on the
vehicle.
The authorised load on the roof of your vehicle is 75 kg. Use the weight of
the roof rack system and that of the load as a basis to calculate the roof
load.
If less resistant systems are used, the roof rack must not be loaded to the
maximum weight permitted. If less resistant systems are used, these must
only be loaded to the maximum weight permitted indicated in the assembly
instructions.
WARNING
● Loads carried on the roof must be securely attached. Failure to do so
could result in an accident.
● Do not exceed the maximum roof load for the vehicle, the maximum
axle loads or the maximum gross vehicle weight. Failure to do so could
result in an accident.
● When transporting heavy or bulky loads on the roof, bear in mind that
the vehicle's handling is affected by the extra weight on the roof and a
possible susceptibility to cross winds. Adjust your speed and driving
style accordingly to avoid accidents.
CAUTION
Please take extra care not to let the rear lid strike the roof load when open.
For the sake of the environment
Roof racks are often left attached for convenience, even when they are not
being used. However, the increased air resistance means that the vehicle
uses more fuel. For this reason you should always take off the roof rack
when it is not in use.
Drink holder
Front drink holder
Fig. 130 Detailed view of
the dash panel: Drink
holder
– To open the drink holder, press the symbol
on the drink hold-
er lid ⇒
Fig. 130
– To close the drink holder, press it in until it engages.
Page 157 of 327

155
Seats and storage
WARNING
● Do not put any hot drinks in the drink holder while the vehicle is mov-
ing. You can be scalded if the hot liquid is spilt.
● Do not use hard china cups or glasses. These could cause injury in the
event of an accident.
Drink holder in the rear armrest*
Fig. 131 Drink holder in
the rear armrest
Opening the drink holder
– Press the symbol
A
⇒
Fig. 131.
Adjusting the retainer arm
– To adjust one of the retainer arms B
, release it by pressing in
the direction indicated (arrow) and move it as required.
The retainer arm should be positioned against the drink holder so that it is
held securely. One or two drink holders can be held in the centre console.
WARNING
● Do not put any hot drinks in the drink holder while the vehicle is mov-
ing. You can be scalded if the hot liquid is spilt.
● Do not use hard china cups or glasses. These could cause injury in the
event of an accident.
Ashtray*, cigarette lighter* and electric
sockets* Front ashtray*
Fig. 132 Centre console:
Open ashtray
Opening the ashtray
– Lightly press the front part of the ashtray A
⇒
Fig. 132.
Safety FirstOperating instructionsPractical TipsTechnical Specifications
Page 158 of 327
156Seats and storage
Removing the ashtray
–Take hold of the sides of the ashtray B
⇒ Fig. 132 and lift it
out.
Fitting the ashtray casing
– Insert the casing and press it into its mountings.
WARNING
Never put waste paper in the ashtray, as this could cause a fire.
Rear ashtray
Fig. 133 Rear ashtray
Opening the ashtray
– Lift the lid. Removing the ashtray
–
Take hold of the lid ⇒ Fig. 133 and lift out the ashtray.
Fitting the ashtray casing
– Open the lid on the ashtray and press the casing into the
mounting as far as it will go.
WARNING
Never put waste paper in the ashtray, as this could cause a fire.
Cigarette lighter*
The 12 volt socket for the cigarette lighter can also be used
as a power source for other electrical appliances.
Fig. 134 Cigarette light-
er in the centre console
Page 159 of 327

157
Seats and storage
Using the cigarette lighter
– Press in the cigarette lighter button.
– Wait for the lighter to pop out slightly.
– Pull out the cigarette lighter immediately.
– Use the glowing heater element of the cigarette lighter to light
your cigarette.
– Put the cigarette lighter back in its socket.
Operating the socket
– Take out the cigarette lighter.
– Insert the plug of the electrical appliance into the cigarette
lighter socket.
The cigarette lighter ⇒ Fig. 134 employs a standard 12 volt socket, which can also be used as a power source for electrical appliances. The applian-
ces connected to the power socket must not exceed a power rating of 100
W.
WARNING
● Be careful when using the electric cigarette lighter. Carelessness or
negligence when using the cigarette lighter can cause burns.
● The lighter will only work when the ignition is switched on.
● The electrical sockets and, therefore, any appliances connected to
them will only work when the ignition is switched on.
CAUTION
Always use the correct type of plugs to avoid damaging the sockets.
Note
The use of electrical appliances with the engine switched off will cause a
battery discharge.
Electric socket in the luggage compartment*
Electrical equipment can be connected to the 12 volt power
socket.
Fig. 135 Detailed view of
the side trim in the lug-
gage compartment:
12 volt power socket
– Lift the power socket cover ⇒
Fig. 135.
– Insert the plug of the electrical appliance into the power socket.
Electrical equipment can be connected to the 12 volt power socket. The ap-
pliances connected to the power socket must not exceed a power rating of
100 W.
Safety FirstOperating instructionsPractical TipsTechnical Specifications
Page 160 of 327

158Seats and storage
WARNING
The power points, and any accessories connected to them are also func-
tional with the ignition switched off or the key removed. To avoid the risk
of injury, never leave children unsupervised in the vehicle.
CAUTION
Always use the correct type of plugs to avoid damaging the sockets.
Note
The use of electrical appliances with the engine switched off will cause a
battery discharge.
230 volt socket for Europlug*
Electrical equipment can also be connected to the 230 volt
socket in the centre console.
Fig. 136 Centre console:
230 volt socket The 230 Volt socket can only be used when the engine is running
⇒
.
In vehicles with folding cover:
– Hold the cover of the socket at the lower recess.
– Lift the cover to open ⇒ Fig. 136.
Inserting the Europlug
– Insert the Europlug in the socket. The childproof safety device
on the socket is deactivated.
– If necessary, press the Europlug as far as possible into the sock-
et to ensure it is correctly inserted and will not jump out of
place while driving over a bump or similar.
LED warning lamp above socket
Steady green
light:The childproof lock is unlocked. The socket is ready for
use
Flashing red
light:There is a fault, for example, disconnection due to ex-
cess current or temperature
Equipment which may be connected
The 230 volt socket can be used to connect electrical equipment with a Eu-
roplug. Please note that the power consumption in this socket must not ex-
ceed 150 watts (peaks of 300 watts).
Even when more than one appliance is connected, the total consumption of
all the appliances must not exceed 150 watts. If necessary, please refer to
the manufacturer's label to confirm the power consumption of the connec-
ted equipment.
All connected appliances should be in perfect working order without any
faults.