2013 NISSAN LEAF display
[x] Cancel search: displayPage 155 of 275
![NISSAN LEAF 2013 1.G Navigation Manual Bluetooth®trademark:
Bluetooth®is a trademark owned
by Bluetooth®SIG, Inc., and
licensed to Clarion.
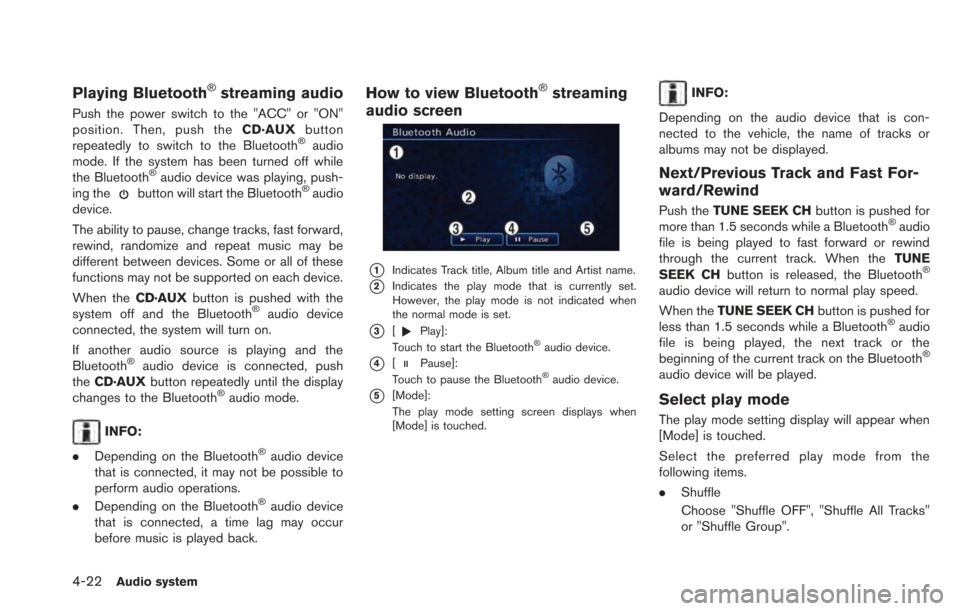
Connecting procedure
1. Push the MENUand touch [Settings].
2. Touch [Bluetooth].
3. Touch [Conne NISSAN LEAF 2013 1.G Navigation Manual Bluetooth®trademark:
Bluetooth®is a trademark owned
by Bluetooth®SIG, Inc., and
licensed to Clarion.
Connecting procedure
1. Push the MENUand touch [Settings].
2. Touch [Bluetooth].
3. Touch [Conne](/manual-img/5/324/w960_324-154.png)
Bluetooth®trademark:
Bluetooth®is a trademark owned
by Bluetooth®SIG, Inc., and
licensed to Clarion.
Connecting procedure
1. Push the MENUand touch [Settings].
2. Touch [Bluetooth].
3. Touch [Connect Bluetooth]. A confirmation
message is displayed.
4. Confirm the contents of the message, thentouch [No].
INFO:
Selecting [Yes] will only connect the hands-
free phone portion of a Bluetooth
®device.
5. Choose a PIN code to use with the compatible Bluetooth®audio device using
the number input screen. The PIN code will
need to be entered into the Bluetooth
®
audio device after step 6.
6. Touch [OK]. The standby message screen will appear. Operate the compatible Blue-
tooth
®audio device. Please refer to the
device’s Owners Manual for the Bluetooth®
audio connection instructions for your spe-
cific device. When the connection is com-
pleted, the screen will return to the
Bluetooth
®setup display.
INFO:
It may not be possible to connect to a Blue-
tooth
®audio profile from the system. In this
case, perform connection operation from the
Bluetooth
®audio player, after connecting the
system and the Bluetooth®audio. For details of
how to perform connection, refer to the Owner’s
Manual of the Bluetooth
®audio player that is
being used.
Audio system4-21
Page 156 of 275

4-22Audio system
Playing Bluetooth®streaming audio
Push the power switch to the "ACC" or "ON"
position. Then, push theCD·AUXbutton
repeatedly to switch to the Bluetooth
®audio
mode. If the system has been turned off while
the Bluetooth
®audio device was playing, push-
ing thebutton will start the Bluetooth®audio
device.
The ability to pause, change tracks, fast forward,
rewind, randomize and repeat music may be
different between devices. Some or all of these
functions may not be supported on each device.
When the CD·AUXbutton is pushed with the
system off and the Bluetooth
®audio device
connected, the system will turn on.
If another audio source is playing and the
Bluetooth
®audio device is connected, push
the CD·AUX button repeatedly until the display
changes to the Bluetooth
®audio mode.
INFO:
. Depending on the Bluetooth
®audio device
that is connected, it may not be possible to
perform audio operations.
. Depending on the Bluetooth
®audio device
that is connected, a time lag may occur
before music is played back.
How to view Bluetooth®streaming
audio screen
*1Indicates Track title, Album title and Artist name.
*2Indicates the play mode that is currently set.
However, the play mode is not indicated when
the normal mode is set.
*3[Play]:
Touch to start the Bluetooth®audio device.
*4[Pause]:
Touch to pause the Bluetooth®audio device.
*5[Mode]:
The play mode setting screen displays when
[Mode] is touched.
INFO:
Depending on the audio device that is con-
nected to the vehicle, the name of tracks or
albums may not be displayed.
Next/Previous Track and Fast For-
ward/Rewind
Push the TUNE SEEK CH button is pushed for
more than 1.5 seconds while a Bluetooth®audio
file is being played to fast forward or rewind
through the current track. When the TUNE
SEEK CH button is released, the Bluetooth
®
audio device will return to normal play speed.
When theTUNE SEEK CH button is pushed for
less than 1.5 seconds while a Bluetooth
®audio
file is being played, the next track or the
beginning of the current track on the Bluetooth
®
audio device will be played.
Select play mode
The play mode setting display will appear when
[Mode] is touched.
Select the preferred play mode from the
following items.
. Shuffle
Choose "Shuffle OFF", "Shuffle All Tracks"
or "Shuffle Group".
Page 157 of 275

.Repeat
Choose "Repeat 1 Track", "Repeat All
Tracks" or "Repeat Group".
Bluetooth®settings
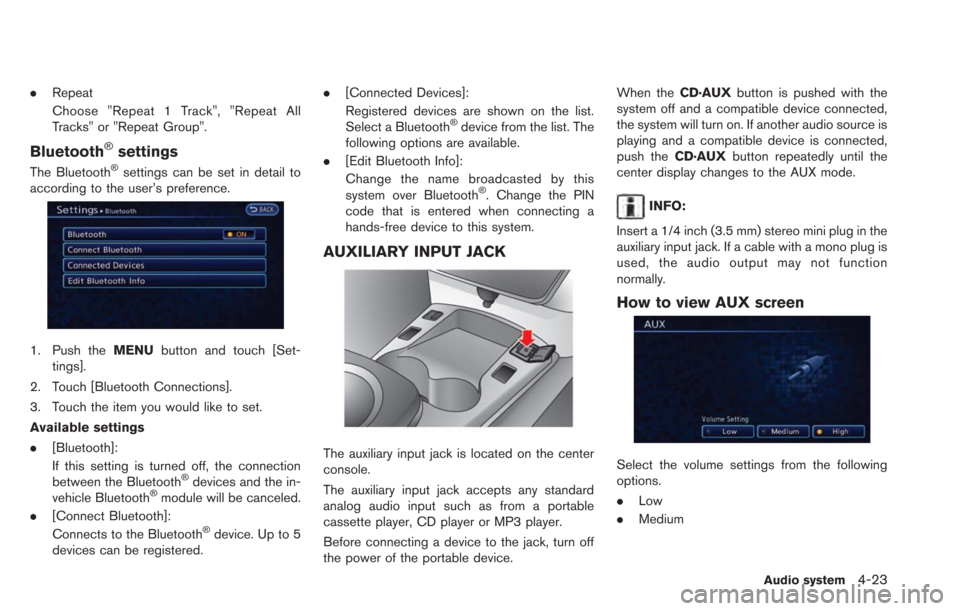
The Bluetooth®settings can be set in detail to
according to the user’s preference.
1. Push the MENUbutton and touch [Set-
tings].
2. Touch [Bluetooth Connections].
3. Touch the item you would like to set.
Available settings
. [Bluetooth]:
If this setting is turned off, the connection
between the Bluetooth
®devices and the in-
vehicle Bluetooth®module will be canceled.
. [Connect Bluetooth]:
Connects to the Bluetooth
®device. Up to 5
devices can be registered. .
[Connected Devices]:
Registered devices are shown on the list.
Select a Bluetooth
®device from the list. The
following options are available.
. [Edit Bluetooth Info]:
Change the name broadcasted by this
system over Bluetooth
®. Change the PIN
code that is entered when connecting a
hands-free device to this system.
AUXILIARY INPUT JACK
The auxiliary input jack is located on the center
console.
The auxiliary input jack accepts any standard
analog audio input such as from a portable
cassette player, CD player or MP3 player.
Before connecting a device to the jack, turn off
the power of the portable device. When the
CD·AUXbutton is pushed with the
system off and a compatible device connected,
the system will turn on. If another audio source is
playing and a compatible device is connected,
push the CD·AUXbutton repeatedly until the
center display changes to the AUX mode.
INFO:
Insert a 1/4 inch (3.5 mm) stereo mini plug in the
auxiliary input jack. If a cable with a mono plug is
used, the audio output may not function
normally.
How to view AUX screen
Select the volume settings from the following
options.
. Low
. Medium
Audio system4-23
Page 161 of 275

5 CARWINGSTM
Telematics overview .................................................................. 5-2
CARWINGSTMoverview.......................................................... 5-4
About service application .................................................. 5-6
Notice for usage................................................................... 5-6
Radio approval number and information ........................ 5-7
Displaying CARWINGS
TMinformation screen ................... 5-7
How to view information screen ...................................... 5-8
Storing favorites ........................................................................\
. 5-9
Google search ........................................................................\
. 5-10
Viewing CARWINGS
TMrecords ........................................ 5-11 CARWINGS
TMsettings ....................................................... 5-12
Setting messages that are received by email ......... 5-12
Information feed setting ................................................ 5-15
Displaying unit ID information ...................................... 5-18
Reset all CARWINGS
TMsettings to default ........... 5-18
Error message on communication ..................................... 5-19
Data communication settings.............................................. 5-20 Automatic carrier settings ............................................. 5-20
Manual carrier settings .................................................. 5-20
Page 167 of 275

RADIO APPROVAL NUMBER AND
INFORMATION
WARNING
.The TCU antenna is installed inside
the upper central part of the instru-
ment panel. An occupant should not
get any closer to the antenna than
specified by the pacemaker manu-
facturer. The radio waves from the
TCU antenna may adversely affect
the operation of the pacemaker
while using the CARWINGS
TMser-
vice.
. Radio waves could adversely affect
electric medical equipment. Those
who use a pacemaker should con-
tact the electric medical equipment
manufacturer regarding the possi-
ble influences before use.
. FCC ID: LHJGNOV1N
The antenna(s) used for this transmitter
must not be co-located or operating in
conjunction with any other antenna or
transmitter. .
IC ID: 2807E-GNOV1N
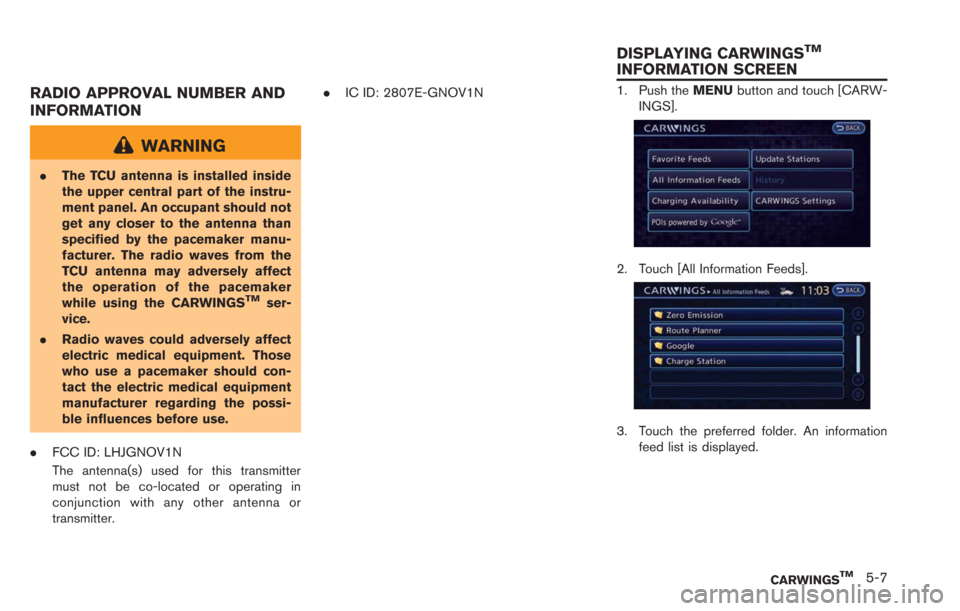
1. Push the MENUbutton and touch [CARW-
INGS].
2. Touch [All Information Feeds].
3. Touch the preferred folder. An information feed list is displayed.
CARWINGSTM5-7
DISPLAYING CARWINGSTM
INFORMATION SCREEN
Page 168 of 275
![NISSAN LEAF 2013 1.G Navigation Manual 5-8CARWINGSTM
4. Touch the preferred information feed. Aninformation feed screen is displayed.
INFO:
. Touch [Stop] while communicating with the
NISSAN CARWINGS Data Center to can-
cel the communicati NISSAN LEAF 2013 1.G Navigation Manual 5-8CARWINGSTM
4. Touch the preferred information feed. Aninformation feed screen is displayed.
INFO:
. Touch [Stop] while communicating with the
NISSAN CARWINGS Data Center to can-
cel the communicati](/manual-img/5/324/w960_324-167.png)
5-8CARWINGSTM
4. Touch the preferred information feed. Aninformation feed screen is displayed.
INFO:
. Touch [Stop] while communicating with the
NISSAN CARWINGS Data Center to can-
cel the communication.
. A message is displayed when the commu-
nication is disconnected while downloading
information due to poor communication
status. Touch [Yes] to restart the download.
HOW TO VIEW INFORMATION
SCREEN
When the information screen is displayed, the
contents are shown with images and sounds.
Screen when Auto-play is on*1When the selected feed includes image data, the
images are displayed. If not, only titles are shown.
*2[Menu]:
Various operation menus become available.
*3[]/[]:
Touch [
] to have the system announce the
previous information. Touch [] to have the
system announce the next information.
*4The page number, the number of information
items, location data information and telephone
data information are displayed.
Auto-play function:
This function receives feeds from the NISSAN
CARWINGS Data Center, displays them on the
screen, and then automatically reads out the
contents.
Screen when Auto-play is offWhen [Menu] is touched during Auto-play, the
Auto-play function stops and the settings
appear on the screen. The items displayed on
the screen vary depending on the feeds that are
received.
Available settings
. [Play]:
The system will resume reading out the
information.
. [Show Map]:
If a feed received includes information about
shops etc., it may also include map data.
Touch to display the map on the screen.
. [New Dest.]:
If a feed received includes map data, the
location can be set as a destination.
. [Add to Route]:
If a route is already set, the location of the
feed received can be added to the route as
Page 169 of 275
![NISSAN LEAF 2013 1.G Navigation Manual a destination or a waypoint.
. [Call]:
If a feed received includes a telephone
number, it will be displayed on the screen.
Touch to make a phone call. A cellular phone
must be connected to the vehicle NISSAN LEAF 2013 1.G Navigation Manual a destination or a waypoint.
. [Call]:
If a feed received includes a telephone
number, it will be displayed on the screen.
Touch to make a phone call. A cellular phone
must be connected to the vehicle](/manual-img/5/324/w960_324-168.png)
a destination or a waypoint.
. [Call]:
If a feed received includes a telephone
number, it will be displayed on the screen.
Touch to make a phone call. A cellular phone
must be connected to the vehicle before
making a phone call.
. [Show Image]:
If a feed received includes image data, it will
be displayed on the screen. Touch to display
the image on the screen.
. [Details]:
Displays detailed information for a selected
feed.
. [Store Loc.]:
If a feed received includes map data, the
location can be registered as a registered
location in the address book .
. [My Location]:
Displays the map for the current position.
. [Lock Feed]:
Protects one of the feeds that are stored in
the history from being deleted.
. [Unlock Feed]:
This will be displayed only when a selected
feed is already protected. Touch to cancel
protection. .
[Delete Feed]
Deletes the feeds that are stored in the
history.
INFO:
. Some images are not displayed depending
on the contents.
. Some words such as personal names, place
names, special terms, symbols, etc. may not
be pronounced correctly. This does not
indicate a malfunction.
. The system will pause announcements when
voice guidance given by the navigation
system occurs. When the voice guidance
finishes, the system will restart the an-
nouncement.
. The volume can be adjusted when the
system announces the information.
“Volume settings” (page 1-16)
A maximum of 16 favorite feeds selected from
the information feeds can be stored in a folder.
1. Push the MENUbutton and touch [CARW-
INGS].
2. Touch [Favorite Feeds].
3. Touch [Add New]. A folder list is displayed.
CARWINGSTM5-9
STORING FAVORITES
Page 170 of 275
![NISSAN LEAF 2013 1.G Navigation Manual 5-10CARWINGSTM
4. Touch the preferred folder from the list. Aninformation feed list is displayed.
5. Touch a favorite feed to be stored.
6. Check the contents of the message, thentouch [Yes]. When the NISSAN LEAF 2013 1.G Navigation Manual 5-10CARWINGSTM
4. Touch the preferred folder from the list. Aninformation feed list is displayed.
5. Touch a favorite feed to be stored.
6. Check the contents of the message, thentouch [Yes]. When the](/manual-img/5/324/w960_324-169.png)
5-10CARWINGSTM
4. Touch the preferred folder from the list. Aninformation feed list is displayed.
5. Touch a favorite feed to be stored.
6. Check the contents of the message, thentouch [Yes]. When the contents of the
information are sent to the NISSAN CARW-
INGS Data Center, the registration is
completed.
INFO:
. The contents that are entered in the favorites
folder need to be transmitted to the NISSAN
CARWINGS Data Center. Registration of
the contents is not completed until the data
is transmitted to the NISSAN CARWINGS
Data Center.
. A message is displayed if communication is
interrupted while downloading information.
Touch [Yes] to restart the download.
Information can be searched by entering key
words using Google.
1. Push the
(Zero Emission menu) button
and touch [CARWINGS].
2. Touch [POIs powered by Google
TM].
3. Select the place for searching.
Available settings
.[Near Current Location]:Search from a location near the current
location.
.[Near Destination]:Search from the locations near the
destination.
.[Near Scroll Position]:Search from any available location.
.[Near City Center]:
Search from a designated location.
GOOGLE SEARCH