2013 NISSAN LEAF buttons
[x] Cancel search: buttonsPage 21 of 275
1 Getting Started
Control buttons and functions ................................................ 1-2Control panel ........................................................................\
1-2
Steering wheel switches .................................................... 1-4
USB connector and Auxiliary input jack ........................ 1-4
Start-up screen ........................................................................\
.. 1-5
Functions disabled while driving ............................................ 1-6
Basic operation ........................................................................\
.. 1-7 Selecting item ....................................................................... 1-7
Adjusting volume and others ............................................ 1-7
Scrolling message or list ................................................... 1-7
How to input letters and numbers .................................. 1-7
Viewing display screens........................................................... 1-9
Map screen........................................................................\
.... 1-9
Zero Emission menu screen ............................................. 1-9 Menu screen ....................................................................... 1-9
Status screen................................................................... 1-10
FM·AM radio screen ....................................................... 1-10
SiriusXM Satellite Radio screen ................................. 1-10
CD·AUX screen ............................................................... 1-10
Items to be set initially .......................................................... 1-11
Subscription to CARWINGS
TMservice.................... 1-11
Inputting user ID and password ................................. 1-11
Storing home location ................................................... 1-12
Connecting cellular phone ........................................... 1-13
Display adjustment ......................................................... 1-14
Volume settings ............................................................... 1-16
Clock settings .................................................................. 1-16
Language and unit settings.......................................... 1-17
Page 22 of 275
1-2Getting Started
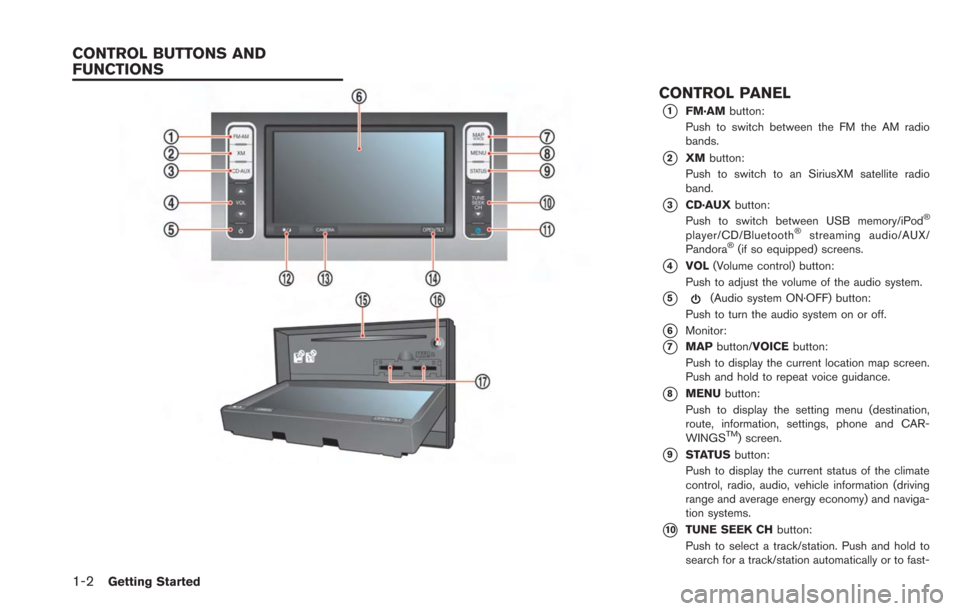
CONTROL PANEL
*1FM·AMbutton:
Push to switch between the FM the AM radio
bands.
*2XM button:
Push to switch to an SiriusXM satellite radio
band.
*3CD·AUX button:
Push to switch between USB memory/iPod®
player/CD/Bluetooth®streaming audio/AUX/
Pandora®(if so equipped) screens.
*4VOL (Volume control) button:
Push to adjust the volume of the audio system.
*5(Audio system ON·OFF) button:
Push to turn the audio system on or off.
*6Monitor:
*7MAP button/VOICE button:
Push to display the current location map screen.
Push and hold to repeat voice guidance.
*8MENU button:
Push to display the setting menu (destination,
route, information, settings, phone and CAR-
WINGS
TM) screen.
*9STATUS button:
Push to display the current status of the climate
control, radio, audio, vehicle information (driving
range and average energy economy) and naviga-
tion systems.
*10TUNE SEEK CH button:
Push to select a track/station. Push and hold to
search for a track/station automatically or to fast-
CONTROL BUTTONS AND
FUNCTIONS
Page 25 of 275
![NISSAN LEAF 2013 1.G Navigation Manual 1. The system starts when the power switch ispushed to the "ACC" or "ON" position. The
start-up screen is displayed.
2. Check the message that is displayed on the
screen and touch [OK].
Subject to the NISSAN LEAF 2013 1.G Navigation Manual 1. The system starts when the power switch ispushed to the "ACC" or "ON" position. The
start-up screen is displayed.
2. Check the message that is displayed on the
screen and touch [OK].
Subject to the](/manual-img/5/324/w960_324-24.png)
1. The system starts when the power switch ispushed to the "ACC" or "ON" position. The
start-up screen is displayed.
2. Check the message that is displayed on the
screen and touch [OK].
Subject to the selected items, a different
indication may be displayed at subsequent
times. The set-up screen will be displayed
again after a given period of time.
INFO:
. The setting can be changed from [Vehicle
Data Transmission Setting] in CAR-
WINGS
TMsetting.“CARWINGSTMsettings” (page 5-12)
. If you do not select [OK], vehicle data will
not be stored in the NISSAN CARWINGS
Data Center and you will not be able to
check it via the NISSAN Owner’s Portal
Website.
Also, if [Share Vehicle Information] is set to
OFF, vehicle data will not be uploaded.
Make sure that this setting is ON.
When [Service Reminder] is set to ON,
communication with the NISSAN CARW-
INGS Data Center will be performed once
daily. NISSAN recommends that you set
[Service Reminder] to ON.
“CARWINGSTMsettings” (page 5-12)
NOTE:
. Navigation functions, audio, hands-free
phone, vehicle information display, etc.
can still be operated even if [Decline] is
touched. However, if the CARWINGS
TM
function is selected, the start-up screen
will be displayed again. .
If other buttons such as the MAP
button or MENU button etc., are
pressed without [OK] or [Decline] being
touched, the corresponding screen will
be displayed and operations can be
performed. However, if the CAR-
WINGS
TMfunction is selected, the
start-up screen will be displayed again.
Getting Started1-5
START-UP SCREEN
Page 242 of 275
10-16Troubleshooting guide/General system information
CARWINGSTM
SymptomPossible cause Possible solution
The system cannot connect to the
NISSAN CARWINGS Data Center. A subscription for the CARWINGSTMservice has not been
established. Sign up for a subscription to the CARWINGSTMservice. For details
about subscriptions, contact a NISSAN certified LEAF dealer.
The user ID and password are not entered. Enter the user ID and password.
“Inputting user ID and password” (page 1-11)
The communication line is busy. Try again after a short period of time.
The vehicle is in a location where it is difficult to receive radio
waves. When the vehicle moves to an area where radio waves can be
transmitted sufficiently, communication will be restored. When the
icon on the display shows that the vehicle is inside the
communication area, the system can be used.
TCU is not turned on. If the icon does not show that the vehicle is inside the communication area despite the fact that the vehicle is in that
location, contact a NISSAN certified LEAF dealer.
Radio wave reception is not sufficient for TCU operation. When the vehicle moves to an area where radio waves can be transmitted sufficiently, communication will be restored. When the
icon on the display shows that the vehicle is inside the
communication area, the system can be used.
Communication may sometimes not be possible even when
the network status is good. Signing in again may restore the connection.
Some of the items that are displayed
on the menu screen cannot be se-
lected. The vehicle is being driven and some menu items are
disabled.
The vehicle is being driven. Stop the vehicle in a safe location and
apply the parking brake before operating the functions.
“Functions disabled while driving” (page 1-6)
Some parts of the screen are not
displayed. The vehicle is being driven and some menu items are
disabled. Operate the system after stopping the vehicle in a safe location and
applying the parking brake.
“Functions disabled while driving” (page 1-6)
The system does not announce in-
formation. The volume level is set to the minimum.
Adjust the volume level by operating theVOLbuttons located on
the control panel or on the steering wheel switch while the system
is announcing information.
Page 258 of 275
10-32Troubleshooting guide/General system information
the lower right corner of the screen. Also, at
this time, voice guidance will announce,
“The route to the destination includes roads
through incomplete map areas. Voice gui-
dance will not be provided in these areas.”
When approaching the endpoint of the
suggested route, voice guidance will an-
nounce, “Entering the road with incomplete
map data. Use the direction arrow and
distance information to proceed to your
destination.”
To reach the destination, refer to the map
screen. Always follow actual roads and
regulations and drive safely.
. The suggested route may not be the short-
est, nor are other circumstances such as
traffic jams considered.
. Because of the inevitable difference in road
conditions and circumstances between the
time you use this system and the time the
information was produced for the map data,
there may be discrepancies in roads and
regulations. In such cases, follow the actual
information available.
. During route calculation, the map will not
scroll, however the vehicle icon will move
with the actual vehicle’s movement. .
During route calculation, buttons such as
theMAP button and the MENUbutton will
be disabled.
. In some cases, after the calculation is
complete, the calculated route may not be
immediately displayed.
. Waypoints that have been passed will be
disregarded by rerouting calculation.
. If you scroll the map while the suggested
route is being drawn, it may take more time
to finish drawing.
. If waypoints are set, the system calculates
multiple routes between waypoints simulta-
neously, and the following may result.
— If one section between waypoints cannot
be calculated, none of the route will be
displayed.
— The route may not connect completely at some waypoints.
— The route may require a U-turn close to some waypoints.
. Route calculation may not be completed in
the following cases.
— If there is no main road within a range of
1.5 miles (2.5 km) from the vehicle, a
message saying so will appear on the
screen. Try recalculating when the vehi-
cle is closer to a main road. — If there is no main road within a range of
1.5 miles (2.5 km) from the destination or
waypoint, a message saying so will
appear on the screen. Try setting the
location closer to a main road.
— If the vehicle is too close to the destina- tion or if there are no roads to the
destination, a message saying so will
appear on the screen.
— If it is impossible to reach the destination or waypoints because of traffic regula-
tions, etc.
— If the only route to reach the destination or waypoints is extremely complicated.
. The following may occur when the route is
displayed.
— If you calculate a route on a main road,
the starting point of the route may not
exactly match the current vehicle loca-
tion.
— The endpoint of the route may not exactly match the destination.
— If you calculate a route on a main road, the system may display a route from
another main road. This may be because
the position of the vehicle icon is not
accurate. In this case, park the vehicle in
a safe location and reset the vehicle icon,
or continue driving to see if the position
Page 271 of 275
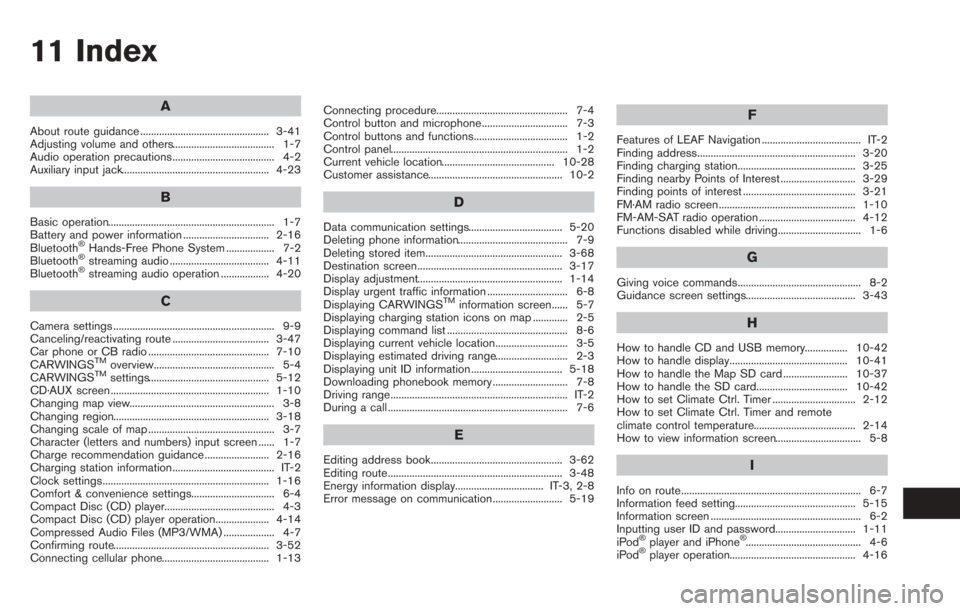
11 Index
A
About route guidance ................................................ 3-41
Adjusting volume and others...................................... 1-7
Audio operation precautions...................................... 4-2
Auxiliary input jack....................................................... 4-23
B
Basic operation.............................................................. 1-7
Battery and power information ................................ 2-16
Bluetooth
®Hands-Free Phone System .................. 7-2
Bluetooth®streaming audio ..................................... 4-11
Bluetooth®streaming audio operation .................. 4-20
C
Camera settings ............................................................ 9-9
Canceling/reactivating route .................................... 3-47
Car phone or CB radio ............................................. 7-10
CARWINGS
TMoverview............................................. 5-4
CARWINGSTMsettings............................................. 5-12
CD·AUX screen ........................................................... 1-10
Changing map view...................................................... 3-8
Changing region.......................................................... 3-18
Changing scale of map ............................................... 3-7
Character (letters and numbers) input screen ...... 1-7
Charge recommendation guidance ........................ 2-16
Charging station information...................................... IT-2
Clock settings.............................................................. 1-16
Comfort & convenience settings............................... 6-4
Compact Disc (CD) player......................................... 4-3
Compact Disc (CD) player operation.................... 4-14
Compressed Audio Files (MP3/WMA) ................... 4-7
Confirming route.......................................................... 3-52
Connecting cellular phone........................................ 1-13 Connecting procedure................................................. 7-4
Control button and microphone................................ 7-3
Control buttons and functions................................... 1-2
Control panel.................................................................. 1-2
Current vehicle location.......................................... 10-28
Customer assistance.................................................. 10-2
D
Data communication settings................................... 5-20
Deleting phone information......................................... 7-9
Deleting stored item................................................... 3-68
Destination screen...................................................... 3-17
Display adjustment...................................................... 1-14
Display urgent traffic information .............................. 6-8
Displaying CARWINGS
TMinformation screen...... 5-7
Displaying charging station icons on map ............. 2-5
Displaying command list ............................................. 8-6
Displaying current vehicle location........................... 3-5
Displaying estimated driving range........................... 2-3
Displaying unit ID information .................................. 5-18
Downloading phonebook memory ............................ 7-8
Driving range.................................................................. IT-2
During a call ................................................................... 7-6
E
Editing address book................................................. 3-62
Editing route................................................................. 3-48
Energy information display................................. IT-3, 2-8
Error message on communication.......................... 5-19
F
Features of LEAF Navigation ..................................... IT-2
Finding address........................................................... 3-20
Finding charging station............................................ 3-25
Finding nearby Points of Interest ............................ 3-29
Finding points of interest .......................................... 3-21
FM·AM radio screen................................................... 1-10
FM-AM-SAT radio operation .................................... 4-12
Functions disabled while driving............................... 1-6
G
Giving voice commands.............................................. 8-2
Guidance screen settings......................................... 3-43
H
How to handle CD and USB memory................ 10-42
How to handle display............................................ 10-41
How to handle the Map SD card ........................ 10-37
How to handle the SD card.................................. 10-42
How to set Climate Ctrl. Timer ............................... 2-12
How to set Climate Ctrl. Timer and remote
climate control temperature...................................... 2-14
How to view information screen................................ 5-8
I
Info on route................................................................... 6-7
Information feed setting............................................. 5-15
Information screen ........................................................ 6-2
Inputting user ID and password.............................. 1-11
iPod
®player and iPhone®........................................... 4-6
iPod®player operation............................................... 4-16