2013 MERCEDES-BENZ SL-CLASS ROADSTER display
[x] Cancel search: displayPage 467 of 572
is shown in the status bar in front of the
area name.
i You can
also use this function in the five-
day forecast ( Y page 462), and in the
detailed information view ( Y page 462).
Selecting a location from the weather
memory X
From the weather memory: in the
information chart, select Position by
turning cVd the COMAND controller and
press W to confirm.
X Select Memory and press W to confirm.
X Select a preset that contains an entry by
turning cVd or sliding ZVÆ the COMAND
controller and press W to confirm.
The weather data for the selected area is
displayed.
X Rapid selection: if there is an entry
available in
the weather memory, e.g. when
the daily forecast is shown, briefly press a
number key, such as l.
The weather data for the selected location
is displayed. Weather map
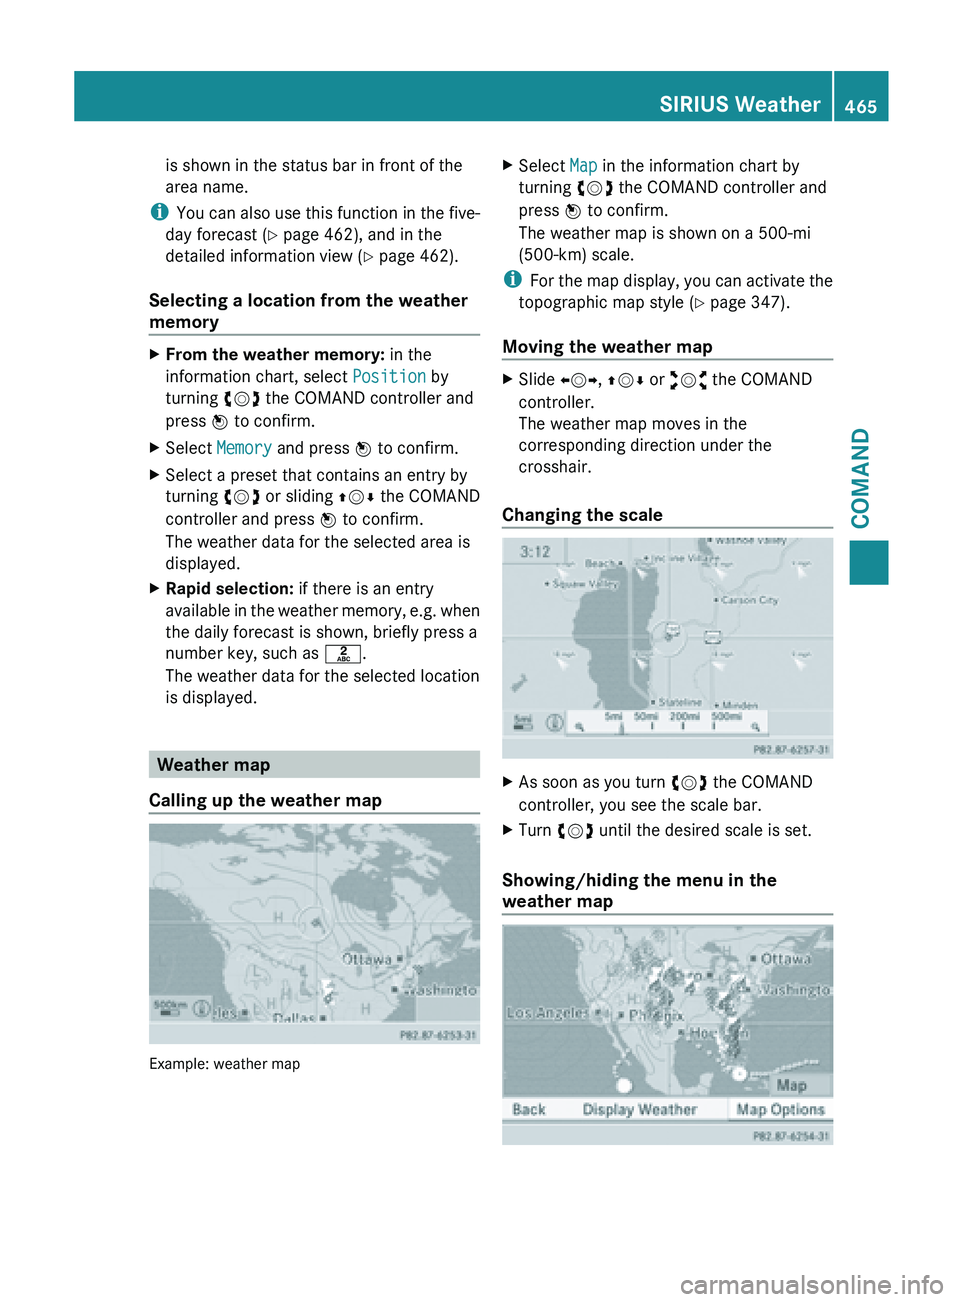
Calling up the weather map Example: weather map X
Select Map in the information chart by
turning cVd the COMAND controller and
press W to confirm.
The weather map is shown on a 500-mi
(500-km) scale.
i For the
map display, you can activate the
topographic map style ( Y page 347).
Moving the weather map X
Slide XVY, ZVÆ or aVb the COMAND
controller.
The weather map moves in the
corresponding direction under the
crosshair.
Changing the scale X
As soon as you turn cVd the COMAND
controller, you see the scale bar.
X Turn cVd until the desired scale is set.
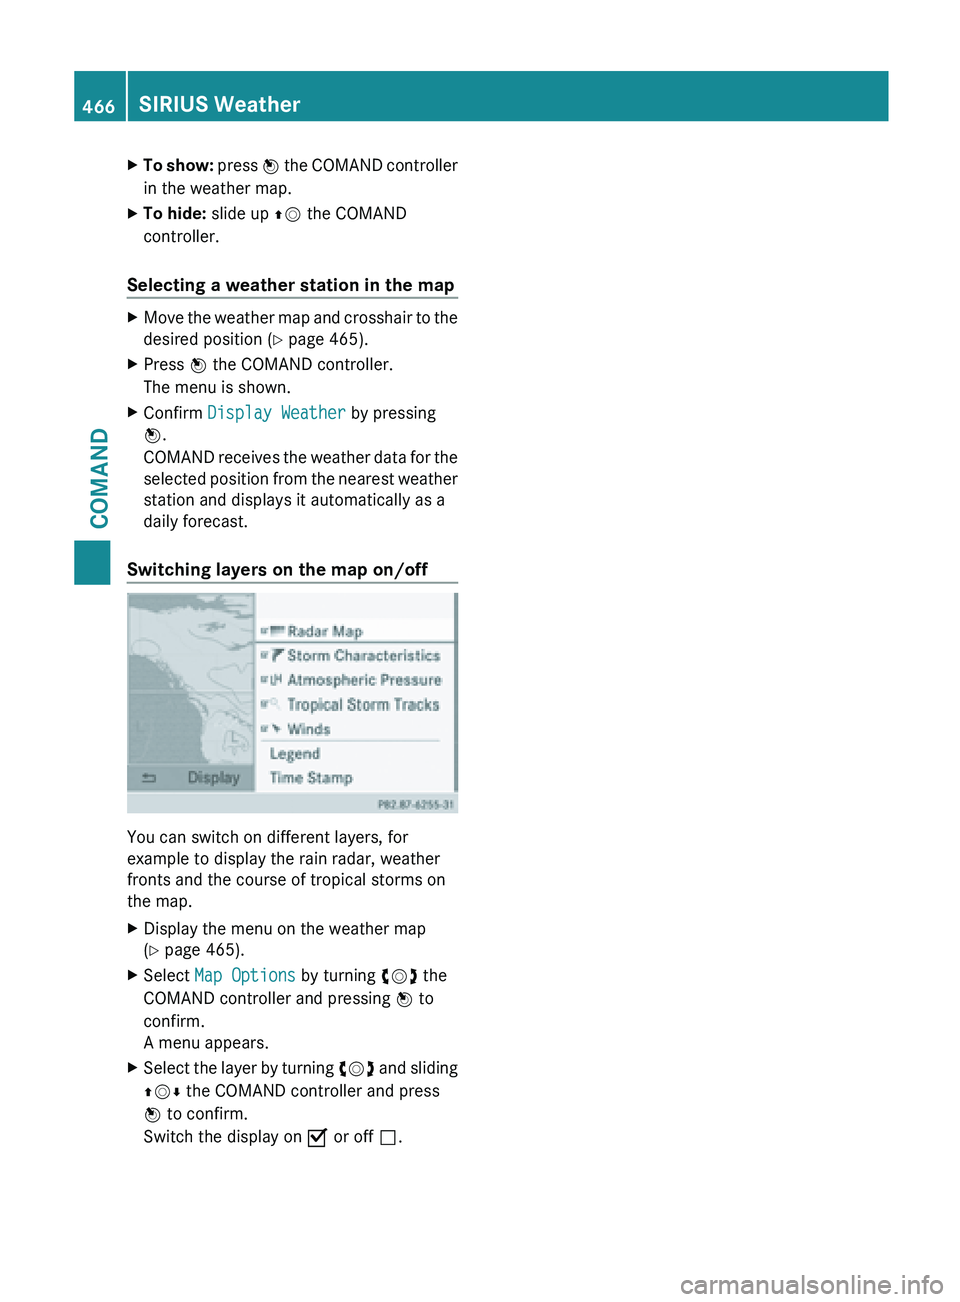
Showing/hiding the menu in the
weather map SIRIUS Weather
465
COMAND Z
Page 468 of 572
X
To show: press W the COMAND controller
in the weather map.
X To hide: slide up ZV the COMAND
controller.
Selecting a weather station in the map X
Move the weather map and crosshair to the
desired position ( Y page 465).
X Press W the COMAND controller.
The menu is shown.
X Confirm Display Weather by pressing
W.
COMAND receives
the weather data for the
selected position from the nearest weather
station and displays it automatically as a
daily forecast.
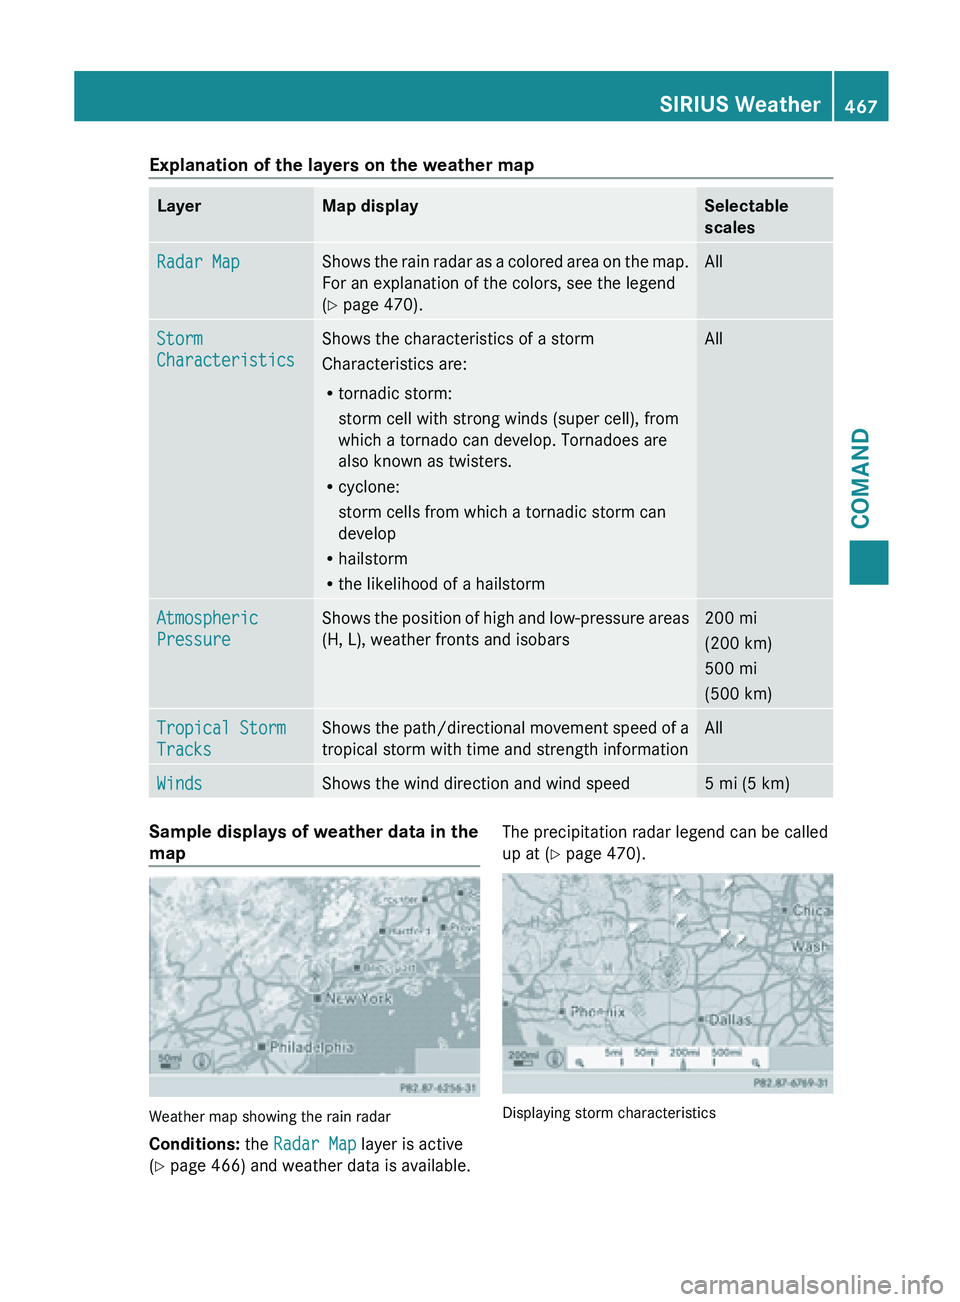
Switching layers on the map on/off You can switch on different layers, for
example to display the rain radar, weather
fronts and the course of tropical storms on
the map.
X
Display the menu on the weather map
(Y page 465).
X Select Map Options by turning cVd the
COMAND controller and pressing W to
confirm.
A menu appears.
X Select the layer by turning cVd and
sliding
ZVÆ the COMAND controller and press
W to confirm.
Switch the display on O or off ª.466
SIRIUS Weather
COMAND
Page 469 of 572
Explanation of the layers on the weather map
Layer Map display Selectable
scales
Radar Map Shows the rain radar as a colored area on the map.
For an explanation of the colors, see the legend
(Y page 470). All
Storm
Characteristics Shows the characteristics of a storm
Characteristics are:
R
tornadic storm:
storm cell with strong winds (super cell), from
which a tornado can develop. Tornadoes are
also known as twisters.
R cyclone:
storm cells from which a tornadic storm can
develop
R hailstorm
R the likelihood of a hailstorm All
Atmospheric
Pressure Shows the position of high and low-pressure areas
(H, L), weather fronts and isobars 200 mi
(200 km)
500 mi
(500 km)
Tropical Storm
Tracks Shows the path/directional movement speed of a
tropical storm with time and strength information All
Winds Shows the wind direction and wind speed 5 mi (5 km)
Sample displays of weather data in the
map
Weather map showing the rain radar
Conditions:
the Radar Map layer is active
(Y page 466) and weather data is available. The precipitation radar legend can be called
up at (
Y page 470). Displaying storm characteristics SIRIUS Weather
467COMAND Z
Page 471 of 572
Weather
front Explanation
Stationary
front The weather front moves
minimally. The weather
remains changeable in this
area.
Occlusion This occurs when a faster cold
front reaches an advancing
warm front and combines
with it. The weather remains
changeable and rainy within
an occlusion.
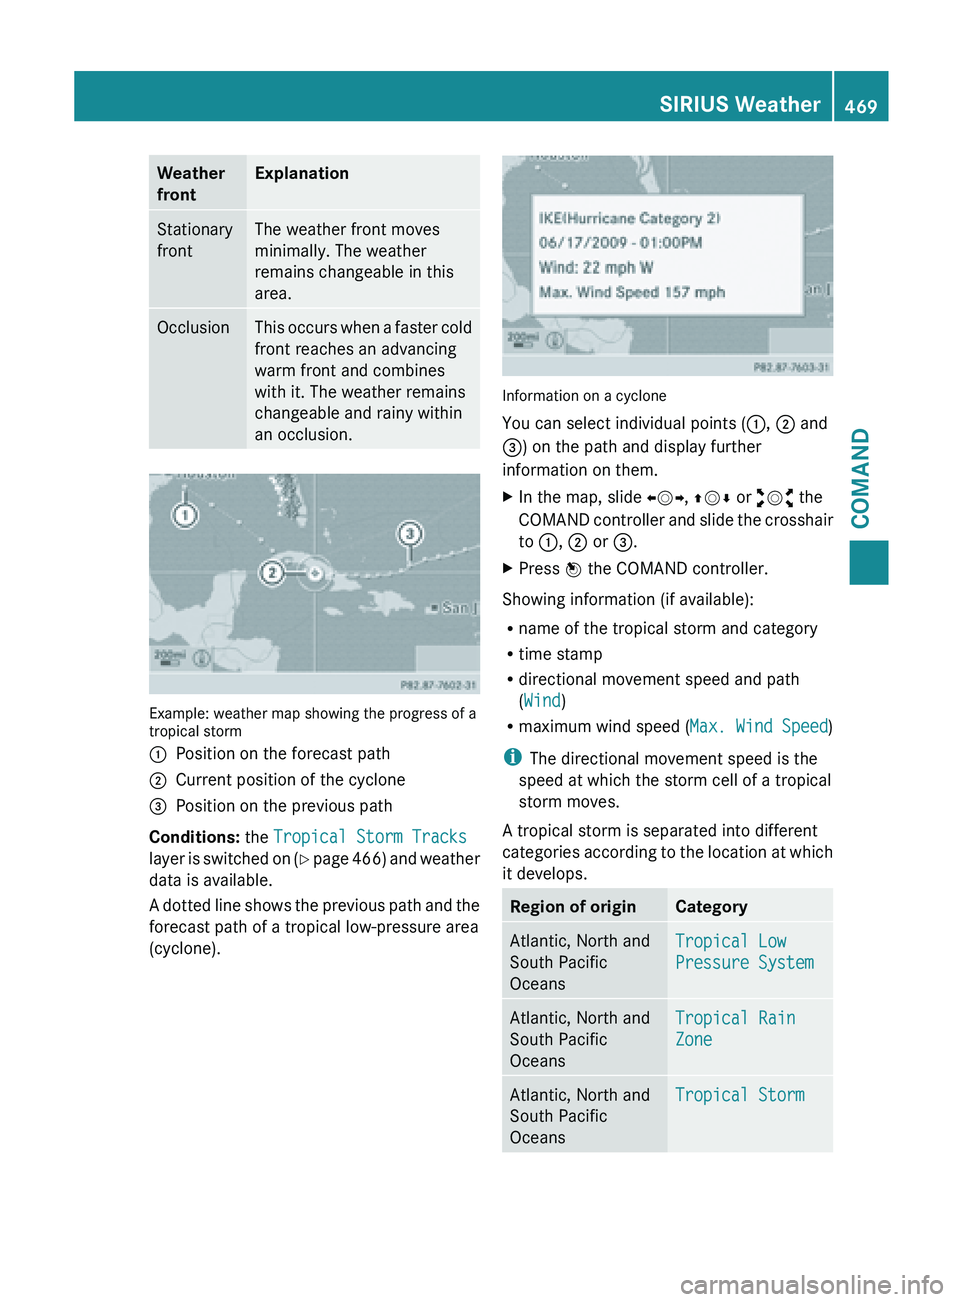
Example: weather map showing the progress of a
tropical storm
:
Position on the forecast path
; Current position of the cyclone
= Position on the previous path
Conditions: the Tropical Storm Tracks
layer is
switched on (Y page 466) and weather
data is available.
A dotted line shows the previous path and the
forecast path of a tropical low-pressure area
(cyclone). Information on a cyclone
You can select individual points (
:, ; and
=) on the path and display further
information on them.
X In the map, slide XVY, ZVÆ or aVb the
COMAND controller
and slide the crosshair
to :, ; or =.
X Press W the COMAND controller.
Showing information (if available):
R name of the tropical storm and category
R time stamp
R directional movement speed and path
(Wind)
R maximum wind speed ( Max. Wind Speed)
i The directional movement speed is the
speed at which the storm cell of a tropical
storm moves.
A tropical storm is separated into different
categories according
to the location at which
it develops. Region of origin Category
Atlantic, North and
South Pacific
Oceans
Tropical Low
Pressure System
Atlantic, North and
South Pacific
Oceans
Tropical Rain
Zone
Atlantic, North and
South Pacific
Oceans
Tropical StormSIRIUS Weather
469
COMAND Z
Page 472 of 572
Region of origin Category
Atlantic, North and
South Pacific
Oceans
Hurricane
Category 1 to
Hurricane
Category 5
Northwestern
Pacific Ocean
Tropical Low
Pressure System
Northwestern
Pacific Ocean
Tropical Cyclone
Northwestern
Pacific Ocean
Typhoon
Northwestern
Pacific Ocean
Super-Typhoon
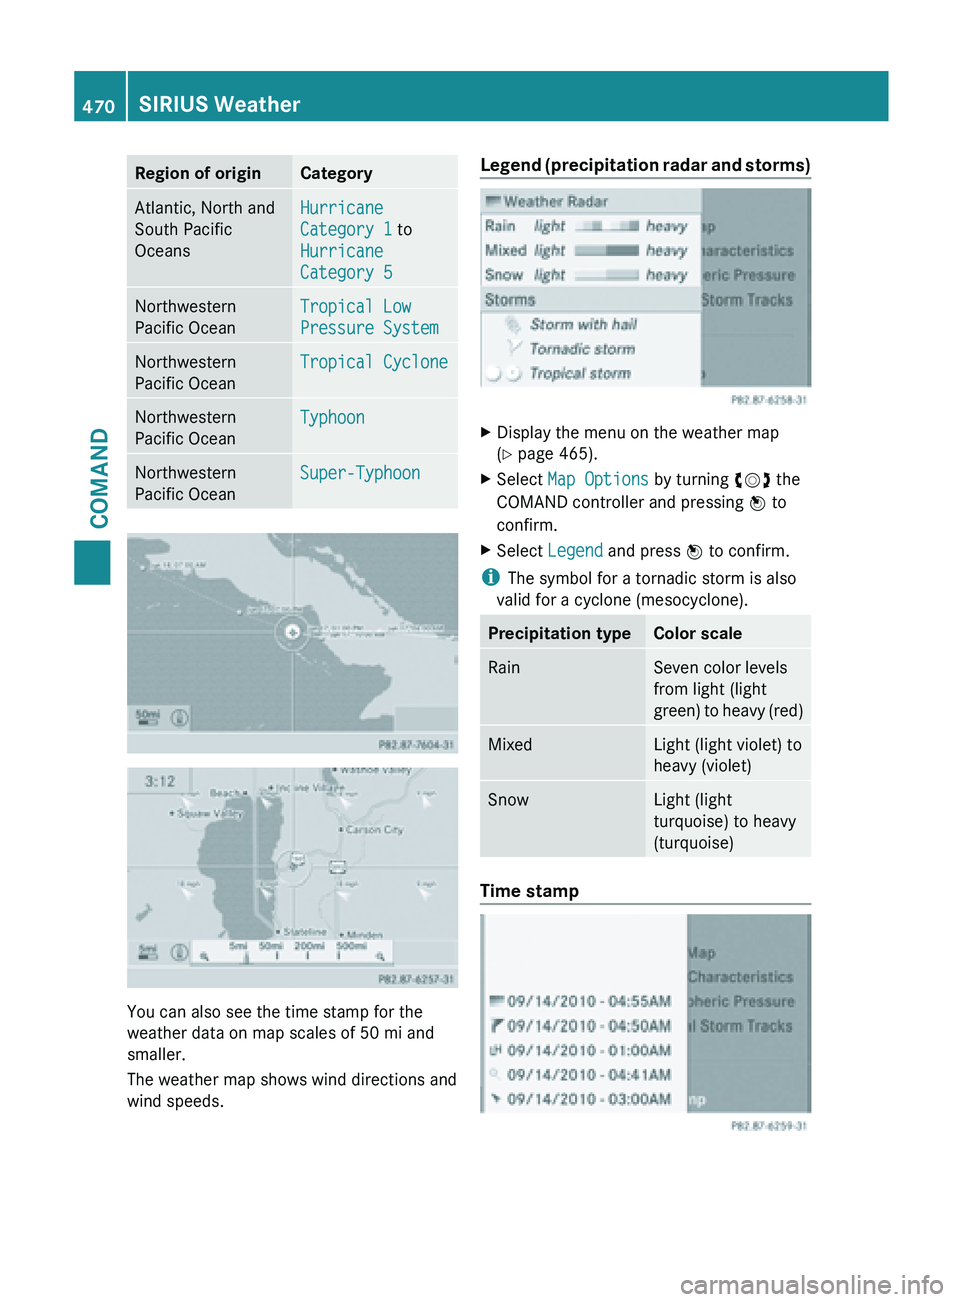
You can also see the time stamp for the
weather data on map scales of
50 mi and
smaller.
The weather map shows wind directions and
wind speeds. Legend
(precipitation radar and storms)
X
Display the menu on the weather map
(Y page 465).
X Select Map Options by turning cVd the
COMAND controller and pressing W to
confirm.
X Select Legend and press W to confirm.
i The symbol for a tornadic storm is also
valid for a cyclone (mesocyclone). Precipitation type Color scale
Rain Seven color levels
from light (light
green)
to
heavy (red) Mixed Light (light violet) to
heavy (violet)
Snow Light (light
turquoise) to heavy
(turquoise)
Time stamp470
SIRIUS Weather
COMAND
Page 473 of 572
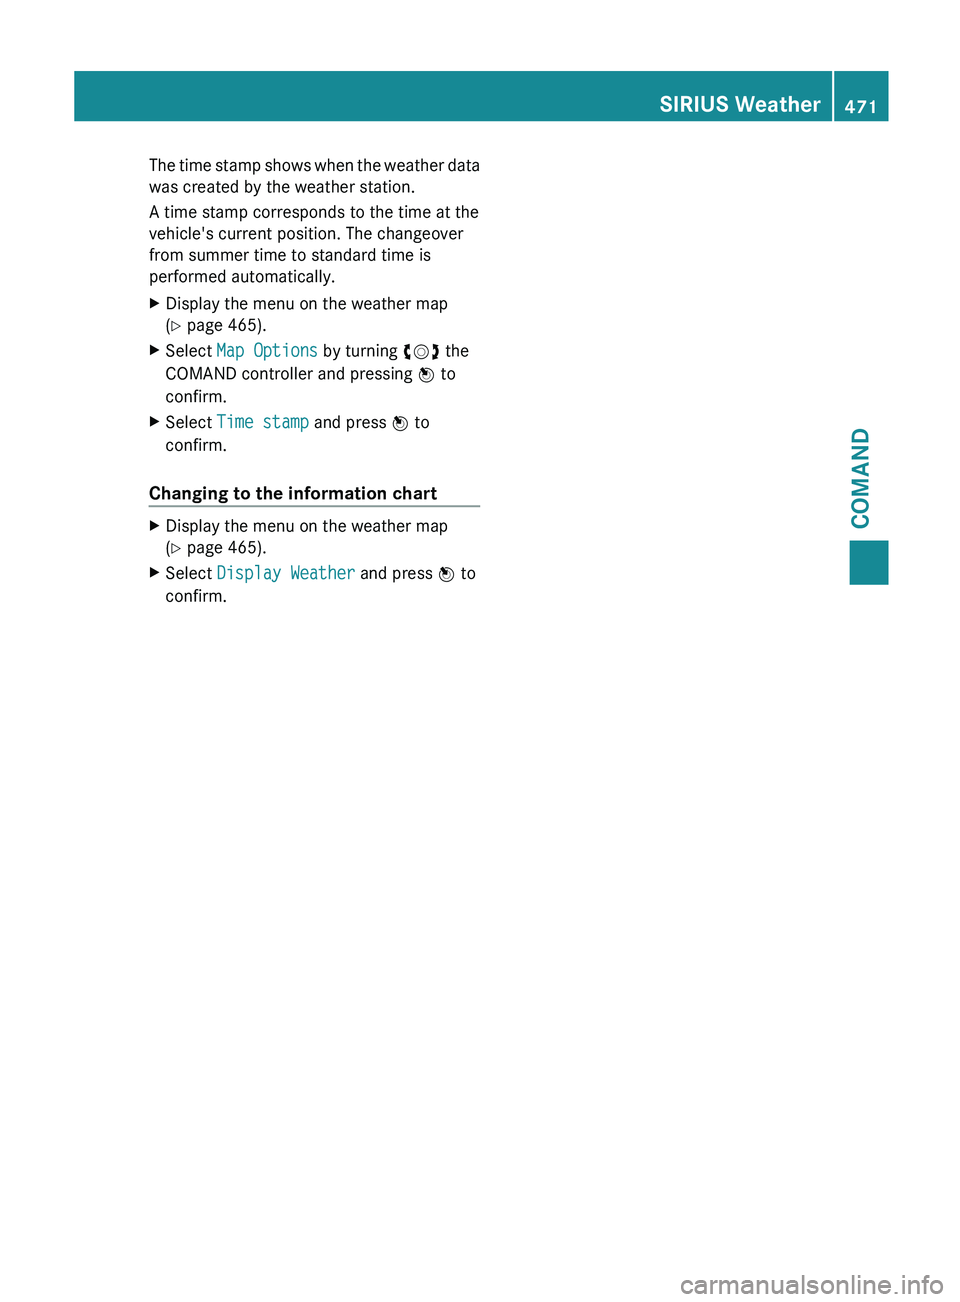
The time stamp shows when the weather data
was created by the weather station.
A time stamp corresponds to the time at the
vehicle's current position. The changeover
from summer time to standard time is
performed automatically.
X
Display the menu on the weather map
(Y page 465).
X Select Map Options by turning cVd the
COMAND controller and pressing W to
confirm.
X Select Time stamp and press W to
confirm.
Changing to the information chart X
Display the menu on the weather map
(Y page 465).
X Select Display Weather and press W to
confirm. SIRIUS Weather
471COMAND Z
Page 488 of 572
Shortly after successfully registering with the
mbrace service, a user ID and password will
be
sent
to you by mail. USA only: you can use
this password to log onto the mbrace area
under "Owners Online" at http://
www.mbusa.com.
The mbrace system is available if:
R it has been activated and is operational.
R the corresponding mobile phone network
is available for transmitting data to the
Customer Assistance Center.
R a service subscription is available.
R the starter battery is sufficiently charged.
i Determining the location of the vehicle on
a map is only possible if:
R GPS reception is available
R the vehicle position can be forwarded to
the Customer Assistance Center.
The mbrace system To adjust the volume during an mbrace call,
proceed as follows:
X
Press the W or X button on the
multifunction steering wheel.
or
X Use the volume controller of COMAND.
The mbrace system provides various
services, e.g.:
R automatic and manual emergency call
R Roadside Assistance call
R MB Info call
USA only: you can find information and a
description of all available features under
"Owners Online"
at http://www.mbusa.com. System self-test G
WARNING
A malfunction in the system has been
detected if one of the following conditions
occurs:
R the indicator lamp in the SOS button does
not light up during the system self-
diagnosis.
R the indicator lamp in the F Roadside
Assistance button does not light up during
the system self-diagnosis.
R the indicator lamp in the ï information
button does not light up during self-
diagnosis of the system.
R the indicator lamp in the SOS button, the
F Roadside Assistance button or the
ï information button continues to light
up red after the system self-diagnosis.
R The mbrace Inoperative or mbrace
Service Not Activated message
appears in the multifunction display after
the system self-diagnosis.
If a
malfunction is indicated as outlined above,
the system may not operate as expected. In
the event of an emergency, assistance must
be summoned by other means.
Have the system checked at the nearest
authorized Mercedes-Benz Center or contact
the following service hotlines:
R USA: Mercedes-Benz Customer Assistance
center at
1-800-FOR-MERCedes (1-800-367-6372)
or 1-888-990-9007
R Canada: Customer Service at
1-888-923-8367
After you have switched on the ignition, the
system carries out a self-diagnosis. 486
Features
Stowage and features
Page 489 of 572
Emergency call
Important safety notes
G
WARNING
If the indicator lamp in the SOS button is
flashing continuously and no voice
connection with the Response center has
been established, then the mbrace system
has not
been able to initiate an emergency call
(e.g. the relevant mobile phone network is not
available).
The Call Failed message is displayed in the
multifunction display and must be confirmed.
Should this occur, assistance must be
summoned by other means.
An emergency call is dialed automatically if
an air bag or Emergency Tensioning Device is
triggered.
i You cannot end an automatically
triggered emergency call yourself.
An emergency call can also be initiated
manually.
As soon as the emergency call has been
initiated, the indicator lamp in the SOS button
flashes. The Connecting Call message
appears on the multifunction display.
The audio output is muted.
Once the connection has been made, the
Call Connected message appears in the
multifunction display.
All important information on the emergency
is transmitted, for example:
R current location of the vehicle (as
determined by the GPS system)
R vehicle identification number
R information on serious accidents
Shortly after the emergency call has been
initiated, a voice connection is automatically
established between the Mercedes-Benz
Customer Assistance Center and the vehicle
occupants. If the vehicle occupants respond,
the Mercedes-Benz Customer Assistance
Center attempts to get more information on
the emergency. i
If there is no response from the vehicle
occupants, an ambulance is immediately
sent to the vehicle.
Making an emergency call G
WARNING
If you feel at any way in jeopardy when in the
vehicle (e.g. smoke or fire in the vehicle,
vehicle in a dangerous road location), please
do not wait for voice contact after you have
pressed the SOS button. Carefully leave the
vehicle and move to a safe location. The
Response Center will automatically contact
local emergency officials with the vehicle's
approximate location if they receive an
automatic SOS
signal and cannot make voice
contact with the vehicle occupants. X
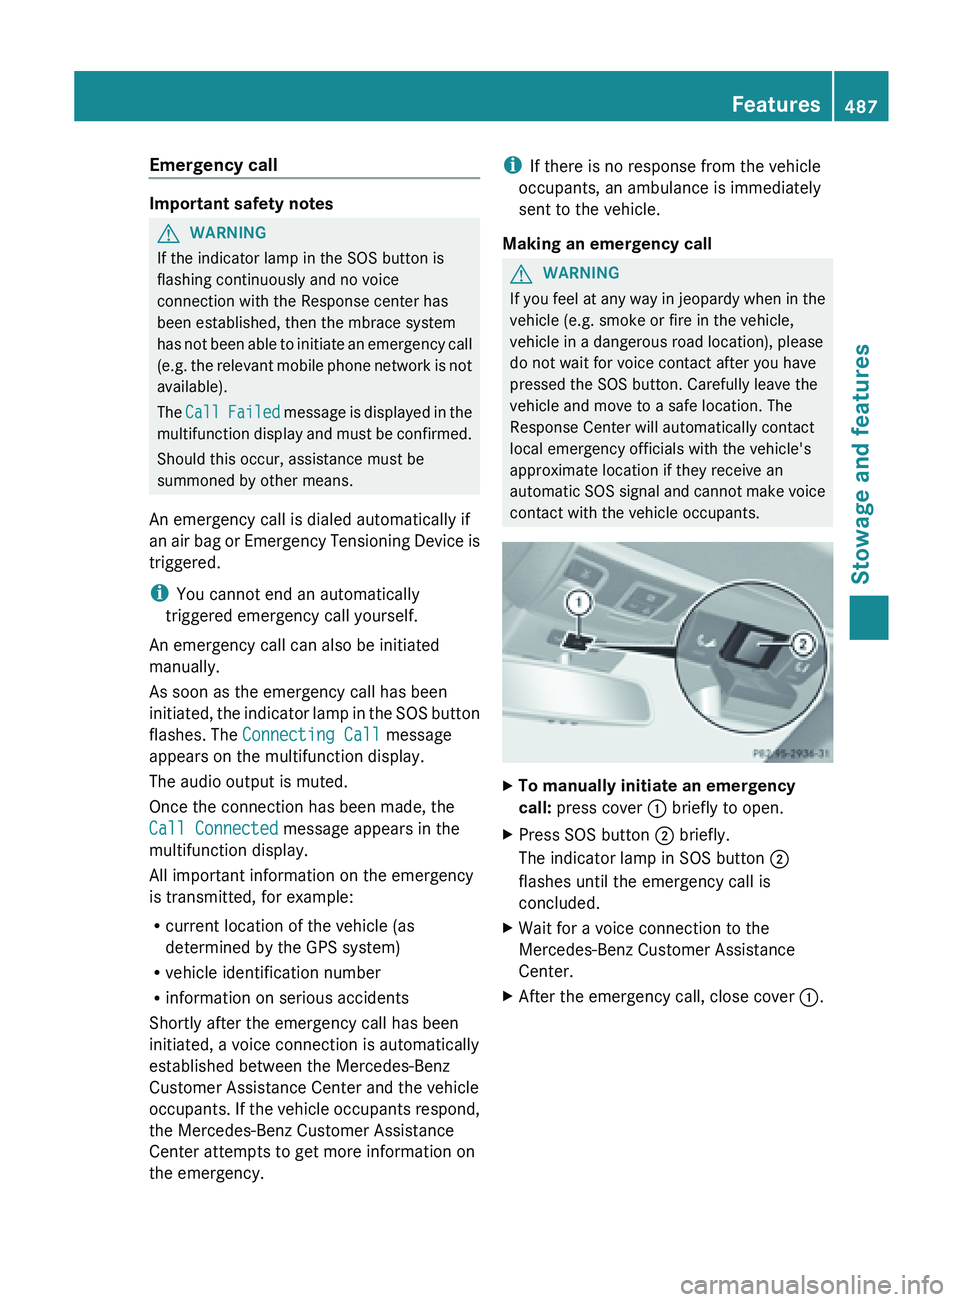
To manually initiate an emergency
call: press cover : briefly to open.
X Press SOS button ; briefly.
The indicator lamp in SOS button ;
flashes until the emergency call is
concluded.
X Wait for a voice connection to the
Mercedes-Benz Customer Assistance
Center.
X After the emergency call, close cover :. Features
487
Stowage and features Z