2013 MERCEDES-BENZ S-CLASS SEDAN phone
[x] Cancel search: phonePage 209 of 536

p To select the character set
*/E To select uppercase and
lowercase letters
% Back
F To delete your selection
¬ To confirm your selection
? Preset phone category
X Enter the respective data in the data fields.
X To enter data in the data field: select the
respective characters from character bar
=.
X To move the cursor in the data field:
select the respective characters from
character bar =.
X To change data fields: slide ZV the
COMAND
controller until the character bar
is hidden.
X Slide ZVÆ the COMAND controller and
press W to confirm.
or
X Press Æ in the character bar.
X To cancel data entry: select the %
symbol in the character bar and press W
to confirm.
If one of the data fields contains data, a
prompt will appear asking whether you
wish to store the entry.
X To save data entry: select the ¬
symbol in the character bar and press W
to confirm.
The
entry is created in the phone book and
in the address book. Deleting contacts X
To delete a group of contacts: select
Data/Connections
in the telephone basic
menu by sliding VÆ and turning cVd the
COMAND controller and press W to
confirm.
X Select Delete Contacts and press W to
confirm.
You can select and delete the following types
of contact here:
R Internal Contacts
R Imported from Memory Card
R Imported via Bluetooth
R Delete All
X Confirm the selection by pressing W.
A
prompt appears asking whether the data
should be deleted.
X Select Yes and press W to confirm.
X To delete an individual contact: select
the entry ( Y page 205).
X Select Options by sliding VY the
COMAND controller and press W to
confirm.
X Select Delete and press W to confirm.
A
prompt appears asking whether the data
should be deleted.
X Select Yes and press W to confirm.
i Automatically imported contacts cannot
be deleted
(Y page 204). Telephone
207
COMAND Z
Page 210 of 536

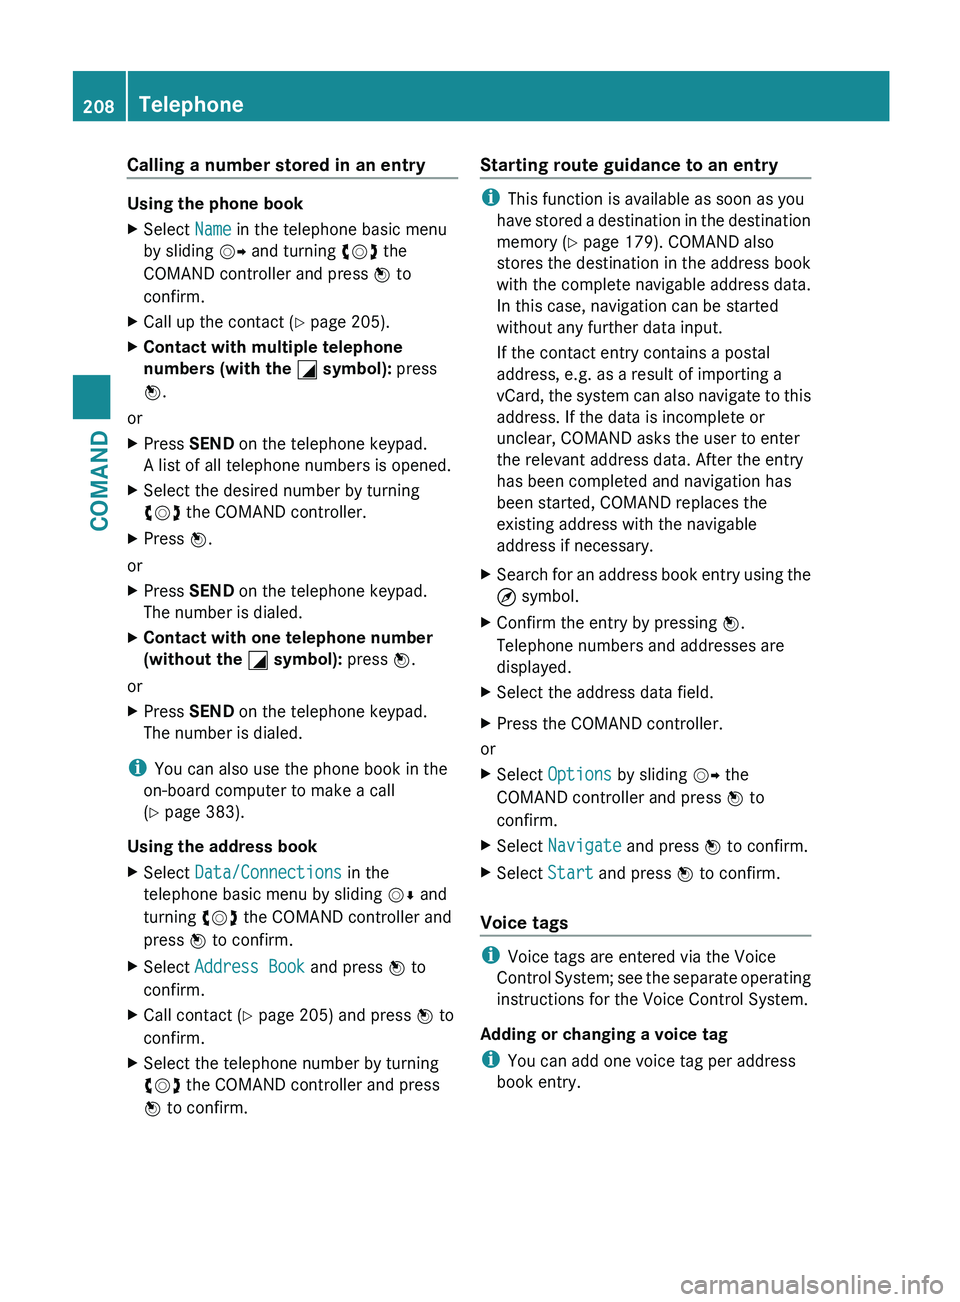
Calling a number stored in an entry
Using the phone book
X
Select Name in the telephone basic menu
by sliding VY and turning cVd the
COMAND controller and press W to
confirm.
X Call up the contact ( Y page 205).
X Contact with multiple telephone
numbers (with the G symbol): press
W.
or
X Press SEND on the telephone keypad.
A list of all telephone numbers is opened.
X Select the desired number by turning
cVd the COMAND controller.
X Press W.
or
X Press SEND on the telephone keypad.
The number is dialed.
X Contact with one telephone number
(without the G symbol): press W.
or
X Press SEND on the telephone keypad.
The number is dialed.
i You can also use the phone book in the
on-board computer to make a call
(Y page 383).
Using the address book
X Select Data/Connections in the
telephone basic menu by sliding VÆ and
turning cVd the COMAND controller and
press W to confirm.
X Select Address Book and press W to
confirm.
X Call contact (Y page 205) and press W to
confirm.
X Select the telephone number by turning
cVd the COMAND controller and press
W to confirm. Starting route guidance to an entry i
This function is available as soon as you
have
stored a destination in the destination
memory ( Y page 179). COMAND also
stores the destination in the address book
with the complete navigable address data.
In this case, navigation can be started
without any further data input.
If the contact entry contains a postal
address, e.g. as a result of importing a
vCard, the system can also navigate to this
address. If the data is incomplete or
unclear, COMAND asks the user to enter
the relevant address data. After the entry
has been completed and navigation has
been started, COMAND replaces the
existing address with the navigable
address if necessary.
X Search for an address book entry using the
¤ symbol.
X Confirm the entry by pressing W.
Telephone numbers and addresses are
displayed.
X Select the address data field.
X Press the COMAND controller.
or
X Select Options by sliding VY the
COMAND controller and press W to
confirm.
X Select Navigate and press W to confirm.
X Select Start and press W to confirm.
Voice tags i
Voice tags are entered via the Voice
Control
System; see the separate operating
instructions for the Voice Control System.
Adding or changing a voice tag
i You can add one voice tag per address
book entry. 208
Telephone
COMAND
Page 211 of 536

X
Search for an address book entry with or
without a voice tag ( ¦ symbol).
X Select Options by sliding VY and turning
cVd the COMAND controller and press
W to confirm.
X Select Voice Name and press W to
confirm.
X Select Add or Edit and press W to confirm.
Subsequent operation is voice-controlled.
The Voice Control System guides you
through the menus.
Deleting a voice tag
X Search for an address book entry with a
voice tag.
X Select Options by sliding VY and turning
cVd the COMAND controller and press
W to confirm.
X Select Voice Name and press W to
confirm.
X Select Delete and press W to confirm.
A deletion prompt appears.
Listening to a voice tag
X Search for an address book entry with a
voice tag.
X Select Options by sliding VY and turning
cVd the COMAND controller and press
W to confirm.
X Select Voice Name and press W to
confirm.
X Select Listen and press W to confirm.
You will hear the voice tag. Using call lists
Introduction COMAND displays calls received (including
missed calls) and made during phone
operation in lists.
i
The respective menu item can only be
selected
if calls have already been made or received in COMAND or if the call lists have
been imported from the telephone.
Opening the call list and selecting an
entry X
To call up the telephone menu:
press the
S function button.
X Select Call lists in the telephone basic
menu by sliding VÆ and turning cVd the
COMAND controller and press W to
confirm.
A menu appears.
X Select Calls received or Calls
Dialed and press W to confirm.
The corresponding list appears.
i The
list of calls made can also be opened
by pressing the SEND button in the menu
or on the telephone keypad as long as no
phone numbers have been entered in the
basic menu. The list of calls made can also
be opened in the on-board computer. Example display: list of calls made
:
To close the list
; Telephone number/name if known
= To call up options (e.g. save)
X Select an entry by sliding VÆ
the COMAND
controller.
X To dial a phone number: press the 6
button.
or
X Press W to confirm. Telephone
209
COMAND Z
Page 212 of 536

Incoming calls which you could not or did not
want to answer are marked with a symbol in
front of the name or phone number.
Storing a phone number which has not
yet been stored
Introduction
For incoming calls from a person who is not
in the address book, COMAND displays the
phone number in the call list. You can save
this entry.
Storing
as a new entry in the address book
X Open a call list and select an entry
(Y page 209).
X Select Options by sliding VY the
COMAND controller and press W to
confirm.
X Select Save Number and press W to
confirm.
X Select New
Entry and press W to confirm.
X Select a category for the number, e.g.
Home, and press W to confirm.
X Select a category for the phone, e.g.
Cellular
Phone Number , and press W to
confirm. Number category Display (phone
book and address
book)
Not Classified No symbol
Home 6
Work \
Phone category Display (phone
book and address
book)
Not Classified No symbol
Mobile Phone ¢
Pager ¨ Phone category Display (phone
book and address
book)
Car ^
Landline ¬
Preferred O
i
If
you have not entered the phone number
in a number and telephone category,
the ; icon will appear in the display.
X Select Next (save) and press W to
confirm.
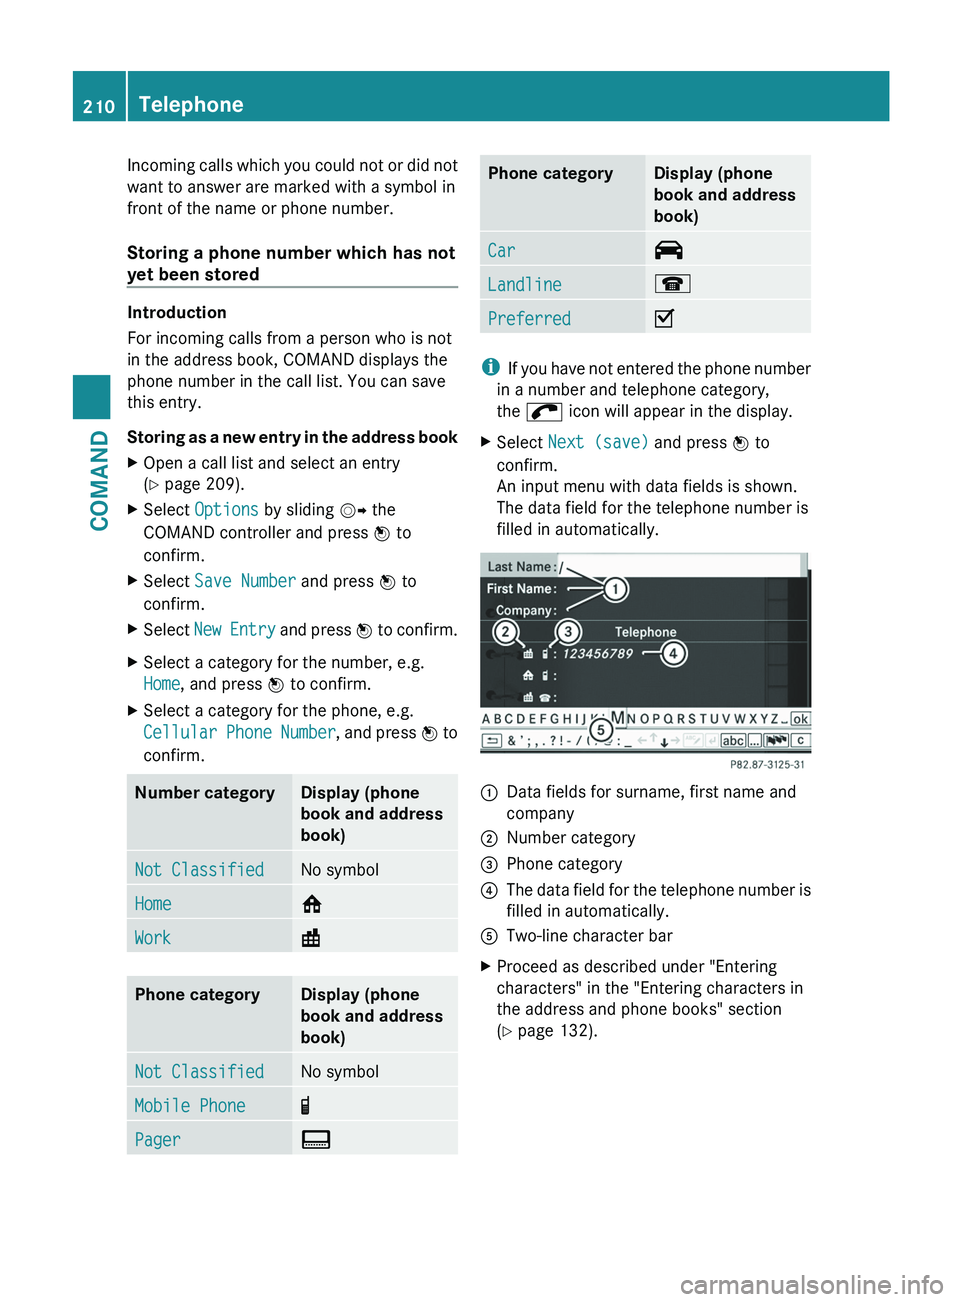
An input menu with data fields is shown.
The data field for the telephone number is
filled in automatically. :
Data fields for surname, first name and
company
; Number category
= Phone category
? The data field for the telephone number is
filled in automatically.
A Two-line character bar
X Proceed as described under "Entering
characters" in the "Entering characters in
the address and phone books" section
(Y page 132).210
Telephone
COMAND
Page 213 of 536

Adding a phone number to an address
book entry
X
Open a call list and select an entry
(Y page 209).
X Select Options by sliding VY the
COMAND controller and press W to
confirm.
X Select Save Number and press W to
confirm.
X Select Add and press W to confirm.
The search menu for address book entries
appears.
X Search for the desired entry (Y page 205).
X Press W when you have finished searching.
X Select a category for the number, e.g.
Home, and press W to confirm.
X Select a category for the phone, e.g.
Cellular
Phone Number , and press W to
confirm.
X Select Next (save) and press W to
confirm.
COMAND
stores the data if there are fewer
than five numbers assigned to the entry you
are searching for.
You will see a message to this effect.
If five numbers are stored for the entry you
are searching for, a prompt will appear
asking whether you wish to overwrite one
of the existing numbers.
X Select Yes or No and press W to confirm.
If you select Yes, a selection list with the
five existing numbers appears.
If
you select No, the process will be aborted.
X Select the number to be overwritten in the
list
by turning cVd the COMAND controller
and press W to confirm.
COMAND overwrites the selected number
with the new data. Audio
Radio mode
General information i
Portable
electronic devices in the vehicle
may seriously impair radio reception.
Switching to radio mode Option 1
X
Press R the function button.
The
radio display appears. You will hear the
last station played on the last waveband.
Option 2
X Select Audio in the main function bar by
sliding ZV
and turning cVd the COMAND
controller and press W to confirm.
If radio mode was the last mode selected,
it will now be active.
If another audio mode is switched on, you
can now switch to radio mode in the audio
menu.
X Select Audio by sliding ZV the COMAND
controller and pressing W to confirm.
The audio menu appears. Example display: audio menu
:
Current audio operating mode
; Main function bar
= Audio menu
X Select FM/AM radio by turning cVd the
COMAND controller and press W to
confirm. Audio
211COMAND Z
Page 216 of 536

Weather Band
Switching on
X
Select the currently set waveband FM or
AM by sliding VÆ and turning cVd the
COMAND controller and press W to
confirm.
X Select WB from the menu and press W to
confirm. :
Display window with the channel setting
; Currently received channel
= Channel list
? Weather Band switched on
A Sound settings
Searching for a channel
X Quick select: turn cVd or slide XVY the
COMAND controller while the display/
selection window is active.
Channel search scans up or down and
stops at the next channel found.
Using the multifunction steering wheel
X Press = or ; to select the Audio
menu.
X Press 9 or :.
Selecting a channel from the channel list
X Select Channel by sliding VÆ and turning
cVd the COMAND controller and press
W to confirm.
The channel list appears. X
Select a channel by turning cVd the
COMAND controller and press W to
confirm.
or
X Press a number key on the telephone
keypad, e.g. 4, at any time.
Displaying station information This function is only available for analog FM
and digital AM/FM programs (HD Radio).
Information relevant to the current station is
shown below the main function bar.
X
Select Radio in the radio display by sliding
VÆ and turning cVd the COMAND
controller and press W to confirm. X
Select Show Station Info by sliding
VÆ and turning cVd the COMAND
controller and press W to confirm.
Depending on the previous status, switch
Show Station Info on O or off ª. 214
Audio
COMAND
Page 219 of 536

Satellite radio mode may be temporarily
unavailable or interrupted for a variety of
reasons. These reasons include
environmental or topographical conditions
as well as other issues beyond the control
of Mercedes-Benz USA, LLC. Operation
may also be impaired in certain locations
(e.g. tunnels, multi-storey car parks or
within as well as close to buildings).
i SIRIUS XM Radio offers more than 130
digital-quality radio channels providing
100% commercial-free music, sport, news
and entertainment.
SIRIUS XM Radio employs a fleet of high-
performance
satellites to broadcast around
the clock throughout the USA and Canada.
The satellite radio program is available for
a monthly fee. Details are available from
the SIRIUS XM Service Center and at
http://www.sirius.com (USA) or
http://www.siriuscanada.com
(Canada).
Registering satellite radio X
Select Audio in the main function bar by
sliding ZV
and turning cVd the COMAND
controller and press W to confirm.
X Select Sat. Radio and press W to
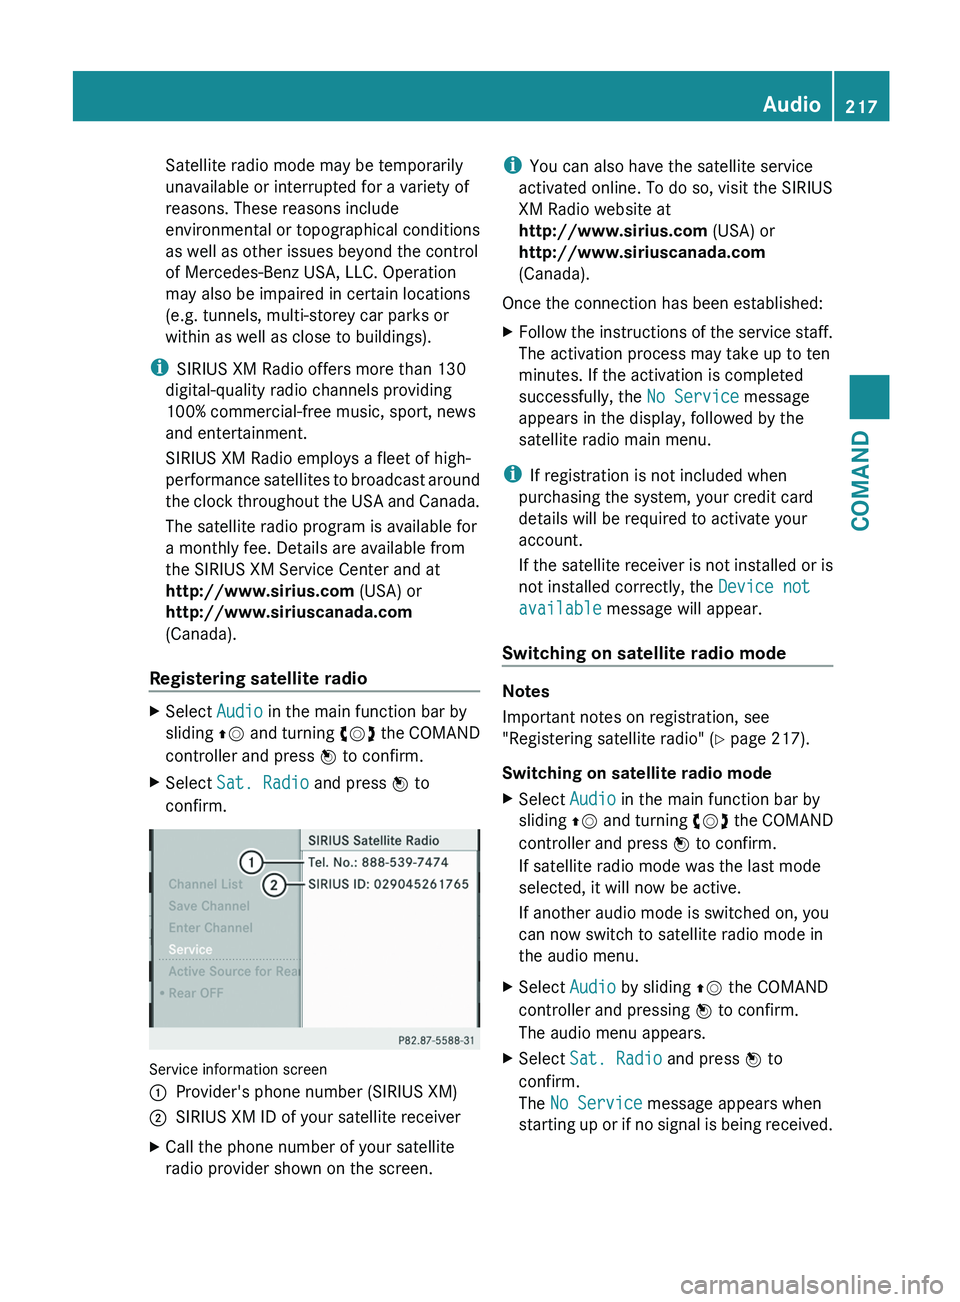
confirm. Service information screen
1
Provider's phone number (SIRIUS XM)
2 SIRIUS XM ID of your satellite receiver
X Call the phone number of your satellite
radio provider shown on the screen. i
You can also have the satellite service
activated online. To do so, visit the SIRIUS
XM Radio website at
http://www.sirius.com (USA) or
http://www.siriuscanada.com
(Canada).
Once the connection has been established:
X Follow the instructions of the service staff.
The activation process may take up to ten
minutes. If the activation is completed
successfully, the No Service message
appears in the display, followed by the
satellite radio main menu.
i If registration is not included when
purchasing the system, your credit card
details will be required to activate your
account.
If
the satellite receiver is not installed or is
not installed correctly, the Device not
available message will appear.
Switching on satellite radio mode Notes
Important notes on registration, see
"Registering satellite radio"
(Y page 217).
Switching on satellite radio mode
X Select Audio in the main function bar by
sliding ZV
and turning cVd the COMAND
controller and press W to confirm.
If satellite radio mode was the last mode
selected, it will now be active.
If another audio mode is switched on, you
can now switch to satellite radio mode in
the audio menu.
X Select Audio by sliding ZV the COMAND
controller and pressing W to confirm.
The audio menu appears.
X Select Sat. Radio and press W to
confirm.
The No Service message appears when
starting
up or if no signal is being received. Audio
217
COMAND Z
Page 222 of 536

Using the multifunction steering wheel
X
Press = or ; to select the Audio
menu.
X Press 9 or : briefly.
Displaying information
X Select Info in the submenu bar by turning
cVd the COMAND controller and press
W to confirm.
Information on the currently received
program is displayed.
X To return to the SatRadio main display:
slide XVY the COMAND controller.
Displaying service information
The provider's customer service center is
available
by phone at any time to answer any
general questions or questions on the
versions available.
X Select Sat. Radio in the submenu bar by
turning cVd the COMAND controller and
press W to confirm.
X Select Service and press W to confirm.
The provider's details appear.
X To return to the SatRadio main display:
slide XVY the COMAND controller.
Channel list updates
When
receiving a new channel list, the display
shows the Updating channel... message.
The station last selected is switched to mute
until the update has been completed.
Satellite radio mode is not available during
this process.
Once the update has been completed, the
satellite radio main menu appears. The
station last selected is played.
Sound settings
You will find details on the sound settings in
the "At a glance" section (Y page 135). Audio CD/DVD and MP3 mode
Important safety notes G
WARNING
COMAND is classified as a Class 1 laser
product.
You must not open the casing. If you
open the casing, or if the casing is faulty or
damaged, there is a risk of exposure to
invisible laser radiation. This may damage
your eyes, or those of others.
COMAND does not contain any parts that can
be serviced by the user. For safety reasons,
all maintenance work must be carried out by
qualified aftersales technicians. G
WARNING
Only when the vehicle is stationary should
you:
R load a disc
R eject a disc
There is a risk of being distracted from the
road
and traffic conditions if this is done while
the vehicle is in motion.
Inserting/ejecting CDs/DVDs DVD changer
The DVD changer has a fixed magazine with
six trays.
Magazine tray status
=:
R Indicator
lamp off: magazine tray is empty.
R Indicator lamp constantly lit: magazine tray
is loaded.220
Audio
COMAND