Page 89 of 373

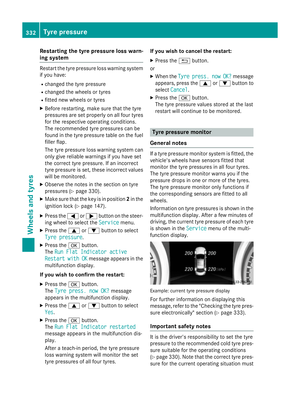
X
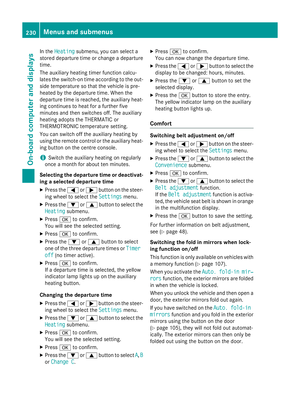
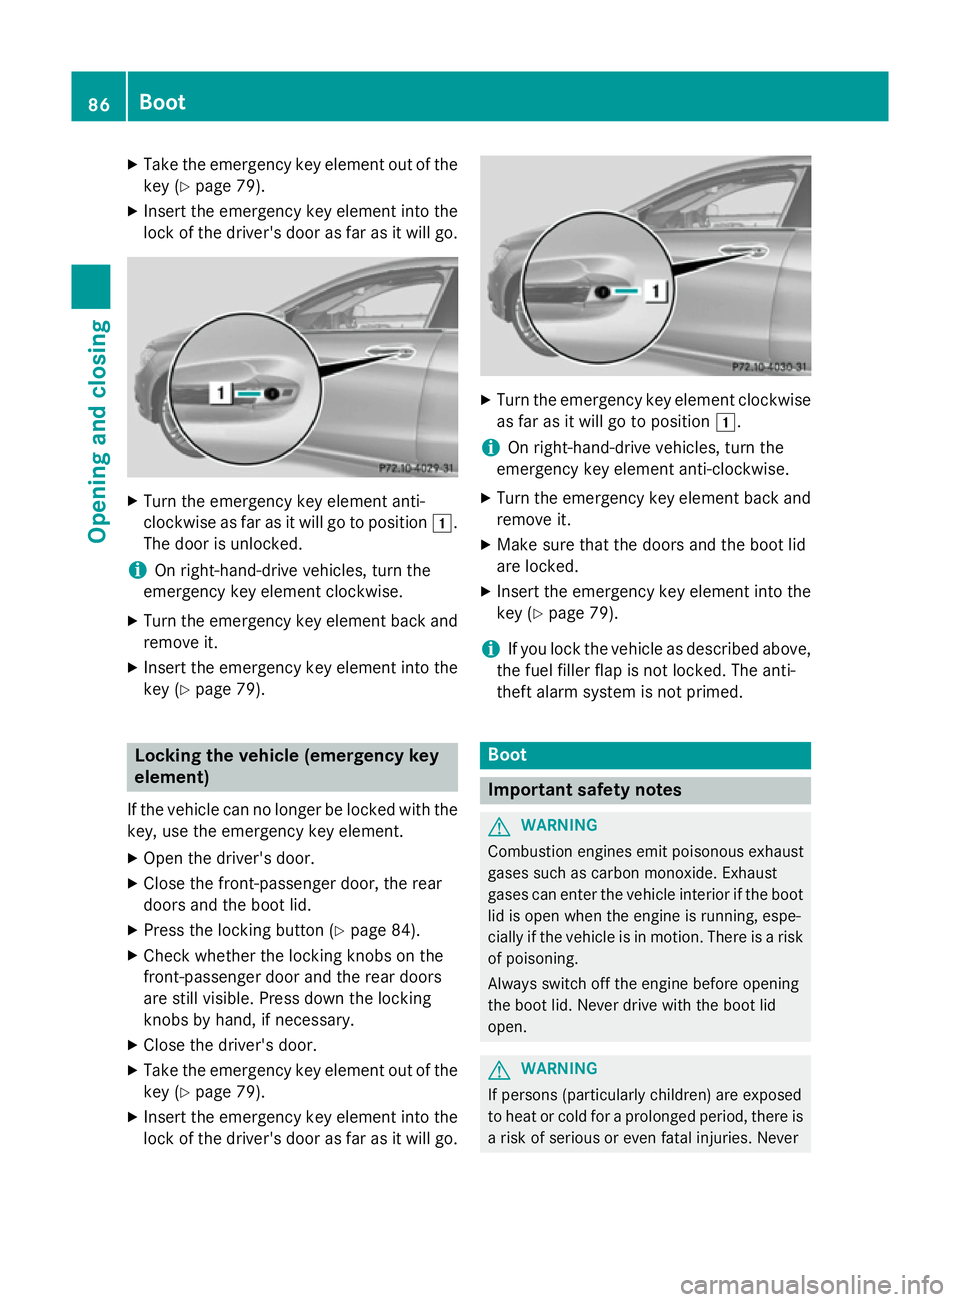
Take the emergency key element out of the
key (Y page 79).
X Insert the emergency key element into the
lock of the driver's door as far as it will go. X
Turn the emergency key element anti-
clockwise as far as it will go to position 1.
The door is unlocked.
i On right-hand-drive vehicles, turn the
emergency key element clockwise.
X Turn the emergency key element back and
remove it.
X Insert the emergency key element into the
key (Y page 79). Locking the vehicle (emergency key
element)
If the vehicle can no longer be locked with the key, use the emergency key element.
X Open the driver's door.
X Close the front-passenger door, the rear
doors and the boot lid.
X Press the locking button (Y page 84).
X Check whether the locking knobs on the
front-passenger door and the rear doors
are still visible. Press down the locking
knobs by hand, if necessary.
X Close the driver's door.
X Take the emergency key element out of the
key (Y page 79).
X Insert the emergency key element into the
lock of the driver's door as far as it will go. X
Turn the emergency key element clockwise
as far as it will go to position 1.
i On right-hand-drive vehicles, turn the
emergency key element anti-clockwise.
X Turn the emergency key element back and
remove it.
X Make sure that the doors and the boot lid
are locked.
X Insert the emergency key element into the
key (Y page 79).
i If you lock the vehicle as described above,
the fuel filler flap is not locked. The anti-
theft alarm system is not primed. Boot
Important safety notes
G
WARNING
Combustion engines emit poisonous exhaust
gases such as carbon monoxide. Exhaust
gases can enter the vehicle interior if the boot
lid is open when the engine is running, espe-
cially if the vehicle is in motion. There is a risk of poisoning.
Always switch off the engine before opening
the boot lid. Never drive with the boot lid
open. G
WARNING
If persons (particularly children) are exposed
to heat or cold for a prolonged period, there is a risk of serious or even fatal injuries. Never 86
BootOpening and closing
Page 90 of 373

leave persons (particularly children) unatten-
ded in the vehicle.
! The boot lid swings upwards when
opened. Therefore, make sure that there is sufficient clearance above the boot lid.
i The opening dimensions of the boot lid
can be found in the "Vehicle data" section
(Y page 362).
Stow luggage or loads preferably in the boot.
Observe the loading guidelines (Y page 276).
Do not leave the key in the boot. You could
otherwise lock yourself out.
The boot lid can be:
R opened and closed manually from outside
R opened automatically from outside
R opened automatically from inside
R unlocked from the inside with the emer-
gency key element Opening and closing manually from
outside
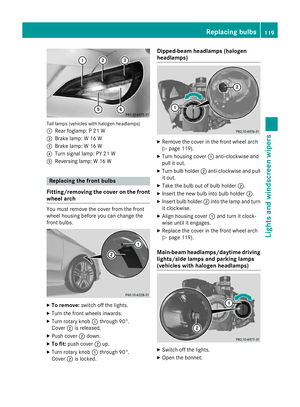
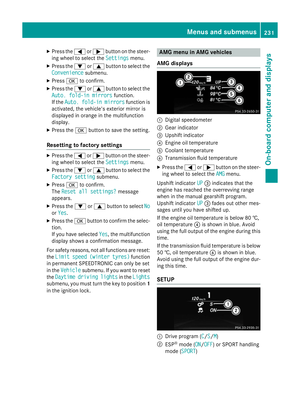
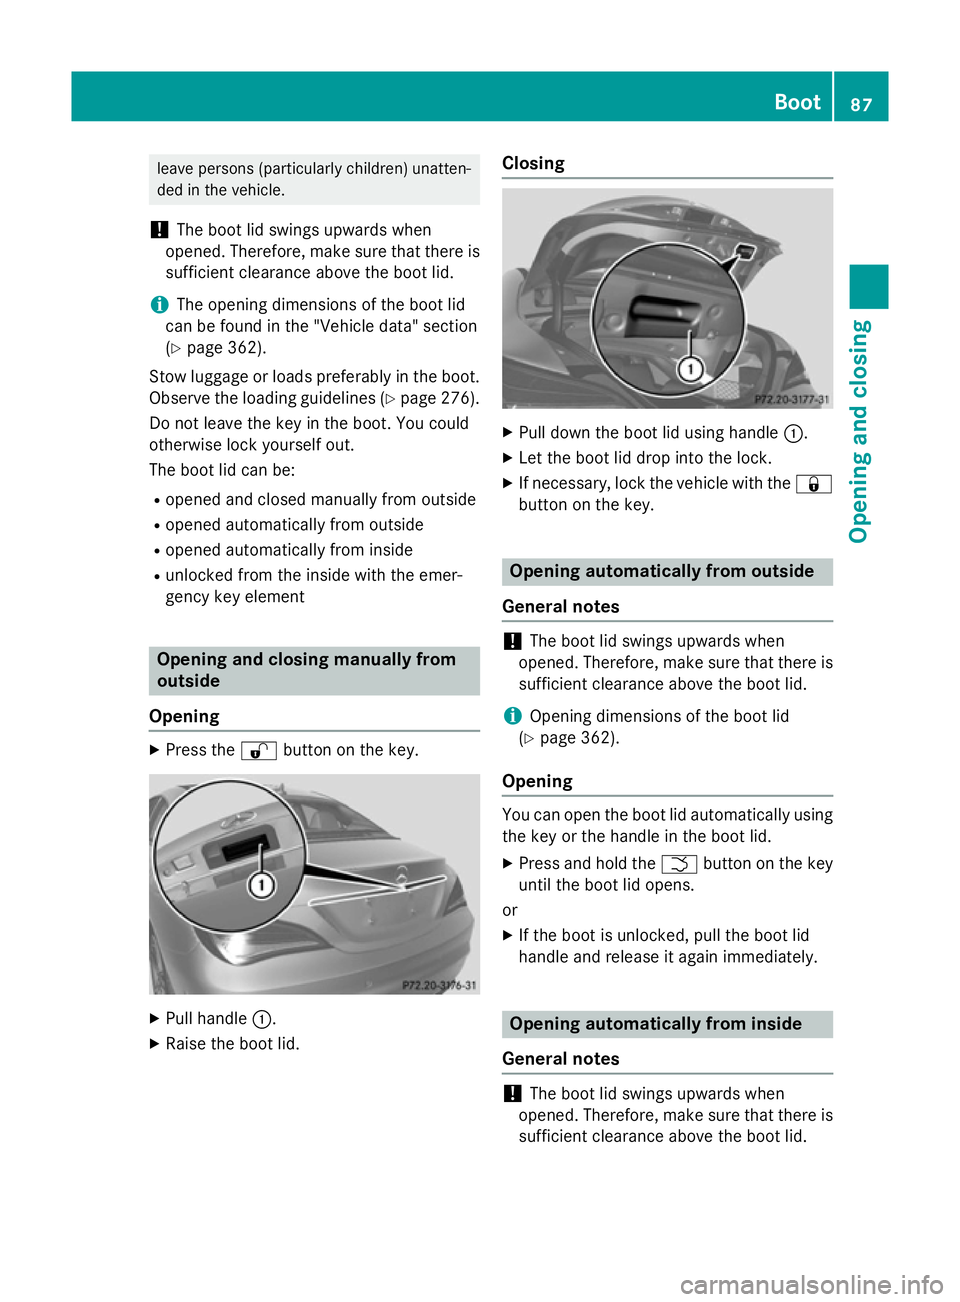
Opening X
Press the %button on the key. X
Pull handle :.
X Raise the boot lid. Closing
X
Pull down the boot lid using handle :.
X Let the boot lid drop into the lock.
X If necessary, lock the vehicle with the &
button on the key. Opening automatically from outside
General notes !
The boot lid swings upwards when
opened. Therefore, make sure that there is sufficient clearance above the boot lid.
i Opening dimensions of the boot lid
(Y page 362).
Opening You can open the boot lid automatically using
the key or the handle in the boot lid.
X Press and hold the Fbutton on the key
until the boot lid opens.
or
X If the boot is unlocked, pull the boot lid
handle and release it again immediately. Opening automatically from inside
General notes !
The boot lid swings upwards when
opened. Therefore, make sure that there is sufficient clearance above the boot lid. Boot
87Opening and closing Z
Page 91 of 373

i
The opening dimensions of the boot lid
can be found in the "Vehicle data" section
(Y page 362).
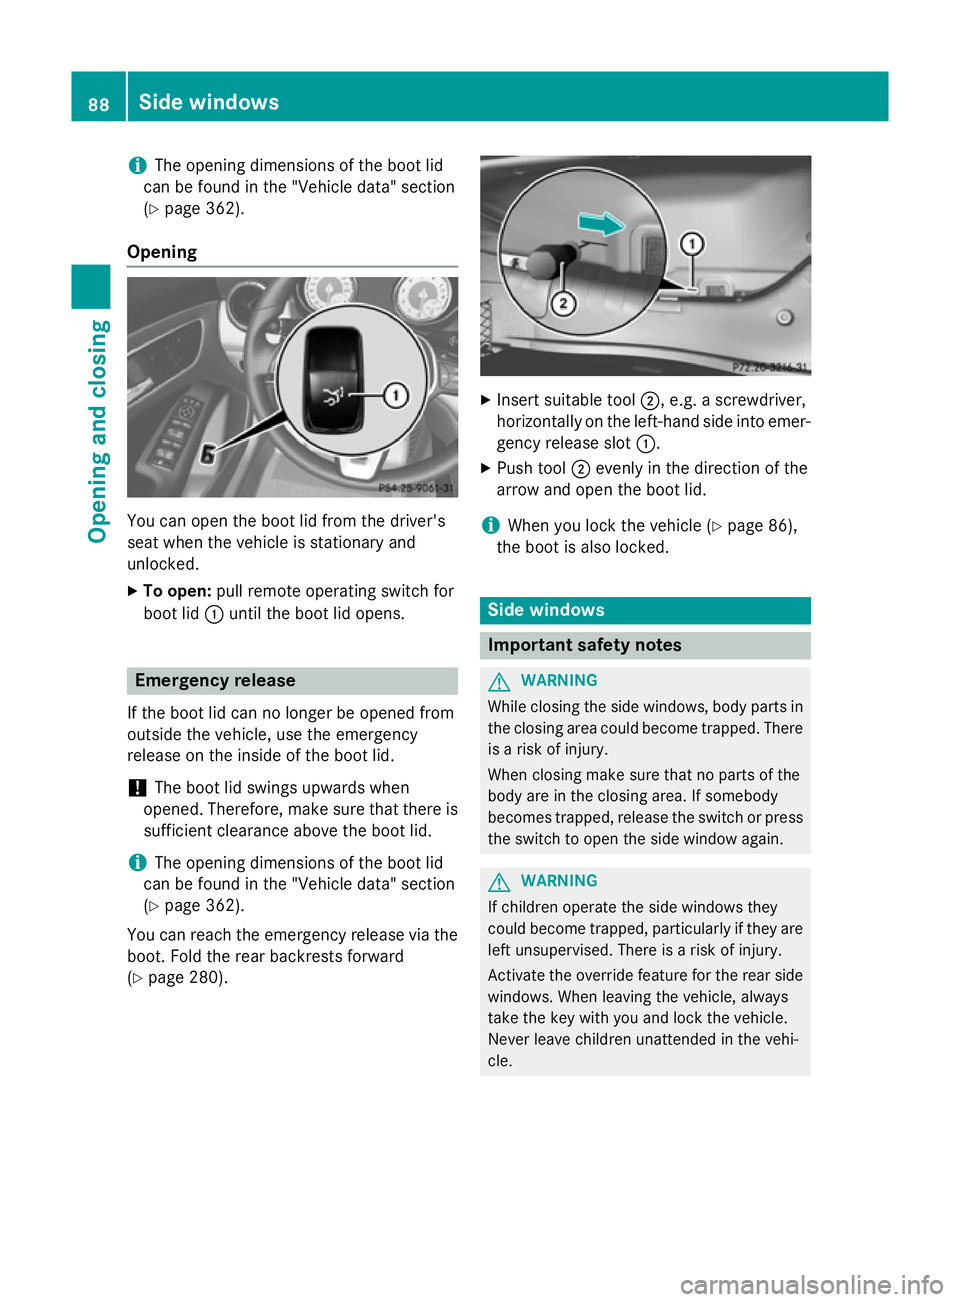
Opening You can open the boot lid from the driver's
seat when the vehicle is stationary and
unlocked.
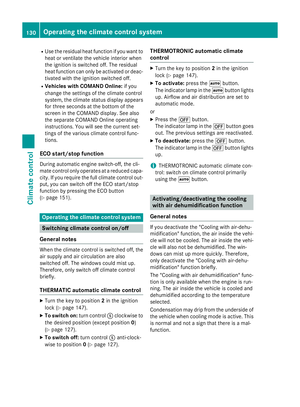
X To open: pull remote operating switch for
boot lid :until the boot lid opens. Emergency release
If the boot lid can no longer be opened from
outside the vehicle, use the emergency
release on the inside of the boot lid.
! The boot lid swings upwards when
opened. Therefore, make sure that there is sufficient clearance above the boot lid.
i The opening dimensions of the boot lid
can be found in the "Vehicle data" section
(Y page 362).
You can reach the emergency release via the boot. Fold the rear backrests forward
(Y page 280). X
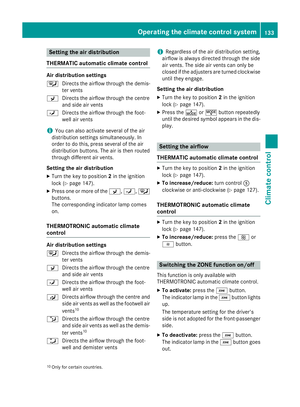
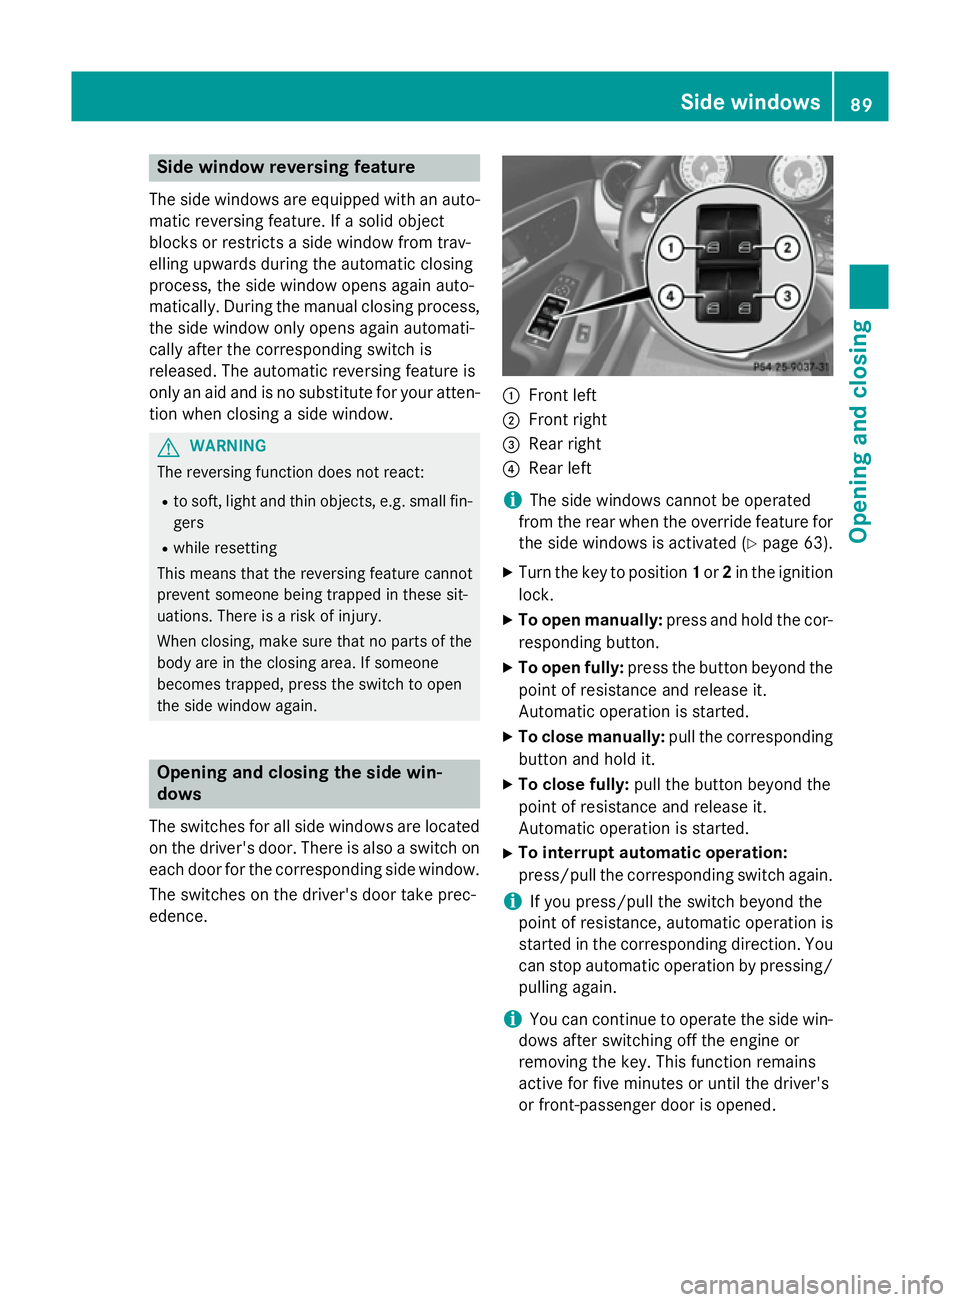
Insert suitable tool ;, e.g. a screwdriver,
horizontally on the left-hand side into emer- gency release slot :.
X Push tool ;evenly in the direction of the
arrow and open the boot lid.
i When you lock the vehicle (Y
page 86),
the boot is also locked. Side windows
Important safety notes
G
WARNING
While closing the side windows, body parts in the closing area could become trapped. There is a risk of injury.
When closing make sure that no parts of the
body are in the closing area. If somebody
becomes trapped, release the switch or press
the switch to open the side window again. G
WARNING
If children operate the side windows they
could become trapped, particularly if they are left unsupervised. There is a risk of injury.
Activate the override feature for the rear side
windows. When leaving the vehicle, always
take the key with you and lock the vehicle.
Never leave children unattended in the vehi-
cle. 88
Side windowsOpening and closing
Page 92 of 373

Side window reversing feature
The side windows are equipped with an auto- matic reversing feature. If a solid object
blocks or restricts a side window from trav-
elling upwards during the automatic closing
process, the side window opens again auto-
matically. During the manual closing process,
the side window only opens again automati-
cally after the corresponding switch is
released. The automatic reversing feature is
only an aid and is no substitute for your atten- tion when closing a side window. G
WARNING
The reversing function does not react:
R to soft, light and thin objects, e.g. small fin-
gers
R while resetting
This means that the reversing feature cannot
prevent someone being trapped in these sit-
uations. There is a risk of injury.
When closing, make sure that no parts of the
body are in the closing area. If someone
becomes trapped, press the switch to open
the side window again. Opening and closing the side win-
dows
The switches for all side windows are located
on the driver's door. There is also a switch on
each door for the corresponding side window.
The switches on the driver's door take prec-
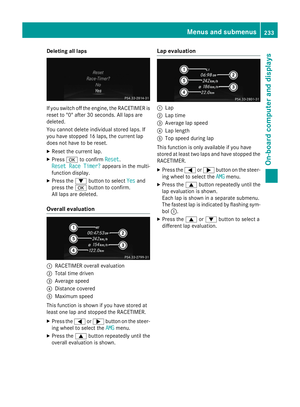
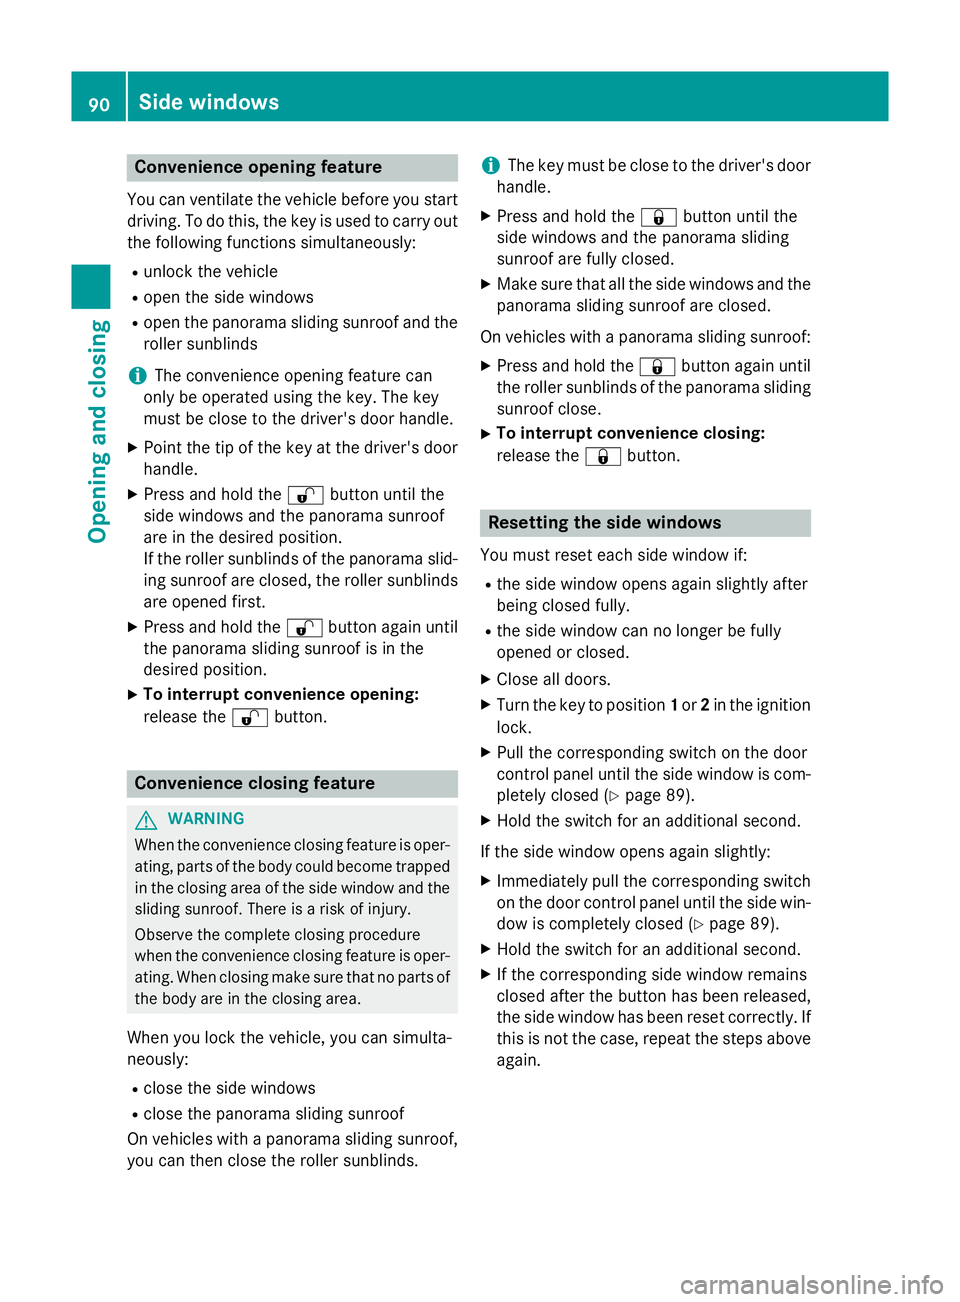
edence. :
Front left
; Front right
= Rear right
? Rear left
i The side windows cannot be operated
from the rear when the override feature for
the side windows is activated (Y page 63).
X Turn the key to position 1or 2in the ignition
lock.
X To open manually: press and hold the cor-
responding button.
X To open fully: press the button beyond the
point of resistance and release it.
Automatic operation is started.
X To close manually: pull the corresponding
button and hold it.
X To close fully: pull the button beyond the
point of resistance and release it.
Automatic operation is started.
X To interrupt automatic operation:
press/pull the corresponding switch again.
i If you press/pull the switch beyond the
point of resistance, automatic operation is
started in the corresponding direction. You
can stop automatic operation by pressing/ pulling again.
i You can continue to operate the side win-
dows after switching off the engine or
removing the key. This function remains
active for five minutes or until the driver's
or front-passenger door is opened. Side windows
89Opening and closing Z
Page 93 of 373

Convenience opening feature
You can ventilate the vehicle before you start driving. To do this, the key is used to carry out
the following functions simultaneously:
R unlock the vehicle
R open the side windows
R open the panorama sliding sunroof and the
roller sunblinds
i The convenience opening feature can
only be operated using the key. The key
must be close to the driver's door handle.
X Point the tip of the key at the driver's door
handle.
X Press and hold the %button until the
side windows and the panorama sunroof
are in the desired position.
If the roller sunblinds of the panorama slid- ing sunroof are closed, the roller sunblinds
are opened first.
X Press and hold the %button again until
the panorama sliding sunroof is in the
desired position.
X To interrupt convenience opening:
release the %button. Convenience closing feature
G
WARNING
When the convenience closing feature is oper- ating, parts of the body could become trapped
in the closing area of the side window and the
sliding sunroof. There is a risk of injury.
Observe the complete closing procedure
when the convenience closing feature is oper-
ating. When closing make sure that no parts of the body are in the closing area.
When you lock the vehicle, you can simulta-
neously:
R close the side windows
R close the panorama sliding sunroof
On vehicles with a panorama sliding sunroof, you can then close the roller sunblinds. i
The key must be close to the driver's door
handle.
X Press and hold the &button until the
side windows and the panorama sliding
sunroof are fully closed.
X Make sure that all the side windows and the
panorama sliding sunroof are closed.
On vehicles with a panorama sliding sunroof: X Press and hold the &button again until
the roller sunblinds of the panorama sliding
sunroof close.
X To interrupt convenience closing:
release the &button. Resetting the side windows
You must reset each side window if: R the side window opens again slightly after
being closed fully.
R the side window can no longer be fully
opened or closed.
X Close all doors.
X Turn the key to position 1or 2in the ignition
lock.
X Pull the corresponding switch on the door
control panel until the side window is com- pletely closed (Y page 89).
X Hold the switch for an additional second.
If the side window opens again slightly:
X Immediately pull the corresponding switch
on the door control panel until the side win-
dow is completely closed (Y page 89).
X Hold the switch for an additional second.
X If the corresponding side window remains
closed after the button has been released,
the side window has been reset correctly. If
this is not the case, repeat the steps above again. 90
Side windowsOpening and closing
Page 94 of 373

Problems with the side windows
G
WARNING
If you close a side window again immediately after it has been blocked or reset, the side window
closes with increased or maximum force. The reversing function is then not active. Parts of the
body could be trapped in the closing area in the process. This poses an increased risk of injury or even fatal injury.
Make sure that no parts of the body are in the closing area. To stop the closing process, releasethe switch or push the switch again to reopen the side window. Problem
Possible causes/consequences and
M MSolutions A side window cannot
be closed because it is
blocked by objects, e.g.
leaves in the window
guide. X
Remove the objects.
X Close the side window. A side window cannot
be closed and you can-
not see the cause. If a side window is obstructed during closing and reopens again
slightly:
X Immediately after the window blocks, pull the corresponding
switch again until the side window has closed.
The side window is closed with increased force.
If a side window is obstructed again during closing and reopens
again slightly: X Immediately after the window blocks, pull the corresponding
switch again until the side window has closed.
The side window is closed without the anti-entrapment feature. Panorama sliding sunroof
Important safety notes
In the following section, the term "sliding sun-
roof" refers to the panorama sliding sunroof. G
WARNING
While opening and closing the sliding sunroof, body parts in close proximity could become
trapped. There is a risk of injury.
Make sure that no body parts are in close
proximity during the opening and closing pro- cedures. If somebody becomes trapped:
R release the switch immediately, or
R during automatic operation, press the
switch briefly in any direction
The opening or closing procedure will be stop-
ped. G
WARNING
If children operate the sliding sunroof they
could become trapped, particularly if they are left unsupervised. There is a risk of injury.
When leaving the vehicle, always take the key
with you and lock the vehicle. Never leave
children unattended in the vehicle. Panorama sliding sunroof
91Opening and closing Z
Page 95 of 373

G
WARNING
At high speeds the raised sliding sunroof auto- matically lowers slightly at the rear. This could
trap you or other persons. There is a risk of
injury. Make sure that nobody reaches into
the sweep of the sliding sunroof whilst the
vehicle is in motion.
If somebody becomes trapped, immediately
pull back the sliding sunroof switch. The slid- ing sunroof lifts during opening.
! Only open the panorama sliding sunroof if
it is free of snow and ice. Otherwise, mal-
functions may occur.
Do not allow anything to protrude from the
sliding sunroof. Otherwise, the seals could
be damaged.
i Resonance noises can occur in addition to
the usual airflow noises when the sliding
sunroof is open. They are caused by minor
pressure fluctuations in the vehicle interior.
Change the position of the sliding sunroof
or open a side window slightly to reduce or
eliminate these noises. Sliding sunroof reversing feature
The sliding sunroof is equipped with an auto-
matic reversing feature. If an object blocks or restricts the sliding sunroof during the closing
process, the sliding sunroof opens again
automatically. The automatic reversing fea-
ture is only an aid and is no substitute for your attention when closing the sliding roof. G
WARNING
The reversing function does not react:
R to soft, light and thin objects, e.g. small fin-
gers
R over the last 4 mm of the closing movement
R during resetting
R when closing the sliding sunroof again man-
ually immediately after automatic reversing This means that the reversing function cannot
prevent someone being trapped in these sit-
uations. There is a risk of injury.
When closing make sure that no parts of the
body are in the closing area.
If someone is trapped:
R release the switch immediately or
R during automatic operation, press the
switch briefly in any direction
The closing process is stopped. Operating the sliding sunroof
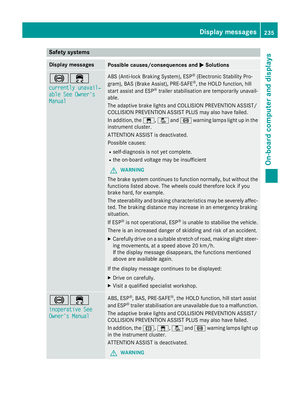
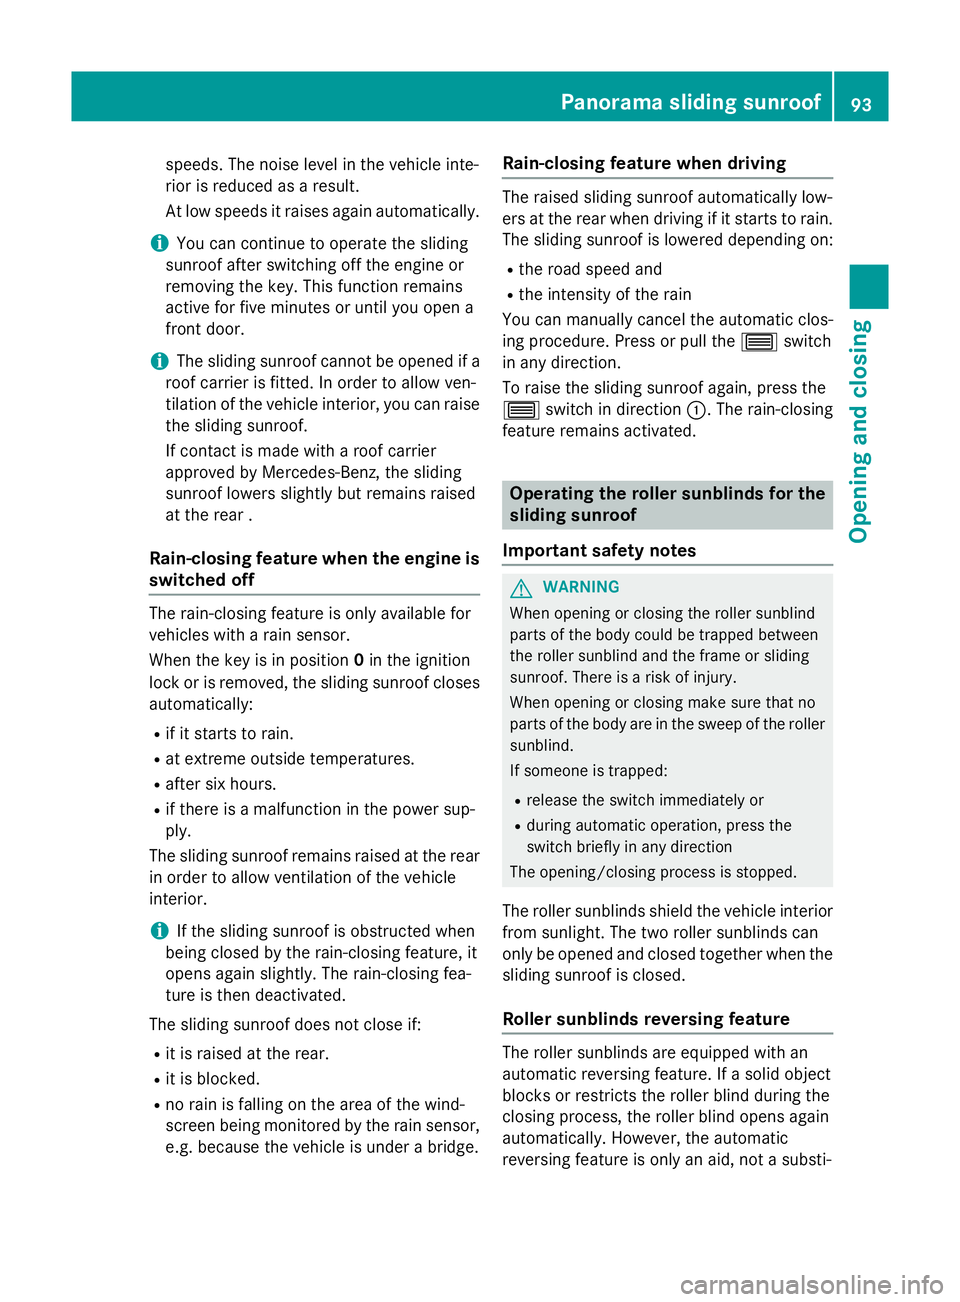
Opening and closing :
To raise
; To open
= To close/lower
X Turn the key to position 1or 2in the ignition
lock.
X Press or pull the 3switch in the corre-
sponding direction.
i If you press/pull the
3switch beyond
the point of resistance, automatic opera-
tion is started in the corresponding direc-
tion. You can stop automatic operation by
pressing/pulling again.
i After opening the sliding sunroof, the
roller sunblind automatically closes
slightly. This reduces drafts in the vehicle
interior.
i If the sliding sunroof is raised at the rear,
it automatically lowers slightly at higher 92
Panorama sliding sunroofOpening and closing
Page 96 of 373

speeds. The noise level in the vehicle inte-
rior is reduced as a result.
At low speeds it raises again automatically.
i You can continue to operate the sliding
sunroof after switching off the engine or
removing the key. This function remains
active for five minutes or until you open a
front door.
i The sliding sunroof cannot be opened if a
roof carrier is fitted. In order to allow ven-
tilation of the vehicle interior, you can raise the sliding sunroof.
If contact is made with a roof carrier
approved by Mercedes-Benz, the sliding
sunroof lowers slightly but remains raised
at the rear .
Rain-closing feature when the engine is
switched off The rain-closing feature is only available for
vehicles with a rain sensor.
When the key is in position 0in the ignition
lock or is removed, the sliding sunroof closes
automatically:
R if it starts to rain.
R at extreme outside temperatures.
R after six hours.
R if there is a malfunction in the power sup-
ply.
The sliding sunroof remains raised at the rear
in order to allow ventilation of the vehicle
interior.
i If the sliding sunroof is obstructed when
being closed by the rain-closing feature, it
opens again slightly. The rain-closing fea-
ture is then deactivated.
The sliding sunroof does not close if: R it is raised at the rear.
R it is blocked.
R no rain is falling on the area of the wind-
screen being monitored by the rain sensor, e.g. because the vehicle is under a bridge. Rain-closing feature when driving The raised sliding sunroof automatically low-
ers at the rear when driving if it starts to rain.
The sliding sunroof is lowered depending on:
R the road speed and
R the intensity of the rain
You can manually cancel the automatic clos-
ing procedure. Press or pull the 3switch
in any direction.
To raise the sliding sunroof again, press the
3 switch in direction :. The rain-closing
feature remains activated. Operating the roller sunblinds for the
sliding sunroof
Important safety notes G
WARNING
When opening or closing the roller sunblind
parts of the body could be trapped between
the roller sunblind and the frame or sliding
sunroof. There is a risk of injury.
When opening or closing make sure that no
parts of the body are in the sweep of the roller sunblind.
If someone is trapped:
R release the switch immediately or
R during automatic operation, press the
switch briefly in any direction
The opening/closing process is stopped.
The roller sunblinds shield the vehicle interior from sunlight. The two roller sunblinds can
only be opened and closed together when the sliding sunroof is closed.
Roller sunblinds reversing feature The roller sunblinds are equipped with an
automatic reversing feature. If a solid object
blocks or restricts the roller blind during the
closing process, the roller blind opens again
automatically. However, the automatic
reversing feature is only an aid, not a substi- Panorama sliding sunroof
93Opening and closing Z