2013 MERCEDES-BENZ B-CLASS SPORTS buttons
[x] Cancel search: buttonsPage 18 of 336

Adjusting the 4-way lumbar
support
............................................ 88
Adjusting the head restraint ............87
Cleaning the cover .........................270
Correct driver's seat position ........... 84
Important safety notes ....................85
Seat heating problem ......................89
Storing settings (memory
function) .......................................... 93
Switching sea theating on/off .........89
Sensors (cleaning instructions) .......269
Service see ASSYST PLUS
Service menu (on-board computer) .189
Service products Brake fluid ..................................... 327
Coolant (engine) ............................ 327
Engine oil ....................................... 326
Fuel ................................................ 324
Important safety notes ..................324
Washer fluid .................................. .328
Service work
see ASSYST PLUS
Settings
Factory (on-board computer) .........192
On-board computer .......................189
Setting the air distribution ...............120
Setting the airflow ............................120
Side impact air bag .............................42
Side marker lamp (display
message) ............................................ 205
Side windows Cleaning ......................................... 268
Convenience closing feature ............78
Convenience opening feature ..........78
Important safety information ...........77
Opening/closing .............................. 78
Problem (malfunction) .....................79
Resetting ......................................... 79
Sliding sunroof
see Panorama roof with power
tilt/sliding panel
SmartKey
Changing the battery .......................70
Changing the programming .............69
Checking the battery .......................70
Convenience closing feature ............78
Convenience opening feature ..........78 Display message
............................ 218
Door central locking/unlocking .......68
Important safety notes ....................68
Loss ................................................. 72
Mechanical key ................................ 69
Positions (ignition lock) .................127
Problem (malfunction) .....................72
Starting the engine ........................127
SmartKey positions (ignition lock) ..127
Snow chains ...................................... 295
Sockets Center console .............................. 244
Luggage compartment ...................245
Points to observe before use .........244
Rea rcompartmen t......................... 245
Specialist workshop ............................ 23
Speed, controlling see Cruise control
Speedometer
Activating/deactivating the
additional speedometer .................189
Digita l............................................ 183
In the Instrument cluster .................27
Segments ...................................... 179
Selecting the unit of
measurement ................................ 189
see Instrument cluster
SRS (Supplemental Restraint
System)
Display message ............................ 201
Introduction ..................................... 37
Warning lamp ................................. 225
Warning lamp (function) ................... 37
Standing lamps
Changing bulbs .............................. 105
Display message ............................ 204
Switching on/off .............................. 98
Starting (engine) ................................ 127
STEE RCONTROL .................................. 64
Steering (display message) ..............217
Steering wheel Adjusting (manually). .......................89
Button overview ............................... 29
Buttons (on-board computer) ......... 180
Cleaning ......................................... 270
Important safety notes ....................89
Paddle shifters ............................... 136
Steering wheel paddle shifters ........136 Index
15
Page 35 of 336
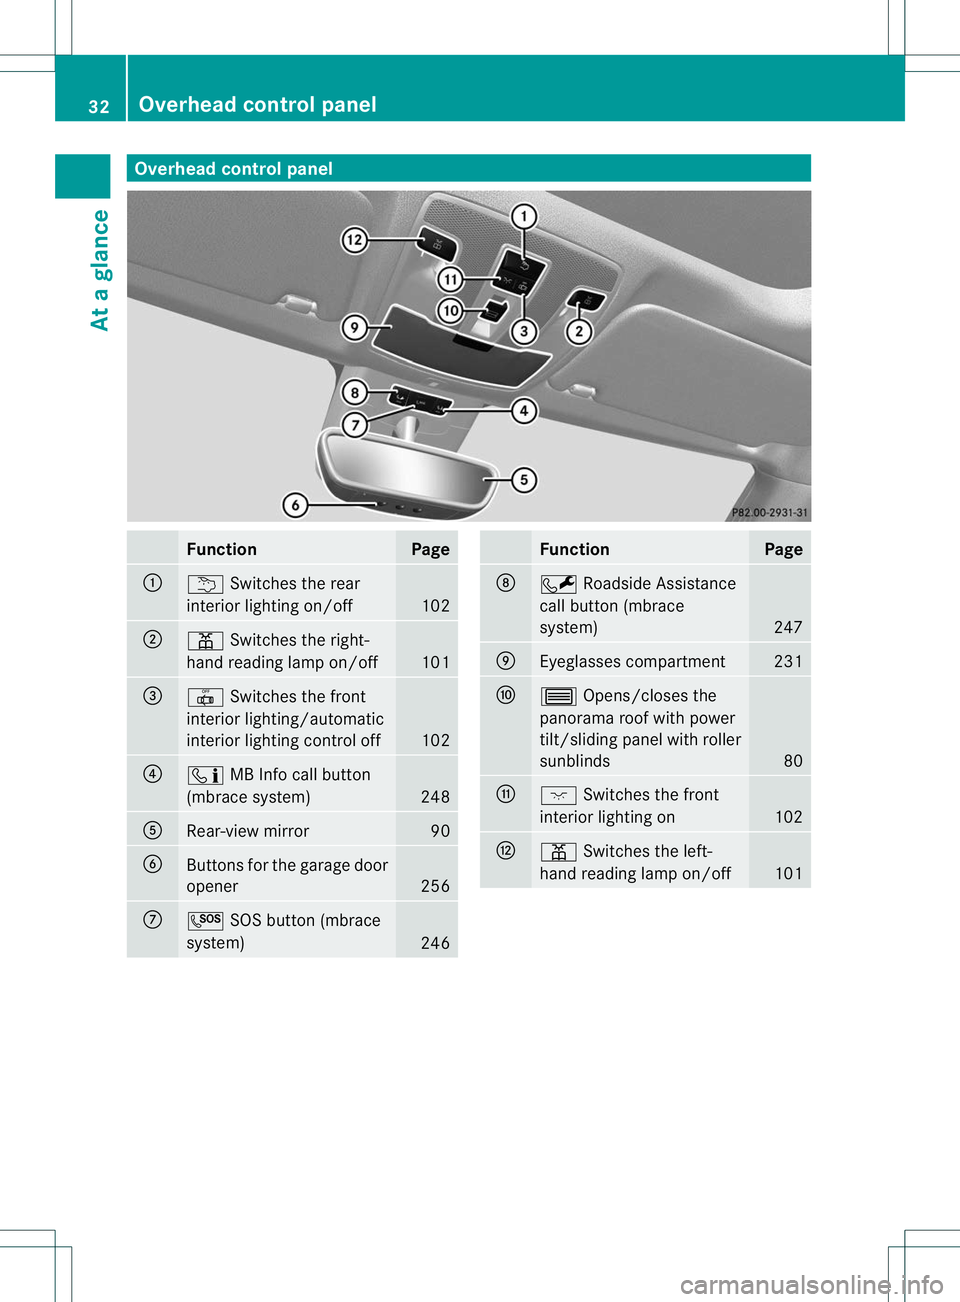
Overhea
dcontrol panel Function Page
:
u
Switches the rear
interio rlighting on/off 102
;
p
Switches the right-
hand reading lamp on/off 101
=
|
Switches the front
interior lighting/automatic
interior lighting control off 102
?
ï
MB Info call button
(mbrace system) 248
A
Rear-view mirror 90
B
Buttons for the garage door
opener
256
C
G
SOS button (mbrace
system) 246 Function Page
D
F
Roadside Assistance
call button (mbrace
system) 247
E
Eyeglasses compartment 231
F
3
Opens/closes the
panorama roof with power
tilt/sliding panel with roller
sunblinds 80
G
c
Switches the front
interior lighting on 102
H
p
Switches the left-
hand reading lamp on/off 10132
Overhead control panelAt a glance
Page 72 of 336
X
To lock centrally: press the&button.
The SmartKey centrally locks/unlocks:
R the doors
R the tailgate
R the fuel fille rflap
When unlocking, the tur nsignals flash once.
When locking, they flash three times.
When it is dark, the surround lighting also
comes on if it is activated in the on-board
computer (Y page 190).
You can also set an audible signal to confirm
that the vehicle has been locked. The audible
signal can be activated and deactivated using
the on-board computer (Y page 191).Changing the settings of the locking
system
You can change the settings of the locking
system. When you the nunlock the vehicle
only the driver's door and the fuel fille rflap
are unlocked. This is useful if you frequently
travel on your own.
X To change the setting: press and hold
down the %and& buttons
simultaneously for approximately six
seconds until the battery chec klamp
(Y page 70) flashes twice.
i If the setting of the locking system is
changed within the signal range of the
vehicle, pressing the &or% button:
R locks or
R unlocks the vehicle
The SmartKey now functions as follows:
X To unlock the driver's door: press the
% button once.
X To unlock centrally: press the%
butto ntwice.
X To lock centrally: press the&button.
X To restore the factory settings: press
and hold down the %and& buttons
simultaneously for approximately six seconds until the battery check lamp
flashes twice (
Ypage 70). Mechanical key
General notes If the vehicle can no longer be unlocked with
the SmartKey, use the mechanical key.
If you use the mechanical key to unloc
kand
open the driver's door, the anti-thef talarm
system will be triggered ( Ypage 65).
There are several ways to tur noff the alarm:
X Press the %or& button on the
SmartKey.
or
X Insert the SmartKey into the ignition lock.
If you unlock the vehicle using the mechanical
key, the fuel filler flapw ill not be unlocked
automatically.
X To unlock the fuel filler flap: insert the
SmartKey into the ignition lock.
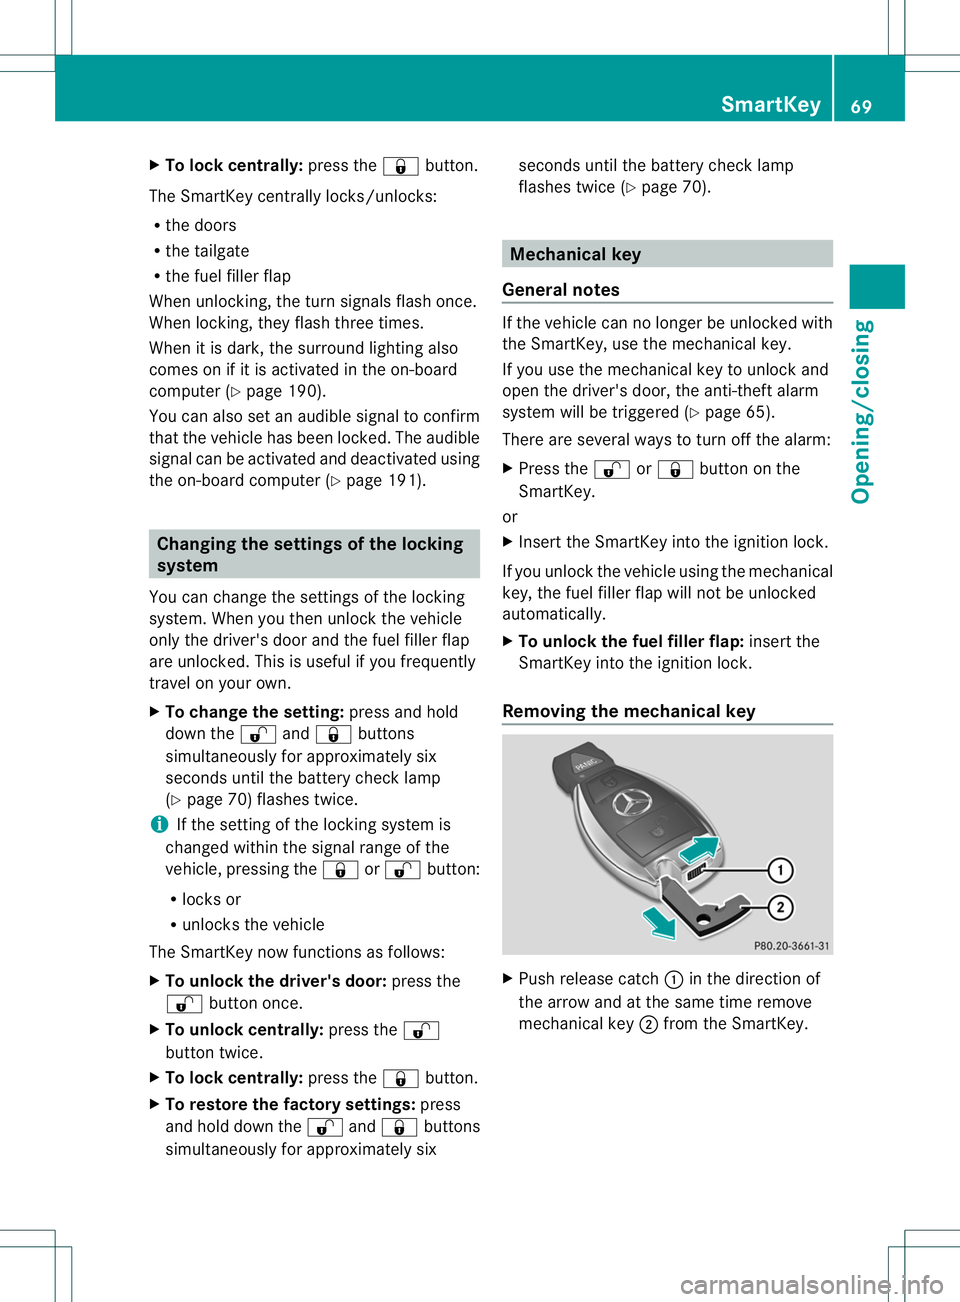
Removing the mechanical key X
Push release catch :in the direction of
the arrow and at the same time remove
mechanical key ;from the SmartKey. SmartKey
69Opening/closing Z
Page 74 of 336
X
Make sure that the surface of the battery is
free from lint, grease and all other forms of
contamination.
X Insert the front tabs of battery tray
cover :and then press to close it.
X Insert the mechanical key into the
SmartKey.
X Check the function of all SmartKey buttons
on the vehicle. SmartKey
71Opening/closing Z
Page 78 of 336
i
If you press one of the two buttons and
do not hear a tone, the relevant setting has
already been selected.
The vehicle is locked automatically when the
ignition is switched on and the wheels are
turning.
You could therefore lock yourself out if:
R the vehicle is being pushed.
R the vehicle is being towed.
R the vehicle is on a rollerd ynamometer.
You can also switch the automati clocking
function on and off using the on-board
computer (Y page 191). Unlocking the driver's door
(mechanical key)
If the vehicle can no longer be unlocked with
the SmartKey, use the mechanical key.
If you use the mechanical key to unlock and
open the driver's door, the anti-theft alarm
system will be triggered (Y page 65).
X Take the mechanical key out of the
SmartKey (Y page 69).
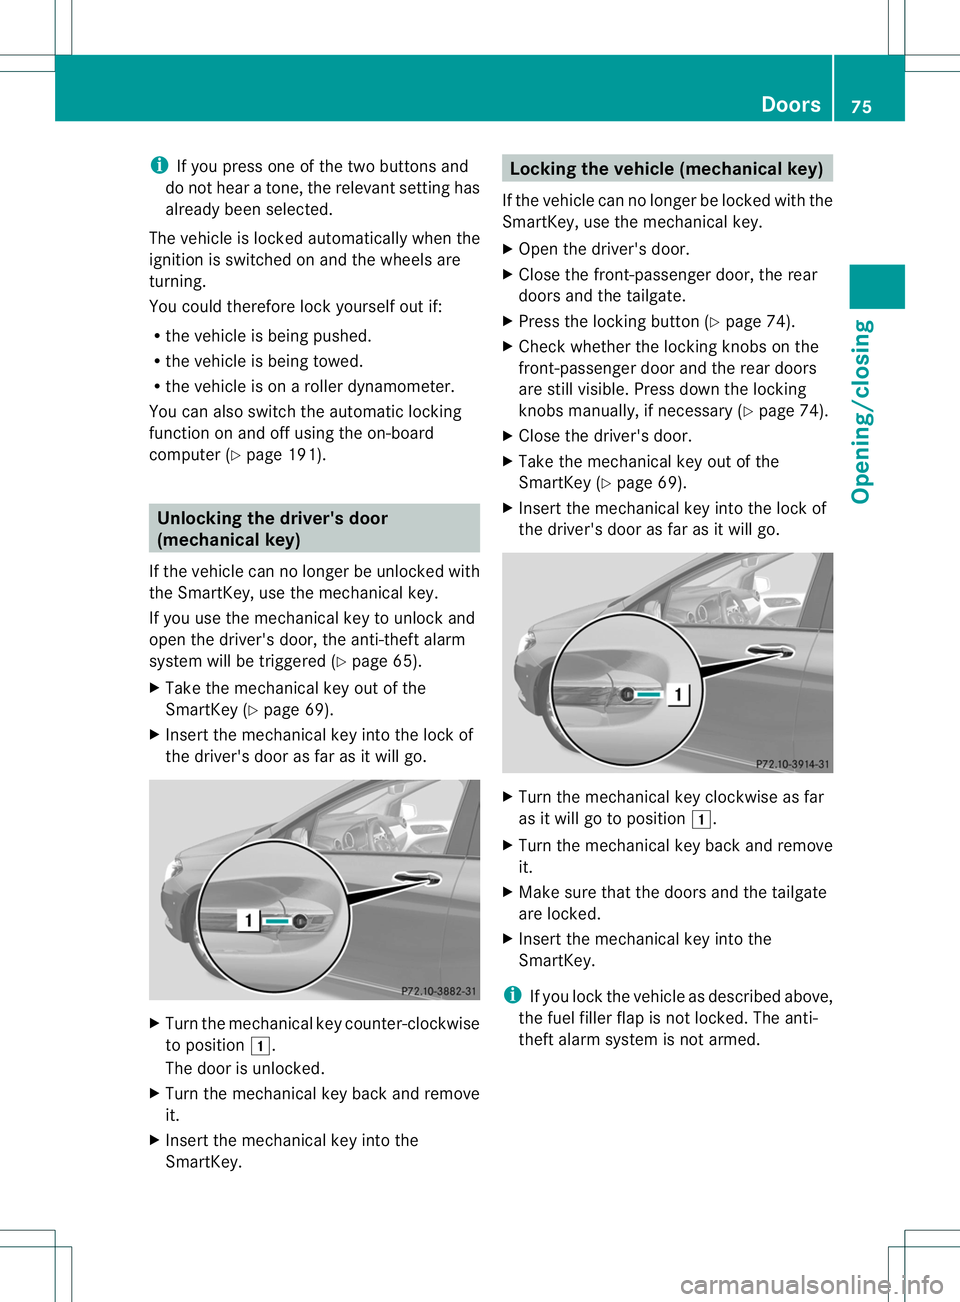
X Insert the mechanical key into the lock of
the driver's door as far as it will go. X
Turn the mechanical key counter-clockwise
to position 1.
The door is unlocked.
X Turn the mechanical key back and remove
it.
X Insert the mechanical key into the
SmartKey. Locking the vehicle (mechanical key)
If the vehicle can no longer be locked with the
SmartKey, use the mechanical key.
X Open the driver's door.
X Close the front-passenger door, the rear
doors and the tailgate.
X Press the locking button (Y page 74).
X Check whether the locking knobs on the
front-passenger door and the rear doors
are still visible. Press down the locking
knobs manually, if necessary (Y page 74).
X Close the driver's door.
X Take the mechanical key out of the
SmartKey (Y page 69).
X Insert the mechanical key into the lock of
the driver's door as far as it will go. X
Turn the mechanical key clockwise as far
as it will go to position 1.
X Turn the mechanical key back and remove
it.
X Make sure that the doors and the tailgate
are locked.
X Insert the mechanical key into the
SmartKey.
i If you lock the vehicle as described above,
the fuel filler flap is not locked. The anti-
theft alarm system is not armed. Doors
75Opening/closing Z
Page 120 of 336
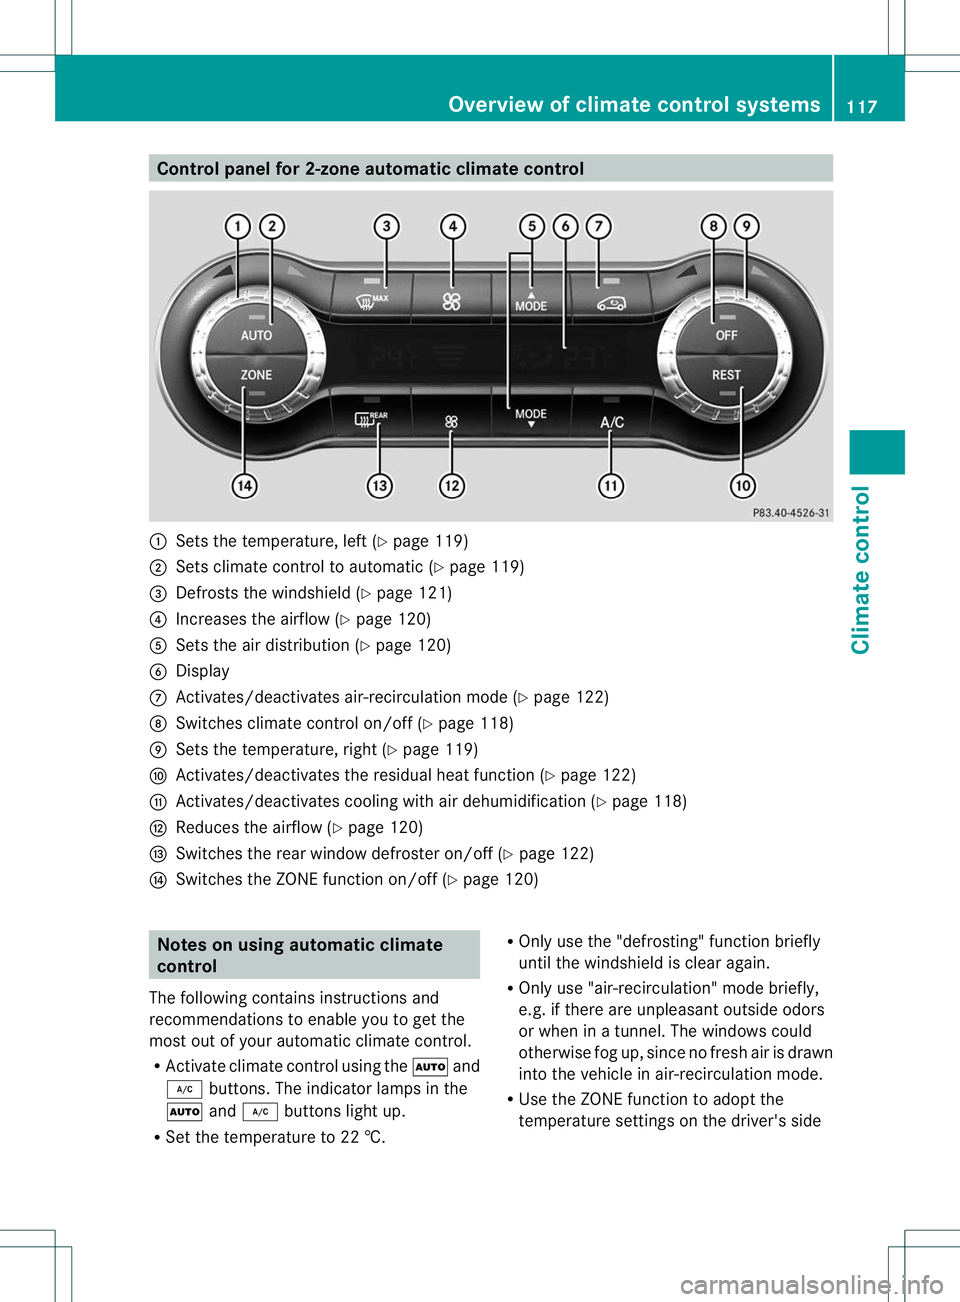
Control panel for 2-zone automatic climate control
:
Sets the temperature, left (Y page 119)
; Sets climate control to automatic (Y page 119)
= Defrosts the windshield (Y page 121)
? Increases the airflow (Y page 120)
A Sets the air distribution (Y page 120)
B Display
C Activates/deactivates air-recirculation mode (Y page 122)
D Switches climate control on/off (Y page 118)
E Sets the temperature, righ t(Ypage 119)
F Activates/deactivates the residual heat function (Y page 122)
G Activates/deactivates coolin gwith air dehumidification ( Ypage 118)
H Reduces the airflow ( Ypage 120)
I Switches the rear window defroster on/off (Y page 122)
J Switches the ZONE function on/off (Y page 120)Notes on using automatic climate
control
The following contains instructions and
recommendations to enable you to get the
most out of your automatic climate control.
R Activate climate control using the Ãand
¿ buttons .The indicator lamps in the
à and¿ buttons light up.
R Set the temperature to 22 †. R
Only use the "defrosting" function briefly
until the windshield is clear again.
R Only use "air-recirculation" mode briefly,
e.g. if there are unpleasant outside odors
or when in a tunnel. The windows could
otherwise fog up, since no fresh air is drawn
into the vehicle in air-recirculation mode.
R Use the ZONE function to adopt the
temperature settings on the driver's side Overview of climate control systems
117Climate control Z
Page 123 of 336
Setting the air distribution
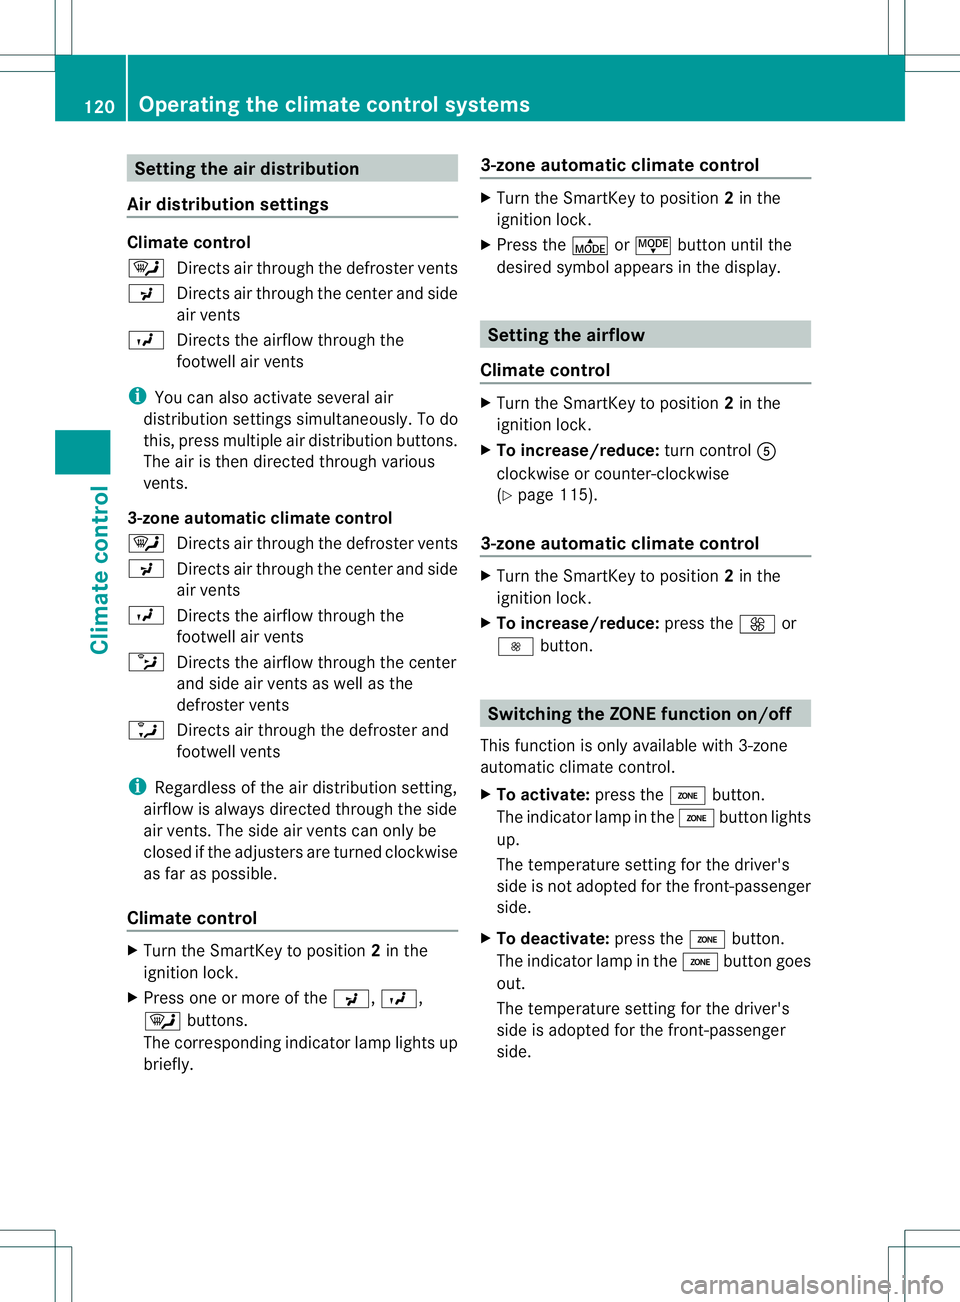
Air distribution settings Climate control
¯
Directs air through the defroster vents
P Directs air through the center and side
air vents
O Directs the airflow through the
footwell air vents
i You can also activate several air
distribution settings simultaneously .To do
this, press multiple air distribution buttons.
The air is then directed through various
vents.
3-zone automatic climate control
¯ Directs air through the defroster vents
P Directs air through the center and side
air vents
O Directs the airflow through the
footwell air vents
b Directs the airflow through the center
and side air vents as well as the
defroster vents
a Directs air through the defroster and
footwell vents
i Regardless of the air distribution setting,
airflow is always directed through the side
air vents. The side air vents can only be
closed if the adjusters are turned clockwise
as far as possible.
Climate control X
Turn the SmartKey to position 2in the
ignition lock.
X Press one or more of the P,O,
¯ buttons.
The corresponding indicator lamp lights up
briefly. 3-zone automatic climate control X
Turn the SmartKey to position 2in the
ignition lock.
X Press the ÉorË button until the
desired symbol appears in the display. Setting the airflow
Climate control X
Turn the SmartKey to position 2in the
ignition lock.
X To increase/reduce: turn controlA
clockwise or counter-clockwise
(Y page 115).
3-zone automatic climate control X
Turn the SmartKey to position 2in the
ignition lock.
X To increase/reduce: press theKor
I button. Switching the ZONE function on/off
This function is only available with 3-zone
automatic climate control.
X To activate: press theábutton.
The indicator lamp in the ábutton lights
up.
The temperature setting for the driver's
side is not adopted for the front-passenger
side.
X To deactivate: press theábutton.
The indicator lamp in the ábutton goes
out.
The temperature setting for the driver's
side is adopted for the front-passenger
side. 120
Operating the climate control systemsClimate control
Page 183 of 336
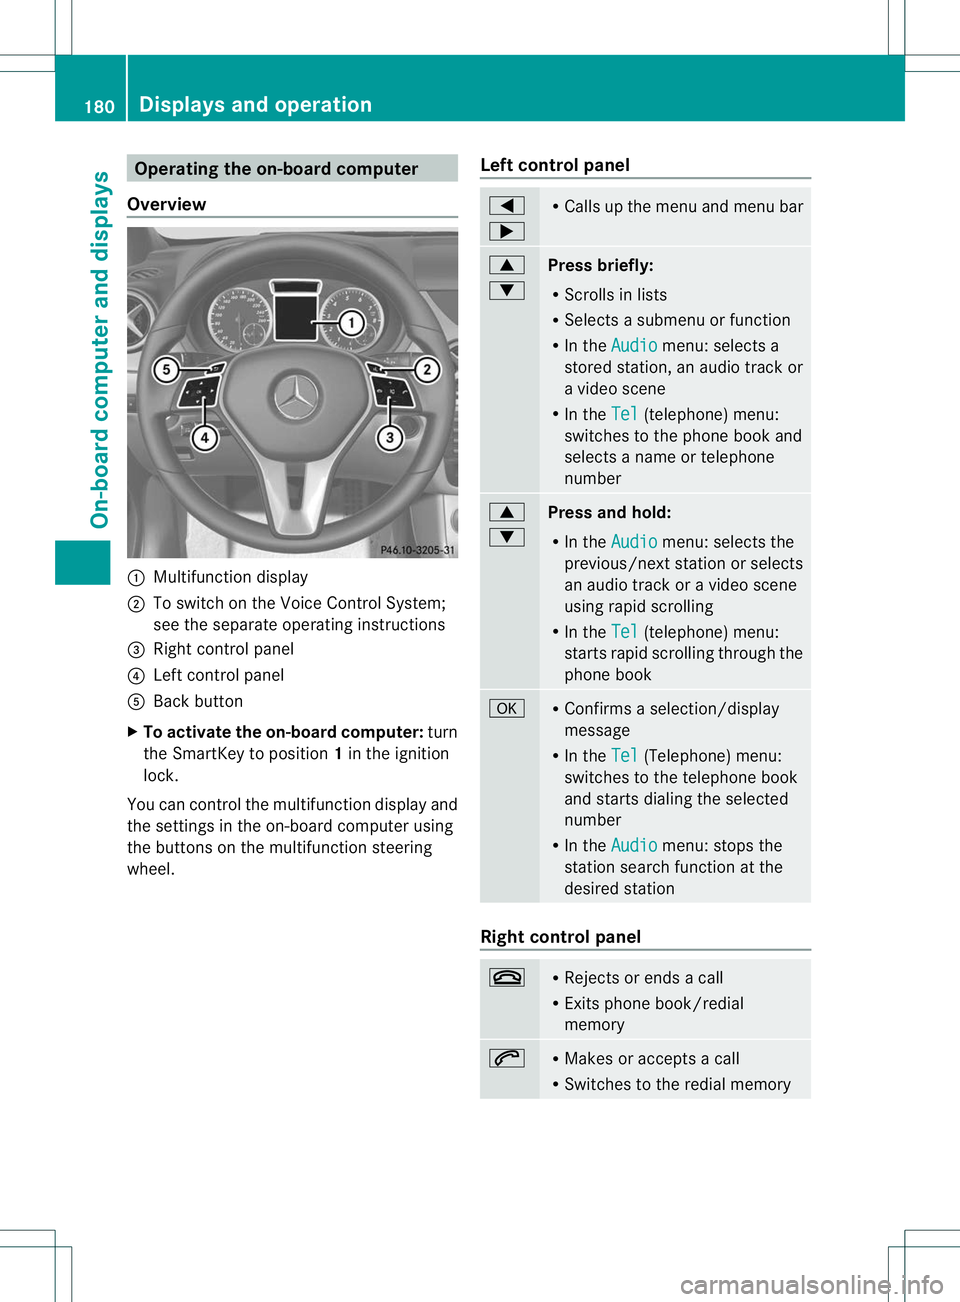
Operating the on-board computer
Overview :
Multifunction display
; To switch on the Voice Control System;
see the separate operating instructions
= Right control panel
? Left control panel
A Back button
X To activate the on-board computer: turn
the SmartKey to position 1in the ignition
lock.
You can control the multifunction display and
the settings in the on-board computer using
the buttons on the multifunction steering
wheel. Left control panel =
; R
Calls up the menu and menu bar 9
:
Press briefly:
R
Scrolls in lists
R Selects a submenu or function
R In the Audio menu: selects a
stored station, an audio trackor
a video scene
R In the Tel (telephone) menu:
switches to the phone book and
selects a name or telephone
number 9
:
Press and hold:
R
In the Audio menu: selects the
previous/next statio norselects
an audio trac koravideo scene
using rapid scrolling
R In the Tel (telephone) menu:
starts rapid scrolling through the
phone book a R
Confirms a selection/display
message
R In the Tel (Telephone) menu:
switches to the telephone book
and starts dialing the selected
number
R In the Audio menu: stops the
station search function at the
desired station Right control panel
~ R
Rejects or ends a call
R Exits phone book/redial
memory 6 R
Makes or accepts a call
R Switches to the redial memory 180
Displays and operationOn-board computer and displays