Page 15 of 256

15
1. NAVIGATION OPERATION
1
QUICK GUIDE
GS450h_300h_350_250_NAVI_OM30D64E_(EE)
13.10.23 11:07
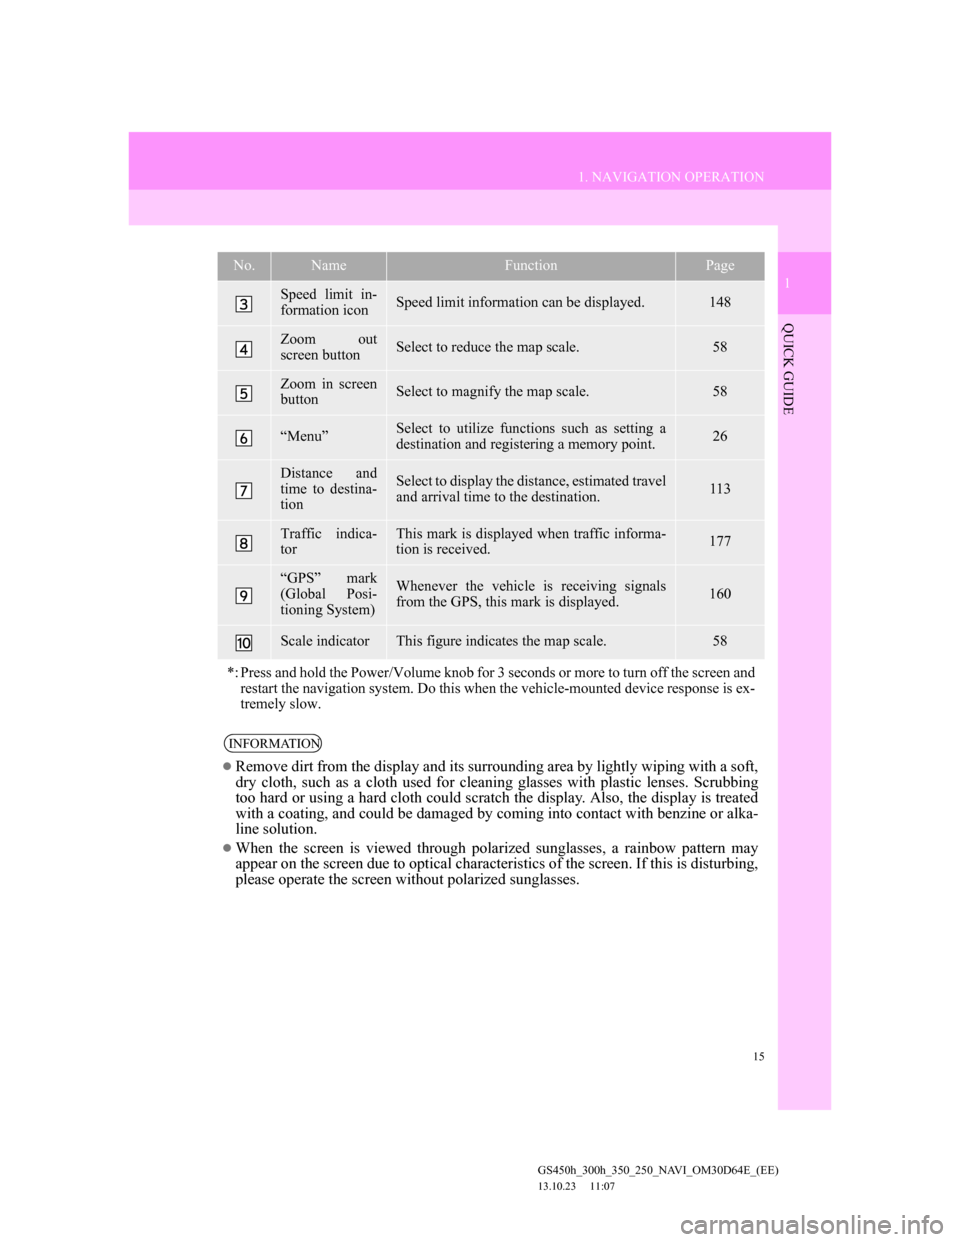
Speed limit in-
formation iconSpeed limit information can be displayed.148
Zoom out
screen buttonSelect to reduce the map scale.58
Zoom in screen
buttonSelect to magnify the map scale.58
“Menu”Select to utilize functions such as setting a
destination and registering a memory point.26
Distance and
time to destina-
tionSelect to display the distance, estimated travel
and arrival time to the destination.113
Traffic indica-
torThis mark is displayed when traffic informa-
tion is received.177
“GPS” mark
(Global Posi-
tioning System)Whenever the vehicle is receiving signals
from the GPS, this mark is displayed.160
Scale indicatorThis figure indicates the map scale.58
*: Press and hold the Power/Volume knob for 3 seconds or more to turn off the screen and
restart the navigation system. Do this when the vehicle-mounted device response is ex-
tremely slow.
INFORMATION
Remove dirt from the display and its surrounding area by lightly wiping with a soft,
dry cloth, such as a cloth used for cleaning glasses with plastic lenses. Scrubbing
too hard or using a hard cloth could scratch the display. Also, the display is treated
with a coating, and could be damaged by coming into contact with benzine or alka-
line solution.
When the screen is viewed through polarized sunglasses, a rainbow pattern may
appear on the screen due to optical characteristics of the screen. If this is disturbing,
please operate the screen without polarized sunglasses.
No.NameFunctionPage
Page 46 of 256

46
1. BASIC INFORMATION BEFORE OPERATION
GS450h_300h_350_250_NAVI_OM30D64E_(EE)
13.10.23 11:07
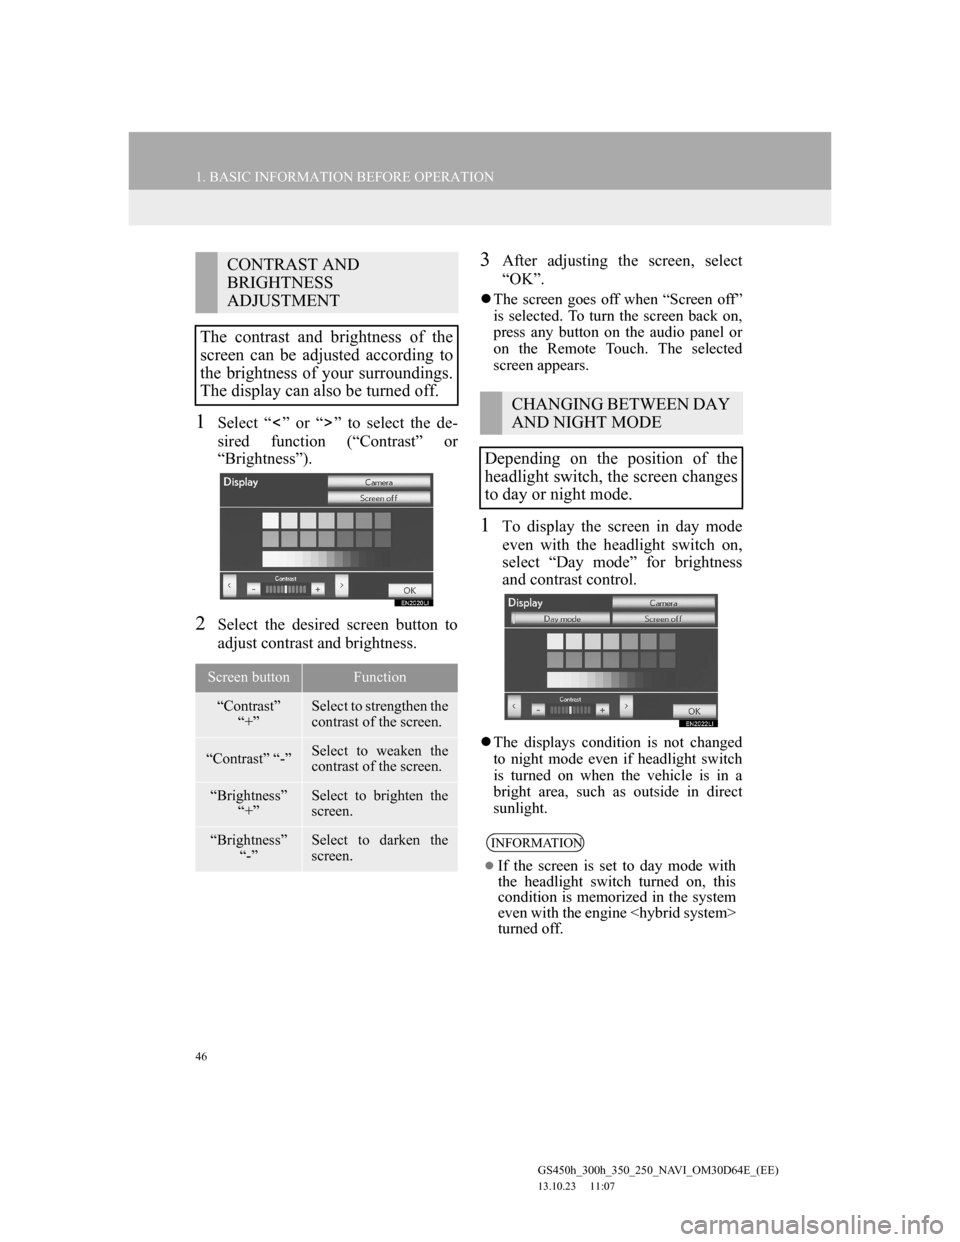
1Select “ ” or “ ” to select the de-
sired function (“Contrast” or
“Brightness”).
2Select the desired screen button to
adjust contrast and brightness.
3After adjusting the screen, select
“OK”.
The screen goes off when “Screen off”
is selected. To turn the screen back on,
press any button on the audio panel or
on the Remote Touch. The selected
screen appears.
1To display the screen in day mode
even with the headlight switch on,
select “Day mode” for brightness
and contrast control.
The displays condition is not changed
to night mode even if headlight switch
is turned on when the vehicle is in a
bright area, such as outside in direct
sunlight.
CONTRAST AND
BRIGHTNESS
ADJUSTMENT
The contrast and brightness of the
screen can be adjusted according to
the brightness of your surroundings.
The display can also be turned off.
Screen buttonFunction
“Contrast”
“+”Select to strengthen the
contrast of the screen.
“Contrast” “-”Select to weaken the
contrast of the screen.
“Brightness”
“+”Select to brighten the
screen.
“Brightness”
“-”Select to darken the
screen.
CHANGING BETWEEN DAY
AND NIGHT MODE
Depending on the position of the
headlight switch, the screen changes
to day or night mode.
INFORMATION
If the screen is set to day mode with
the headlight switch turned on, this
condition is memorized in the system
even with the engine
turned off.
Page 61 of 256
61
2. SETUP
GS450h_300h_350_250_NAVI_OM30D64E_(EE)
13.10.23 11:07
2
BASIC FUNCTION
On this screen, the following functions
can be performed:SCREENS FOR GENERAL
SETTINGS
No
.Function
Select to change the time zone and
select “On” or “Off” for daylight
saving time. (See “SYSTEM
TIME SETTINGS” on page 62.)
Select to change the language.
(See “SELECTING A LAN-
GUAGE” on page 64.)
Select to change the voice recog-
nition language. (See “SELECT-
ING A VOICE RECOGNITION
LANGUAGE” on page 64.)
Select to customize the opening
image. (See “CHANGING THE
OPENING IMAGE” on page 65.)
Select to customize the screen off
image. (See “CHANGING THE
SCREEN OFF IMAGE” on page
67.)
Select to set automatic screen
changes “On” or “Off”. If “On” is
selected, the audio/air condition-
ing control screen will automati-
cally change back to the
previously displayed screen (for
example the map screen) if no op-
erations are performed for 20 sec-
onds.
Page 62 of 256

62
2. SETUP
GS450h_300h_350_250_NAVI_OM30D64E_(EE)
13.10.23 11:07
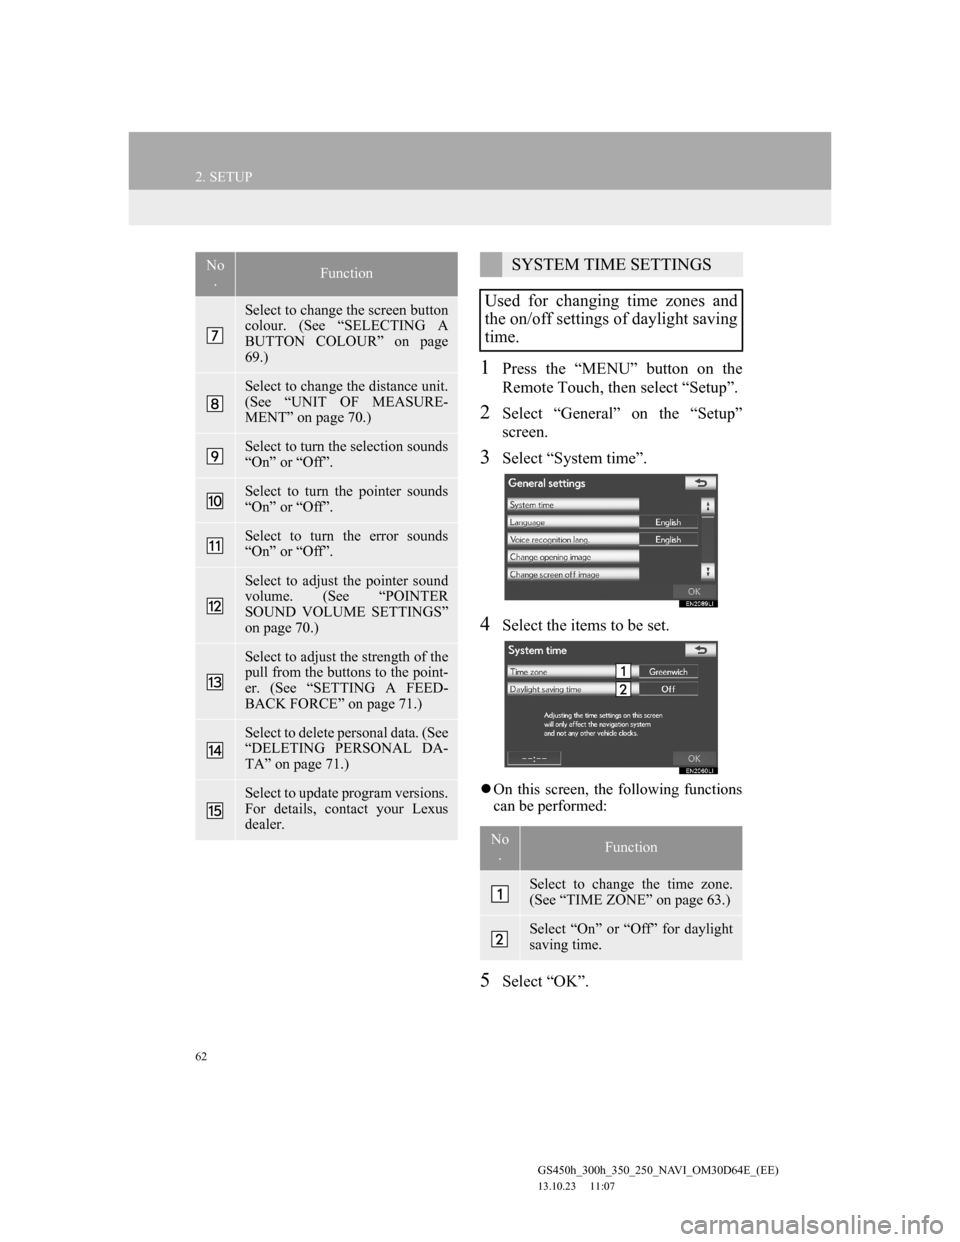
1Press the “MENU” button on the
Remote Touch, then select “Setup”.
2Select “General” on the “Setup”
screen.
3Select “System time”.
4Select the items to be set.
On this screen, the following functions
can be performed:
5Select “OK”.
Select to change the screen button
colour. (See “SELECTING A
BUTTON COLOUR” on page
69.)
Select to change the distance unit.
(See “UNIT OF MEASURE-
MENT” on page 70.)
Select to turn the selection sounds
“On” or “Off”.
Select to turn the pointer sounds
“On” or “Off”.
Select to turn the error sounds
“On” or “Off”.
Select to adjust the pointer sound
volume. (See “POINTER
SOUND VOLUME SETTINGS”
on page 70.)
Select to adjust the strength of the
pull from the buttons to the point-
er. (See “SETTING A FEED-
BACK FORCE” on page 71.)
Select to delete personal data. (See
“DELETING PERSONAL DA-
TA” on page 71.)
Select to update program versions.
For details, contact your Lexus
dealer.
No
.FunctionSYSTEM TIME SETTINGS
Used for changing time zones and
the on/off settings of daylight saving
time.
No
.Function
Select to change the time zone.
(See “TIME ZONE” on page 63.)
Select “On” or “Off” for daylight
saving time.
Page 112 of 256
112
2. ROUTE GUIDANCE
GS450h_300h_350_250_NAVI_OM30D64E_(EE)
13.10.23 11:07
ROUTE INCLUDING IPD
ROADS
After the system has calculated a route,
it will advise the user whether IPD
roads are included in the route or not.
The portion of the route that covers IPD
roads is indicated by light blue.
*: The area that includes IPD roads.
No.Voice guidance
“There is the possibility that there
are traffic regulations that are not
known on the way to the destina-
tion.” (start point)
“In 400 meters, left turn.”
“Next left. Please obey all traffic
regulations.”
IPD roads are roads that are not yet
completely digitized in our database.
However, their geometry, name and
administrative coding are already
known.
*
CAUTION
Be sure to obey the traffic regulations
and keep the road condition in mind
especially when you are driving on
IPD roads. The route guidance may
not have the updated information
such as the direction of a one way
street.
Page 198 of 256

198
1. CONNECTED SERVICES
GS450h_300h_350_250_NAVI_OM30D64E_(EE)
13.10.23 11:07
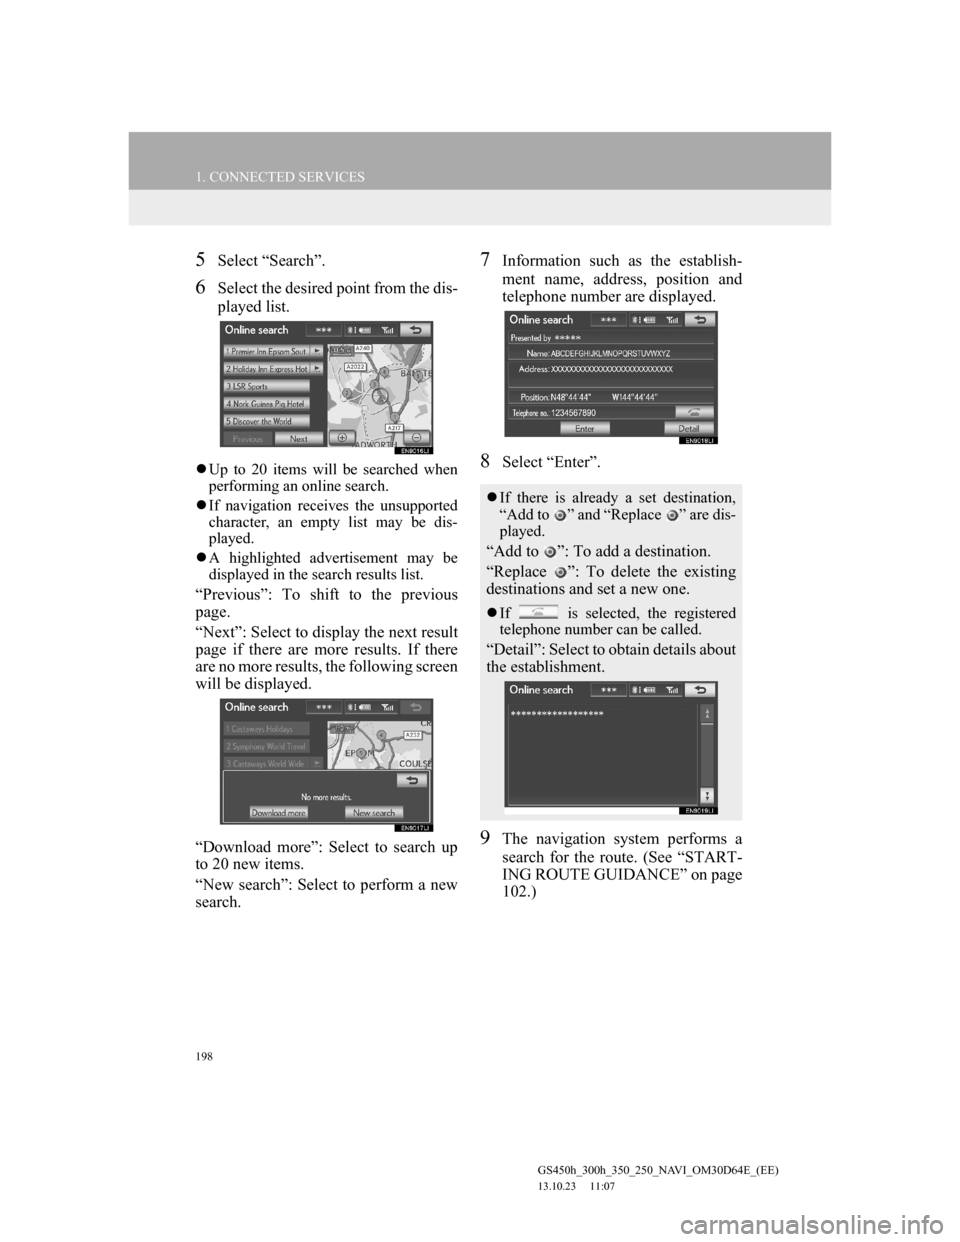
5Select “Search”.
6Select the desired point from the dis-
played list.
Up to 20 items will be searched when
performing an online search.
If navigation receives the unsupported
character, an empty list may be dis-
played.
A highlighted advertisement may be
displayed in the search results list.
“Previous”: To shift to the previous
page.
“Next”: Select to display the next result
page if there are more results. If there
are no more results, the following screen
will be displayed.
“Download more”: Select to search up
to 20 new items.
“New search”: Select to perform a new
search.
7Information such as the establish-
ment name, address, position and
telephone number are displayed.
8Select “Enter”.
9The navigation system performs a
search for the route. (See “START-
ING ROUTE GUIDANCE” on page
102.)
If there is already a set destination,
“Add to ” and “Replace ” are dis-
played.
“Add to ”: To add a destination.
“Replace ”: To delete the existing
destinations and set a new one.
If is selected, the registered
telephone number can be called.
“Detail”: Select to obtain details about
the establishment.