Page 246 of 573
Continued245
uuAudio System Basic OperationuPlaying Hard Disc Drive (HDD) Audio
Features
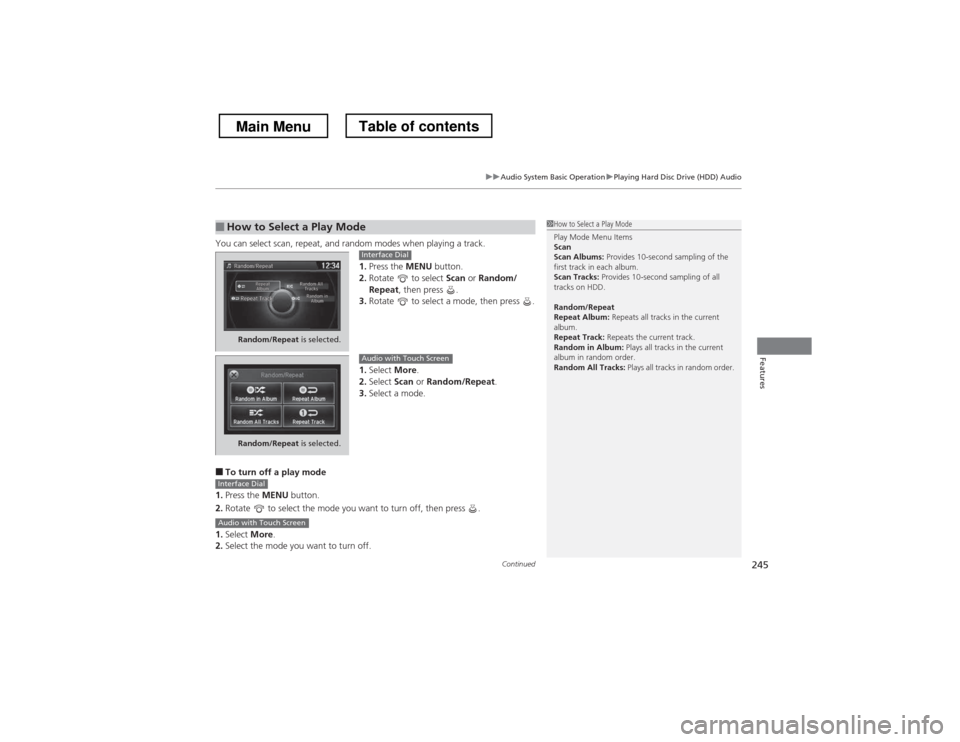
You can select scan, repeat, and random modes when playing a track.
1.Press the MENU button.
2. Rotate to select Scan or Random/
Repeat , then press .
3. Rotate to select a mode, then press .
1. Select More.
2. Select Scan or Random/Repeat .
3. Select a mode.
■ To turn off a play mode
1. Press the MENU button.
2. Rotate to select the mode you want to turn off, then press .
1. Select More.
2. Select the mode you want to turn off.
■How to Select a Play Mode1How to Select a Play Mode Play Mode Menu Items Scan
Scan Albums: Provides 10-second sampling of the
first track in each album.
Scan Tracks: Provides 10-second sampling of all
tracks on HDD.
Random/Repeat
Repeat Album: Repeats all tracks in the current
album.
Repeat Track: Repeats the current track.
Random in Album: Plays all tracks in the current
album in random order.
Random All Tracks: Plays all tracks in random order.
Random/Repeat is selected.
Interface Dial
Random/Repeat is selected.
Audio with Touch Screen
Interface Dial
Audio with Touch Screen
Main MenuTable of contents
Page 253 of 573
252
uuAudio System Basic OperationuPlaying an iPod®
Features
Playing an iPod ®
Connect the iPod ® using your dock connector to the USB adapter cable, then select
the iPod mode. 2 USB Adapter Cable P. 165
Audio/Information Screen Audio with Touch Screen
MENU Button
Press to display the menu items.
Album Bar
Select to search for an album.
Source
Select to change an audio source.
Skip/Seek Icons
Select or to change songs.
Select and hold to move rapidly
within a song.
More
Select to display the menu items.
(Power) Button
Press to turn the audio system on and off.
BACK Button
Press to go back to the previous display.
VOL (Volume) Knob
Turn to adjust the volume.
Interface Dial/ENTER Button
Press and turn to select an item,
then press to set your selection.
Move up, down, right and left to
select secondary menu.
USB Indicator
Appears when an iPod
® is connected.
Album Art
Album Art Icon
Main MenuTable of contents
Page 261 of 573
260
uuAudio System Basic OperationuPlaying Internet Radio
Features
Playing Internet Radio
Connect a compatible phone through Bluetooth®.
You can also connect the phone using your dock connector to the USB adapter cable.
Make sure the audio setting is correct for the connection type. 2 USB/Bluetooth Connection Priority *
P. 312
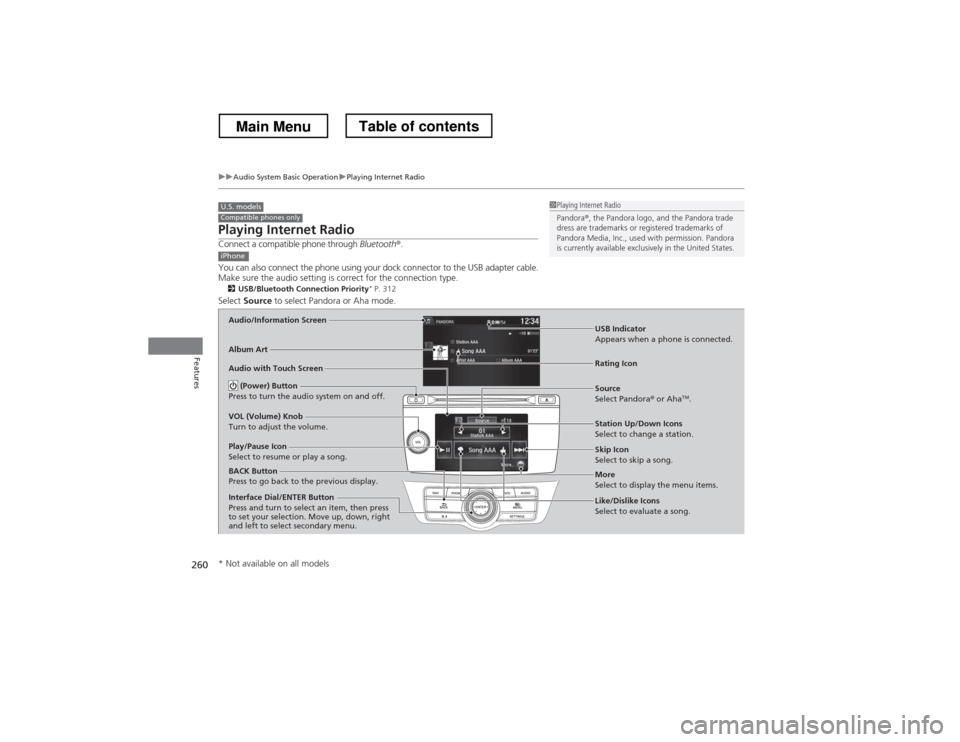
Select Source to select Pandora or Aha mode.
U.S. modelsCompatible phones only1Playing Internet Radio
Pandora®, the Pandora logo, and the Pandora trade
dress are trademarks or registered trademarks of
Pandora Media, Inc., used with permission. Pandora
is currently available exclusively in the United States.
iPhone
Audio/Information Screen
Album Art
USB Indicator
Appears when a phone is connected.
Rating IconAudio with Touch Screen
BACK Button
Press to go back to the previous display.
Skip Icon
Select to skip a song.
More
Select to display the menu items.
Station Up/Down Icons
Select to change a station.
Source
Select Pandora
® or Aha TM
.
Play/Pause Icon
Select to resume or play a song.
Like/Dislike Icons
Select to evaluate a song.
(Power) Button
Press to turn the audio system on and off.
VOL (Volume) Knob
Turn to adjust the volume.
Interface Dial/ENTER Button
Press and turn to select an item, then press
to set your selection. Move up, down, right
and left to select secondary menu.
* Not available on all models
Main MenuTable of contents
Page 264 of 573
263
uuAudio System Basic OperationuPlaying a USB Flash Drive
Continued
Features
Playing a USB Flash Drive
Your audio system reads and plays sound files on a USB flash drive in either MP3,
WMA, or AAC*1
format.
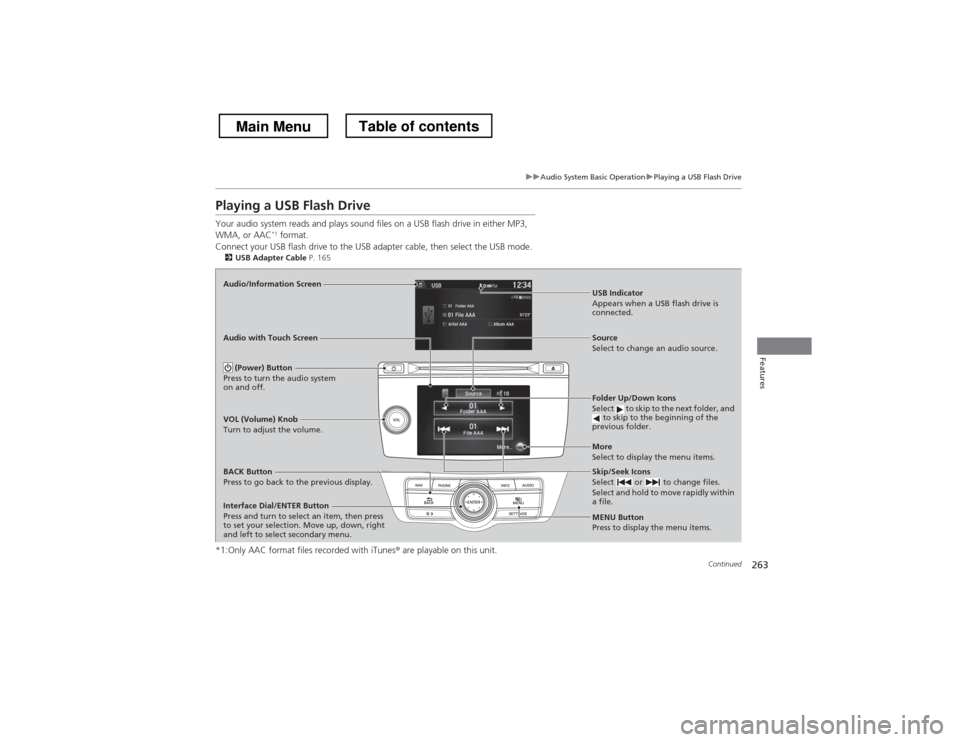
Connect your USB flash driv e to the USB adapter cable, then select the USB mode.
2 USB Adapter Cable P. 165
*1:Only AAC format files recorded with iTunes ® are playable on this unit.
Audio/Information Screen
BACK Button
Press to go back to the previous display.
More
Select to display the menu items.
Source
Select to change an audio source.
USB Indicator
Appears when a USB flash drive is
connected.
Folder Up/Down Icons
Select to skip to the next folder, and
to skip to the beginning of the
previous folder.
Skip/Seek Icons
Select or to change files.
Select and hold to move rapidly within a file.
(Power) Button
Press to turn the audio system
on and off.
VOL (Volume) Knob
Turn to adjust the volume.
Interface Dial/ENTER Button
Press and turn to select an item, then press
to set your selection. Move up, down, right
and left to select secondary menu.
Audio with Touch Screen
MENU Button
Press to display the menu items.
Main MenuTable of contents
Page 266 of 573
265
uuAudio System Basic OperationuPlaying a USB Flash Drive
Features
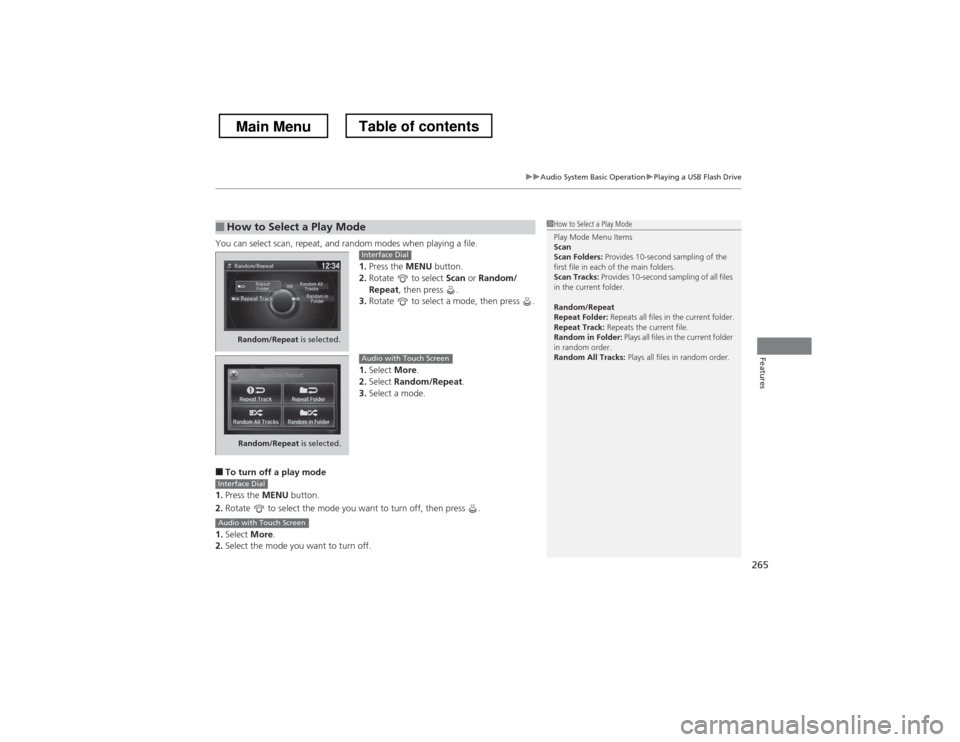
You can select scan, repeat, and random modes when playing a file.1.Press the MENU button.
2. Rotate to select Scan or Random/
Repeat , then press .
3. Rotate to select a mode, then press .
1. Select More.
2. Select Random/Repeat .
3. Select a mode.
■ To turn off a play mode
1. Press the MENU button.
2. Rotate to select the mode you want to turn off, then press .
1. Select More.
2. Select the mode you want to turn off.
■How to Select a Play Mode1How to Select a Play Mode Play Mode Menu Items Scan
Scan Folders: Provides 10-second sampling of the
first file in each of the main folders.
Scan Tracks: Provides 10-second sampling of all files
in the current folder.
Random/Repeat
Repeat Folder: Repeats all files in the current folder.
Repeat Track: Repeats the current file.
Random in Folder: Plays all files in the current folder
in random order.
Random All Tracks: Plays all files in random order.
Random/Repeat is selected.
Interface Dial
Random/Repeat is selected.
Audio with Touch Screen
Interface Dial
Audio with Touch Screen
Main MenuTable of contents
Page 268 of 573
267
uuAudio System Basic OperationuPlaying Bluetooth ® Audio
Features
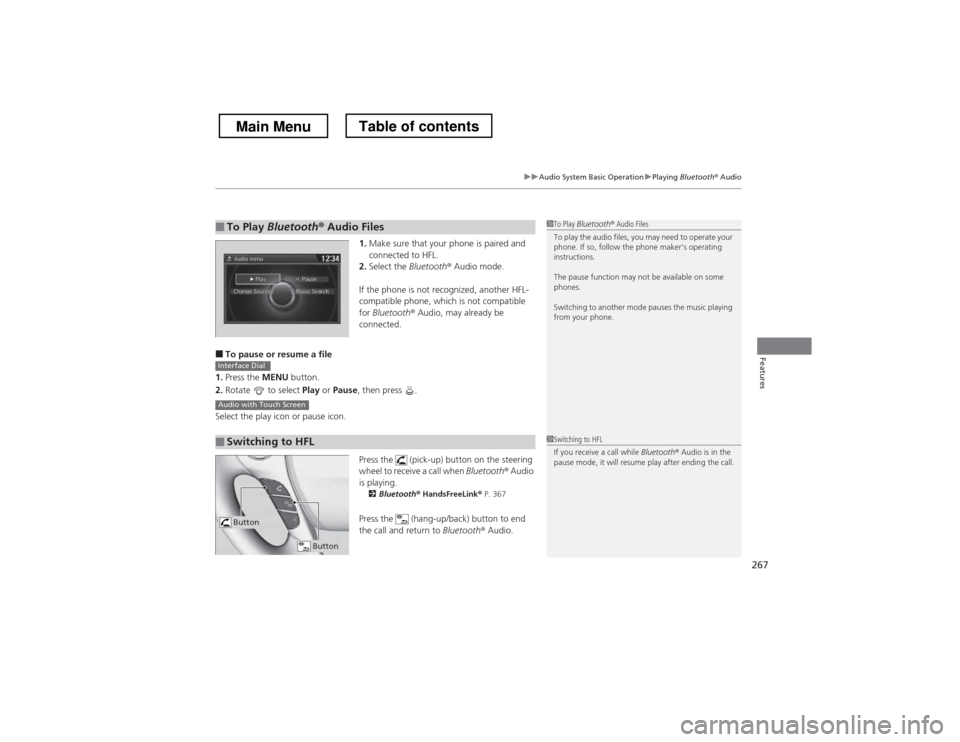
1. Make sure that your phone is paired and
connected to HFL.
2. Select the Bluetooth® Audio mode.
If the phone is not recognized, another HFL-
compatible phone, which is not compatible
for Bluetooth ® Audio, may already be
connected.
■ To pause or resume a file
1. Press the MENU button.
2. Rotate to select Play or Pause , then press .
Select the play icon or pause icon.
Press the (pick-up) button on the steering
wheel to receive a call when Bluetooth® Audio
is playing. 2 Bluetooth ® HandsFreeLink ® P. 367
Press the (hang-up/back) button to end
the call and return to Bluetooth® Audio.
■To Play Bluetooth ® Audio Files1To Play Bluetooth ® Audio Files
To play the audio files, you may need to operate your
phone. If so, follow the phone maker’s operating instructions.
The pause function may not be available on some
phones.
Switching to another mode pauses the music playing
from your phone.
■Switching to HFL
Interface Dial
Audio with Touch Screen
1Switching to HFL
If you receive a call while Bluetooth® Audio is in the
pause mode, it will resume play after ending the call.
Button
Button
Main MenuTable of contents
Page 278 of 573
277
uuGeneral Information on the Audio SystemuRecommended CDs
Continued
Features
Recommended CDs •Use only high-quality CD-R or CD-RW discs labeled for audio use.
• Use only CD-R or CD-RW discs on which the recordings are closed.
• Play only standard round-shaped CDs.
• Some software files may not allow for audio play or text data display.
• Some versions of MP3, WMA, or AAC formats may be unsupported.
1Recommended CDs
A Dual-disc cannot play on this audio unit. If recorded
under certain conditions, a CD-R or CD-RW may not play either.
Manufactured under license under U.S. Patent Nos:
5,956,674; 5,974,380; 6,487,535 & other U.S. and
worldwide patents issued & pending. DTS, the
Symbol, & DTS and the Symbol together are
registered trademarks & DTS 2.0 Channel is a
trademark of DTS, Inc. Product includes software.
©DTS, Inc. All Rights Reserved.
■CDs with MP3, WMA, or AAC files
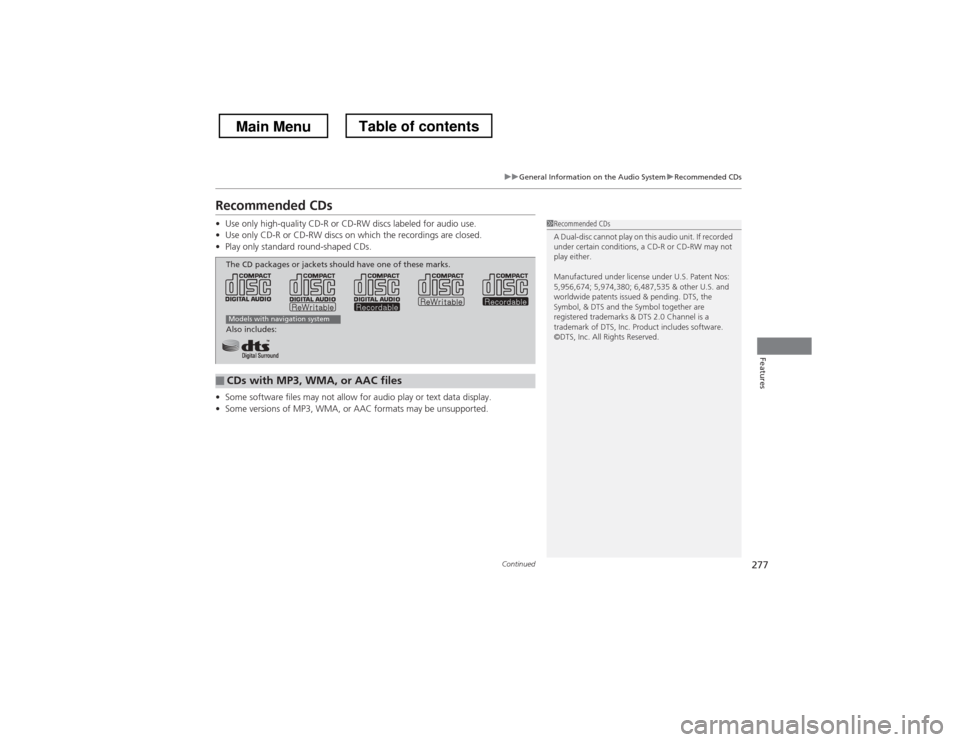
The CD packages or jackets should have one of these marks.
Also includes:
Models with navigation system
Main MenuTable of contents
Page 284 of 573
283
uuCustomized Features*u
Continued
Features
■
Customization flow
Models without navigation system
Clock Format
Background Color
Header Clock Display
Factory data reset
Clock Adjustment
Press and hold the DISP button.
Language
Default
Edit Pairing Code
Bluetooth
Bluetooth Device List
Brightness
Contrast
Black level
Beep
Clock/
Wallpaper
TypeClock Type
Wallpaper
System
Settings
Bluetooth
Display
Clock
Other s
Display Operation Restriction Tips
Voice Recognition
Main MenuTable of contents