Page 431 of 573
430
uuWhen DrivinguShifting
Driving
Use the paddle shifters to change between 1st and 6th gears without removing your
hands from the steering wheel. The transmission will switch to the sequential shift mode. ■When the shift lever is in
(D :
The vehicle will go into the sequential shift mode momentarily, and the gear position indicator will come on.
Once you start traveling at a constant speed, the sequential shift mode will
automatically switch off, and the gear position indicator will go off.
Hold the
(+ paddle shifter for two seconds to return to normal drive.
■ When the shift lever is in
(S :
The vehicle will go into the sequential shift mode, and the M (sequential shift mode)
indicator and gear position indicator will come on. At speeds of 6 mph (10 km/h) or
less, the vehicle automatically shifts down into 1st gear. It will not automatically shift
up, even if vehicle speed increases.
You can only pull away in 1st or 2nd gear.
When switching out of the sequential shift mode, move the shift lever from
(S to (D. When the sequential shift mode is canceled, the M indicator and gear position
indicator go off.
■Sequential Shift Mode
Main MenuTable of contents
Page 432 of 573
431
uuWhen DrivinguShifting
Driving
■Second gear lock mode
If you pull the (+ paddle shifter while stopped or driving at 6 mph (10 km/h) or less,
the gear position will be locked in 2nd gear. This makes it easier to pull away on
slippery surfaces such as snow covered roads.
To cancel the 2nd gear lock mode, pull the
(- paddle shifter, or move the shift lever
from (S to (D.
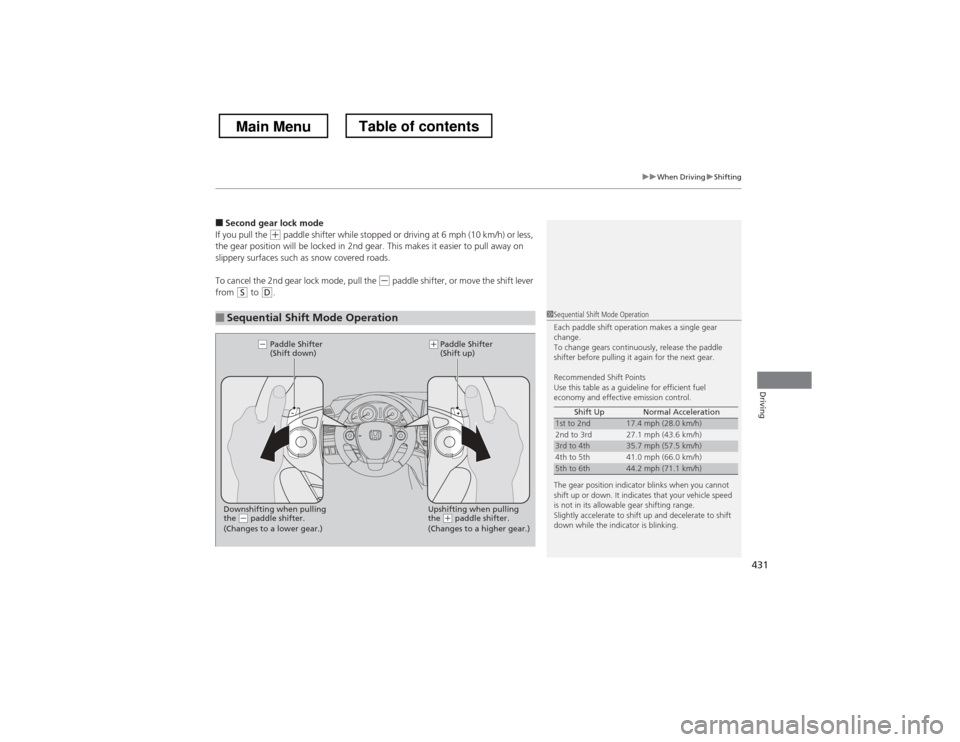
■Sequential Shift Mode Operation1Sequential Shift Mode Operation
Each paddle shift operation makes a single gear change.
To change gears continuously, release the paddle
shifter before pulling it again for the next gear.
Recommended Shift Points
Use this table as a guideline for efficient fuel
economy and effective emission control.
The gear position indicator blinks when you cannot
shift up or down. It indicates that your vehicle speed
is not in its allowable gear shifting range.
Slightly accelerate to shift up and decelerate to shift
down while the indicator is blinking. Shift Up Normal Acceleration
1st to 2nd17.4 mph (28.0 km/h)
2nd to 3rd 27.1 mph (43.6 km/h)
3rd to 4th35.7 mph (57.5 km/h)
4th to 5th 41.0 mph (66.0 km/h)
5th to 6th44.2 mph (71.1 km/h)
Paddle Shifter
(Shift down) Paddle Shifter
(Shift up)
Downshifting when pulling
the
(- paddle shifter. Upshifting when pulling
the (+
paddle shifter.
(-(+
(Changes to a lower gear.) (Changes to a higher gear.)
Main MenuTable of contents
Page 437 of 573
uuWhen DrivinguForward Collision Warning (FCW)*
436
Driving
1Forward Collision Warning (FCW) *
Never apply a film or attach any objects to the
windshield that could obstruct the FCW camera’s
field of vision.
Scratches, nicks, and other damage to the windshield
within the FCW camera’s field of vision can cause the
system to operate abnormally. If this occurs, we
recommend that you replace the windshield with a
genuine Honda replacement windshield. Making
even minor repairs within the camera’s field of vision
or installing an aftermarket replacement windshield
may also cause the system to operate abnormally.
After replacing the windshield, have a dealer
recalibrate the camera. Proper calibration of the FCW
camera is necessary for the system to operate properly.
Beep
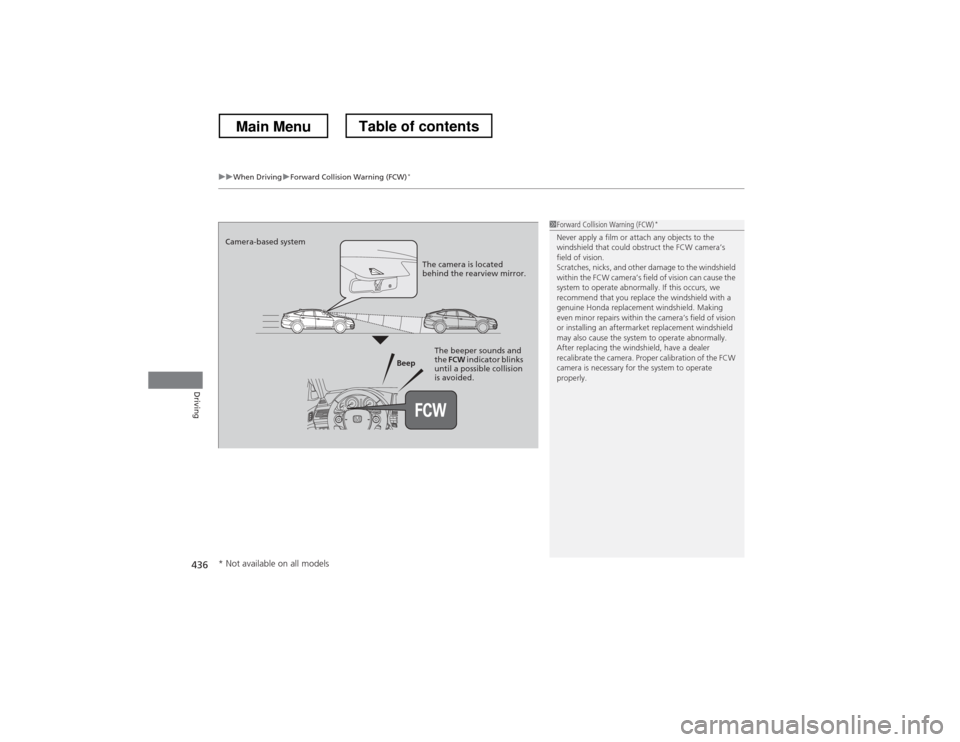
Camera-based system
The camera is located
behind the rearview mirror.
The beeper sounds and
the FCW indicator blinks
until a possible collision
is avoided.
* Not available on all models
Main MenuTable of contents
Page 441 of 573
uuWhen DrivinguLane Departure Warning (LDW)*
440
Driving
The system begins to search for lane markings when all the following conditions are met: • The vehicle is traveling between at 40-90 mph (64-145 km/h).
• The vehicle is on a straight or slightly curved road.
• The turn signals are off.
• The brake pedal is not pressed.
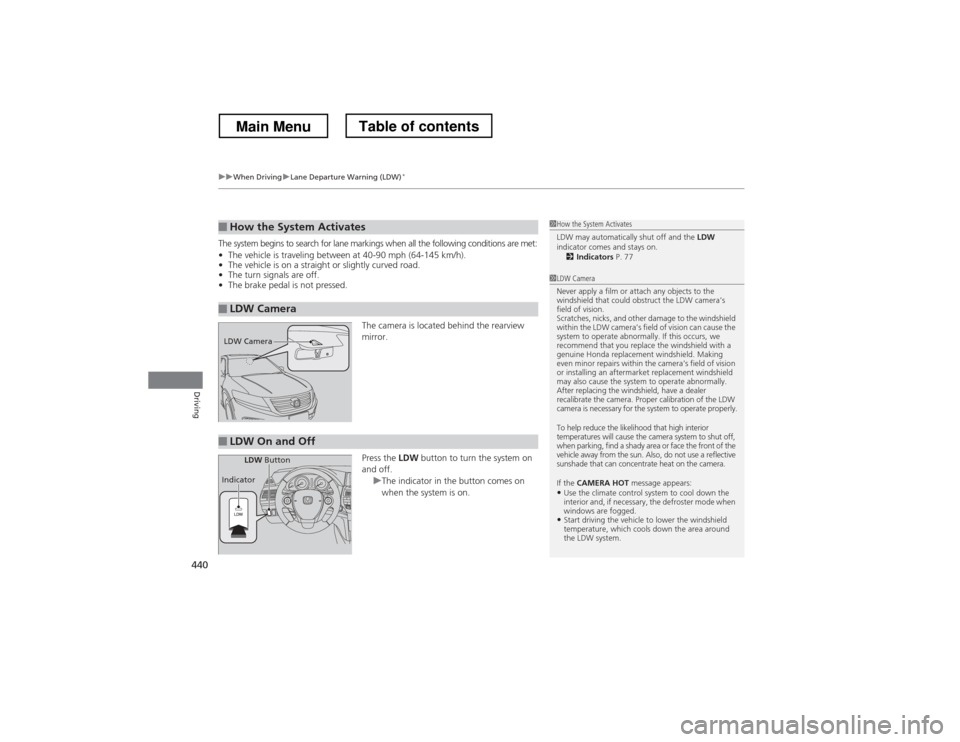
The camera is located behind the rearview mirror. Press the LDW button to turn the system on
and off.
uThe indicator in the button comes on
when the system is on.
■How the System Activates
■LDW Camera
1How the System Activates
LDW may automatically shut off and the LDW
indicator comes and stays on.
2 Indicators P. 77
1LDW Camera
Never apply a film or attach any objects to the
windshield that could obstruct the LDW camera’s
field of vision.
Scratches, nicks, and other damage to the windshield
within the LDW camera’s field of vision can cause the
system to operate abnormally. If this occurs, we
recommend that you replace the windshield with a
genuine Honda replacement windshield. Making
even minor repairs within the camera’s field of vision
or installing an aftermarket replacement windshield
may also cause the system to operate abnormally.
After replacing the windshield, have a dealer
recalibrate the camera. Proper calibration of the LDW
camera is necessary for the system to operate properly.
To help reduce the likelihood that high interior
temperatures will cause the camera system to shut off,
when parking, find a shady area or face the front of the
vehicle away from the sun. Also, do not use a reflective
sunshade that can concentrate heat on the camera.
If the CAMERA HOT message appears:
• Use the climate control system to cool down the
interior and, if necessary, the defroster mode when
windows are fogged.
• Start driving the vehicle to lower the windshield
temperature, which cools down the area around
the LDW system.
LDW Camera
■LDW On and Off
LDW Button
Indicator
Main MenuTable of contents
Page 448 of 573
447
uuWhen DrivinguTire Pressure Monitoring System (TPMS) - Required Federal Explanation
Continued
Driving
Tire Pressure Monitoring System (TPMS) - Required
Federal Explanation
Each tire, including the spare (if provided), should be checked
monthly when cold and inflated to the inflation pressure recommended by the vehicle manufacturer on the vehicle placard
or tire inflation pressure label.
(If your vehicle has tires of a different size than the size indicated
on the vehicle placard or tire inflation pressure label, you should
determine the proper tire inflation pressure for those tires.)
As an added safety feature, your vehicle has been equipped with a tire pressure monitoring system (TPM S) that illuminates a low
tire pressure telltale
when one or more of your tires is significantly under-inflated.
Accordingly, when the low tire pressure telltale illuminates, you
should stop and check your tires as soon as possible, and inflate them to the proper pressure.
Driving on a significantly under-inflated tire causes the tire to
overheat and can lead to tire fail ure. Under-inflation also reduces
fuel efficiency and tire tread life, and may affect the vehicle’s
handling and stopping ability.
U.S. models
Main MenuTable of contents
Page 455 of 573
454
Driving
Rearview Camera
About Your Rearview Camera
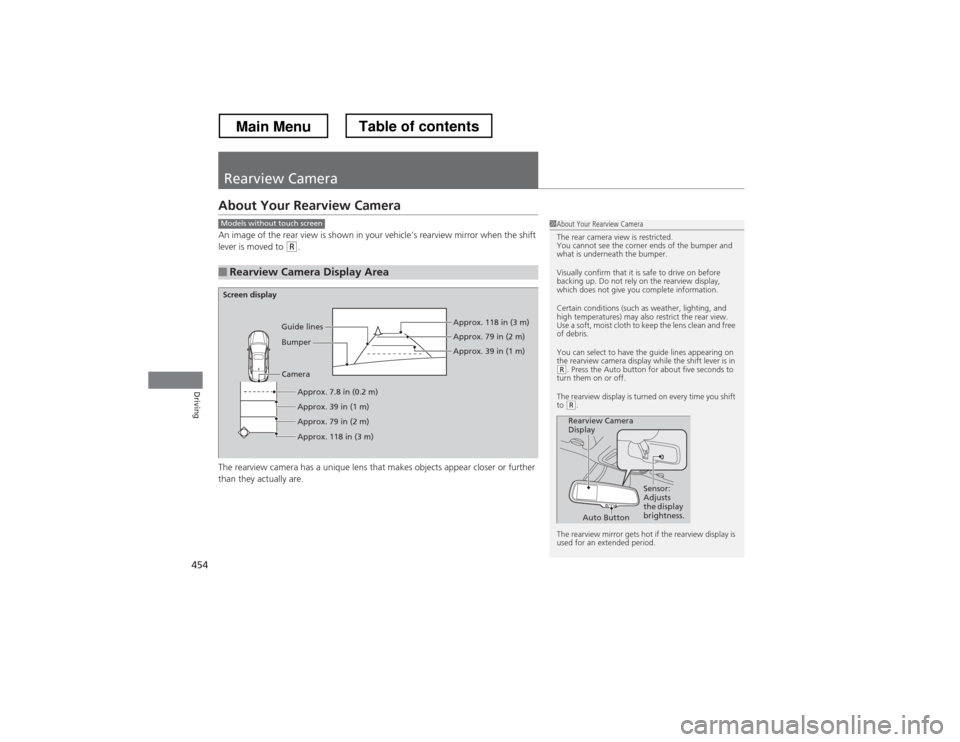
An image of the rear view is shown in your vehicle’s rearview mirror when the shift
lever is moved to
(R.
The rearview camera has a unique lens that makes objects appear closer or further
than they actually are.
■Rearview Camera Display Area
1About Your Rearview Camera
The rear camera view is restricted.
You cannot see the corner ends of the bumper and
what is underneath the bumper.
Visually confirm that it is safe to drive on before
backing up. Do not rely on the rearview display,
which does not give you complete information.
Certain conditions (such as weather, lighting, and
high temperatures) may also restrict the rear view.
Use a soft, moist cloth to keep the lens clean and free
of debris.
You can select to have the guide lines appearing on
the rearview camera display while the shift lever is in
(R . Press the Auto button for about five seconds to
turn them on or off.
The rearview display is turned on every time you shift to
(R .
The rearview mirror gets hot if the rearview display is
used for an extended period.
Rearview Camera
Display Sensor:
Adjusts
the display
brightness.
Auto Button
Models without touch screen
Screen display
CameraApprox. 7.8 in (0.2 m)
Approx. 39 in (1 m)
Approx. 79 in (2 m) Approx. 118 in (3 m) Approx. 118 in (3 m) Approx. 79 in (2 m) Approx. 39 in (1 m)
Bumper
Guide lines
Main MenuTable of contents
Page 463 of 573
462
Maintenance
Before Performing Maintenance
Inspection and Maintenance
For your safety, perform all listed inspections and maintenance to keep your vehicle
in good condition. If you become aware of any abnormality (noise, smell, insufficient
brake fluid, oil residue on the ground, etc.), have your vehicle inspected by a dealer.
(Note, however, that service at a dealer is not mandatory to keep your warranties in
effect.) Refer to the separate maintenance booklet for detailed maintenance and inspection information. ■Daily inspections
Perform inspections before long distance trips, when washing the vehicle, or when refueling.
■ Periodic inspections
• Check the brake fluid level monthly.
2 Checking the Brake Fluid P. 481
• Check the tire pressure monthly. Examine the tread for wear and foreign objects.
2 Checking and Maintaining Tires P. 497
• Check the operation of the exterior lights monthly.
2 Replacing Light Bulbs P. 484
• Check the condition of the wiper blades at least every six months.
2 Checking and Maintaining Wiper Blades P. 493
■Types of Inspection and Maintenance
1Inspection and Maintenance
Maintenance, replacement, or repair of
emissions control devices and systems may be
done by any automotive repair establishment or
individuals using parts that are “certified” to EPA standards.
According to state and federal regulations, failure to
perform maintenance on the maintenance main
items marked with # will not void your emissions
warranties. However, all maintenance services should
be performed in accordance with the intervals
indicated by the information display.
2 Maintenance Service Items P. 467
If you want to perform complex maintenance tasks
that require more skills and tools, you can purchase a
subscription to the Service Express website at
www.techinfo.honda.com .
2 Authorized Manuals P. 557
If you want to perform maintenance yourself, make
sure that you have the necessary tools and skills first.
After performing maintenance, update the records in
the separate maintenance booklet.
U.S. models
Main MenuTable of contents
Page 474 of 573
473
uuMaintenance Under the HooduOil Check
Continued
Maintenance
Oil Check
We recommend that you check the engine oil level every time you refuel.
Park the vehicle on level ground.
Wait approximately three minutes after turning the engine off before you check the
oil.1.Remove the dipstick (orange handle).
2. Wipe the dipstick with a clean cloth or paper towel.
3. Insert the dipstick back all the way into its
hole.
1Oil Check
If the oil level is near or below the lower mark, slowly
add oil being careful not to overfill.
4-cylinder models
6-cylinder models
Main MenuTable of contents