Page 57 of 294

close to this position as possible
c:>page 57.
A WARNING
Never place any objects in the driver's foot
well. An object could get into the pedal
area and interfere with pedal function. In
case of sudden braking or an accident, you
would not be able to brake or accelerate .
Front passenger's seat
Always move the front passenger seat into
the rearmost position .
To avoid contact with the airbag while it is de
ploying, do not sit any closer to the instru
ment panel than necessary and always wear
the three-point safety belt provided adjusted
correctly . We recommend that you adjust the
passenger's seat in the following manner:
.,. Bring the backrest up to an (almost) upright
position.
Do not ride with the seat reclined .
"" Applies to vehicles with adjustable head re
stra ints: Adjust the head restraint so the up
per edge is as even as possible with the top
of your head. If that is not possible, try to
adjust the head restraint so that it is as
close to this position as possible
c:> page 57.
.,. Place your feet on the floor in front of the
passenger's seat .
Front seats
Manual seat adjustment
Appl ies to vehicles: with manu ally a djustable seats
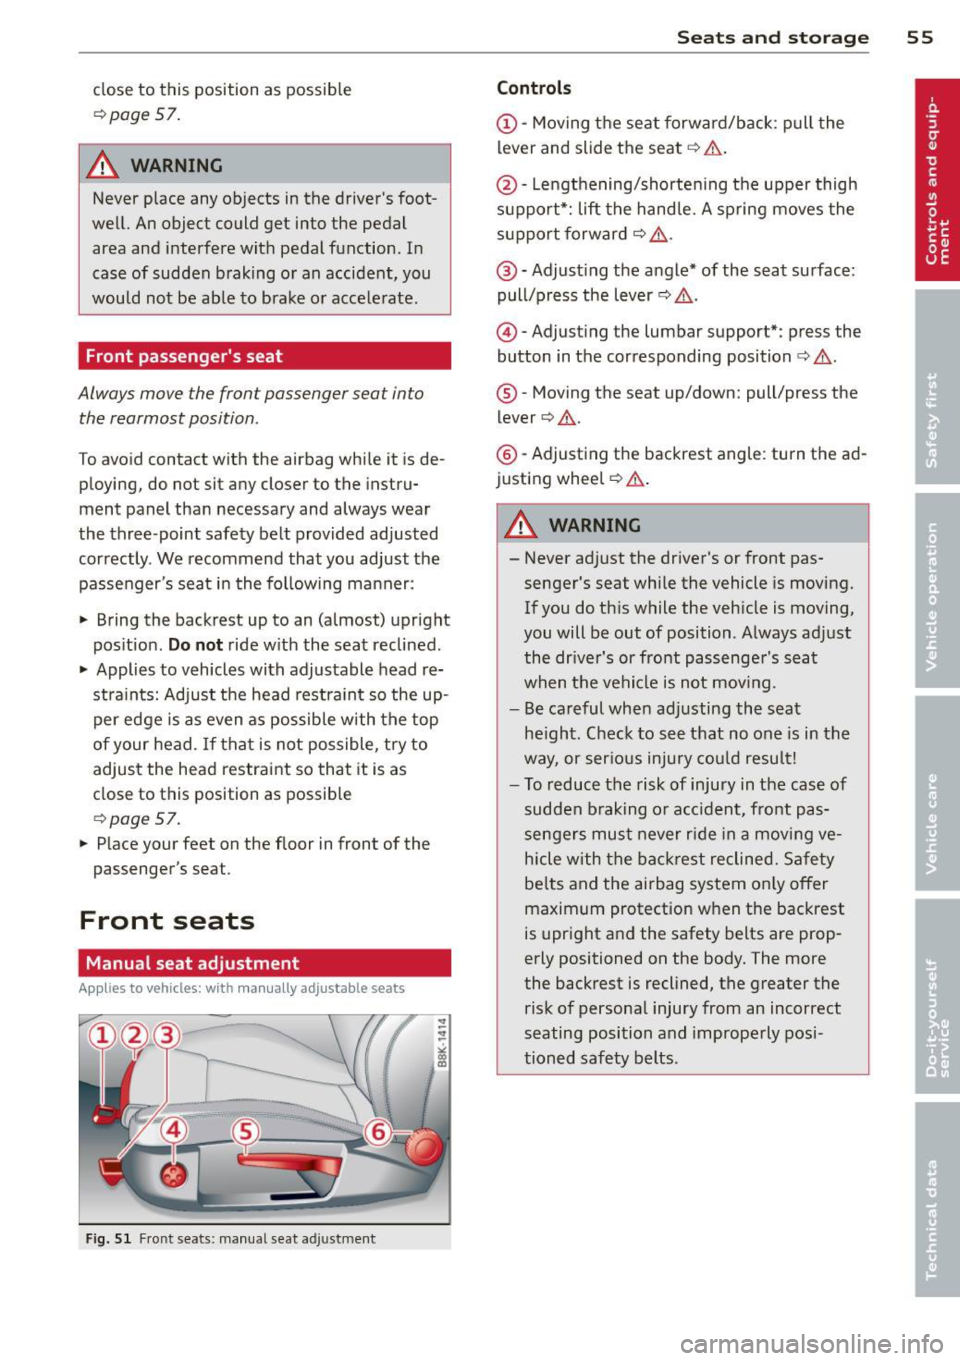
Fig. 51 Fr ont seats: manual seat adjustment
Seats and storage 55
Controls
@-Moving the seat forward/back: pull the
lever and slide the seat
c:> A.
@ -Lengthening/shortening the upper thigh
support*: lift the handle. A spring moves the
support forward
c:> ,& .
@ -Adjust ing the angle* of the seat surface:
pull/press the lever
c:> ,& .
@) -Adjusting the lumbar support*: press the
button in the corresponding position
c:> ,& .
®-Moving the seat up/down: pull/press the
lever
c:> .&. .
@ -Adjusting the backrest angle : turn the ad
justing wheel
c:> .&..
A WARNING ,--
-Never adjust the driver's or front pas
senger's seat while the vehicle is moving.
If you do this while the veh icle is moving,
you will be out of position. Always adjust
the dr iver's or front passenger's seat
when the vehicle is not mov ing.
- Be careful when adjusting the seat
he ight. Check to see that no one is in the
way, or ser ious injury could result!
- To reduce the risk of injury in the case of
sudden braking or accident, front pas
sengers must never rid e in a moving ve
hicle with the backrest reclined. Safety
be lts and the airbag system on ly offer
maximum protection when the backrest
is upright and the safety belts are prop
erly positioned on the body. The more
the backrest is reclined, the greater the
risk of personal injury from an incorrect
seating position and improperly posi
tioned safety belts.
Page 58 of 294

56 Seats and storage
Power seat adjustment
App lies to vehicles: with power adjustable seats
Fig. 52 Front seats: power seat adjustment
Controls
@ -Adj usting the lumbar support*: press the
button in the corresponding position¢ .&..
@-Moving the seat up/down: press the but
ton up/down¢ .&..
@-Moving the seat forward/back: p ress the
button fo rward/back
¢ & .
©-Adjusting the backrest angle: press the
button fo rward/back
¢ & .
©-Raising/lowering* the head restraints:
press the button up/down ¢ .&. .
@ -Lengthening/shortening the upper thigh
support*: lift the handle. A spring moves the
front seat cushion forward¢&.
A WARNING
- Never adjust the d river's or front pas
senger 's seat while the veh icle is moving.
If you do this wh ile the vehicle is movi ng,
yo u will be out of posit ion. Always adjus t
the drive r's or front passenger's seat
when the vehicle is not moving .
- Be care ful when adjus ting the seat
heig ht. Check to see that no one is in the
way, o r serious injury could result!
- B eca use the sea ts can be elec trically ad
justed with the ignit ion off or with the
ignition key removed, never leave chil
dren unattended in the vehicle. Unsuper
vised use of the electric seat adjust ments may cause serious injury. -
To reduce the risk of injury in the case of
sudden braking or accident, front pas
sengers must never r ide in a moving ve
hicle with the backrest reclined. Safety
be lts and the airbag system only offer
maximum protection when the backrest is upr ight and the safety belts are prop
e rly po sitioned on the body. The more
the backres t is reclined, the grea ter the
risk of persona l injury from an incorrect
seating position and imprope rly posi
tioned safety belts.
Center armrest
The center armrest can be adjusted to several
levels .
Fig. 53 A rm rest between the driver's/front passenger's
seats.
Ad ju sting the center armrest
"" To adjust the ang le, raise the arm rest from
the starting position
¢ fig. 53 detent by de
t en t.
.,. To bring the armres t back into the starting
position, raise it out of the top detent and
fold it back down.
T he armrest can slide forwar d and back .
Page 59 of 294

Head restraints
Front head restraints
Applies to vehicles: with adj ustable head restraints
Head restraints that ore adjusted according
to body size, along with the seat belt , offer
effective protection .
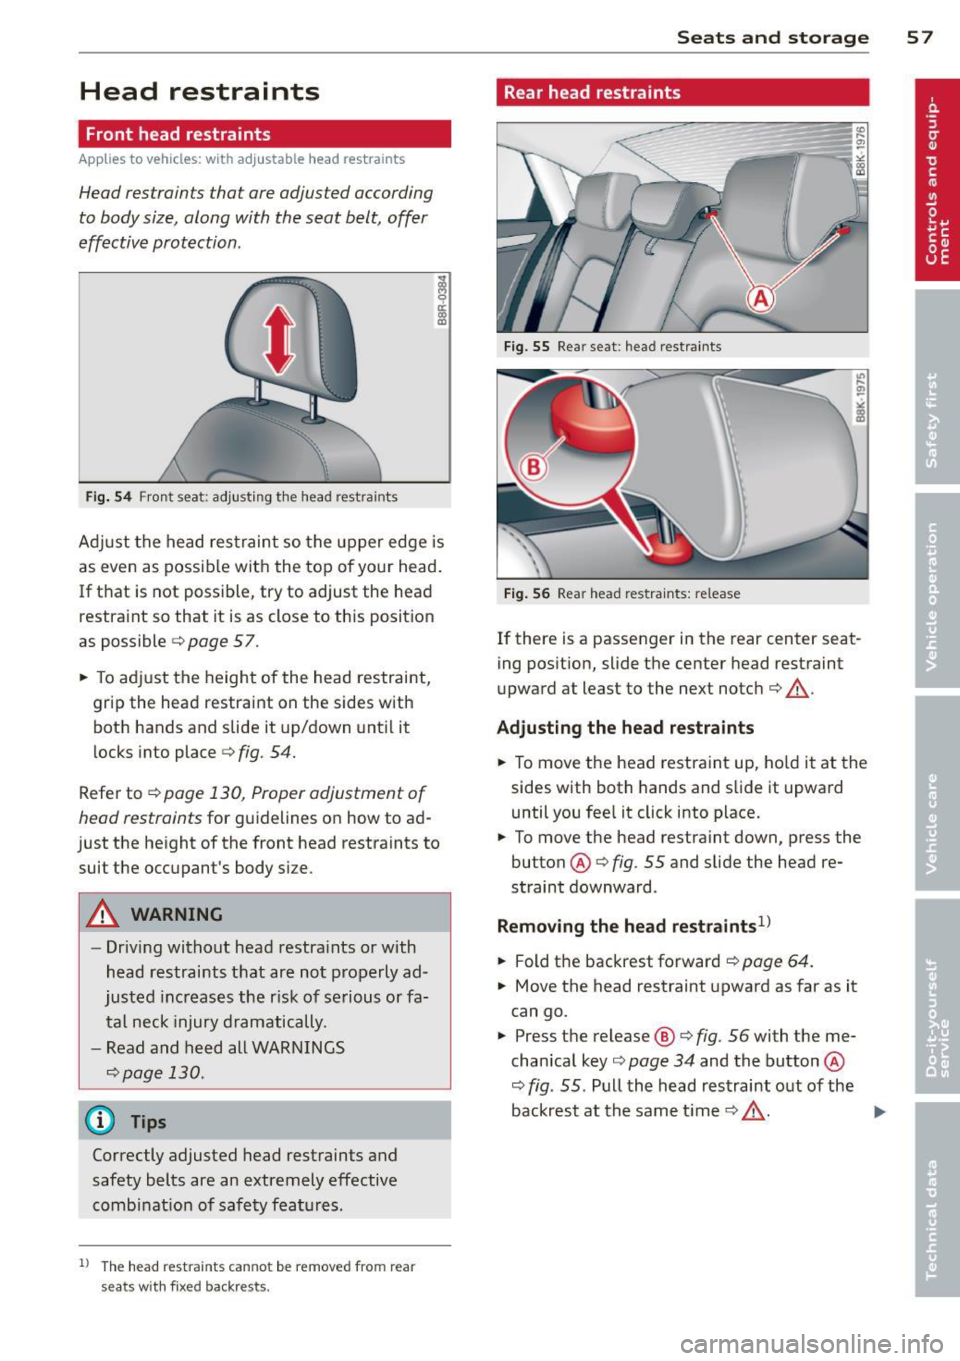
Fig. 54 Fron t seat: adjusting the head rest ra in ts
Ad just the head restraint so the upper edge is
as even as possible with the top of your head.
If that is not poss ible, try to adjust the head
restraint so that it is as close to this position
as possible
¢ page 57.
~ To adjust the height of the head restraint,
grip the head restraint on the sides with
both hands and slide it up/down until it
locks into place
¢fig. 54.
Refer to ¢ page 130, Proper adjustment of
head restraints
for guidelines on how to ad
just the height of the front head restraints to
suit the occupant's body size .
A WARNING
-Driving without head restra ints or with
head restraints that are not properly ad
justed increases the r isk of serious or fa
tal neck injury dramatically.
- Read and heed all WARNINGS
¢page 130.
@ Tips
Correctly adjusted head restraints and
safety belts are an extremely effective
combinat ion of safety features .
l) The head restr aints cann ot be re move d fro m rear
se ats with fixe d backr ests.
-
Seats and storage 57
Rear head restraints
Fig. 55 Rea r seat : head restraints
Fig. 56 Rear head restraints: release
If there is a passenger in the rear center seat
ing position, slide the center head restraint
upward at least to the next notch¢&_.
Adjusting the head restraints
~ To move the head restraint up, hold it at the
sides with both hands and slide it upward
until you feel it click into place.
~ To move the head restraint down, press the
button @¢
fig. 55 and slide the head re
straint downward .
Removing the head restraints1>
~ Fold the backrest forward ¢ page 64.
~ Move the head restraint upward as far as it
can go.
~ Press the release@¢ fig. 56 with the me
chanical key¢
page 34 and the button @
¢
fig . 55 . Pull the head restraint out of the
backrest at the same time¢&_ .
~
Page 60 of 294

58 Seats and storage
Install ing the head restraints
.,. Slide the posts on the head restra int down
into the guides un til you feel the posts click
into place.
.,. Press the button @
Q fig. 55 and slide the
head restraint all the way down. You sho uld
not be able to pull the head restra int out of
the backrest .
So that the driver can have a better view to
the rear, the head restraints should be pushed
down complete ly when the rear seats are not
occupied.
A WARNING
- Read and heed all WARNINGS
9page 130 .
-Only remove the rear seat head rest raints
when necessa ry in order to install a chi ld
sea t
Q page 173. Insta ll the head re
stra in t again immedia tely once the c hild
sea t is removed. Driving w ithout head re
st raints or w ith head restra ints that a re
not properly adjusted increases the risk
of serious or fata l neck injury dramatical
ly.
@ Tips
Correctly adjus ted head restraints and
safety belts are an extremely effective
comb inat ion of safety features .
Seat memory
Description
Applies to vehicles: wit h memory fu nctio n
The memo ry function a llows you to quickly
and eas ily s to re and reca ll personal seating
profiles for the dr iver. The memory func tion is
operated through the master key and the memory buttons in the driver's door .
The driver's seating profi le is stored and as
signed to the master key each t ime the vehicle
is locked. The seating p rof ile is recalled auto
matica lly when the vehicle is un locked. If two
peop le use one vehicle, it is recommended t
h at each person always uses "their own"
master key .
Up to 2 seat p rofiles can be stored i n the
memo ry but tons in the drive r's door . Once
they are stored, these seat profiles can be se
lected at any time.
In add ition to the dr iver's se at settings, yo u
c a n a lso store and access the exterior mirror
adjus tment setti ngs * using the remote con
tro l key or memory button.
Remote control key
Applies to veh icles: w it h seat memory
To assign the dr iver's seat settings to the re
mote control key when locking the vehicle, the
funct ion must be act ivated in the radio or
MMI*
.,. Select: !CAR ! function button> Seat adjust
ment > Dr iver's seat
> Remote control ke y >
on.Or
.,. Select : I CAR I function b utton > Car systems
cont ro l butto n > Ve hicle setting s > Seats >
Driver's sea t> Remote contr ol ke y> On.
(@ Tips
If yo u do not want anothe r drive r's set·
ti ngs to be assigned to the remote key,
swi tc h off the memory f unct ion usi ng the
radio or
M MI* or th e IOFFI butto n
9page 58.
Memory buttons
Applies to veh icles : w it h seat memory
Fig . 57 Drive r's door : mem ory function buttons
The memory buttons a re located in the driv
er's door.
Page 61 of 294

Switching the memory function on/off
• Press the !O FF ! button to sw itch the memo
ry function on/off. The word
OFF lights up
when the memory function is switched off .
S eat profi le s are not stor ed .
Storing a seat profile
" Press the !SE T! button. When the word SET
lights up, the memory is ready to store set
tings.
" Press a memory button
([II or rn ) briefly. A
tone confirms that the s ett ing s wer e stored.
Accessing a seat profile
" If the driver's door is open, press a memory
button.
" If the driver 's door is closed, press and ho ld
the memory button until the seat adjust
ment is complete .
.&_ WARNING
- For safety reasons, the seat sett ing can
only be recalled when the veh icle is sta
tionary- otherwise you risk having an ac
c ident .
- In an emergency the recall procedure can
be cancelled by press ing the
!OF F! switch
or by tapping the memory buttons .
Ashtray
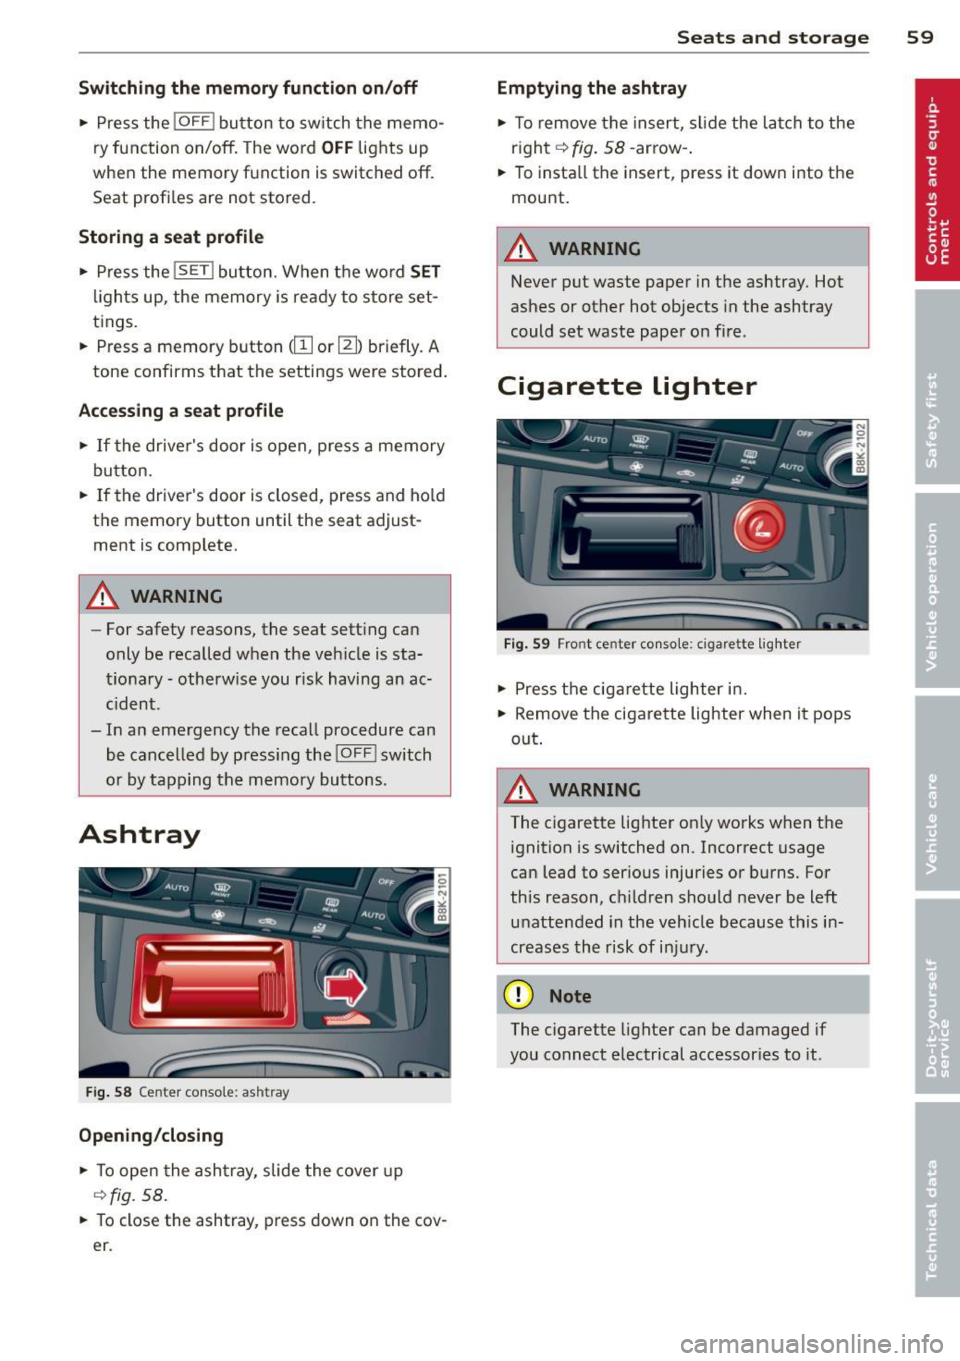
Fig. 58 Cente r conso le: ash tray
Opening /closing
• To open the ashtray , slide the cover up
¢ fig. 58 .
.. To close the ashtray, press down on the cov
e r.
Seats and storage 59
Emptying the ashtray
" To remove the insert, slide the latch to the
r ight ¢
fig. 58 -arrow- .
.. To insta ll the insert, press it down into the
mount.
.&_ WARNING
--Never put waste paper in the ashtray. Hot
ashes or other hot objects in the ashtray
could set waste paper on fire .
Cigarette lighter
Fig. 59 Fro nt ce nter con sole : cigare tte lighter
" Press the cigarette lighter in.
" Remove the cigarette lighter when it pops
out .
A WARNING
The cigarette lighter on ly works when the
ignition is switched on .1ncorrect usage
can lead to ser ious injuries or burns. For
this reason, children should never be left
unattended in the vehicle because this in
creases the risk of injury .
(D Note
The cigarette lighter can be damaged if
you connect electrical accessories to it .
Page 62 of 294

60 Seats and st o rage
12-volt socket
Appl ies to vehicles: wit h 12-volt socket
Electrical accessories can be connected to the
12-volt socket.
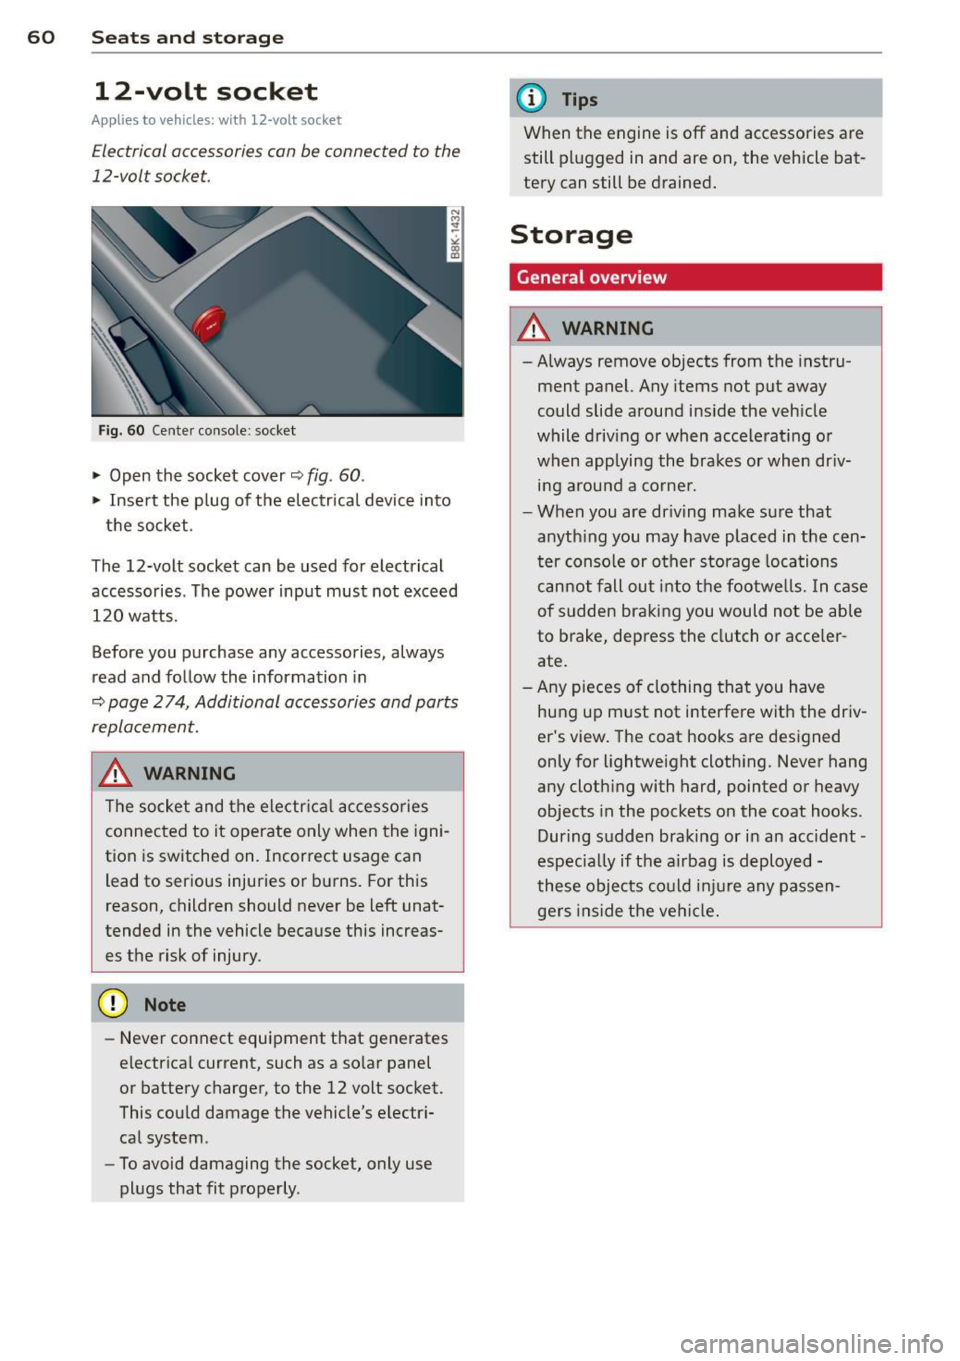
Fig. 60 Cente r console: socket
.,. Open the socket cover~ fig. 60 .
.,. Insert the plug of the electrical device into
the socket.
The 12-volt socket can be used for electrical accessories. The power input must not exceed 120 watts.
Before you purchase any accessories, always
read and follow the information in
~ page 2 74, Additional accessories and parts
replacement.
.&_ WARNING
The socket and the electr ica l accesso ries
connected to it operate only when the igni
tion is switched on. Incorrect usage can lead to ser ious injuries or burns. For this
reason, children should never be Left unat
tended in the vehicle because this increas es the risk of injury.
- Never connect equipment that generates
electrical current, such as a so lar panel
or battery charger, to the 12 volt socket.
This could damage the vehicle's electr i
cal system .
- To avoid damaging the socket, only use
plugs that fit properly .
(D Tips
When the engine is off and accessories are
still plugged in and are on, the vehicle bat
tery can still be drained.
Storage
General overview
.&_ WARNING
-Always remove objects from the instru
ment panel. Any items not put away
could slide around inside the veh icle
while driv ing or when accelerat ing o r
when applying the brakes or when dr iv
ing around a corne r .
- When you are driving make sure that
anyth ing you may have placed in the cen
ter console or other storage locations
cannot fall out into the footwells. In case
of sudden braking you would not be able
to brake, depress the clutch or acce ler
ate.
- Any pieces o f clothing that you have
hung up must not i nterfere wit h the driv
er's view . The coat hooks are designed
only for lightweight clothing. Never hang
any cloth ing with hard, pointed or heavy
objects in the pockets on the coat hooks .
During sudden braking or in an accident -
especia lly if the a irbag is deployed -
these objects could injure any passen gers inside the vehicle.
-
Page 63 of 294

(upholder
Fig. 61 Ce nter console: front cupholder
Fig. 62 Rear armrest: rea r cupho lder
Opening rear cupholders
~ To open the cupholder, press on the symbol
ii@ ~ fig. 62 .
~ To adjust the arm @, swing it in the direc
tion of the arrow.
~ Place the beverage in the holder and release
the arm. The arm swings back by itself and
automatically secures the beverage .
Closing cupholders
~ To close the cupholder, press on the center
section between the two arms and push the
cupholder in the slot as far as it will go.
A WARNING
Spilled hot liquid can cause an accident
and personal injury.
- Never carry any beverage containers with
hot liquids, such as hot coffee or hot tea,
in the vehicle while it is moving . In case
of an accident, sudden braking or o ther
vehicle movement, hot liqu id could spill,
caus ing scald ing burns . Spilled hot liquid
can also ca use an accident and personal
injury.
Seats and storage 61
-Use on ly soft cups in the cupholder. Hard
cups and glasses can cause injury in an
accident.
- Never use the cupho lder or adapter as an
ashtray -risk of fire.
(D Note
Only drink containers with lids should be
carried in the cupholder. Liquid could spill
out and damage your vehicle's electronic
equipment or stain the upholstery, etc.
Glove compartment
The glove compartment is illuminated and
can be locked.
Fig . 63 G love compar tment
~ To open the glove compartment, pull the
handle in the direction of the arrow~
fig. 63
and swing the cover down to open.
~ To close the glove compartment, push the
glove compartment lid upward until the lock
engages .
T he glove compartment can be locked using
the mechanical key~
page 34.
On the right side in the glove compartment is
a holder with the key body into which the
eme rgency key must be clipped to be able to
start the veh icle.
&_ WARNING
To reduce the risk of personal injury in an
accident or sudden stop, always keep the
glove compartment closed while driving .
-
Page 64 of 294

62 Seat s a nd s tor ag e
Addit ional storage
There are a variety of storage compa rtments
and fasteners in var ious places in the vehicle.
- In the roof headliner above the rearview
mirror .
- On the back of the front seat . The com pa rt
ment can hold a maximum weight of 1 kg.
- On the left and right of the luggage com
partment, behind the s ide trim.
- Garment hooks on the pillars in the rear of
the vehicle .
A WARNING
-When driving, do not leave any hard ob
jects on the rear wi ndow shelf or allow
your pet to s it on the shelf. They could
become a hazard for ve hicle occ upan ts in
the event of sudden braking or a crash.
- Always remove objects from the instru
ment pane l. Any items no t stored could
slide around inside the vehicle while driv
ing or when accelerating or when apply
ing the brakes or when driving around a
corner.
- When you are driving make sure that
anything you may have placed in the cen
ter console or other storage locations cannot fall out into the footwells. In case
of sudden braking you would not be able
to brake or accelerate .
- Any articles of cloth ing that you have
hung up must not interfere with the driv
er's v iew. The coat hooks are designed
only for lightweight clothing. Never hang
any clothing wit h hard, po inted or heavy
objects in the pockets on the coat hooks .
During sudden braking or in an accident -
especially if the airbag is deployed -
these objects could injure any passen
gers inside the vehicle .
- To reduce the risk of persona l injury in an
acc ident or sudden stop, always keep the
glove compartment closed while dr iving.
- Read and fo llow all WARNINGS
i=> page 161, Important safety instruc
tions on the side airbag system.
- Hang clothes in such a way that they do
not impa ir the driver's vision.
- The coat hooks must on ly be used for
lightweight clothing. Do not leave any
heavy or sharp edged objects in the pock
ets which may interfere with the s ide cur
tain airbag deployment and can cause pe rsonal injury in a crash.
- Do not use coat hangers for hanging
cloth ing o n the coat hooks as t his can in
terfere with proper deployment of the
side curta in a irbags in an a ccident.
- Do not hang heavy objects on the coat
hooks , as they could cause personal in
jury in a sudden stop.
- Always keep the compa rtment above the
rea rv iew mirror closed while d riving to
re duc e the risk of i nju ry in the event of
sudden b raking m aneuvers or a collision.
(£} Note
Objects located on the rear shelf that rub
against the rea r window could damage the
hea ting wi res for the rear window defog"
ger.
(D Tips
- A vent slot is located between the shelf
and the rear w indow. Do not bloc k the
vent wi th any items you may place o n the
rear window she lf.
- Do not place b ulky items on the rear win
dow shelf as they co uld restrict or block
the drive r's vision in the rear view mirror.