Page 109 of 235
![NISSAN PATHFINDER 2012 R52 / 4.G 06IT Navigation Manual 4. Highlight [Auto Reroute] and push<ENTER> . The indicator for the selected
condition illuminates. When the current
location map screen or route setting screen
is displayed, the system recalculates a NISSAN PATHFINDER 2012 R52 / 4.G 06IT Navigation Manual 4. Highlight [Auto Reroute] and push<ENTER> . The indicator for the selected
condition illuminates. When the current
location map screen or route setting screen
is displayed, the system recalculates a](/manual-img/5/280/w960_280-108.png)
4. Highlight [Auto Reroute] and push . The indicator for the selected
condition illuminates. When the current
location map screen or route setting screen
is displayed, the system recalculates a route
with the set conditions.
“Detailed route settings” (page 5-14)
SETTING A DETOUR ROUTE
If you want to detour from the suggested route,
you can calculate a route detouring for a
specified distance.
1. Push .
2. Highlight [Detour] and push .
3. Highlight a detour distance and push
.
After calculating the detour, the system displays
the detour route on the map.
INFO:
. When the vehicle has deviated from the
suggested route, [Detour] cannot be se- lected.
. If the system cannot calculate a detour with
the specified conditions, it displays the
previous suggested route.
. If the vehicle is traveling very fast, the detour
route may start from a location that the
vehicle has already passed.
Voice command
1. Push located on the steering
switch.
2. After the tone sounds, speak a command.
To set a detour route:
“Detour” (Alternate command mode)
ROUTE GUIDANCE SETTINGS
You can set various guidance information to be
displayed during route guidance and activate or
deactivate route and/or voice guidance.
Route guidance5-17
Page 110 of 235
![NISSAN PATHFINDER 2012 R52 / 4.G 06IT Navigation Manual Basic operation
1. Push<ROUTE> .
2. Highlight [Guidance Settings] and push <ENTER> .
3. Highlight the preferred item and push <ENTER> .
4. Push <BACK> to return to the previous
screen. Push <MAP>to re NISSAN PATHFINDER 2012 R52 / 4.G 06IT Navigation Manual Basic operation
1. Push<ROUTE> .
2. Highlight [Guidance Settings] and push <ENTER> .
3. Highlight the preferred item and push <ENTER> .
4. Push <BACK> to return to the previous
screen. Push <MAP>to re](/manual-img/5/280/w960_280-109.png)
Basic operation
1. Push .
2. Highlight [Guidance Settings] and push .
3. Highlight the preferred item and push .
4. Push to return to the previous
screen. Push
Page 111 of 235

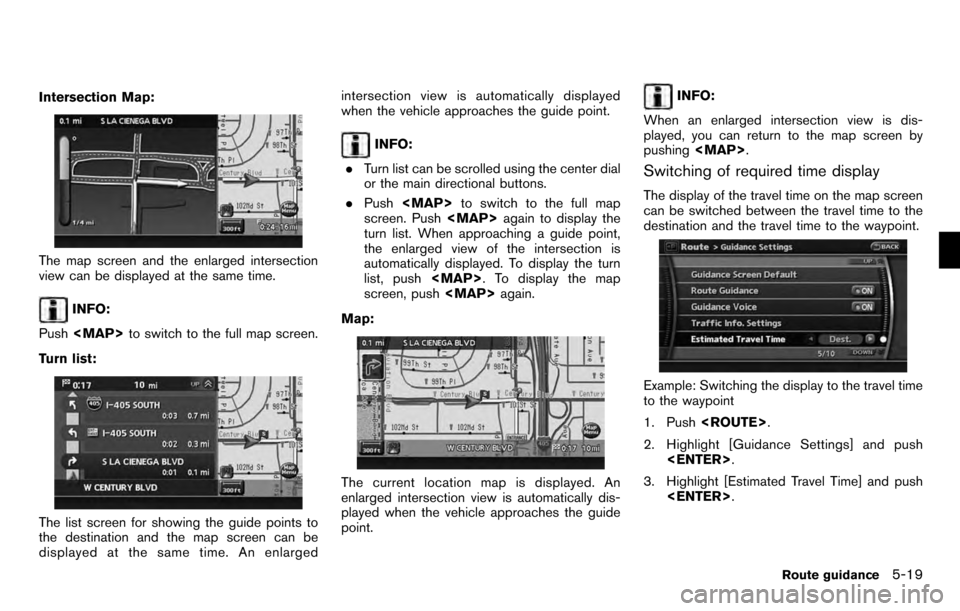
Intersection Map:
The map screen and the enlarged intersection
view can be displayed at the same time.
INFO:
Push
Page 112 of 235

4. Push the left or right directional buttons toswitch from “Dest.” to “Waypoint”.
5. Push to return to the current
location map screen.
6. The icon displayed on the map screen is switched, and the travel time to the waypoint
is displayed.
Displayed icon
: Display of the travel time to thedestination
: Display of the travel time to the
waypoint
Deactivating the information icon display
in the turn list
The display of information icons in the turn list
including the highway exits, junctions, and rest
areas can be deactivated.
1. Push .
2. Highlight [Guidance Settings] and push .
3. Highlight [Exit Info. on Turn List] and push to turn off the indicator.
4. Push to return to the current
location map screen.
5. The information icon display in the turn list is
now deactivated.
Selecting a waypoint from the turn list:
When [Exit info. on Turn List] is set to on, you
can set a waypoint to a facility located near the
freeway exit.
1. Highlight the exit where the traffic informa- tion icon is displayed, and push .
The category list screen is displayed.
5-20Route guidance
Page 113 of 235
2. Highlight the landmark category and push . The list screen for showing
facilities located near the freeway exit is
displayed.
3. Highlight the preferred facility for the way- point and push .
4. The waypoint is set, and the route search is
performed.
“PROCEDURES AFTER SETTING A
DESTINATION” (page 5-2)
Voice guidance settings
You can set how many times voice guidance is
repeated.
1. Push .
2. Highlight [Guidance Settings] and push . 3. Highlight [Voice Announcements] and push
.
4. Highlight [Twice] or [Three Times] and push
. The indicator for the selected
number of repetitions illuminates.
5. Push to return to the current
location map screen.
Voice command
1. Push located on the steering
switch.
2. After the tone sounds, speak a command. . To turn on voice guidance:
“Guidance Voice” (Alternate command
mode)
. To repeat voice guidance once:
“Guidance Voice Repeat” (Alternate com-
mand mode)
Route guidance5-21
Page 116 of 235

GUIDANCE SCREENS AND PREVIEW
MODE
Route guidance displays map screens and
various information according to the situation.
When route guidance starts, the Small Turn
Arrow on Map is displayed in the upper left
corner of the map screen. This arrow indicates
the turning direction at the next guide point
(corner or intersection) . The distance is also
displayed. At the top of the screen, the distance
to the next guide point and the name of the next
street to turn on to are displayed. Also, there
may be cases that next street names are
announced. The Small Turn Arrow on Map can
be enabled or disabled by the user.
“ROUTE GUIDANCE SETTINGS” (page
5-17)
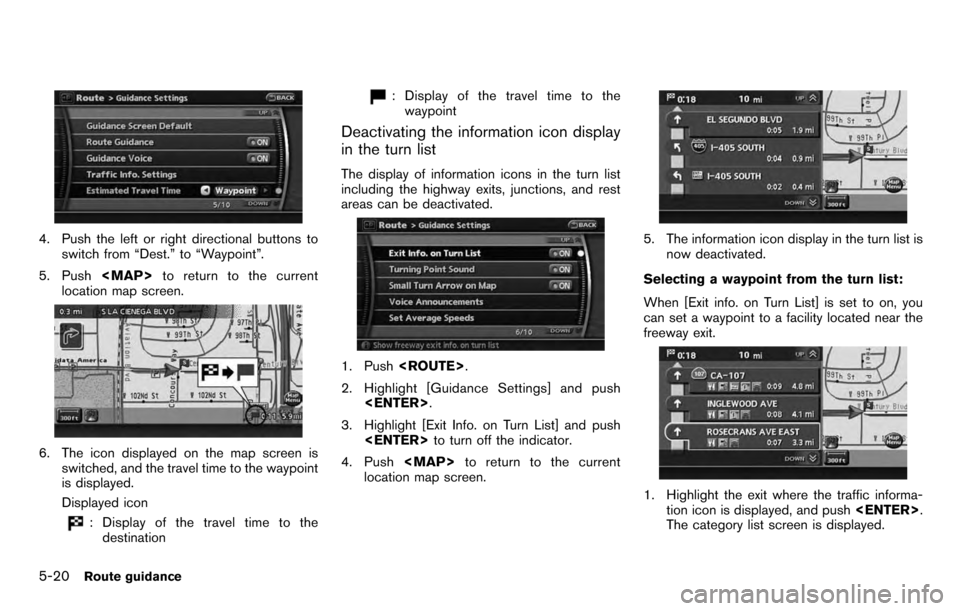
Enlarged intersection view
When approaching a guide point, the system
automatically changes to the split screen and
shows an enlarged view of the intersection in the
left screen. After passing through the intersec-
tion, the system automatically returns to the full
screen mode. To switch to the full screen mode
while the enlarged intersection view is dis-
played, push. Pushing again
displays the enlarged intersection view.
Junction guidance
While driving on a freeway, when the vehicle is
approximately 1 mile (approximately 2 km) from a
junction, the system automatically switches to
the split screen and displays an enlarged view of
the junction (3D) in the left screen. After passing
the junction, the system automatically returns to
the full screen mode. To switch to the full screen
mode while the enlarged junction view is
displayed, push .
5-24Route guidance
Page 117 of 235
Turn list
Depending on the setting, the system can
constantly display the split screen and show
the turn list in the left screen. When approaching
a guide point, the left screen automatically
switches to an enlarged view of the intersection.
To switch to the full screen mode, push
. Pushingagain displays the
turn list. When approaching a guide point, the
enlarged view of the intersection is automatically
displayed. To display the turn list, push .
To display the map screen, push again.
“ROUTE GUIDANCE SETTINGS” (page
5-17)
Route guidance5-25
Page 121 of 235

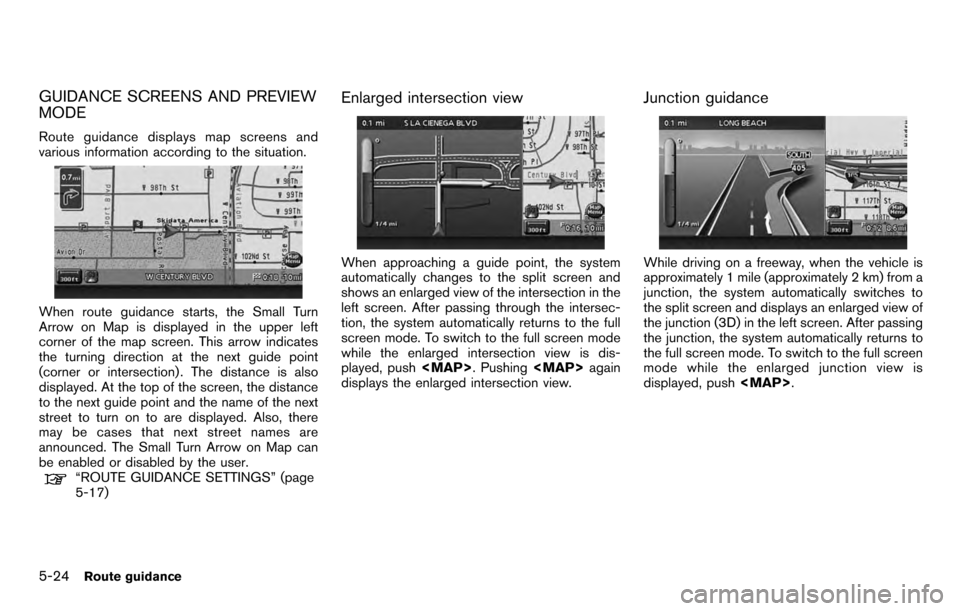
7. When your preferred location is displayed atthe center of the map, confirm the location
and push .
A message is displayed, and the location is
stored in the Address Book.
INFO:
.When you store the location from the
Address Book, you cannot use [Address
Book] to search for the location.
.You can adjust a location by selecting
[Move Location] using the same method
as the one for a destination.
“ADJUSTING THE LOCATION
OF THE DESTINATION” (page 4-
25)
8. Adjust the location of the stored item and
edit the contents of the stored item as
necessary. After finishing the setting, high-
light [OK] and push .
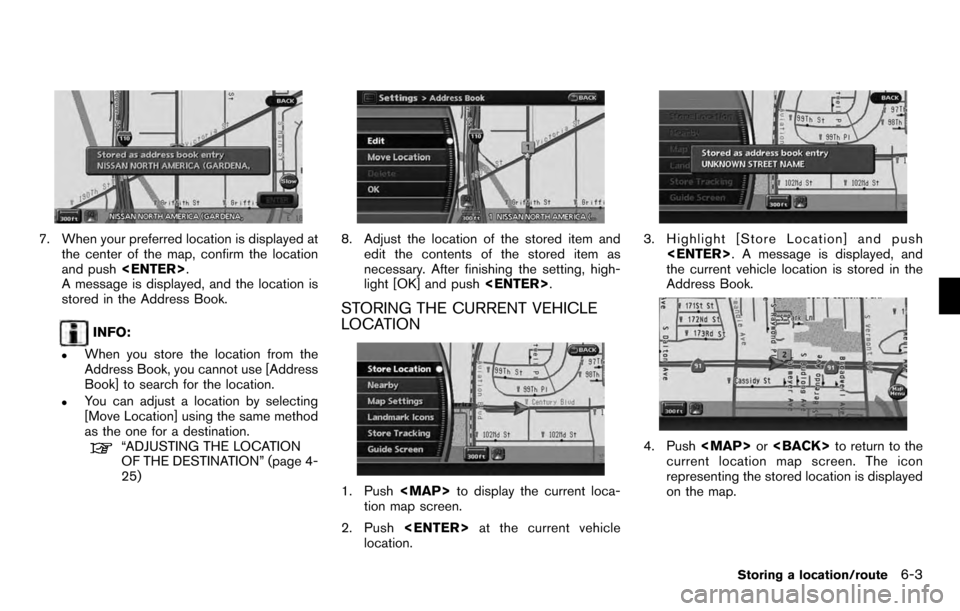
STORING THE CURRENT VEHICLE
LOCATION
1. Pushto display the current loca-
tion map screen.
2. Push at the current vehicle
location.
3. Highlight [Store Location] and push
. A message is displayed, and
the current vehicle location is stored in the
Address Book.
4. Push or to return to the
current location map screen. The icon
representing the stored location is displayed
on the map.
Storing a location/route6-3