Page 6 of 235

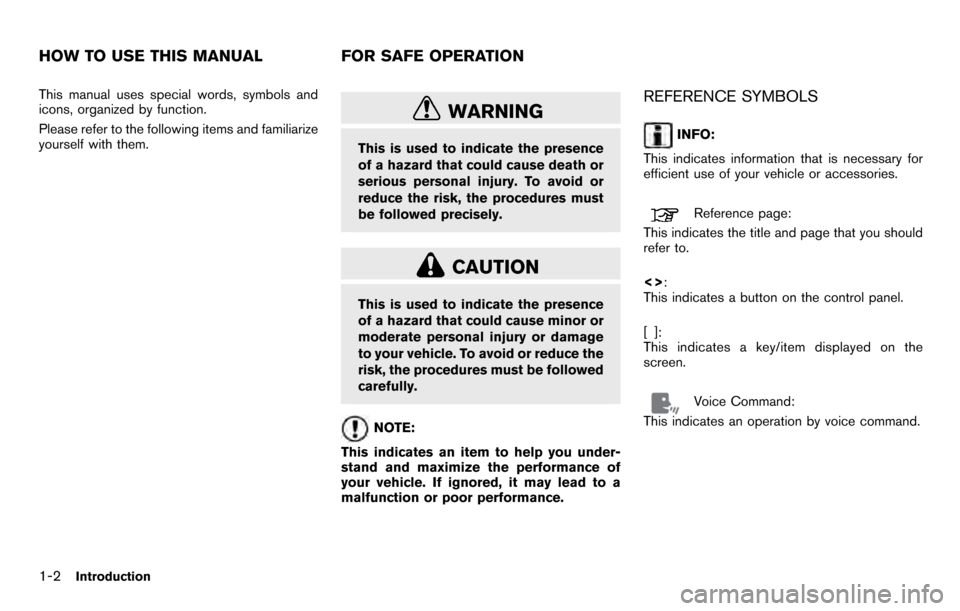
This manual uses special words, symbols and
icons, organized by function.
Please refer to the following items and familiarize
yourself with them.
WARNING
This is used to indicate the presence
of a hazard that could cause death or
serious personal injury. To avoid or
reduce the risk, the procedures must
be followed precisely.
CAUTION
This is used to indicate the presence
of a hazard that could cause minor or
moderate personal injury or damage
to your vehicle. To avoid or reduce the
risk, the procedures must be followed
carefully.
NOTE:
This indicates an item to help you under-
stand and maximize the performance of
your vehicle. If ignored, it may lead to a
malfunction or poor performance.
REFERENCE SYMBOLS
INFO:
This indicates information that is necessary for
efficient use of your vehicle or accessories.
Reference page:
This indicates the title and page that you should
refer to.
<> :
This indicates a button on the control panel.
[]:
This indicates a key/item displayed on the
screen.
Voice Command:
This indicates an operation by voice command.
HOW TO USE THIS MANUAL FOR SAFE OPERATION
1-2Introduction
Page 29 of 235

CHARACTER (letter and number) INPUT
SCREEN
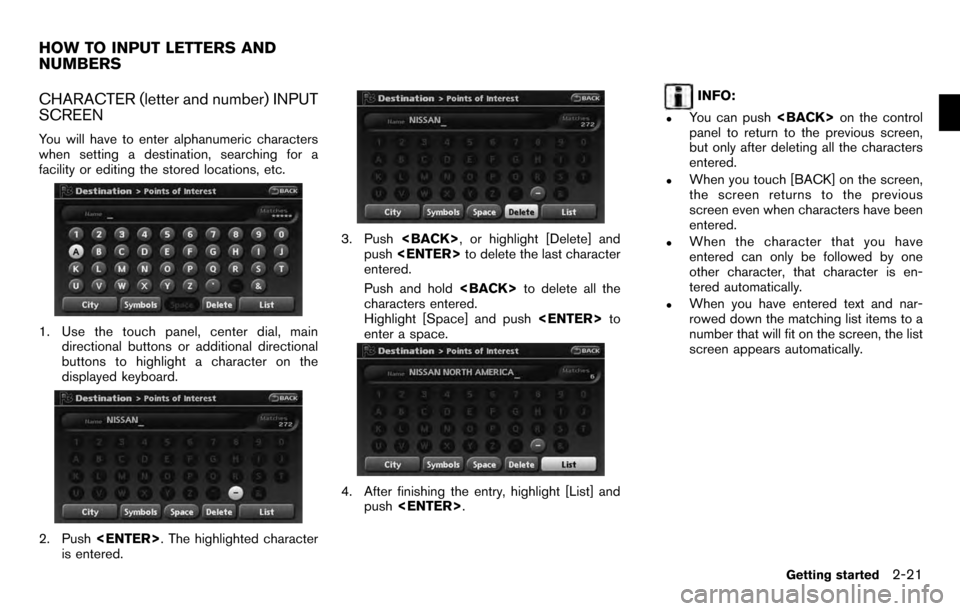
You will have to enter alphanumeric characters
when setting a destination, searching for a
facility or editing the stored locations, etc.
1. Use the touch panel, center dial, maindirectional buttons or additional directional
buttons to highlight a character on the
displayed keyboard.
2. Push . The highlighted character
is entered.
3. Push , or highlight [Delete] and
push to delete the last character
entered.
Push and hold to delete all the
characters entered.
Highlight [Space] and push to
enter a space.
4. After finishing the entry, highlight [List] and push .
INFO:
.You can push on the control
panel to return to the previous screen,
but only after deleting all the characters
entered.
.When you touch [BACK] on the screen,
the screen returns to the previous
screen even when characters have been
entered.
.When the character that you have
entered can only be followed by one
other character, that character is en-
tered automatically.
.When you have entered text and nar-
rowed down the matching list items to a
number that will fit on the screen, the list
screen appears automatically.
HOW TO INPUT LETTERS AND
NUMBERS
Getting started2-21
Page 30 of 235
.Symbol keys are displayed by high-
lighting [Symbols] and pushing
. Alphabet keys are displayed
by highlighting [A-Z] and pushing
.
Symbol input screen
PHONE NUMBER INPUT SCREEN
You can enter a phone number as a search
method to look for a point of interest.
INFO:
Only the locations included in the database in
the map data can be searched by the phone
number.
1. Use the touch panel, center dial, main directional buttons or additional directional
buttons to highlight a number on the
displayed keyboard.
2. Push . The highlighted number is
entered.
3. Push , or highlight [Delete] and
push to delete the last number
entered.
Push and hold to delete all the
numbers entered.
4. After finishing the entry, highlight [Map] and push .
2-22Getting started
Page 46 of 235
&3Street name
Operating with the touch operation
1. Touch the screen.Displays the cross pointer, and the touched
position is set as the center of the screen.
2. Touch the direction you desire to scroll to.The map continues to scroll while the screen
is touched.
INFO:
When the operation is performed during driving,
the scrolling is stopped after the screen scrolls
to the touched direction for a specified amount.
If the map screen is set to the building footprint
graphics, the map cannot be scrolled while
driving.
Fine-adjusting the cursor position:
1. Touch [Slow]. Displays the 8-directional key.
2. Touch the 8-directional key to adjust the
cross pointer position.
Touch [BACK] to end the adjustment.
INFO:
Fine-adjusting the cursor position is not possible
while driving.
3-6Map settings
Page 47 of 235
BirdviewTM
Operating with the multi-function con-
troller
The main directional buttons and additional
directional buttons allow movement in the
following ways.
Hold down one of the main directional buttons
or additional directional buttons to continue to
rotate or move across the map in that direction.
Rotates the map clockwise.
Rotates the map counterclockwise.
The cross pointer moves in the direc-
tion of the arrow.
Once you start moving on the map, the cross
pointer appears. Screen information:
&1Cross pointer
&2Distance from the vehicle position to the
cross pointer
&3Street name
Operating with the touch operation
1. Touch the screen.
Displays the cross pointer and 8-directional
key.
Map settings3-7
Page 103 of 235

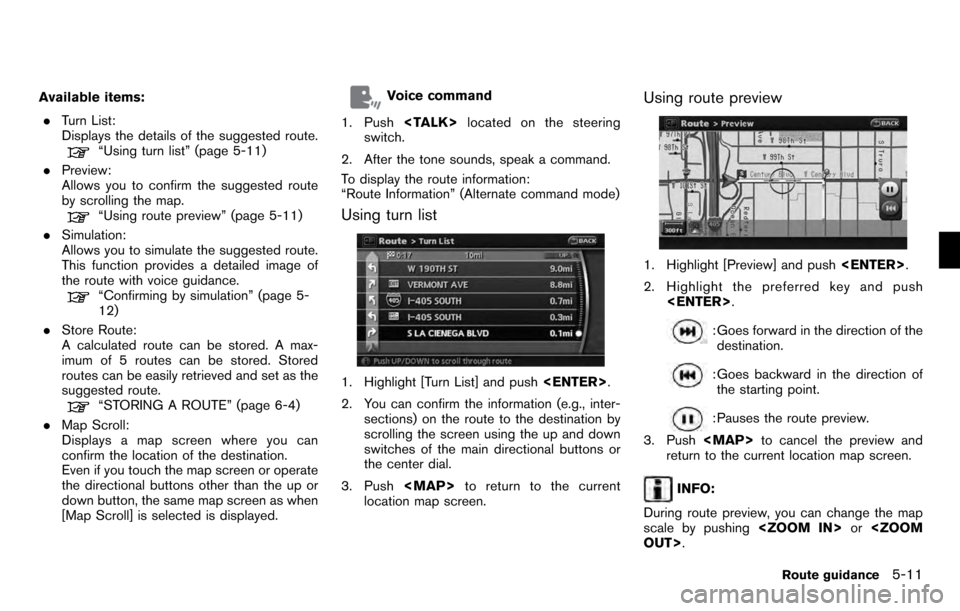
Available items:. Turn List:
Displays the details of the suggested route.
“Using turn list” (page 5-11)
. Preview:
Allows you to confirm the suggested route
by scrolling the map.
“Using route preview” (page 5-11)
. Simulation:
Allows you to simulate the suggested route.
This function provides a detailed image of
the route with voice guidance.
“Confirming by simulation” (page 5-
12)
. Store Route:
A calculated route can be stored. A max-
imum of 5 routes can be stored. Stored
routes can be easily retrieved and set as the
suggested route.
“STORING A ROUTE” (page 6-4)
. Map Scroll:
Displays a map screen where you can
confirm the location of the destination.
Even if you touch the map screen or operate
the directional buttons other than the up or
down button, the same map screen as when
[Map Scroll] is selected is displayed.
Voice command
1. Push located on the steering
switch.
2. After the tone sounds, speak a command.
To display the route information:
“Route Information” (Alternate command mode)
Using turn list
1. Highlight [Turn List] and push .
2. You can confirm the information (e.g., inter- sections) on the route to the destination by
scrolling the screen using the up and down
switches of the main directional buttons or
the center dial.
3. Push
Page 104 of 235
![NISSAN PATHFINDER 2012 R52 / 4.G 06IT Navigation Manual While the map scale is being changed, the route
preview is temporarily stopped.
Confirming by simulation
1. Highlight [Simulation] and press<ENTER>.
2. Highlight the preferred key and push <ENTER> .
: NISSAN PATHFINDER 2012 R52 / 4.G 06IT Navigation Manual While the map scale is being changed, the route
preview is temporarily stopped.
Confirming by simulation
1. Highlight [Simulation] and press<ENTER>.
2. Highlight the preferred key and push <ENTER> .
:](/manual-img/5/280/w960_280-103.png)
While the map scale is being changed, the route
preview is temporarily stopped.
Confirming by simulation
1. Highlight [Simulation] and press.
2. Highlight the preferred key and push .
: Pauses the simulation.
: Resumes the simulation.
: Ends the simulation.
3. Push to cancel the simulation and
return to the current location map screen.
INFO:
During simulation, you can change the map
scale by pushing or
OUT> . While the map scale is being changed, the
simulation is temporarily stopped.
SEARCHING FOR A DETOUR ROUTE
TAKING TRAFFIC INFORMATION INTO
CONSIDERATION
When a serious traffic event occurs on the route,
or if the system finds a faster route, a detour alert
will pop up automatically. If you miss the
automatic alert, you can also manually search
for a detour.
1. Push
.
2. Highlight [Traffic Detour] and push .
3. When the detour search is successful,
detailed information about the detour route
(left screen) and the comparison screen of
the two routes (right screen) are displayed.
&1Yellow: Original route
&2Pink: Detour route
&3The change of distance and estimated
travel time to destination when the
detour route is taken.
4. If you want to accept the suggested detour route, select [Yes], and then push
.
INFO:
. If no route is set, or “Use Traffic for Route
Calculation” is turned off, this function
cannot be operated.
5-12Route guidance
Page 153 of 235

8 Other settings
Settings screen................................................. 8-2
Basic operation ............................................. 8-2
Display settings ................................................. 8-2
Basic operation ............................................. 8-2
Display ........................................................ 8-3
Brightness .................................................... 8-3
Contrast ...................................................... 8-3
Background color ........................................... 8-3
Navigation setting ............................................... 8-4
Basic operation ............................................. 8-4
Customizing nearby places ............................... 8-5
Map color settings .......................................... 8-6 Displaying the AV information on the map
screen
......................................................... 8-6
Settings the keyboard layout of the character
input screen .................................................. 8-7
Adjusting the current vehicle location .................. 8-7
Reset all navigation settings to default ................ 8-8
Volume adjustment ............................................. 8-9
Basic operation ............................................. 8-9
Clock settings ................................................. 8-10
Basic operation ........................................... 8-10
Language and unit settings .................................8-11
Language settings ........................................ 8-11
Unit settings ............................................... 8-12