Page 10 of 235
CONTROL PANEL
&1:
Push to display the current status of the air
conditioner, radio, audio, vehicle information
(driveable distance and average fuel econ-
omy) and navigation systems.
&2 :
Push to enter a destination. Various methods
for entering a destination are available.
“4. Setting a destination”
&3
Page 12 of 235

&4Center dial:
Turn to highlight an item on the screen or
adjust a setting.
Turn the center dial on the map screen. The
map scale is displayed. Use the center dial
to adjust the map scale.
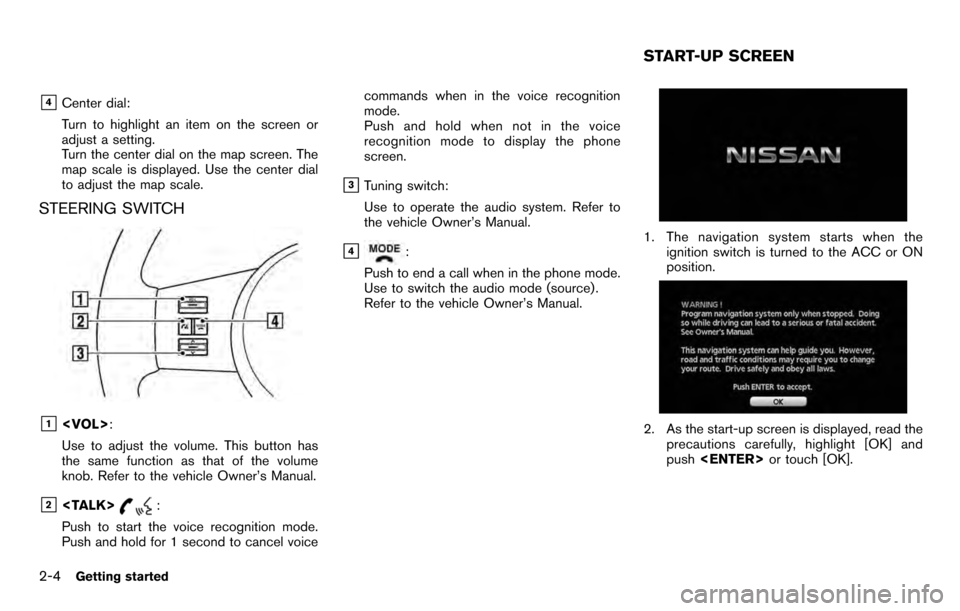
STEERING SWITCH
&1:
Use to adjust the volume. This button has
the same function as that of the volume
knob. Refer to the vehicle Owner’s Manual.
&2:
Push to start the voice recognition mode.
Push and hold for 1 second to cancel voice commands when in the voice recognition
mode.
Push and hold when not in the voice
recognition mode to display the phone
screen.
&3Tuning switch:
Use to operate the audio system. Refer to
the vehicle Owner’s Manual.
&4:
Push to end a call when in the phone mode.
Use to switch the audio mode (source) .
Refer to the vehicle Owner’s Manual.1. The navigation system starts when the ignition switch is turned to the ACC or ON
position.
2. As the start-up screen is displayed, read theprecautions carefully, highlight [OK] and
push or touch [OK].
START-UP SCREEN
2-4Getting started
Page 13 of 235

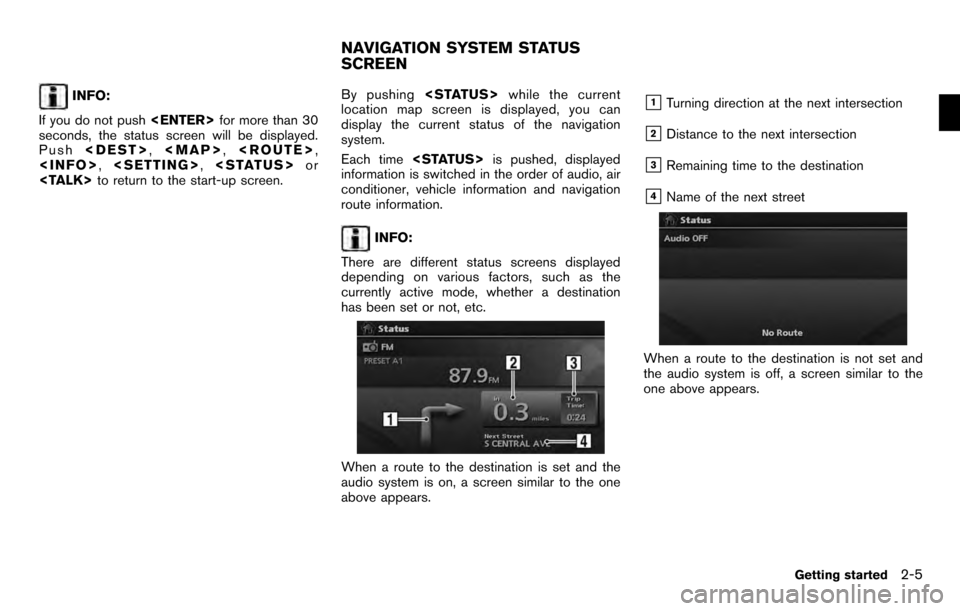
INFO:
If you do not push for more than 30
seconds, the status screen will be displayed.
Push ,
Page 28 of 235
.
ADJUSTING VOICE GUIDANCE VO-
LUME
You can adjust the volume of voice guidance.
1. Push .
2. Highlight [Volume and Beeps] and push
.
3. Highlight [Guidance Vol.] and push
.
4. Adjust the voice guidance volume by using
the center dial or main directional buttons.
INFO:
You can also adjust the volume by turning the
audio system volume knob on the steering
switch while voice guidance is tilting
on the steering switch.
2-20Getting started
Page 31 of 235
![NISSAN PATHFINDER 2012 R52 / 4.G 06IT Navigation Manual INFO:
. You can push <BACK>on the control
panel to return to the previous screen, but
only after deleting all the numbers entered.
. When you touch [BACK] on the screen, the
screen returns to the prev NISSAN PATHFINDER 2012 R52 / 4.G 06IT Navigation Manual INFO:
. You can push <BACK>on the control
panel to return to the previous screen, but
only after deleting all the numbers entered.
. When you touch [BACK] on the screen, the
screen returns to the prev](/manual-img/5/280/w960_280-30.png)
INFO:
. You can push on the control
panel to return to the previous screen, but
only after deleting all the numbers entered.
. When you touch [BACK] on the screen, the
screen returns to the previous screen even
when numbers have been entered.NISSAN VOICE RECOGNITION
NISSAN Voice Recognition allows hands-free
operation of the navigation system and other
systems equipped on this vehicle, in one of two
modes, Standard Mode or Alternate Command
Mode. In Standard Mode, you can operate
Phone and Information.
The commands that are available are always
shown on the display and announced by the
system. You can complete your desired opera-
tion by simply following the prompts given by the
system. In Standard Mode, hands–free opera-
tion of Audio, Climate Control and Display is not
available through Voice Recognition.
For U.S. customers, Standard Mode is selected
by default. For Canadian customers, Alternate
Command Mode is the default mode.
INFO:
. For the voice commands for the audio, air
conditioner and other systems, refer to the
Owner’s Manual of your vehicle. The follow-
ing sections refer only to the navigation,
phone, and information systems.
. When the system language is set to
“Franc¸ ais” (French) the available commands
and functions differ from those available
when using the system in English.
Using the system
Initialization:
When the ignition switch is pushed to the ON
position, NISSAN Voice Recognition is initia-
lized, which may take up to one minute. When
completed, the system is ready to accept voice
commands. If is pushed before the
initialization completes, the display will show the
message: “Phonetic data downloading. Please
wait.”
Before starting
To get the best recognition performance from
NISSAN Voice Recognition, observe the follow-
ing:
. The interior of the vehicle should be as quiet
as possible. Close the windows to eliminate
the surrounding noises (traffic noise and
vibration sounds, etc.) , which may prevent
the system from correctly recognizing the
voice commands.
. Wait until the tone sounds before speaking a
command.
. Speak in a natural conversational voice
without pausing between words.
. If the air conditioner is set to “Auto”, the fan
speed is automatically lowered so that your
commands can be recognized more easily.
NISSAN VOICE RECOGNITION
Getting started2-23
Page 32 of 235

Giving voice commands
1. Push located on the steering
switch.
2. A list of commands appears on the screen, and the system provides the voice menu
prompt “Would you like to access Phone,
Navigation, Information or Help?”.
3. After the tone sounds and the icon on the screen changes from [
]to[], speak
a command.
4. Continue to follow the voice menu prompts and speak after the tone sounds until your
desired operation is completed.
Operating tips: . Say a command after the tone.
. Commands that are available are always
shown on the display and spoken through
voice menu prompts. Commands other than
those that are displayed are not accepted.
Please follow the prompts given by the
system.
. If the command is not recognized, the
system announces, “Please say again”.
Repeat the command in a clear voice.
. Push once to return to the
previous screen.
. If you want to cancel the command, push
and hold . The message, “Voice
cancelled” will be announced.
. When you do not say a command, the
system pauses the operation. Push
to restart the operation.
. If you want to adjust the volume of the
system feedback, push the volume control
buttons [+] or [−] on the steering switch or use the audio system volume knob while the
system is making an announcement.
2-24Getting started
Page 154 of 235

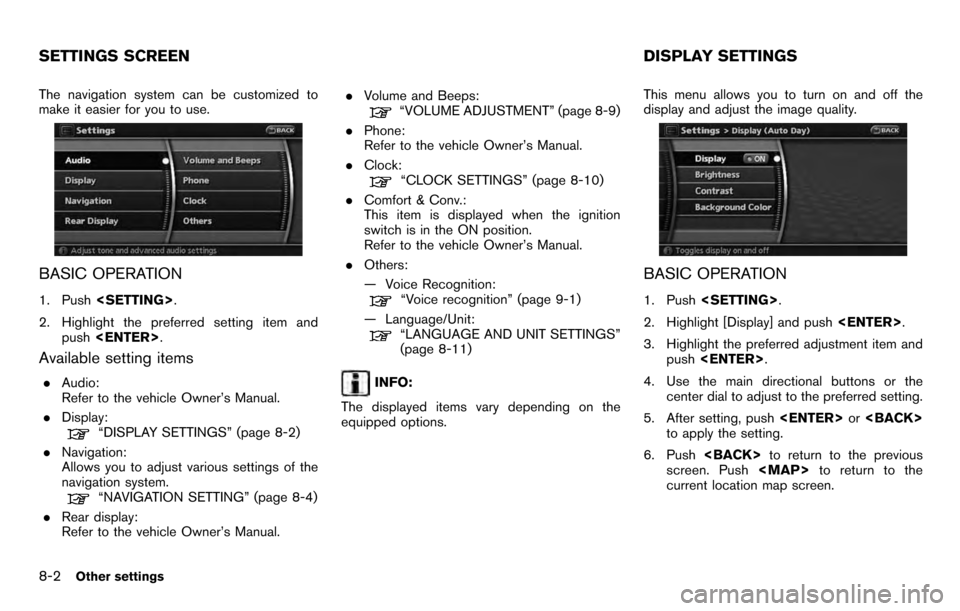
The navigation system can be customized to
make it easier for you to use.
BASIC OPERATION
1. Push .
2. Highlight the preferred setting item and push .
Available setting items
.Audio:
Refer to the vehicle Owner’s Manual.
. Display:
“DISPLAY SETTINGS” (page 8-2)
. Navigation:
Allows you to adjust various settings of the
navigation system.
“NAVIGATION SETTING” (page 8-4)
. Rear display:
Refer to the vehicle Owner’s Manual. .
Volume and Beeps:
“VOLUME ADJUSTMENT” (page 8-9)
. Phone:
Refer to the vehicle Owner’s Manual.
. Clock:
“CLOCK SETTINGS” (page 8-10)
. Comfort & Conv.:
This item is displayed when the ignition
switch is in the ON position.
Refer to the vehicle Owner’s Manual.
. Others:
— Voice Recognition:
“Voice recognition” (page 9-1)
— Language/Unit:
“LANGUAGE AND UNIT SETTINGS”
(page 8-11)
INFO:
The displayed items vary depending on the
equipped options. This menu allows you to turn on and off the
display and adjust the image quality.
BASIC OPERATION
1. Push
.
2. Highlight [Display] and push .
3. Highlight the preferred adjustment item and push .
4. Use the main directional buttons or the center dial to adjust to the preferred setting.
5. After setting, push or
to apply the setting.
6. Push to return to the previous
screen. Push
Page 157 of 235

“CUSTOMIZING NEARBY PLACES”
(page 8-5)
. Map Scrolling Information:
Performs the setting so that when the map is
scrolled, the information of the location
aligned at the center of the cross pointer is
displayed.
“MAP SCROLLING INFORMATION”
(page 3-20)
. Map Color Settings:
Switches the map color.
“MAP COLOR SETTINGS” (page 8-
6)
. Audio Display on Map:
Allows the AV information to be displayed at
all times.
“DISPLAYING THE AV INFORMA-
TION ON THE MAP SCREEN” (page
8-6)
. Keyboard Input:
Switches the keyboard layout for the char-
acter input screen.
“SETTINGS THE KEYBOARD LAY-
OUT OF THE CHARACTER INPUT
SCREEN” (page 8-7)
. Small Step Zoom by Dial:
Sets the ON/OFF of the free zoom function.
When this setting is ON, it is possible to
adjust the scale in smaller steps than with normal scale adjustment.
. Auto North Up Zoom:
When this setting is ON, the orientation of
the map is automatically changed to North
Up when the widest map scale is selected.
The orientation is changed to North Up even
when Heading Up is set.
. Adjust Current Location:
Corrects the position of current location.
“ADJUSTING THE CURRENT VEHI-
CLE LOCATION” (page 8-7)
. Reset ALL Navigation Settings to Default:
Resets all of the settings to default.
“RESET ALL NAVIGATION SET-
TINGS TO DEFAULT” (page 8-8)
CUSTOMIZING NEARBY PLACES
You can change the categories used for
searching Points of Interest nearby.
The modified list of Points of Interest can be
used for searching for a location using [Nearby
Places].
“SETTING A NEARBY PLACE” (page 4-
14)
1. Highlight [Navigation] and push .
2. Highlight [Nearby Places Custom Settings] and push .
3. Highlight the preferred item and push
. The main category list is dis-
played.
Other settings8-5