Page 177 of 378
Vehicles equipped with 6M/T
Pull
up the pull-ring (A), then move the gearshift
lever to the “R” (Reverse) position with the pull-
ring still pulled. CAUTION
l
Do
not pull up the pull-ring (A) when mov-
ing the gearshift lever to any position oth-
er than the “R” (Reverse) position. If you
always pulled up the pull-ring (A) when
moving the gearshift lever, you could un-
intentionally move the gearshift lever to
the “R” (Reverse) position and cause an
accident and/or a transmission fault.
The pull-ring will return to its original position
when
you return the gearshift lever to the “N” (Neu-
tral) position. CAUTION
l
If
the pull-ring will not return from the
pulled-up position, we recommend you to
have the vehicle inspected. Starting and driving
4-23 4
OGWE12E1
Page 178 of 378
Possible driving speed
E00610801425
Avoid shifting down at high speed, as this may cause excessive engine speed (the tachometer needle into the red zone) and damage the engine.
Petrol-powered vehicles Shift point Speed limit
1600 models 2000 models
1
st
gear 50 km/h (30 mph) 50 km/h (30 mph)2
nd
gear 95 km/h (59 mph) 100 km/h (62 mph)3
rd
gear 140 km/h (87 mph) 140 km/h (87 mph)4
th
gear 190 km/h (118 mph) 185 km/h (115 mph)Use 5
th
gear whenever vehicle speed allows, for maximum fuel economy.
Diesel-powered vehicles Shift point Speed limit
1
st
gear 35 km/h (22 mph), 30 km/h*
(19 mph) 2
nd
gear 65 km/h (40 mph), 60 km/h*
(37 mph) 3
rd
gear 105 km/h (65 mph), 95 km/h*
(59 mph) 4
th
gear 140 km/h (87 mph)5
th
gear 180 km/h (112 mph)
* : 85 kW engine (Low CO 2 emissions) Use 6
th
gear whenever vehicle speed allows, for maximum fuel economy. Starting and driving
4-24
4
OGWE12E1
Page 179 of 378

Automatic transmission
INVECS-III Sports Mode 6CVT
(Intelligent & Innovative Vehicle Electronic Control System III)* E00602100031
The
INVECS-III uses optimization and adaptation
functions to optimally match the gear ratio to driv-
ing and road conditions.
The CVT is capable of changing the gear ratio auto-
matically and steplessly to suit driving conditions
in all phases of vehicle operation. It therefore real-
izes smooth, shock-free operation and excellent
fuel efficiency. CAUTION
l
Automatic
downshifts may not take place
while the CVT fluid is still cool immedi-
ately after you start driving. To cause a
downshift, depress the brake pedal, man-
ually shift down when necessary.
Always strive to drive safely in accord-
ance with road conditions.
Selector lever operation E00602200221
The CVT selects an optimum gear ratio automati-
cally,
depending on the speed of the vehicle and
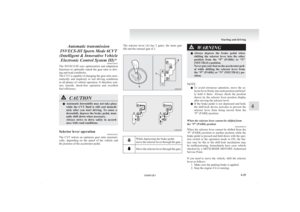
the position of the accelerator pedal. The selector lever (A) has 2 gates; the main gate
(B) and the manual gate (C).
While depressing the brake pedal,
move
the selector lever through the gate. Move the selector lever through the gate. WARNING
l Always
depress the brake pedal when
shifting the selector lever into the other
position from the “P” (PARK) or “N”
(NEUTRAL) position.
Never put your foot on the accelerator ped-
al while shifting the selector lever from
the “P” (PARK) or “N” (NEUTRAL) po-
sition.
NOTE l To
avoid erroneous operation, move the se-
lector lever firmly into each position and brief-
ly hold it there. Always check the position
shown by the selector lever position display
after moving the selector lever.
l If the brake pedal is not depressed and held,
the shift-lock device activates to prevent the
selector lever from being moved from the
“P” (PARK) position.
When the selector lever cannot be shifted from
the “P” (PARK) position E00629000224
When the selector lever cannot be shifted from the
“P”
(PARK) position to another position while the
brake pedal is pressed and held down with the igni-
tion switch or the operation mode in ON, the bat-
tery may be flat or the shift-lock mechanism may
be malfunctioning. Immediately have your vehicle
checked by a MITSUBISHI MOTORS Authorized
Service Point.
If you need to move the vehicle, shift the selector
lever as follows. 1. Make sure the parking brake is applied.
2. Stop the engine if it is running. Starting and driving
4-25 4
OGWE12E1
Page 180 of 378

3. Insert a straight blade (or minus) screwdriver
with a cloth over its tip into notch (A) of the
cover. Pry gently as shown to remove the cov-
er. 4. Depress the brake pedal with the right foot.
5. Turn
the ignition switch to the “ACC” posi-
tion or put the operation mode in ACC.
6. Insert a straight blade (or minus) screwdriver in the shiftlock release hole (B). Shift the se-
lector lever to the “N” (NEUTRAL) position
while pressing the straight blade (or minus)
screwdriver down. Selector lever position display
E00602300394
When
the ignition switch is turned to the “ON” po-
sition or the operation mode is put in ON, the posi-
tion of the selector lever is indicated in the multi-
information display.
Type 1 Type 2 Selector lever positions (Main gate)
E00602400180
“P” PARK
This
position locks the transmission to prevent the
vehicle from moving. The engine can be started in
this position.
“R” REVERSE
This position is to back up. CAUTION
l
Never
shift into the “P” (PARK) or “R”
(REVERSE) position while the vehicle is
in motion to avoid a transmission damage. “N” NEUTRAL
At this position the transmission is disengaged. It is
the
same as the neutral position on a manual trans-
mission, and should only be used when the vehicle
is stationary for an extended length of time during
driving, such as in a traffic jam. WARNING
l Never
move the selector lever to the “N”
(NEUTRAL) position while driving. A se-
rious accident could occur since you
could accidentally move the lever into the
“P” (PARK) or “R” (REVERSE) position
or you will lose engine braking.
l On a gradient the engine should be star-
ted in the “P” (PARK) position, not in the
“N” (NEUTRAL) position.
l Always keep your right foot on the brake
pedal when shifting into or out of “N”
(NEUTRAL), to minimize the risk of loss
of control.
“D” DRIVE
This
position is for normal driving. The transmis-
sion automatically selects a suitable gear ratio for
your speed and acceleration.
Engine braking is automatically applied when nec-
essary, depending on road conditions. CAUTION
l
Never
shift into the “D” (DRIVE) posi-
tion from the “R” (REVERSE) position
while the vehicle is in motion to avoid
transmission damage. Starting and driving
4-26
4
OGWE12E1
Page 181 of 378

Sports mode
E00602500194
Whether
the vehicle is stationary or in motion,
sports mode is selected by gently pushing the selec-
tor lever from the “D” (DRIVE) position into the
manual gate (A). To return to “D” range operation,
gently push the selector lever back into the main
gate (B).
In sports mode, gear ratio shifts can be made rapid-
ly simply by moving the selector lever backward
and forward. Shift paddles at the steering wheel
can also be used to shift the gear ratio. In contrast
to a manual transmission, the sports mode allows
gear shifts with the accelerator pedal depressed.
NOTE
l You can shift into sports mode with shift pad-
dles when the selector lever is in the main
gate as well. Also, you can return to the “D”
range operation in any of following ways.
When returning to “D” range operation, the
selector lever position display will change to
“D” (DRIVE) position.
• Pull the “+ (SHIFT UP)” side shift pad-dle forward (towards the driver) for over
2 seconds.
• Stop the vehicle.
• Push the selector lever from the “D” (DRIVE) position into the manual gate
(A) and push the selector lever back into
the main gate (B).
SHIFT
UP SHIFT
DOWN SHIFT
UP
SHIFT
DOWN + (SHIFT UP)
The
transmission shifts up once by each opera-
tion.
- (SHIFT DOWN)
The transmission shifts down once by each op-
eration. CAUTION
l
In
sports mode, the driver must execute
upward shifts in accordance with prevail-
ing road conditions, taking care to keep
the engine speed below the red zone.
l Repeated continuous operation of the se-
lector lever or the shift paddles will con-
tinuously switch shift position.
l Do not use the left- and right-hand shift
paddles at the same time. Doing so could
cause a shift of gear ratio that you do not
expect. NOTE
l The
upward shift may be made automatically
in sports mode when the engine revolutions
rises and approaches the tachometer’s red
zone (the red-coloured part of the tachometer
dial).
l In sports mode, only the 6 forward gears can
be selected. To reverse or park the vehicle,
move the selector lever to the “R” (RE-
VERSE) or “P” (PARK) position as required.
l To maintain good running performance, the
transmission may refuse to perform an up-
shift when the selector lever is moved to the
“+ (SHIFT UP)” position at certain vehicle
speeds. Also, to prevent over-revving of the
engine, the transmission may refuse to per-
form a downshift when the lever is moved to
the “- (SHIFT DOWN)” position at certain
vehicle speeds. When this happens, a buzzer
sounds to indicate that a downshift is not go-
ing to take place.
l In sports mode, downward shifts are made au-
tomatically when the vehicle slows down.
When the vehicle stops, 1 st
gear is automati-
cally selected. Starting and driving
4-27 4
OGWE12E1
Page 182 of 378

Sports mode display
E00612200354
In
sports mode, the currently selected position is dis-
played on the multi-information display.
Type 1 Type 1When a malfunction occurs in the CVT
E00602300336
Type 1 or
Type 2
or
When the warning display appears
There
could be a system malfunction if the warn-
ing
display or the warning display is displayed
on
the information screen in the multi-information
display. CAUTION
l
If
malfunction occurs in the CVT while
driving, the warning display or the
warning display will appear on the infor-
mation
screen in the multi-information
display.
In this case, follow these procedures:
[When warning display is showing]
The
CVT fluid is overheating. The engine
control may activate to lower the CVT flu-
id temperature, causing the engine revolu-
tions and vehicle speed to decrease. In
this case, take one of the following meas-
ures. • Slow down your vehicle.
• Stop the vehicle in a safe place, placethe selector lever in the “P” (PARK)
position, and open the bonnet with the
engine running to allow the engine to
cool down.
After a while, confirm that the warn-
ing
display is no longer showing. It is safe
to continue driving if the display is no lon-
ger showing. If the warning display re-
mains or appears frequently, we recom-
mend you to have your vehicle inspected.
[When warning display is showing]
It
may be that there is something unusual
happening in the CVT, causing a safety de-
vice to activate. We recommend you to
have your vehicle inspected as soon as pos-
sible. Operation of the CVT
E00602600326 CAUTION
l
Before
selecting a position with the en-
gine running and the vehicle stationary,
fully depress the brake pedal to prevent
the vehicle from creeping.
The vehicle will begin to move as soon as
the CVT is engaged, especially when the
engine speed is high, at fast idle or with
the air conditioning operating, the brakes
should only be released when you are
ready to drive away.
l Depress the brake pedal with the right
foot at all times.
Using the left foot could cause driver move-
ment delay in case of an emergency.
l To prevent sudden acceleration, never
race the engine when shifting from the
“P” (PARK) or “N” (NEUTRAL) position.
l Operating the accelerator pedal while the
other foot is resting on the brake pedal
will affect braking efficiency and may
cause premature wear of brake pads.
l Use the selector lever in the correct shift
position in accordance with driving condi-
tions.
Never coast downhill backward with the
selector lever in the “D” (DRIVE) or
sports mode position or coast forward
with the selector lever in the “R” (RE-
VERSE) position.
The engine may stop and the unexpected
increase in brake pedal effort and steer-
ing wheel weight could lead to an accident. Starting and driving
4-28
4
OGWE12E1
Page 183 of 378

CAUTION
l
Do not race the engine with brake pedal
pressed when the vehicle is stationary.
This can damage the CVT.
Also, when you depress the accelerator
pedal while holding down the brake ped-
al with the selector lever in the “D”
(DRIVE) position, the engine revolutions
may not rise as high as when performing
the same operation with the selector lever
in the “N” (NEUTRAL) position.
Passing acceleration E00602700109
To gain extra acceleration in “D” (DRIVE) posi-
tion,
push the accelerator to the floor. The CVT
will automatically downshift.
NOTE
l In “Sports mode”, downshifts do not take
place when the accelerator is depressed all
the way to the floor.
Uphill/downhill driving E00603000037
DRIVING UPHILL
The
transmission may not upshift to a higher shift
position if the computer determines the current
speed cannot be maintained once a higher shift po-
sition is engaged.
For smoother vehicle performance, if you release
the throttle while climbing a steep grade, the trans-
mission may not upshift.
This is normal, as the computer is temporarily pre-
venting shifting. After reaching the top of the hill,
normal shift function will resume. DRIVING DOWNHILL
When
travelling down steep grades, the computer
may automatically select a lower shift position.
This function assists engine braking efforts, reduc-
ing the need for using the service brakes.
Waiting E00602800126
For short waiting periods, such as at traffic signals
the
vehicle can be left in selector lever position and
held stationary with the service brake.
For longer waiting periods with the engine running,
place the selector lever in the “N” (NEUTRAL) po-
sition and apply the parking brake, while holding
the vehicle stationary with the service brake. CAUTION
l
Never
hold the vehicle stationary while in
CVT on a hill with the accelerator, al-
ways apply the parking brake and/or serv-
ice brake.
Parking E00602900039
To park the vehicle, first bring it to a complete
stop,
fully engage the parking brake, and then
move the selector lever to the “P” (PARK) position.
If you are going to leave the vehicle unattended, al-
ways switch off the engine and carry the key. NOTE
l On
a slope, be sure to apply the parking
brake before moving the selector lever to the
“P” (PARK) position. If you move the selec-
tor lever to the “P” (PARK) position before
applying the parking brake, it may be diffi-
cult to disengage the selector lever from the
“P” (PARK) position when next you drive
the vehicle, requiring application of a strong
force to the selector lever to move from the
“P” (PARK) position.
When the CVT makes no speed change E00603100139
If the transmission does not change speeds while
driving,
or your vehicle does not pick up enough
speed when starting on an uphill slope, it may be
that there is something unusual happening in the
transmission, causing a safety device to activate.
We recommend you to have your vehicle checked
as soon as possible. Starting and driving
4-29 4
OGWE12E1
Page 184 of 378

Electronically controlled 4WD
system* E00604900307
The
electronically controlled 4WD system is a 4-
wheel drive system that allows one of three drive
modes to be selected with a dial, in accordance
with the driving conditions.
The following drive modes are available. Drive mode Function
2WD This mode is for economical
driving on normal dry roads
and motorway.
Driving in front-wheel drive.
4WD AUTO The default mode.
This mode is for automatical-
ly controlling the distribution
of driving torque to all four
wheels according to the driv-
ing conditions.
4WD LOCK This mode is for driving in
slippery conditions such as
on snow-covered roads or
sand.
The large amount of driving
torque that is applied to the
rear tyres enables getting out
of slippery areas and power-
ful driving is possible across
all ranges.4-wheel drive operation requires special driving
skills.
Carefully
read the “4-wheel drive operation” on
page 4-32 and take care to drive safely. Drive mode-selector
The
drive mode can be switched by turning the dial
while the ignition switch or the operation mode is
in ON. 1- 2WD
2-
4WD AUTO
3- 4WD LOCK
The drive mode is displayed as an interrupt display
on the information screen in the multi-information
display when the drive mode is switched.
After a few seconds, the information screen returns
from the drive mode display to the previous screen. Drive mode Display
Type 1 Type 2
2WD 4WD AUTO
4WD LOCK
CAUTION
l
Do not operate the drive mode-selector
with the front wheels spinning on a
snowy road or in similar conditions. The
vehicle could lunge in an unexpected di-
rection.
l Driving on dry, paved roads in “4WD
LOCK” mode causes increased fuel con-
sumption and noise.
l Do not drive with the tyres spinning in
“2WD” mode.
Doing so could generate heat in the drive-
system components.
NOTE l The
drive mode can be switched while driv-
ing or stopped. Starting and driving
4-30
4
OGWE12E1