2012 MINI COUPE ROADSTER CONVERTIBLE ESP
[x] Cancel search: ESPPage 219 of 283
MOBILITYWheels and tires
218
Tread depth
The tread depth should not drop below 1/8 in/
3 mm, although, for example, European
legislation only specifies a minimum tread depth
of 1/16 in/1.6 mm. At tr ead depths below 1/8 in/
3 mm there is an increased risk of high-speed
hydroplaning, even when only small amounts of
water are present on the road surface.
Winter tires
When winter tires wear down past a tread depth
of 1/6 in/4 mm, they become perceptibly less
suitable for winter condit ions. In the interest of
safety, new tires should be installed.
Minimum tread depth
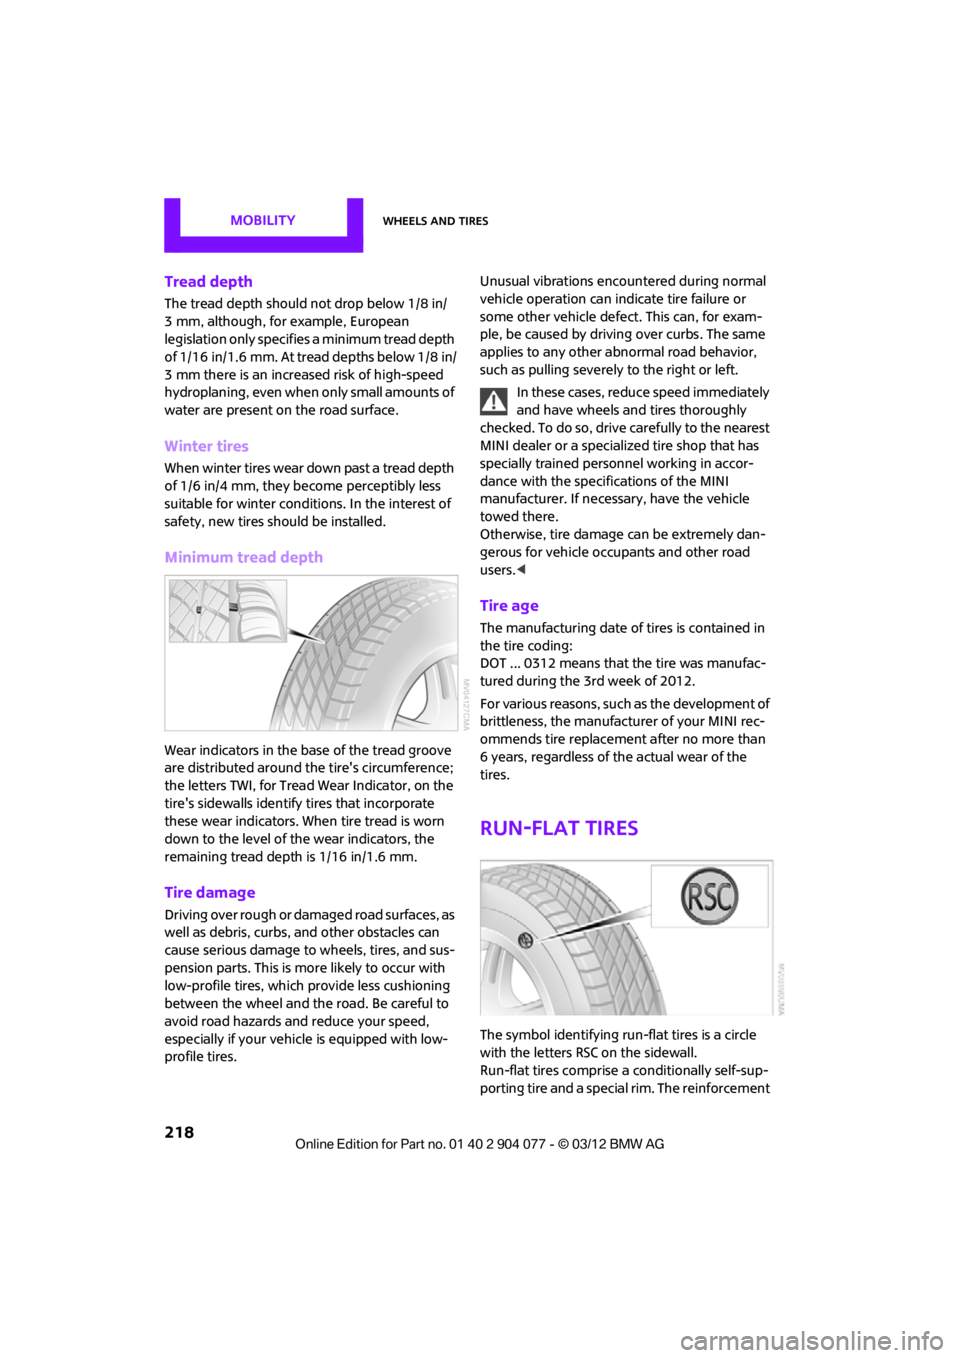
Wear indicators in the base of the tread groove
are distributed around the tire's circumference;
the letters TWI, for Tread Wear Indicator, on the
tire's sidewalls identify tires that incorporate
these wear indicators. When tire tread is worn
down to the level of the wear indicators, the
remaining tread dept h is 1/16 in/1.6 mm.
Tire damage
Driving over rough or damaged road surfaces, as
well as debris, curbs, and other obstacles can
cause serious damage to wheels, tires, and sus-
pension parts. This is more likely to occur with
low-profile tires, which provide less cushioning
between the wheel and the road. Be careful to
avoid road hazards and reduce your speed,
especially if your vehicle is equipped with low-
profile tires. Unusual vibrations encountered during normal
vehicle operation can indi
cate tire failure or
some other vehicle defect . This can, for exam-
ple, be caused by drivin g over curbs. The same
applies to any other abnormal road behavior,
such as pulling severely to the right or left.
In these cases, reduce speed immediately
and have wheels and tires thoroughly
checked. To do so, drive carefully to the nearest
MINI dealer or a specialized tire shop that has
specially trained personnel working in accor-
dance with the specifications of the MINI
manufacturer. If necessa ry, have the vehicle
towed there.
Otherwise, tire damage can be extremely dan-
gerous for vehicle occu pants and other road
users. <
Tire age
The manufacturing date of tires is contained in
the tire coding:
DOT ... 0312 means that the tire was manufac-
tured during the 3rd week of 2012.
For various reasons, such as the development of
brittleness, the manufacturer of your MINI rec-
ommends tire replacemen t after no more than
6 years, regardless of the actual wear of the
tires.
Run-flat tires
The symbol identifying run-flat tires is a circle
with the letters RSC on the sidewall.
Run-flat tires comprise a conditionally self-sup-
porting tire and a special rim. The reinforcement
00320051004F004C00510048000300280047004C0057004C005200510003
Page 220 of 283
Wheels and tiresMOBILITY
219
in the sidewalls ensures that the tire can con-
tinue to be used subject to certain restrictions,
even if depressurized.
For information on continuing to drive with a flat
tire, refer to Indication of a flat tire, page88.
New wheels and tires
Have new wheels and tires mounted only
by your MINI dealer or a specialized tire
shop that has specially trained personnel work-
ing in accordance with th e specifications of the
MINI manufacturer. If this work is not carried out
properly, there is a danger of subsequent dam-
age and related safety ha zards. Make sure that
the new wheels are balanced. <
Retreaded tires
The manufacturer of your MINI recom-
mends that you avoid using retreaded
tires, as this could impair driving safety. The
causes for this include potentially different tire
casing structures and of ten wide variations in
tire age, which can result in a limited service
life.<
Correct wheels and tires
The manufacturer of your MINI recom-
mends mounting only wheels and tires
that it has specifically approved for use on your
particular model. Although other wheels and
tires may theoretically have the same dimen-
sions, variations in factors such as manufactur-
ing tolerances can result in contact between tire
and bodywork, ultimately leading to serious
accidents. The manufacturer of your MINI can-
not evaluate non-approved wheels and tires to
determine if they are su ited for use, and there-
fore cannot ensure the operating safety of the
vehicle if they are mounted. <
Your MINI dealer will be glad to inform you
about the correct wheel an d tire combination for
your vehicle. The correct combination of wheels and tires is
also necessary to ensure
reliable operation of
various vehicle systems such as ABS and DSC.
To maintain good handling and vehicle
response, use only tires of a single brand and
tread configuration. After a tire has been
damaged, mount the previous wheel and tire
combination again as soon as possible.
Wheels with Tire Pressure Monitor TPM
electronics
When mounting new tires or changing over from
summer to winter tires, or vice versa, only use
wheels with TPM electronics; otherwise, the Tire
Pressure Monitor may not be able to detect a
puncture, refer to page 90. Your MINI dealer will
be glad to advise you.
Recommended tire brands
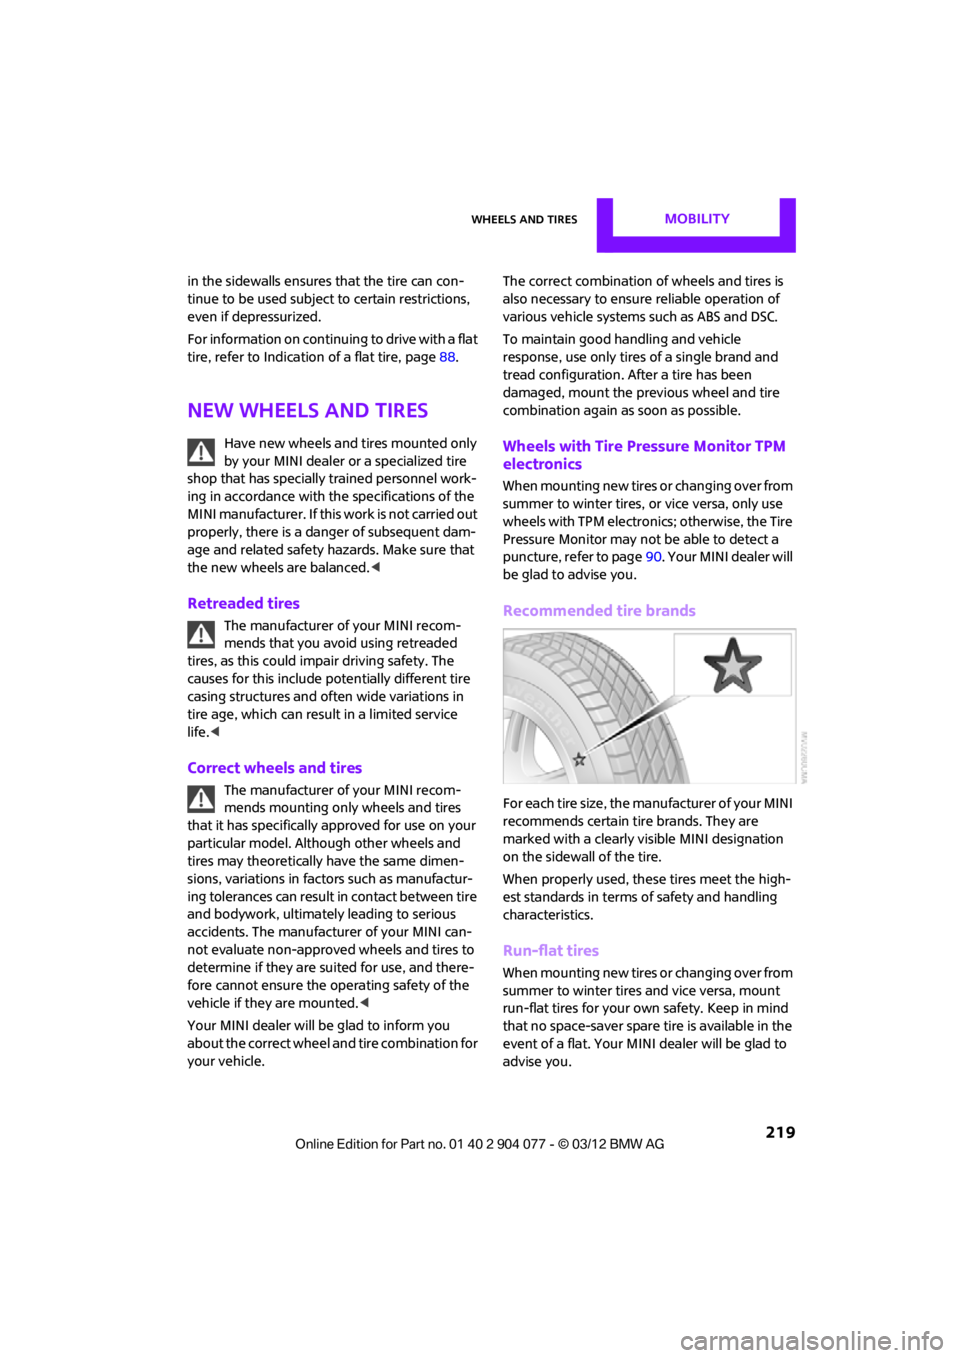
For each tire size, the manufacturer of your MINI
recommends certain tire brands. They are
marked with a clearly visible MINI designation
on the sidewall of the tire.
When properly used, these tires meet the high-
est standards in terms of safety and handling
characteristics.
Run-flat tires
When mounting new tires or changing over from
summer to winter tires and vice versa, mount
run-flat tires for your ow n safety. Keep in mind
that no space-saver spare tire is available in the
event of a flat. Your MINI dealer will be glad to
advise you.
00320051004F004C00510048000300280047004C0057004C005200510003
Page 224 of 283
Engine compartmentMOBILITY
223
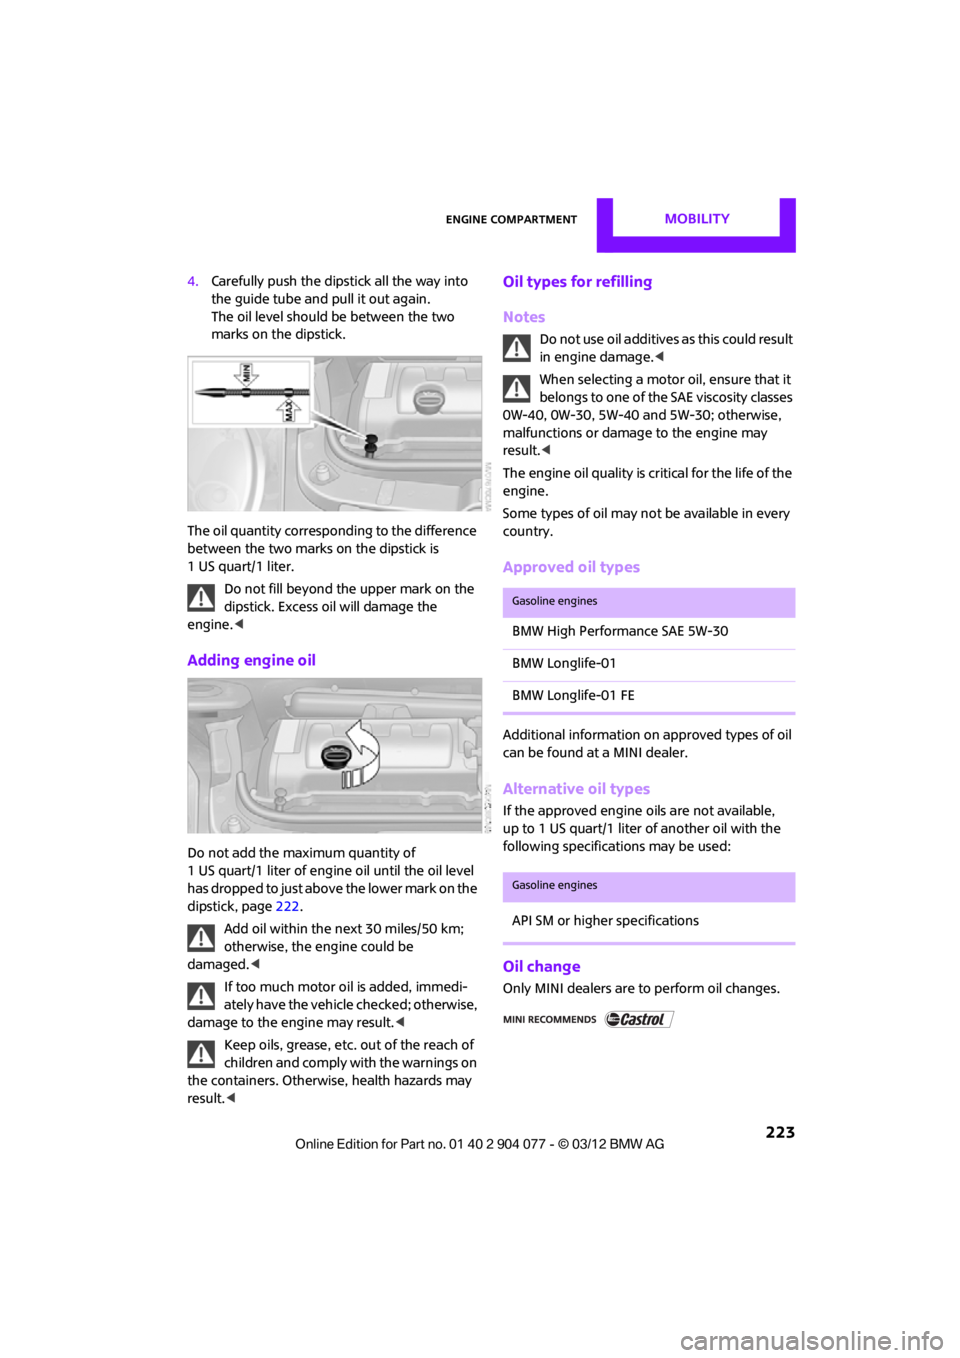
4.Carefully push the dipstick all the way into
the guide tube and pull it out again.
The oil level should be between the two
marks on the dipstick.
The oil quantity corresponding to the difference
between the two marks on the dipstick is
1 US quart/1 liter. Do not fill beyond the upper mark on the
dipstick. Excess oil will damage the
engine. <
Adding engine oil
Do not add the maximum quantity of
1 US quart/1 liter of engine oil until the oil level
has dropped to just abov e the lower mark on the
dipstick, page 222.
Add oil within the next 30 miles/50 km;
otherwise, the engine could be
damaged. <
If too much motor oi l is added, immedi-
ately have the vehicle checked; otherwise,
damage to the engine may result.<
Keep oils, grease, etc. out of the reach of
children and comply with the warnings on
the containers. Otherwise, health hazards may
result. <
Oil types for refilling
Notes
Do not use oil additives as this could result
in engine damage. <
When selecting a motor oil, ensure that it
belongs to one of the SAE viscosity classes
0W-40, 0W-30, 5W-40 and 5W-30; otherwise,
malfunctions or damage to the engine may
result. <
The engine oil quality is critical for the life of the
engine.
Some types of oil may not be available in every
country.
Approved oil types
Additional information on approved types of oil
can be found at a MINI dealer.
Alternative oil types
If the approved engine oils are not available,
up to 1 US quart/1 liter of another oil with the
following specifications may be used:
Oil change
Only MINI dealers are to perform oil changes.
Gasoline engines
BMW High Performance SAE 5W-30
BMW Longlife-01
BMW Longlife-01 FE
Gasoline engines
API SM or higher specifications
00320051004F004C00510048000300280047004C0057004C005200510003
Page 227 of 283
MOBILITYMaintenance
226
Socket for On-Board
Diagnosis OBD
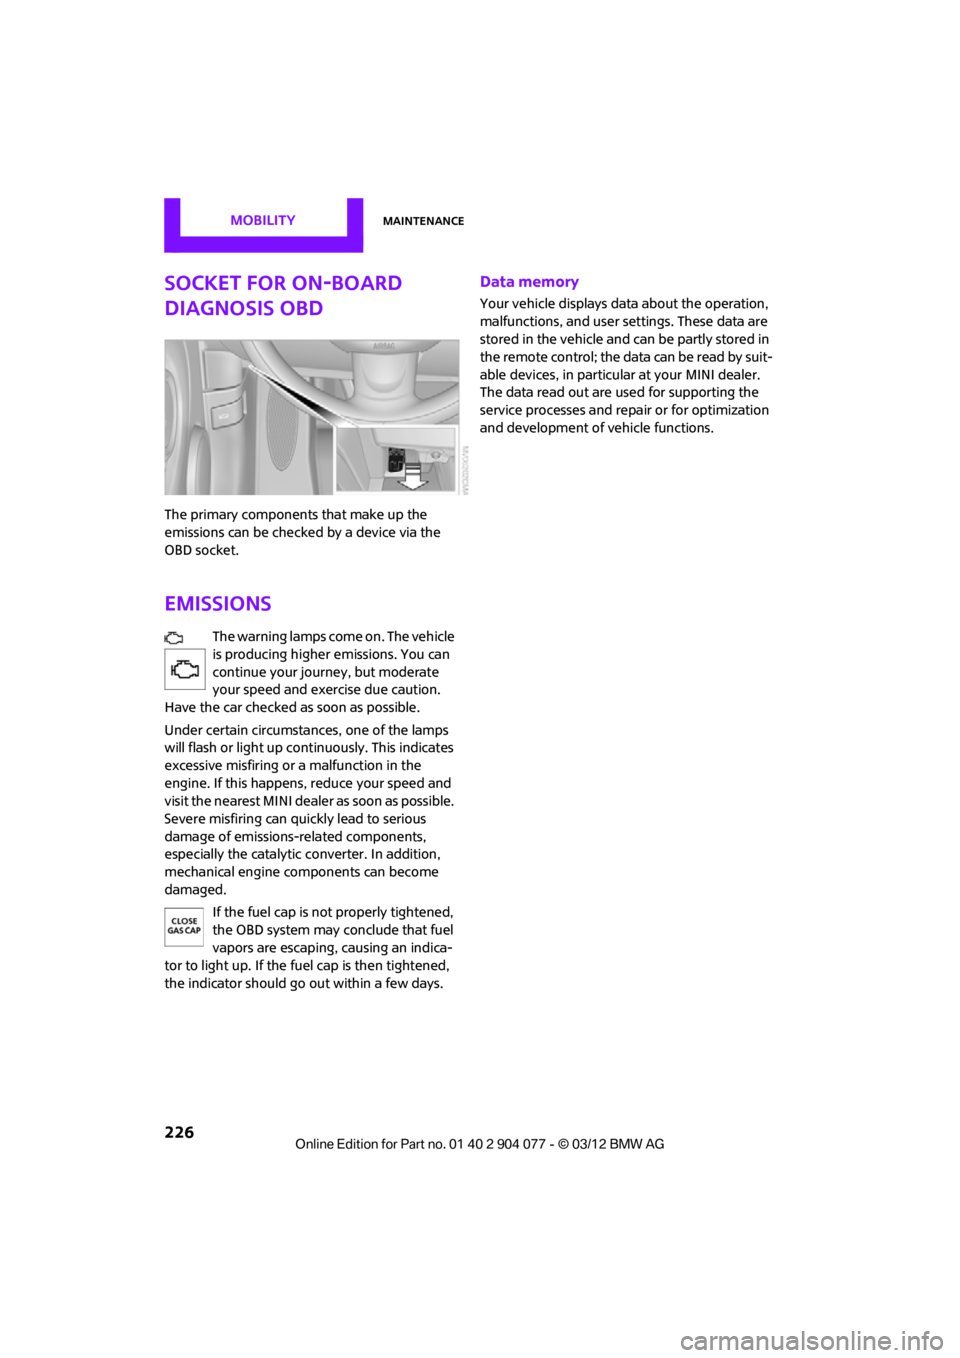
The primary components that make up the
emissions can be checked by a device via the
OBD socket.
Emissions
The warning lamps come on. The vehicle
is producing higher emissions. You can
continue your journey, but moderate
your speed and exercise due caution.
Have the car checked as soon as possible.
Under certain circumstances, one of the lamps
will flash or light up cont inuously. This indicates
excessive misfiring or a malfunction in the
engine. If this happens, reduce your speed and
visit the nearest MINI dealer as soon as possible.
Severe misfiring can quickly lead to serious
damage of emissions-related components,
especially the catalytic converter. In addition,
mechanical engine components can become
damaged.
If the fuel cap is not properly tightened,
the OBD system may conclude that fuel
vapors are escaping, causing an indica-
tor to light up. If the fuel cap is then tightened,
the indicator should go out within a few days.
Data memory
Your vehicle displays data about the operation,
malfunctions, and user settings. These data are
stored in the vehicle and can be partly stored in
the remote control; the data can be read by suit-
able devices, in particul ar at your MINI dealer.
The data read out are used for supporting the
service processes and repair or for optimization
and development of vehicle functions.
00320051004F004C00510048000300280047004C0057004C005200510003
Page 228 of 283

CareMOBILITY
227
Care
Vehicle equipment
In this chapter, all production, country, and
optional equipment that is offered in the model
range is described. Equipment is also described
that is not available because of, for example,
selected options or count ry version. This also
applies to safety related functions and systems.
Car-care products
Regular cleaning and care helps to maintain the
value of your MINI.
The manufacturer of your MINI recommends
using manufacturer-approved products to clean
and care for your vehicle.
Your MINI dealer would be pleased to advise
you on cleaning and care products and services
for your MINI.
The ingredients of original MINI Care Prod-
ucts have been tested, and the products
have been tested in the laboratory and in prac-
tice. They offer optimum care and protection for
your vehicle.<
Do not use any cleansers containing
alcohol or solvents as these may cause
damage. <
Cleaning agents may contain hazardous
or health-damaging substances. Follow
the warning and hazard instructions on the
packaging. For interior cleaning, always open
the doors or windows of the vehicle.
Do not use any products that are not intended
for cleaning the vehicle. <
External care
Washing your vehicle
Especially during the winter months the
vehicle should be frequently washed. Dirt
and road salt can damage the vehicle.<
After washing the vehicle, apply the
brakes briefly to dry them; otherwise,
water can reduce braking efficiency over the
short term and the brake rotors can corrode. <
Car washes
Preference should be given to cloth car washes.
Do not use automatic high-pressure car
washes; otherwise, water may drip into
the vehicle around the windows. <
Before driving into the car wash, check if the
system is suitable for your MINI. Observe the
following points:
> Vehicle dimensions, page 251.
> If necessary: fold in the outside mirrors,
page 54.
> Maximum permissible tire width.
Avoid car washes with tracks higher than
4 in/10 cm; otherwise, the chassis could
be damaged. <
Preparations for driving into the car wash:
> Unscrew the rod antenna.
> MINI Coupe, MINI Roadster: retract spoiler.
> Deactivate the rain sensor to prevent
unintentional wiping.
> Remove additional attachments, e.g. spoil-
ers or telephone antennas, if there is a
possibility that they could be damaged.
> Insert the remote control into the ignition
lock.
00320051004F004C00510048000300280047004C0057004C005200510003
Page 229 of 283

MOBILITYCare
228
Automatic transmission
Before driving into the car wash, make sure that
the vehicle can roll:
1.Place the remote control, even with Comfort
Access, in the ignition lock.
2. Move the selector lever to position N.
3. Release the parking brake.
4. Switch off the engine.
5. Insert the remote control in the ignition lock
so that the vehicle can roll.
Steam jets/high-pressure washers
When using steam jets or high-pressure
washers, make sure that you maintain
sufficient distance from the vehicle and do not
exceed a maximum temperature of 140 7/
60 6 .
If the distance is too close, the pressure too high,
or the temperature too high, parts of the vehicle
can be damaged, or water can penetrate.
Observe the operating instructions for high-
pressure washers. <
Do not spray sensors, such as the Park Dis-
tance Control, with high-pressure washers
for a long time or at a distance of less than 1 ft/
30 cm. <
Manual washing
Use a great deal of water and, if necessary, car
shampoo when washing your car by hand. Clean
the vehicle with a sponge or a washing brush
applying a slight amount of pressure.
Before cleaning the windshield, deacti-
vate the rain sensor or turn off the ignition
to prevent unintentional wiping. <
Observe local regulations regarding wash-
ing vehicles by hand. <
Headlamps
Do not wipe dry and do not use abrasive or
corrosive cleaning agen ts. Remove dirt and
contamination, such as in sects, by soaking with
shampoo and then washing with plenty of
water.
Do not remove accumulated ice and snow with
an ice scraper; use window deicers instead.
Windows
Clean the outside and inside of the windows and
mirrors with a window cleaner.
Do not clean the mirrors with cleaners
containing quartz. <
Wiper blades
Clean with soapy water and change regularly to
prevent the formation of streaks.
Wax, preservatives and dirt on the win-
dows cause streaks wh en the windshield
wipers are on, and can cause premature wear
of the wiper blades and interfere with the rain
sensor. <
Care of the convertible top
The appearance and service life of the convert-
ible top largely depends on its proper care and
operation.
Please follow these instructions:
>Never attempt to fold and stow the convert-
ible top in the convertible compartment
when the top is wet or frozen. Otherwise,
water stains, mildew, and chafe marks may
occur.
> If water spots occur on the inside headliner
despite precautions, remove them using a
microfiber cloth and interior cleaner.
> If the vehicle is parked in an enclosed area
for a longer period of time, make sure that
there is sufficient ventilation.
> Remove any bird droppings immediately,
since they have corrosive properties which
will corrode the conver tible top and damage
the rubber seals.
00320051004F004C00510048000300280047004C0057004C005200510003
Page 230 of 283

CareMOBILITY
229
When attempting to remove stains from
the convertible top, do not use spot
removers, paint thinners, solvents, gasoline, or
similar fluids. These cleaners may damage the
rubber seals. The improper care or cleaning
methods may cause the convertible top and its
seams to leak.<
Use special convertible top cleaning agents if
attempting to re move heavy stains.
Always read and foll ow the manufacturer's
instructions.
Use an impregnating agent to treat the convert-
ible top once a year.
MINI Coupe, MINI Roadster: rear spoiler
compartment
So that the operation of the rear spoiler is not
compromised, e.g., by leaves, snow or ice,
clean the rear spoiler compartment at regular
intervals.
Paintwork, care
Regular care helps your vehicle retain its value
and protects the paint from the long-term
effects of aggre ssive substances.
Environmental influences in areas with
increased air pollution or natural contaminants,
such as tree sap or pollen, can affect the vehicle
paintwork. It is therefor e important to adjust the
frequency and extent of vehicle care corre-
spondingly.
Immediately remove any pa rticularly aggressive
substances, such as fuel that has overflowed, oil,
grease, brake fluid, or bi rd droppings; otherwise,
paint damage can be caused.
Removing paintwork damage
Depending on the severity of the damage,
immediately repair stone damage or
scratches to prevent rusting. <
The manufacturer of the MINI recommends
repairing paint damage pr ofessionally according
to factory specifications with original MINI
paints.
Preservation
Preservation is necessary when water no longer
beads on the clean paint surface. To preserve
the paint, only use pres ervatives that contain
carnauba or synthetic waxes.
Rubber seals
Only treat with water or rubber care products.
Do not use silicon spra ys or other silicon-
containing care products on rubber seals;
otherwise, noise and damage could occur. <
Chrome parts
Carefully clean vehicle parts such as the radiator
grill and door handles with copious quantities of
water and, if necessary, a shampoo additive,
especially when contaminated with road salt.
For additional treatment, use chrome polish.
Light alloy wheels
The system produces brake dust that collects on
the light alloy wheels. Clean them regularly with
acid-free wheel cleaner.
Do not use aggressive, acid-containing,
highly alkaline, or abrasive cleansers or
steam jets hotter than 140 7/60 6 as they may
cause damage. <
External sensors
Keep the outside sensors on the vehicle
such as the Park Di stance Control clean
and ice-free to ensure that they function
properly. <
Internal care
Upholstery/fabrics
Regularly use a vacuum cleaner to remove
surface dirt.
In case of serious spots such as liquid stains, use
a soft sponge or lint-free microfiber cloth and
suitable interior cleane rs. Observe the instruc-
tions on the packaging.
00320051004F004C00510048000300280047004C0057004C005200510003
Page 231 of 283
MOBILITYCare
230
Clean upholstery up to the seams. Do not
rub forcefully.<
Velcro fasteners on pa nts or other items of
clothing can damage seat covers. Make
sure that all Velcro fasteners are closed. <
Leather/leather coverings
The leather processed by the manufac-
turer of your MINI is a high-quality natural
product. Light variations in the grain is one of
the typical properties of natural leather. <
Dust and road grit in th e pores and folds of the
leather have an abrasive effect, leading to
increased wear and causing the leather surface
to become brittle prematurely. Use a cloth or
vacuum cleaner to remo ve dust on a regular
basis.
Especially when the leather has a light color, it
should be cleaned regularl y since it tends to get
heavily soiled.
Treat the leather twice a year using a leather
lotion since dirt and grease will gradually attack
the leather's protective layer.
Carpets/floor mats
Keep floor mats, carpet, and other objects
out of the movement range of the pedals;
otherwise, they may inhibit the function of the
pedals during driving.
Do not place additional floor mats onto an exist-
ing one or onto other objects.
Only use floor mats that have been approved for
the vehicle and can be appropriately fastened.
Make sure that the floo r mats are securely fas-
tened again after they ha ve been removed, e.g.
for cleaning. <
Floor mats can be removed to be cleaned.
If the carpets are very di rty, clean with a microfi-
ber cloth and water or an interior cleaner. When
doing so, rub forward and back in the driving
direction; otherwise, the carpet may become
matted.
Interior plastic parts
These include:
> Plastic surfaces
> Lamp glass
> Display panes
> Mat parts
Only clean with water and, if necessary, solvent-
free plastic cleaners. Do not use solvents such as alcohol, lac-
quer thinner, cold clea ners, fuel, or similar,
as these will damage the surfaces. <
Decorative strips
Only clean decorative strips with moist cloths.
Wipe dry with a soft cloth.
Safety belts
Dirty belt straps impede the reeling action and
thus have a negative impact on safety.
Do not clean chemically, as this may
destroy the webbing. <
Displays
To clean displays, such as the radio or display
elements, use an anti-static microfiber cloth.
Avoid pressing too hard when cleaning
the display as this can cause damage. <
Do not use chemical or abrasive house-
hold cleaning agents. Keep fluids of any
kind away from the device. Surfaces or electrical
components may otherwise become corroded
or damaged. <
CD/DVD drives
Do not use cleaning CDs as this could
damage parts of the drive. <
Vehicle storage
If you park your vehicle longer than three
months, ask your Mini dealer to advise you.
00320051004F004C00510048000300280047004C0057004C005200510003