2012 MINI COUPE ROADSTER CONVERTIBLE key battery
[x] Cancel search: key batteryPage 29 of 283
CONTROLSOpening and closing
28
Opening and closing
Vehicle equipment
In this chapter, all production, country, and
optional equipment that is offered in the model
range is described. Equipment is also described
that is not available because of, for example,
selected options or coun try version. This also
applies to safety relate d functions and systems.
Keys/remote controls
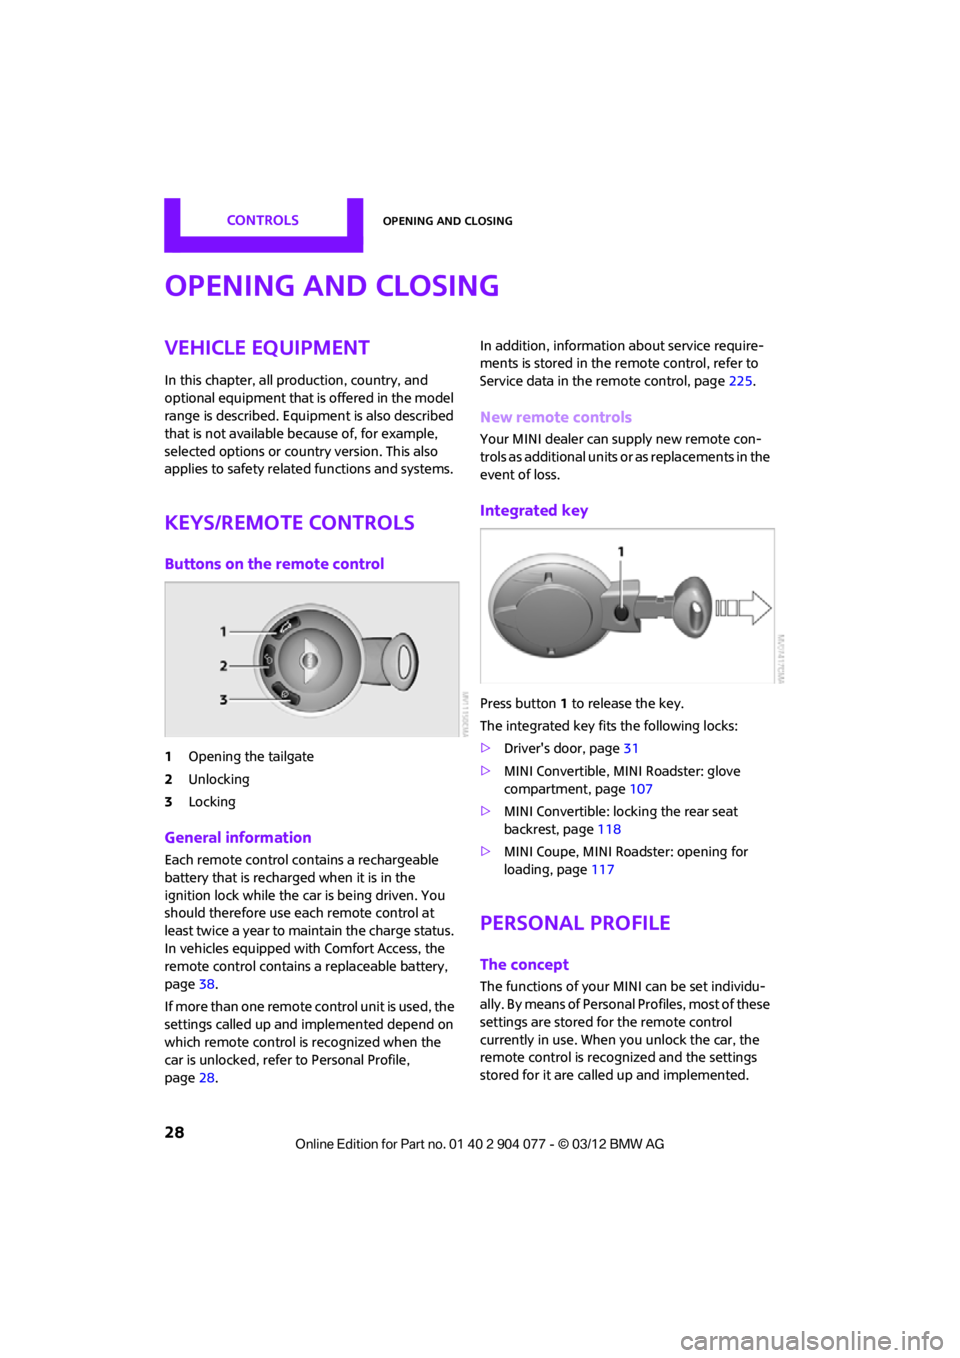
Buttons on the remote control
1Opening the tailgate
2 Unlocking
3 Locking
General information
Each remote control co ntains a rechargeable
battery that is recharged when it is in the
ignition lock while the car is being driven. You
should therefore use each remote control at
least twice a year to maintain the charge status.
In vehicles equipped with Comfort Access, the
remote control contains a replaceable battery,
page 38.
If more than one remote control unit is used, the
settings called up and implemented depend on
which remote control is recognized when the
car is unlocked, refer to Personal Profile,
page 28. In addition, information about service require-
ments is stored in the remote control, refer to
Service data in the remote control, page
225.
New remote controls
Your MINI dealer can supply new remote con-
trols as additional units or as replacements in the
event of loss.
Integrated key
Press button1 to release the key.
The integrated key fits the following locks:
> Driver's door, page 31
> MINI Convertible, MINI Roadster: glove
compartment, page 107
> MINI Convertible: locking the rear seat
backrest, page 118
> MINI Coupe, MINI Roadster: opening for
loading, page 117
Personal Profile
The concept
The functions of your MINI can be set individu-
ally. By means of Personal Profiles, most of these
settings are stored fo r the remote control
currently in use. When you unlock the car, the
remote control is recognized and the settings
stored for it are called up and implemented.
00320051004F004C00510048000300280047004C0057004C005200510003
Page 32 of 283
Opening and closingCONTROLS
31
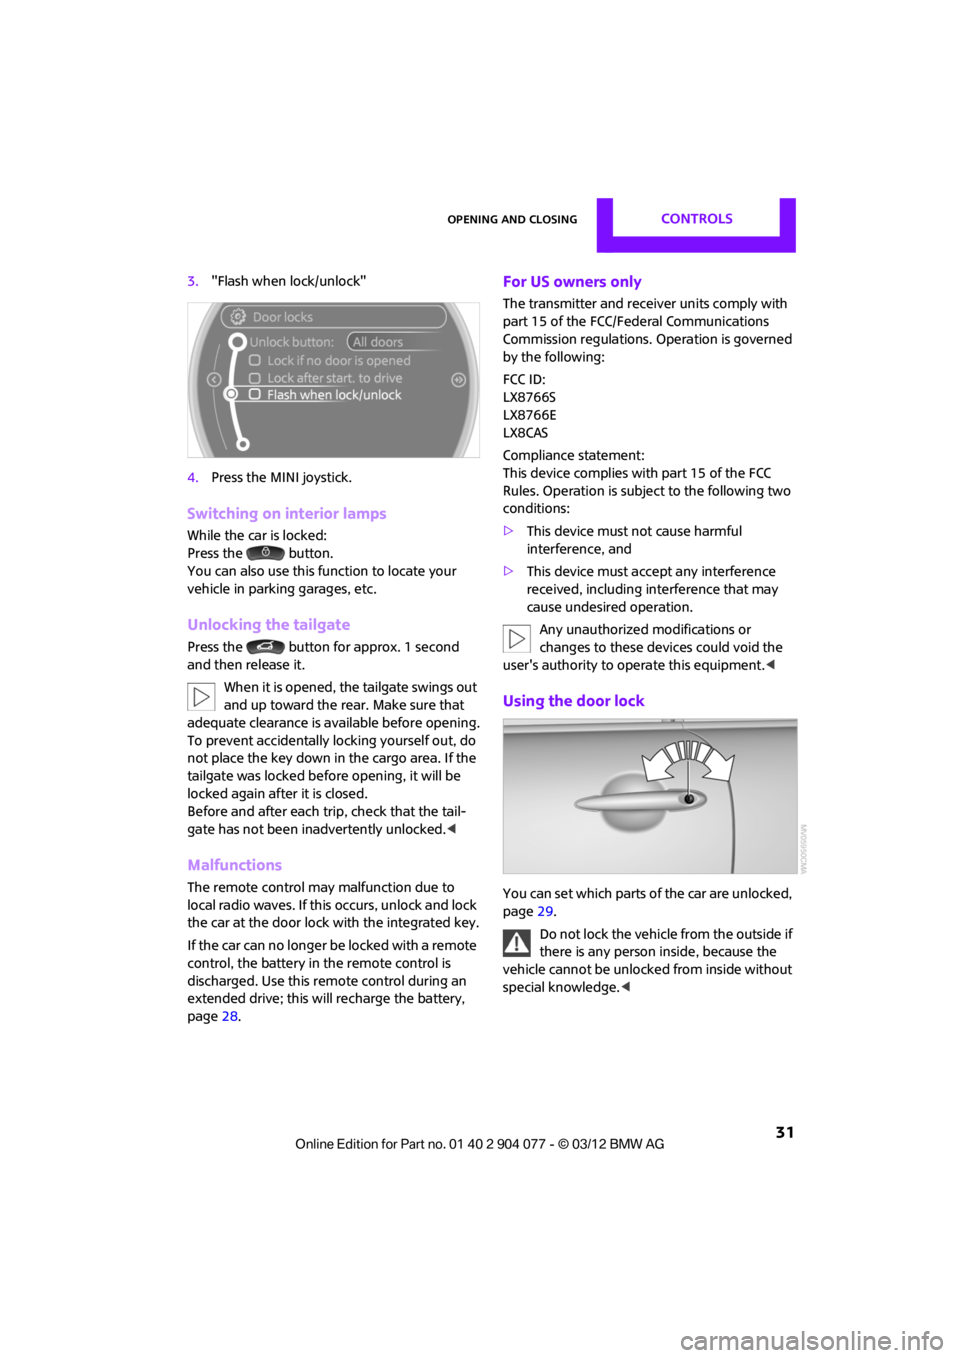
3."Flash when lock/unlock"
4. Press the MINI joystick.
Switching on interior lamps
While the car is locked:
Press the button.
You can also use this function to locate your
vehicle in parking garages, etc.
Unlocking the tailgate
Press the button for approx. 1 second
and then release it.
When it is opened, the tailgate swings out
and up toward the rear. Make sure that
adequate clearance is av ailable before opening.
To prevent accidentally locking yourself out, do
not place the key down in the cargo area. If the
tailgate was locked befo re opening, it will be
locked again after it is closed.
Before and after each trip, check that the tail-
gate has not been inadvertently unlocked. <
Malfunctions
The remote control may malfunction due to
local radio waves. If this occurs, unlock and lock
the car at the door lock with the integrated key.
If the car can no longer be locked with a remote
control, the battery in the remote control is
discharged. Use this remote control during an
extended drive; this wi ll recharge the battery,
page 28.
For US owners only
The transmitter and receiv er units comply with
part 15 of the FCC/Federal Communications
Commission regulations. Operation is governed
by the following:
FCC ID:
LX8766S
LX8766E
LX8CAS
Compliance statement:
This device complies with part 15 of the FCC
Rules. Operation is subj ect to the following two
conditions:
> This device must not cause harmful
interference, and
> This device must acce pt any interference
received, including in terference that may
cause undesired operation.
Any unauthorized modifications or
changes to these devices could void the
user's authority to operate this equipment. <
Using the door lock
You can set which parts of the car are unlocked,
page29.
Do not lock the vehicle from the outside if
there is any person inside, because the
vehicle cannot be unlocked from inside without
special knowledge. <
00320051004F004C00510048000300280047004C0057004C005200510003
Page 36 of 283

Opening and closingCONTROLS
35
>The car’s inclination changes, for example if
an attempt is made to jack it up and steal the
wheels or to raise it prior to towing it away
> There is an interruption in the power supply
from the battery
The alarm system briefly indicates unauthorized
entry or tampering by means of:
> An acoustic alarm
> Switching on the hazard warning flashers
Arming and disarming
General information
Whenever the car is locked or unlocked, the
alarm system is armed or disarmed.
Door lock with armed alarm system
Because of the design, unlocking the door lock
may trigger the alarm in some countries.
To turn off the alarm, unlock the vehicle using
the remote control or switch on the ignition.
Tailgate with armed alarm system
Even when the alarm syst em is armed, you can
open the tailgate by means of the button
on the remote control.
When you subsequently close the tailgate it is
again locked and monitored.
Panic mode
You can activate the alarm system if you find
yourself in a dangerous situation.
Press the button for at least two seconds.
Switching off the alarm:
Press any button.
Switching off an alarm
> Unlock the car with the remote control.
> Insert the key fully into the ignition lock.
> In cars with Comfort Access, press the button
on the door lock.
Display on the revolution counter
When the system is armed, all LEDs pulse. After
approx. 16 minutes one LED flashes.
>LEDs pulse or LED flashes: system is armed.
> One LED flashes at short intervals:
Doors, the hood or the tailgate are not prop-
erly closed. Even if these are not closed fully,
the remaining items are deadlocked and the
LEDs pulse after approx. 10 seconds for
approx. 16 minutes. Afterwards, one LED
flashes.
The interior movement detector is not
activated.
> LEDs go out after the vehicle is unlocked:
No attempt was made to tamper with the
car.
> LEDs flash after unlocking until the key is
inserted in the ignition, but for no longer
than approx. 5 minutes: an attempt was
made to tamper with the vehicle.
Tilt alarm sensor
The vehicle's inclination is monitored. The alarm
is triggered, for instance, if an attempt is made
to steal the vehicle's wheels or tow it away.
Interior movement detector
Before the interior mo vement detector can
operate correctly, the windows and glass roof
must be closed.
00320051004F004C00510048000300280047004C0057004C005200510003
Page 40 of 283
Opening and closingCONTROLS
39
Initializing electric power windows
If the battery was disconnected, e.g. for
changing batteries or vehicle storage,
reinitialize the power wi ndows; otherwise, the
windows will not be lowered.
MINI Convertible: opening the convertible top is
not possible. <
1. Close the doors.
2. Open both windows.
3. Close both windows.
In the event of a system malfunction, please
contact your MINI dealer.
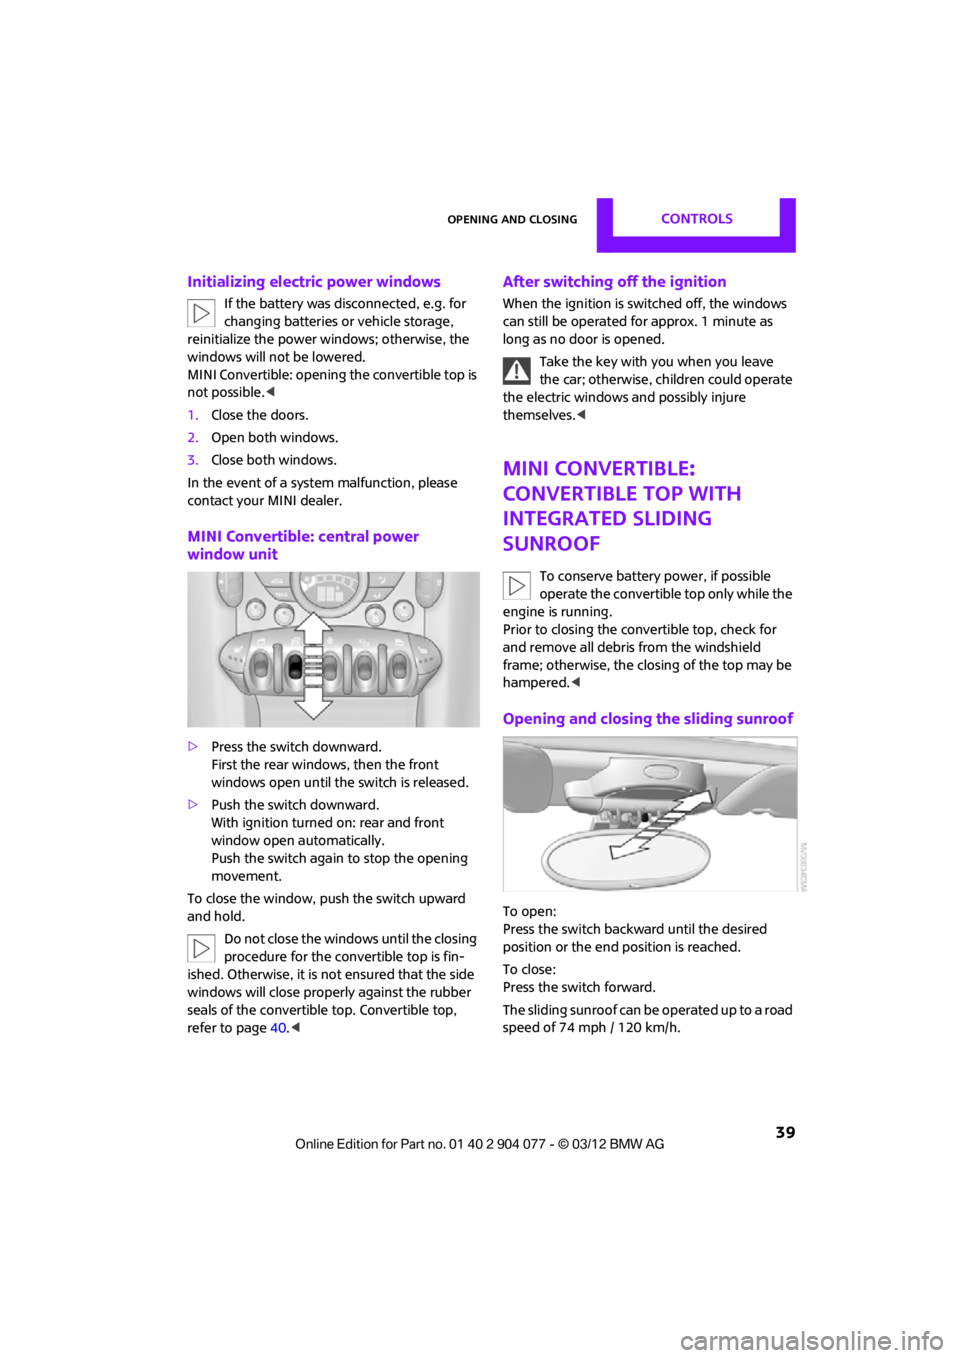
MINI Convertible: central power
window unit
> Press the switch downward.
First the rear windows, then the front
windows open until the switch is released.
> Push the switch downward.
With ignition turned on: rear and front
window open automatically.
Push the switch again to stop the opening
movement.
To close the window, push the switch upward
and hold. Do not close the windows until the closing
procedure for the convertible top is fin-
ished. Otherwise, it is not ensured that the side
windows will close properly against the rubber
seals of the convertible top. Convertible top,
refer to page 40.<
After switching off the ignition
When the ignition is sw itched off, the windows
can still be operated for approx. 1 minute as
long as no door is opened.
Take the key with you when you leave
the car; otherwise, children could operate
the electric windows and possibly injure
themselves. <
MINI Convertible:
Convertible top with
integrated sliding
sunroof
To conserve battery power, if possible
operate the convertible top only while the
engine is running.
Prior to closing the convertible top, check for
and remove all debris from the windshield
frame; otherwise, the closing of the top may be
hampered. <
Opening and closing the sliding sunroof
To open:
Press the switch backwa rd until the desired
position or the end position is reached.
To close:
Press the switch forward.
The sliding sunroof can be operated up to a road
speed of 74 mph / 120 km/h.
00320051004F004C00510048000300280047004C0057004C005200510003
Page 42 of 283
Opening and closingCONTROLS
41
Operating while driving
The convertible top may be opened or closed
while driving not faster than 20 mph/30 km/h.
While operating the convertible top, pay
close attention to the surrounding traffic;
otherwise, an accident may happen. Try to avoid
operating the convertible top while reversing
the vehicle since the rear view is very limited
during the convertible top's movement. Do not
operate the convertible top when driving on
winding and rough roads or during windy
conditions. <
For better control
>The LED lights up during convertible top
operation until the opening or closing
procedure is completely finished.
> The LED flashes after releasing the switch.
The opening or closing procedure has not
yet been completed. The procedure can be
continued in the desired direction by press-
ing the appropriate switch.
> The Convertible top not locked indicator
lamp lights up and a message appears on
the Control Display.
Interruption
A convertible top which is not completely
open or closed is hazardous. <
The automatic movement is immediately inter-
rupted when the switch for the convertible top
operation is released. The procedure can be
continued in the desired direction by pressing
the appropriate switch.
If the opening or closing procedure is inter-
rupted by releasing the respective switch, the
convertible top stays in its current position for
several seconds before it slowly moves into a
more stable position. The procedure can be
continued by pressing the appropriate switch.
The opening and cl osing procedure is also inter-
rupted in case of a mech anical blockage. In this
case, in order to operate the convertible top
again: 1.
Switch off the ignition and then switch it on
again.
2. Press the switch to continue the procedure
in the desired direction.
Opening and closing procedure
Do not interrupt and restart the closing
procedure several times one after
another, or the convertible top mechanism
could be damaged. <
If the convertible top can be moved in only
one direction after several consecutive
attempts to operate it, the convertible top
system has overheated. Allow the system to cool
down for approx. 4 minutes. <
If the battery was disconnected, e.g. for
changing batteries or vehicle storage,
reinitialize the power windows, refer to page 39.
Otherwise, the windows cannot be lowered or
the convertible top cannot be opened. <
Convenience operation
For convenience operation using the remote
control, refer to page30; for operation via the
door lock, refer to page 31.
Manual closing in the event of an
electrical malfunction
Only close the convertible top manually if
it is absolutely necessary. Never open it
manually. Improper handling of the convertible
top can result in damage. The closing procedure
must be completely finished. Otherwise,
damage or injury could result.<
Before closing
1.Remove Allen key and screwdriver from
vehicle tools, refer to page 231.
2. Pry out luggage compartment lamp from
the left side trim using the screwdriver.
00320051004F004C00510048000300280047004C0057004C005200510003
Page 61 of 283

CONTROLSDriving
60
Driving
Vehicle equipment
In this chapter, all production, country, and
optional equipment that is offered in the model
range is described. Equipment is also described
that is not available because of, for example,
selected options or coun try version. This also
applies to safety relate d functions and systems.
Ignition lock
Inserting the key into the ignition lock
Insert the key all the way into the ignition lock.
Radio readiness
Individual electrical consumers can operate.
Removing the key from the ignition lock
Press in the key briefly. It is ejected slightly.
At the same time:
>The ignition is switched off if it was on
beforehand.
Automatic transmission
The key can only be removed if the selector lever
is in position P: interlock.
Start/Stop button
Press the Start/Stop button to switch radio readi-
ness or the ignition on and off. Do not depress
the brake or clutch while doing so.
If the Start/Stop button is pressed while
the clutch is depressed in the manual
transmission or the brake pedal is depressed in
the automatic transmission, the engine starts. <
Radio readiness
Individual electrical consumers can operate. The
time and external temperature are displayed in
the tachometer.
Radio readiness is switched off automatically:
>When the key is removed from the ignition
lock
> When using Comfort Access by pressing
the button on the door handle or the
button on the remote control, refer to
Locking on page 37
> After a certain has elapsed
Ignition on
Most indicator and warn ing lamps in indicator
area 1, page 13, light up for varying lengths of
time.
When the engine is off, switch off the
ignition and any unnecessary electrical
consumers in order to preserve the battery. <
00320051004F004C00510048000300280047004C0057004C005200510003
Page 167 of 283

ENTERTAINMENTExternal devices
166
What to do if…
Information about suitable devices is available
at www.mini.com/connectivity.
Suitable mobile phones, refer to page 180.
Device not supported by vehicle.
> If necessary, perform a software update;
refer to page 166.
Device could not be paired or connected.
> Do the Bluetooth passkeys on the device
and vehicle match? Enter the same passkey
on the device and via the onboard
computer.
> A multi-digit passkey may be required.
> Is the passkey input taking longer than
30 seconds? Repeat th e pairing procedure.
> Are too many Bluetoot h devices connected
to the device or to the vehicle? If necessary,
delete the connections with other devices.
> Is the mobile phone in power economy
mode or does it only have a small amount of
battery charge remaining? Charge the
mobile phone in the snap-in adapter or via a
charging cable.
> Depending on the mobile phone, it may only
be possible to connect one device to the
vehicle. Unpair the connected device from
the vehicle and only pair and connect one
device.
> Is the device no longer responding? Switch
the device off an d back on again.
> Repeat the pairing procedure.
No music can be played.
> Start the program for playing music files on
the device and if necessary, select a track via
the device.
> Activate and deactivate the radio mute on
the radio control panel.
Music files only play quietly.
> Adjust volume settings on the device.
Videos cannot be played or can only be played
with a delayed audio output. >
Check the device compatibility. Information
is available at www.mini.com/connectivity.
Playback is interrupted by the press of a button
or other messages on the device.
> Switch off key tones and other acoustic
signal on the device.
Playback is interrupted by a phone call or traffic
report and does not automatically continue.
> Activate and deactivate the radio mute on
the radio control panel.
Playback is not possible when the mobile phone
is connected via Blueto oth audio and at the
same time via the extended connectivity of the
music player in the mobile phone.
> Disconnect one of the two connections, e.g.
the audio connection, refer to page 165,
and start playback again.
If you have gone through all items in the list and
still cannot activate the desired function please
contact the Hotline or your MINI dealer.
Software update
The vehicle supports various external devices,
depending on the software it is currently using.
A software update can enable the vehicle to
support, for example, new mobile phones or
new external devices.
Software updates and a ssociated, up-to-date
instructions are availa ble on the web page
www.mini.com/c onnectivity.
Displaying current version
The currently installed software is displayed.
1."Settings"
2. "Software update"
3. "Show current version"
Select the desired versio n to display additional
information.
00320051004F004C00510048000300280047004C0057004C005200510003
Page 173 of 283
COMMUNICATIONSHands-free device Bluetooth
172
>After identification, phone book entries are
imported from the mobile phone and/or SIM
card of the telephone, depending on the
telephone.
> Four mobile phones can be paired.
> Specific settings may be necessary in some
mobile phones, e.g. authorization or a
secure connection, re fer to the Owner's
Manual for the mobile phone.
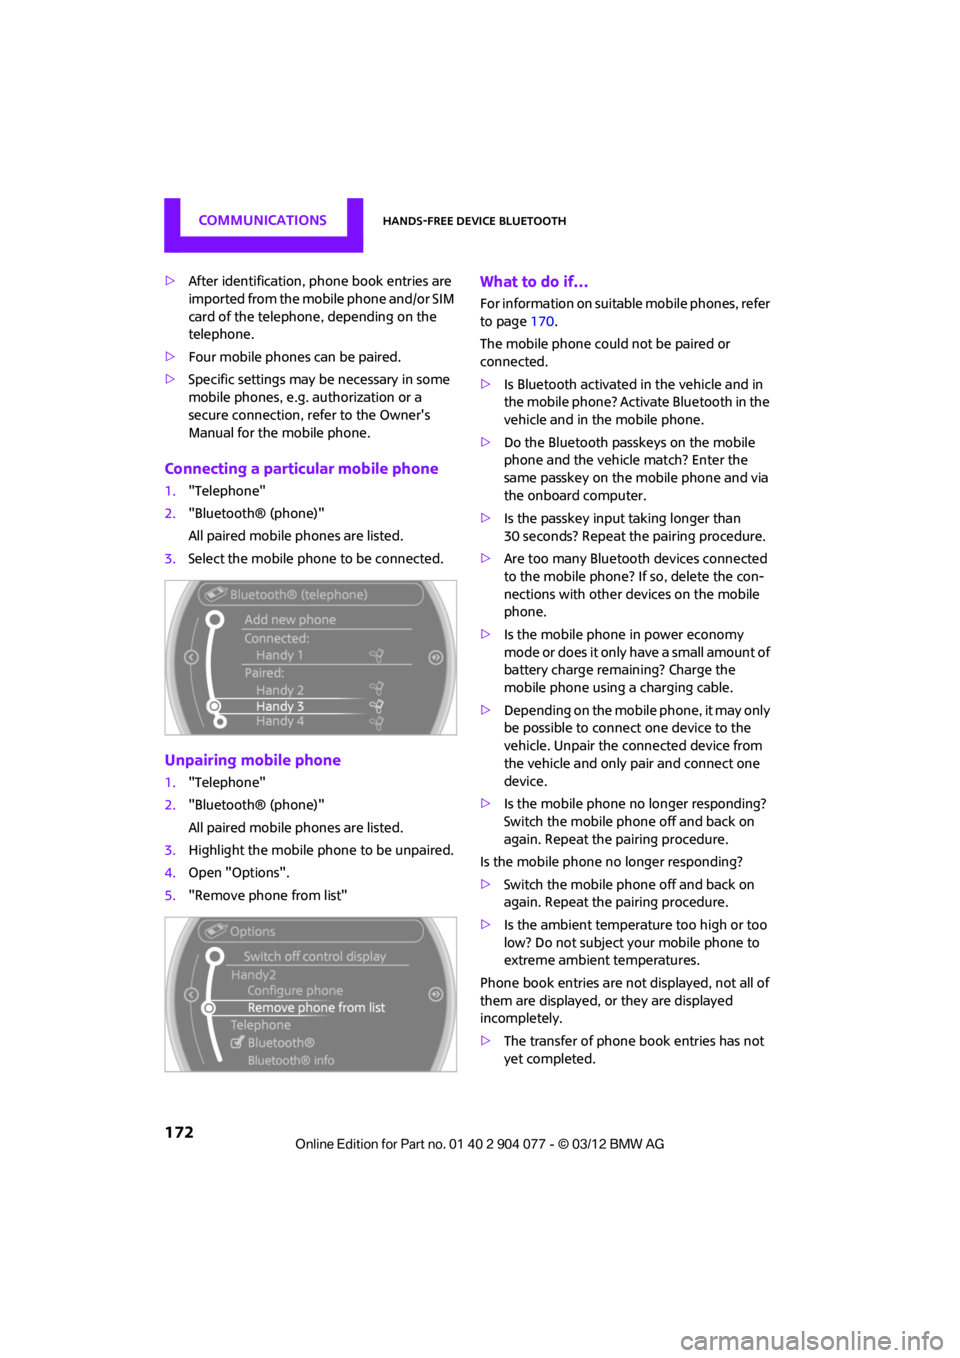
Connecting a particular mobile phone
1. "Telephone"
2. "Bluetooth® (phone)"
All paired mobile phones are listed.
3. Select the mobile phone to be connected.
Unpairing mobile phone
1."Telephone"
2. "Bluetooth® (phone)"
All paired mobile phones are listed.
3. Highlight the mobile phone to be unpaired.
4. Open "Options".
5. "Remove phone from list"
What to do if…
For information on suitab le mobile phones, refer
to page 170.
The mobile phone could not be paired or
connected.
> Is Bluetooth activated in the vehicle and in
the mobile phone? Activate Bluetooth in the
vehicle and in the mobile phone.
> Do the Bluetooth passkeys on the mobile
phone and the vehicle match? Enter the
same passkey on the mobile phone and via
the onboard computer.
> Is the passkey input taking longer than
30 seconds? Repeat th e pairing procedure.
> Are too many Bluetoot h devices connected
to the mobile phone? If so, delete the con-
nections with other devices on the mobile
phone.
> Is the mobile phone in power economy
m o d e o r d o e s i t o n l y have a small amount of
battery charge remaining? Charge the
mobile phone using a charging cable.
> Depending on the mobile phone, it may only
be possible to connect one device to the
vehicle. Unpair the connected device from
the vehicle and only pair and connect one
device.
> Is the mobile phone no longer responding?
Switch the mobile phone off and back on
again. Repeat the pairing procedure.
Is the mobile phone no longer responding?
> Switch the mobile phone off and back on
again. Repeat the pairing procedure.
> Is the ambient temperature too high or too
low? Do not subject your mobile phone to
extreme ambient temperatures.
Phone book entries are not displayed, not all of
them are displayed, or they are displayed
incompletely.
> The transfer of phone book entries has not
yet completed.
00320051004F004C00510048000300280047004C0057004C005200510003